Carrion Crown Adventure Path:
The Trial of the Beast
Conversion created by Jonathan Stark.
Version 1.2 last updated 12/5/18
- The Trial of the Beast
- 2.1 General Changes
- 2.2 Journey to Lepidstadt
- 2.3 The Beast on Trial
- 2.4 The Theft at Lepidstadt University
- 2.5 The Swampers of Morast
- 2.6 The Children of Hergstag
- 2.7 Karb Sanctuary
- 2.8 Vorkstag and Grine's Chymic Works
- 2.8.1 E1: Courtyard
- 2.8.2 E2: Storage
- 2.8.3 E4: The Vats
- 2.8.4 E5: Loading Bay
- 2.8.5 Vorkstag and Grine Tactics
- 2.8.6 E6: Grine's Butchery
- 2.8.7 E7: Vorkstag's Study
- 2.8.8 E8: The Cabinet of Skins and Faces
- 2.8.9 E9: Tower of Curios
- 2.8.10 E10: Top of the Tower
- 2.8.11 E11: Lower Storage
- 2.8.12 E12: Secret Distribution Room
- 2.8.13 E13: Cadaver Pool
- 2.8.14 Leaving the Chymickal Works (optional encounter)
- 2.8.15 Capturing Vorkstag or Grine
- 2.9 The Trial of the Beast
- 2.10 Schloss Caromarc
- 2.10.1 F1: Outer Gate
- 2.10.2 F2: Gateway
- 2.10.3 F3: Inner Gate and Terrace
- 2.10.4 F5: Southwest Gatehouse Tower
- 2.10.5 G1: The Low Bridge
- 2.10.6 G2: The Great Door
- 2.10.7 G3: The Great Hall
- 2.10.8 G4: Library
- 2.10.9 G5: Smoking Room
- 2.10.10 G8: Dining Room
- 2.10.11 G11: Guest Bedrooms
- 2.10.12 G13: Master Bedroom
- 2.11 The Alchemy Wing
- 2.12 Living Museum
- 2.13 The Drowned Menagerie
- 2.13.1 K1: The Narrow Vista
- 2.13.2 K2: Blocked Stairwell
- 2.13.3 K3: Pit of Leeches
- 2.13.4 K4: Descended from Apes
- 2.13.5 K5: The Infestation
- 2.13.6 K6: Pit of Drowned Guards
- 2.13.7 K7: The Transparent Basilisk
- 2.13.8 K8: The Thing on the Ceiling
- 2.13.9 K9: Upper Corridors
- 2.13.10 K10: Buried Alive
- 2.13.11 K11: The High Bridge
- 2.14 The Lightning Tower
- 2.15 Concluding the Adventure
- 2.16 Lepidstadt
Revision History:
1.1 Adjusted magic purchasing rules in Lepidstadt, made more restrictive 1.12 Slight wording changes 1.2 Removed "break doors" strength checks
The Trial of the Beast
This adventure is designed for three to four characters starting at level 4, and it places them in the uncertain position of being criminal investigators and defense lawyers for a hideous beast that has plagued the countryside for years. The populace of Lepidstadt is eager to make The Beast pay for his crimes... but did he really commit them? The players begin to find evidence to the contrary as they revisit the scenes of The Beast's crimes.
This conversion seeks to solve some of the issues that weren't addressed in the original, most of them related to confusions regarding the story. I've organized the conversion to match as closely as possible the flow of the original module. If something is mentioned in the original that isn't discussed here, assume the original text holds. The one exception is combat gear. Enemies only carry combat gear and loot where indicated by me.
General Changes
Advancement Track
Players begin the Trial of the Beast at 4th level and should be 7th level by its conclusion. Because there is no reliable way to convert experience points between Pathfinder and D&D 5e, this guide recommends instead leveling the characters at specific milestones in the adventure as listed below:
- Gain a level: When the players discover the location of Vorkstag and Grine's Chymickal Works or complete the Angry Mob section of the trial.
- Gain a level: After the trial is concluded, no matter the outcome.
- Gain a level: After reaching the Drowned Menagerie.
The Sausage Effigy
This may seem like a small thing, but the designer himself mentions it so I'm repeating it here. It is not easy to say "Sea Sage Effigy." It's true: when I was a player, I ended up thinking my DM was saying "Sausage Effigy." I recommend changing the name to something more ominous and easier to say, like the Sea Spawn Effigy or the Sea Farer's Bane or the Underdeep Enigma. I'll use Sea Farer's Bane in this conversion.
Object Rules
One set of rules that gets used a lot is object rules. Refer to page 246-247 in the DMG and remember that all objects are immune to poison and psychic damage! In addition, there are many doors in this adventure. Unless stated otherwise, the following is true about doors based on their type:
- Wooden doors are vulnerable to fire damage.
- Iron doors are resistant to all damage except acid, bludgeoning, force, and thunder.
- Stone doors have the same resistances as iron doors but are also immune to fire, radiant, and lightning damage.
Three Separate Plotlines
The hardest thing about running Trial of the Beast is that it invovles three seperate plot lines and the only thing they share in common is the Beast. These three plotlines are as follows:
Count Caromarc's wife contracted a horrible disease so he placed her in suspended animation and became obsessed with the study of life and death. He created an arcane laboratory to try and build intelligent life. So far he has only succeeded once, by creating The Beast. Though he has tried time and again, all of his other creations are just monsters. Eventually The Beast left the count's castle to try and make a life for himself. The Beast still loves Caromarc as his "father."
Vorkstag and Grine, two murderous fey in disguise as alchemists, have created a lucrative business selling body parts on the black market. The front for this is a huge alchemical plant in Lepidstadt. Vorkstag is a skin-stealer and has a skin suit that makes him look like a terrible Beast. Sightings of this Beast have wrongfully been attributed to the Caromarc Beast.
The Whispering Way wanted the Sea Farer's Bane. Because of this, one of their leaders, Auren Vrood, visited the count several days ago. Imprisoning the count in his own castle, Vrood used a device there to control the Beast and get him to steal the Bane. Then, not needing them anymore, Vrood abandoned the Beast at the scene of the crime and left the count trapped in his castle to die of starvation (which he hasn't yet).
The two problems here are the count's backstory (which is largely ignored by the module) and the presence of two unconnected villains: The Whispering Way and Vorkstag & Grine. Beyond that, there is the complaint that the Whispering Way has a weak presence throughout the adventure. To solve these issues, make the following adjustments:
Count Caromarc has used Vorkstag & Grine for years to supply him with materials for his experiments. They know he created The Beast (which is why they started using a Beast's skin to get away with their crimes) and they know about his wife's ailment.
Vorkstag & Grine also supply The Whispering Way with bodies, not always dead ones. A number of unsolved missing persons crimes can be linked to this practice. The two are considered ancillary members of the Whispering Way, though they are viewed with disdain by Auren Vrood and Adivion Adrissant because their real motivation is making money, not in furthering the Way's goals.
Auren Vrood paid Vorkstag & Grine handsomely to tell him about Caromarc's secrets and then he made an offer to Caromarc to give the count the power he needed to revive his wife. It was a trick, of course, and when he gained access to the castle he enacted his plan to disable Caromarc and capture the Beast as described in the module.
Auren Vrood is regretting using Vorkstag and Grine because of the sloppiness of their methods and decides to try and silence them, just as the players learn of their involvement and confront them theirselves.
So Much Gold!
Between the award given out to the players for delivering Professor Lorrimor's books and the myriad of treasure discoverable in this adventure, DMs may be concerned about players being able to buy too many magic items. However, D&D 5 is already very restrictive in how purchasing magic items works and how many a player can use. Because of this, I have not attempted to make many changes to the amount of money the players can accumulate, instead limiting them to the level of magic available for purchase, as you'll see later on in the Lepidstadt section. That said, DMs may wish to have players make appraisal checks on anything art or gemstone related to know its value and be able to sell it. This requires proficiency in the proper tools (jewlers, painter supplies, woodcarver's tools, etc) or an appropriate background, and passing a DC 12 Intelligence check.
Deductions
Another problem some DMs have run into are players who don't pick up what the evidence they gather means. The module doesn't give a lot of advice on how players are supposed to make correct deductions about evidence but I reccommend using the following techniques that my GM used when I played this back in my Pathfinder days:
At each crime scene, if the players find a clue, explicitly tell them they have found a clue (clues will be listed in the relevant sections of this conversion, along with the check required to find them).
Let the players continue to make rolls until they have either missed or found all of the clues. Explicity tell them that there is nothing more to find at this crime scene.
Have the players record clues on a separate piece of paper so they can remember to present them later in the Trial.
During the trial, Barrister Gustav Kaple will use the players as witnesses, asking questions based on the clues they have found at each crime scene. Use this dialog not only to roleplay out the trial, but to help players form better theories of what has happened at each crime scene. It's a clever way of exposing the plot to them naturally.
Adivion Adrissant
Continuing on from Haunting of Harrowstone, Adivion Adrissant can also be made a stronger presence in Trial of the Beast. The goal here is to establish him as a reoccuring presence, not just a one-off from Ravengro.
Duplicitous Ally Adivion has perhaps traveled with the players since Ravengro, where he was introduced to the players as a friendly ally. Now he expands his role by becoming a gratious host, revealing he owns apartments in Lepidstadt and insisting the players stay with him. Of course, as before, this is so that he can keep an eye on their activities. The Fate of the Beast doesn't concern him one way or the other but he does want Vorkstag and Grine removed, considering them to be failing at their devotion to the Whispering Way. He will subtly steer players in this direction. At the end of the adventure, Adivion offers to sponsor their journey to the Shudderwood, hoping that they end up falling prey to the Werewolves there. He then orders Auren Vrood to watch out for them.
Dream Visitor The dreams that plagued them in Ravengro susbside for most of this avdenture. The players think themselves free of Adivion's nightmarish visits until they begin gathering clues at which point they begin having them again with a vengeance. In the dreams, the robed figure warnd the players of what happens to those who meddle. When they finish the adventure, they have another dream warning them to stay away from the Shudderwood.
Jigsaw The riddling letters begin after the first day of the trial, once Adivion realizes (with glee) that the players have taken up the case. Each one reference some aspect of the case that the players are working on, often leaving pictographic clues as to what really happened in each area. Andivion himself is in the courthouse every day, though the players may not realize this. The only thing to differentiate him in the crowd is that he stays silent while the crowd around him reacts dramatically to the evidence presented. The final riddle is left at Caromarc's Castle and hints at the Shudderwood.
An Old Admirer Adivion won't show up for this adventure: he was called away during the events of Harrowstone and hasn't returned yet (he is currently dealing with Estovain at Ascanor Lodge in the Shudderwood). Before he leaves, though, he will offer the players use of his apartments in Lepidstadt (the better to keep track of them as it is filled with scrying devices). More importantly, Kendra decides to go with the party to Lepidstadt, saying there is nothing left for her in Ravengro. She will be taken in by Judge Daramid, who is secretly her mother--though under no circumstances will the Judge reveal this. At the end of the adventure, Daramid offers to take Kendra in as an initiate of the Palatine Eye, to which Kendra agrees.
Performance Review When the players rescue him, they find a letter stuck to Caromarc's chest. Though clearly written back when Caromarc was restrained it somehow predicts everything the players did: their success or failure at the trial, their success or failure of tracking down the real killers, and their victory over Caromarc's nightmarish constructions. The letter is signed A.A. and says that he will be watching for them in the Shudderwood.
Journey to Lepidstadt
- If players did not successfully complete Haunting of Harrowstone, then they can have been called to Lepidstadt by their old ally, Judge Daramid, who says she has a task for them that requires speed and discretion.
- Details about Lepidstadt can be gained as described in the module with a DC 10 History check. Passing the check by 5 or more reveals the more detailed information.
- If you desire to have your players have a random encounter before finding the Kin, assume they have an encounter and use the Canterwall table at the end of this guide.
Crooked Kin
- All of the kin use Commoner (MM 345) statistics.
- You probably won't need to use them, but the animals the Crooked Kin keeps are a Grimlock (MM 175), a Giant Frog (MM 325), and the Goblin Dogs are Hyenas (MM 331).
Aleece's Fate
- DC 10 Survival check to track the girl into the swamp. The swamp itself is difficult terrain.
- DC 15 Survival check to follow the tracks into the actual bog and another DC 15 Survival check to discover the body.
- The Feaster is a Phase Spider (MM 334) with 40 hitpoints and with the curious ability to mimic human cries. It will use this ability before combat to try and split the group up. Everyone will hear the pleading cries for help but they will sound to everyone like it is coming from a different direction. Percpetion checks won't help the confusion (the Feaster is Jaunting around the bog to mask her wherebouts) but a DC 15 Perception check reveals the cries are weirdly inhuman.
- If the players split up, the Feaster will launch an attack on the smallest group. Otherwise, she will attack the weakest looking member of the group. Unless the players are specifically on guard they will be surprised as she charges 30ft from the thickest reeds. After attacking, she will Etheral Jaunt to pull back from any counterattack. She will flee if reduced to 7 or less hit points. Returning to the swamp to follow her escape and hunt her down later could make for an interesting side adventure.
- The treasures in the bog can be found with a DC 15 Perception check by someone who is searching the bog for victims or treasure: Potion of Fox's Cunning (see the enhance ability spell), and a number of art objects as described in the module
- The dagger Kaleb promised is a Dagger of Shapechanger's Bane. It does an additional 2d6 damage to shapechangers. Otherwise, it uses regular dagger stats. It counts as an uncommon item.
Delivering the Books
- DC 10 Charisma check reveals Dr. Crowl's whereabouts and his relationship to the trial.
- A DC 10 Charisma check reveals Embreth Daramid's whereabouts and the townsfolk's feelings about her.
- DC 13 Insight checks made on Embreth show that she is trying to hide how upset she is at Lorrimor's death.
- When Emreth hires the players on as investigators it is a great time for her to raise her suspicions of The Whispering Way being involved somehow in events in Lepidstadt. She can't say much, lest she reveal secrets belonging to the Order of the Palatine Eye, but she will tell the players she thinks The Beast's sudden capture is connected somehow. She will also tell them to keep their ears open for the name Auren Vrood. She knows little about him, except that he is an agent of the Whispering Way and his name has been heard around Lepidstadt.
The Crooked Kin in Lepidstadt
How much you use the Kin after arriving in Lepidstadt is up to you and how much interest your party shows in them. If players seek them out for information, rumours, to track leads, or deduce the importance of clues, they gain +2 to their roll.
Their other use is to push the players in the right direction if they seem stuck. For instance, you can use them to highlight something fishy going on at Vorkstag & Grine and their connection to the Whispering Way by having one of the Kin be kidnapped by Vorkstag, with the intent to send them to the Whispering Way.
Information on the Trial
The roll for information about the trial is a straight Charisma check, the DCs for the information gained are 8, 10, 12, 14.
Lepidstadt Courthouse
- Climbing the courthouse is a DC 15 Athletics check. Failure drops the player 30 ft to hard stone for 14 (4d6) bludgeoning damage).
- All exterior doors are strong wooden doors (AC 15, HP 20) and are locked (DC 20 Dexterity Check with lockpicks).
- All interior doors are simple wooden doors (AC 15, HP 15) and are not locked.
- There are 12 Guards (MM 347) with 18 hit points each.
Refer to the module for detailed descriptions of each room in the courthouse. The mechanical changes are:
- Storage It's so strange that there is a ballista here. I don't know why it's here. I can't think of any use for it outside of a daring attempt to rescue The Beast by blasting apart the bars to his cage or blowing a hole in the jail wall behind him. Of course, they'd still have to wheel the ballista down the stairs. But hey, if your players find a use for it, more power to them. Anyone who searches storage will automatically find the dissembled balista. Four hours of work and a DC 13 Intelligence check wiill get the thing built. Use the rules in DMG 255 for how to use the ballista.
- Jails Locks requires a DC 20 Dexterity check with Lockpicks to unlock.
- The Beast's Cell The manacles are AC 20, HP 8, break DC 20 Strength, unlock with DC 30 Dexterity check with lockpicks.
- The Beast DMs seeking to tie things together more clearly can have players notice a curious mark on the Beast's right shoulder, a stylized "C." This is Caromarc's personal brand, something he has placed on all of his creations. No one will recognize the brand, but it will come into play later to tie his creations together.
The Beast on Trial
Timing and Investigations
The players will be doing quite a lot of travelling in a short time in order to investigate their crime scenes each evening before presenting at the trial the next morning. Some general guidelines for handling this:
- It is recommended you do not roll for random encounters while traveling. These investigations are the encounters. Players don't have enough time to get into fights, rest, and get back to present evidence for the trial. Only if you want to present a harder challenge to your players should they encounter monsters on the road. If you do desire to roll, consult the Vieland table at the end of this guide.
- Players may find themselves in a position of having to skip a night's sleep in order to conduct more thorough investigations. Players who do not get a long rest every day take a level of exhaustion each time they fail to long rest.
- If they miss a clue, they miss a clue. It happens, and they don't have to find eveything to solve the mystery.
- Throughout the investigations allow players to be creative with what checks they use to discover clues. Perception, Investigation, and Survival (tracking) checks all could be used for most checks. Only where specified is a specific check required.
- Any NPCs encountered use Commoner (MM 345) statistics unless otherwise noted.
The Theft at Lepidstadt University
- The damaged iron door has AC 16, HP 15, and requires a DC 15 Dexterity check with lockpicks to open the padlock.
- The first perception check made in the room reveals the smell of beeswax in the room, as long as the check is over DC 5.
- Clue: Door Rolling a check on the door automatically shows it was bashed in. Passing the check at DC 13 shows the fine silver wire and tiny bell. DC 15 Arcana reveals it was used to create an alarm spell.
- Clue: Tracks DC 15 check shows the Beast's tracks amongst the others.
- Clue: Jumping the Rail DC 15 check in the central area shows that something heavy fell or landed from above and should direct players to the railing above. A DC 15 check on the railing shows something climbed on top of the railing. If the railing is checked first, the successful check should direct players to the floor below.
- Clue: Clean part of room DC 12 check.
- Clue: Windows DC 13 check to show the center window has been used. DC 18 Strength to open the other windows because they are so caked with grime and stuck with years of non-use.
The Swampers of Morast
Remove any items for purchase from the town. The townsfolk are simple folk, they don't have anything to spare and no magic items. They take care of their own and that's good enough for them.
- Convincing Lazne to talk is a DC 17 Persuasion check.
Abandoned Boneyard
- There is a Manticore (MM 213) with 88 hitpoints encountered on the island. There is a 50% chance she is here when they arrive, or else she shows up 1d6 minutes after they arrive.
- The Manticore nest can be found if the trees in B1 are climbed or if the Manticore is observed going to or coming from the nest. Otherwise, players who fight the Manticore need to make a DC 12 Nature check to ascertain the Manticore was pregnant and probably has a nest nearby.
- The dead dwarf has the hip flask worth 30 gp, the purse containing 31 pp and 22 gp, a shortsword, and two items off Magic Item Table B (DMG 144).
- Clue: Coracle, Graves, and Leatherbound Case A DC 15 check made anywhere on the island to look for clues will find the coracle. If the check is passed by 3 or more, they also find the tampered graves. If the check is passed by 5 or more, they also the leatherbound case.
- Clue: Coracle examination If the coracle is examined, a DC 15 check shows the blood in its bottom. Pulling up the items on the rope only requires a DC 10 Strength check.
- Clue: Surgical Tools The leather-bound case is a fine set of surgical tools (see next page) worth 300 gp, identified by a DC 15 Medicine check. Examining the tools and rolling DC 18 Perception notices the small symbol on the handle.
- Clue: Old Camp Going to the southern part of the island, B2, reveals the camp automatically. A DC 12 check will discover the leftover items. A DC 15 Arcana check is needed to identify the potion as an alchemy extract that provides Darkvision to the drinker.
- Deductions DC 13 Nature reveals the blood caiman didn't leave scars on the Beast. DC 14 Arcana check reveals that the Beast should have Darkvision.
Travel Times
| Lepidstadt | Morast | Boneyard | Sanctuary | Hergstag | |
|---|---|---|---|---|---|
| Lepidstadt | ---- | 2.5 hours | 3 hours | 1 hour | 5 hours |
| Morast | 2.5 hours | ---- | 0.5 hours | 1.5 hours | 4 hours |
| Boneyard | 3 hours | 0.5 hours | ---- | 2 hours | 4.5 hours |
| Sanctuary | 1 hour | 1.5 hours | 2 hours | ---- | 4 hours |
| Hergstag | 5 horus | 4 hours | 4.5 hours | 4 hours | ---- |
- Additional Clue DMs may wish to throw in an additional clue here, found automatically at the campsite. It is a small brooch depicting a gagged skull. Players who don't immediately recognize this as a sign of the Whispering Way can do so with a DC 15 History check.
The Surgeon's Tools
Below are the checks needed to trace back the surgeon's tools to their rightful owners. The original module's intent was to make Charisma checks easier but take time while other skill checks would be harder but immediately give the clue. This didn't actually pan out in the module, so it has been fixed here.
Each check can be made with a straight Charisma check at an easier DC but this takes 1d4 hours per check (they can keep making checks until successful as long as they have time). Otherwise the information can be discovered with a more difficult, more specific check without the time restraint. Keep in mind all of these clues can only be found between 6am and 6pm (business hours) each day. Remember that using the Crooked Kin as part of the straight Charisma check will add +2 to the roll!
- Where the tools are made DC 12 Charisma check or a DC 15 Investigation Check.
- Who made this set of tools DC 14 Charisma check or a DC 18 Investigation check.
- Who bought the tools DC 13 Charisma Check or a DC 18 Investigation check.
- Who the auction house sold to DC 15 Charisma Check or a DC 19 Deception or Persuasion check.
- Who purchased the tools The bribe costs at least 20 gp. a DC 15 Charisma check can locate Vorkstag. Otherwise it is a DC 20 Intimidate check against Radniche to discover the information. Once this step has been completed, the players can at any time visit Vorkstag and Grines.
The Children of Hergstag
Have Gustav tell the players before they go to Hergstag about the three sisters who live in the area, as they are key witnesses for the prosecution. No roll is required to find them.
- Clue: The Sisters DC 15 Insight reveals they are hiding something. DC 13 with an appropriate Charisma skill gets the truth out of them.
Hergstag
- The overgrown village requires a DC 13 Survival Check to find the old pathways. The crops and overgrown weeds allow players to make hide rolls if they drop prone.
- The northern bog makes following any paths a DC 16 Survival Check and there is a 35% chance each turn that someone encounters quicksand (see below).
- The first bear trap (XG 114) is encountered when the players approach the buildings. After that, there is a 20% chance of encountering one as the players walk around between the buildings. There are a dozen traps in all.
Surgeon's Tools
Tools, Requires Proficiency in Medicine to use
Back to Life
Surgeon's tools can be combined with the medicine skill to bring someone back to life who has died as a result of failing three death saving throws. The person must have failed the roll within the last hour and must have a body that could still function after reviving them (so if they were melted by acid, devoured by a Manticore, or had their head chopped off by the Lopper, this will not work). The surgeon must perform a DC 15 Medicine check. If they pass, the target gets to immediaely remake all of their death saving throws as if they had just fallen to 0 hit points, rolling until they either get three successes or three failures. If the player gets three successes, they are revived at 1 hitpoint. If they fail, the patient remains dead and no further check may be made. The whole process takes 1d4 hours.
Other Ailments
At the DM's discretion, other ailments may be cured by surgery and a DC 15 Medicine check, such as cutting off an arm to prevent the spread of a disease, or digging out a burrowing parasite, or curing poison, or resolving one of the lingering injuries listed on page 272 of the DMG.
Quicksand
This trap requires a DC 15 Perception check to spot. Otherwise, someone moving into the trap must make a DC 13 Dexterity save or become restrained by the trap (at the DM's discretion, this may inhibit the casting of spells with somatic components). On every following turn, they can use their action to attempt a DC 15 Strength save, releasing themselves from the trap on a success. Otherwise they sink further. If the player fails three of these saves, they die from suffocation. Certain things may give them advantage on the save, such as another player throwing them a rope and helping pull them out.
Brother Swarm and his Ilk
- None of the Wraiths appear outside of their homes in the daytime, only attacking those who come into their domiciles. At night, they wander the area as described in the module. The wraith children attack at night if a player is in their area and the spectre succeeds on a DC 13 Perception check (which they make once a minute). Brother Swarm automatically attacks when the DM decides it is an appropriate moment for it, or if players enter his area.
- The Wraith Children are 6 Spectres (MM 279) who are small instead of medium, with only 15 hitpoints, and they deal 3d4 damage with their life drain attack. They flee to their homes if reduced to 5 hitpoints or less. If fought in their home, they fight until destroyed.
- Brother Swarm is a Wraith (MM 302) whose life drain attack is delivered via the ghostly hornets who surround him. These hornets and the sickly sweet stench he puts off give players advantage on perception checks made to sense him.
- If Brother Swarm is defeated and there are wraith children remaining, a great sorrowful cry rises from the village and the children all become full grown wraiths that flee into the countryside. They play no further part in the adventure, but if enterprising parties want to hunt them down after the trial it could make for a good side adventure.
Chapel
- A note on the deity here: if you don't have a player who follows Desna you may wish to consider switching the chapel to be a symbol of a god one or more of them does follow.
- The water in the font is enough to create five holy water flasks (PHB 151).
- Clue: Empty Graves No check is required to find the six graves. If the graves are exhumed, only Ellsa and Karin's bodies are found. Exhuming a grave takes 5d6+5 minutes, with the proper tools. Double the amount of time if players are using only their hands, or ineffective tools like their axe and swords.
Karin's House
- Proficiency with Carpentry Tools can easily undo the nails and boards that hold this door shut. The process takes 2d6 minutes. Otherwise the door can be smashed in with a DC 14 Strength check, but this immediately alerts Karin's wraith if she is in the area.
- Clue: No Break In DC 10 to discover the appropriate clues.
The Fallen Man
- All of the treasure is as listed, except the Masterwork Thieve's Tools are just regular thieve's tools.
The Hermit's Tangle
- The book is discoverable with a DC 15 check.
The Rotting Scarecrow
- The entrance to the cave requires a DC 15 Perception check to find.
- Clue: Bodies No check is required to find the bodies.
- Speaking with Dead is a viable option for any child whose spectre or wraith form is defeated. Keep in mind that anyone spoken with aside from Ellsa is unfriendly and will try to mislead the players. Ellsa is helpful.
Karb Sanctuary
Players should be told by Gustav before they head for Sanctuary that Karl, the doctor's old assistant, lives in Lepidstadt still and will be called as a witness. They will be told where he lives as well.
- Interviewing Karl should be done via roleplaying. Use Commoner (MM 345) statistics except that he is blind and his charisma is 14 (+2). Any Charisma rolls he makes in regards to The Beast are made at advantage due to his conviction. Only if shown evidence of the Skin Suit from Vorkstag's closet does he lose this conviction.
Sanctuary
- The entire area counts as difficult terrain.
- DC 13 Perception to spot the entrance into the basement
- DC 13 Athletics to climb down the hole, or else suffer a 15 foot fall.
- Clue: Box DC 18 check to find the strongbox. The box can be broken open with a DC 17 Strength check. The papers require a DC 15 Intelligence check to decipher the words “Vorkstag and Grine’s Chymic Works.”
The Cellar
- There are 4 Ghasts (MM 148) here with 40 hitpoints each. Each one will only fight until they are under 10 hitpoints and then they will try to flee. If two of the Ghasts are killed, the other two immediately flee.
- The treasure is exactly as decribed except the bolts are +1 Magical bolts.
- Clue: Heads A DC 15 Perception check shows the difference between the heads.
- Clue: Vial DC 12 Perception to find the vial in the basement.
- If Karl is still friendly towards the players, they can return to him with any clues found at the scene and question him about them.
Vorkstag and Grine's Chymic Works
- Spending 1d4 hours and making a Charisma check will reveal information about Vorkstag and Grine as listed in the module. The DCs are as follows: 10, 13, 18. The DM may also choose to include a new revelation with any check made: that Vorkstag and Grine are rumored to be part of some ancient secret order (this is a reference to the Whispering Way).
- Anyone with proficiency in Alchemy Tools recognizes the smell coming from the chimney.
- Climbing the chimneys is DC 25 Athletics, with a 40 foot fall to the roof on failure. Climbing the outer walls is DC 18 Athletics, with a 40 foot fall to the ground on failure.
- The windows are easily (if noisily) breakable, while all doors are wooden and have AC 15, HP 15. Most locked doors are bolted with a deadlock so they cannot be picked. When they can be picked, it is noted in the conversion.
Discovering Vorkstag and Grine
The module is set up so that players will discover Vorkstag and Grine organically as they investigate crime scenes. However, if your players miss these clues and don't investigate Vorkstag and Grine they will miss one of the adventure's two dungeons and a major plot point without which the adventure doesn't make a lot of sense. If your players miss these clues, one suggestion is to use the Crooked Kin to point them in the right direction.
In this scenario, the Crooked Kin contact the players and say another of their members has gone missing. They were last seen talking to a man near a prominent tavern. Some investigation and inquiries made in the city will reveal the man to be a merchant named Killjoy, one of Vorkstag's many disguises. From here the players can play detective, tracing "Killjoy" back to the Chymical Works. Avoid setting DCs for these discoveries, instead roleplay them out. After all, you want the players to locate Vorkstag and Grine.
In truth, Vorkstag, with his fascination with the grotesque, kidnapped the Crooked Kin member and now is holding them in the Chymical Works in area E8, undecided as to whether he wants to skin them and keep their shape or if he wants to send them to the Whispering Way, who pays handsomely for fresh specimens. The kidnapped Kin has seen the skins and has learned the connection between Vorkstag and Grine and knows of their crimes and will share this with the players when rescued.
E1: Courtyard
- The wooden gate is AC 15, 15 HP, can be forced with a DC 18 Strength check. It is barred, not locked, so it cannot be opened with lockpicks.
- The wall can be climbed with a DC 18 Athletics check, failing causing a 20 foot fall. The top is lined with broken glass, which takes a DC 14 Dexterity save to avoid taking 2d4 points of piercing damage.
- The north door is locked, DC 18 with lockpicks to unlock.
- The Flesh Golem Hound's chain is AC 19, HP 1. It can also be destroyed with a DC 20 Strength Check. The chain gives the hound full access to the courtyard. At night, while unchained, it will pursue tresspassers into the actual factory.
- It is not clear but is assumed that the kennel is pictured on the map as the big wheelbarrow-looking thing. The hound has total cover while inside of it.
- The Hound is a Flesh Golem (MM 169) with the following changes: it has 65 hitpoints, speed 40 ft, a strength saving throw of +7, Athletics +7, and when it is not muzzled, it can replace one of its slam attacks with the following:
Bite: Melee Weapon Attack: +7 to hit, reach 5ft., one target. Hit 15 (2d10 + 4) piercing damage and the target must make a DC 15 Strength save or be knocked prone.
- While fighting the hound, have players roll perception. The highest roller will notice the same curious mark on its right shoulder that The Beast has: a stylized "C." This is because the hound is Caromarc's creation, given to Vorkstag and Grine as payment for one of their shipments of "parts."
E2: Storage
- Mongrelmen are given statistics in The Curse of Strahd. There are 3 Mongrelmen (CoS 234) here. Each will flee when reduced to 5 or fewer hitpoints.
- The boxes here hold: 8 flasks of alchemist fire (PHB 151), 12 vials of liquid ice (see below), 6 smoke bombs (see below), and the bleach. Anyone proficient in alchemist's tools recognizes these as the creations of a skilled alchemist.
- DC 15 perception check reveals the bottle of port worth 100 gp.
E4: The Vats
- The cellar door is locked with a padlock that requires a DC 17 Dexterity check with lockpicks to unlock.
- Crossing the planks requires a DC 10 Acrobatics check. The check must also be made whenever a player takes damage while on the planks. Failure causes a fall, either into the vats or to the floor 15 feet below (2d6 bludgeoning damage).
- The vats contain either acid or bleach. Acid deals 3d6 points of acid damage at the start of a creature's turn. Bleach deals 1d6 points of acid damage and forces the immersed creature to make a DC 13 Constitution save each round they are immersed or become blinded for 1d6 minutes. Climbing out of any vat requires a DC 18 Atheltics check (remmebr to roll at disadvantage if blinded).
Vial of Liquid Ice
Wondrous Item, Common
This item can be thrown at a target up to 20 feet away. Make a ranged attack roll without proficiency. On a successful strike, the target takes 1d6 cold damage and has disadvantage on the next weapon attack roll it makes before the end of its next turn.
Smoke Bomb
Wondrous Item, Common
This item can be thrown at a targetted square up to 20 feet away. When used, A 15-foot-radius sphere of fog appears centered on that square until a wind of at least 10 miles per hour blows it away, or after ten minutes. The fog spreads around corners and heavily obscures the area it fills.
- The chemicals in this room make it difficult to breath without feeling ill. At the beginning of their turn, a player in this area must succeed at a DC 11 Constitution save or become poisoned until the end of their turn. If a player breathes through some kind of filter, like a scarf wrapped around their face, or holds their breath (see the holding breath rules on PHB 183) they can avoid making the check.
- Of the Mongrelmen in here, only 3 Mongrelmen (CoS 234) attack. They flee if reduced to 5 or fewer hitpoints. The other Mongrelmen ignore combat and focus on their work unless attacked, in which case they join in.
| Day | Night | |
|---|---|---|
| Vorkstag | DC 10 | No check |
| Grine | DC 15 | DC 10 |
- If combat breaks out in this room, there is a chance that Vorkstag and Grine (or both) come to investigate the disturbance. At the beginning of every round of combat after the first, make two perception checks at disadvantage, one for Vorkstag and one for Grine to see if they hear the noise and come to deal with any intruders. See the table above for the DCs. At night, Vorkstag is usually out on an errand, but he can return for dramatic effect whenever the DM deems appropriate, either in the middle of combat or just as the players are discovering his collection...
- DMs who prefer the dice to decide things can roll a d10 once every minute. On a roll of one, Vorkstag returns to the factory.
Grine (Darkling)
Small Fey, Neutral Evil
- Armor Class 15 (leather rags)
- Hit Points 38 (7d6 + 14)
- Speed 30ft. climb 20ft.
STR DEX CON INT WIS CHA 12 (+1) 18 (+4) 15 (+2) 10 (+0) 15 (+2) 12 (+1)
- Skills Acrobatics +6, Deception +3, Perception +6, Stealth +8
- Damage Immunities Poison
- Condition Immunities Poison
- Senses Blindsight 30ft, Darkvision 120ft, passive Perception 16
- Languages Common, Elvish, Sylvan
- Challenge 3 (700 XP)
Sunlight Sensitivity While in sunlight, Grine has disadvantage on attack rolls, as well as on Wisdom (Perception) checks that rely on sight.
Death Burn When Grine is slain, his body combusts in a flash of bright white light, leaving its gear in a heap on the ground. All creatures within 10 feet must make a DC 11 Constitution save. On a failure, the creature takes 7 (2d6) radiant damage and, if the creature can see the light, is blinded until the end of its next turn. If the saving throw is successful, the creature takes half damage and isn't blinded.
Sneak Attack (1/Turn). Grine deals an extra 7 (2d6) damage when he hits a target with a weapon attack and has advantage on the attack roll, or when the target is within 5 feet of an ally of Grine that isn’t incapacitated and Grine doesn’t have disadvantage on the attack roll.
Actions
Multi-Attack Grine makes two attacks on his turn.
Dark Fist Melee Weapon Attack: +3 to hit, reach 5ft., one target. Hit 3 (1d4 + 1) bludgeoning damage + 10 Necrotic damage.
Throwing Axe Ranged Weapon Attack: +6 to hit, reach 20/60ft., one target. Hit 7 (1d6 + 4) slashing damage and target must succeed on a DC 10 Constitution saving throw. On a failed save, it takes 6 (1d12) poison damage and is Poisoned for 24 hours. On a successful save, the creature takes half damage and isn’t Poisoned.
Darkness (1/day) Once per day, Grine can cast darkness as per the spell.
Vorkstag (Skin Stealer)
Medium Fey Alchemist, Neutral Evil
- Armor Class 16 (with mutagen)
- Hit Points 55 (10d8+10)
- Speed 30ft.
STR DEX CON INT WIS CHA 14 (+2) 18 (+4) 12 (+1) 16 (+3) 10 (+0) 17 (+3)
- Saving Throws Str +6 (with mutagen)
- Skills Deception +7, Insight +2
- Condition Immunities Charmed
- Senses Darkvision 60 Ft., passive Perception 12
- Languages Common, Fey
- Challenge 4 (1,100 XP)
Sneak Attack (1/Turn). The skin stealer deals an extra 7 (2d6) damage when it hits a target with a weapon attack and has advantage on the attack roll, or when the target is within 5 feet of an ally of the skin stealer that isn’t incapacitated and the skin stealer doesn’t have disadvantage on the attack roll.
Steal Skin A skin stealer may steal the skin of a creature of Small, Medium, or Large size with a roughly humanoid shape. The target creature must be dead, incapacitated, or willing. The skin stealer can don or remove a stolen skin as a move action.
When wearing a stolen skin, the skin stealer takes on the likeness of the skin’s original owner, including the victim’s voice, build, and size, but gains none of the creature’s abilities.
Stolen skins are preserved and remain as supple as living skin. A skin stealer may only steal and use a number of skins equal to its Charisma ability score. The skin stealer may choose to discard unwanted skins to make room for new ones at any time; discarded skins rot and decay normally.
Mutagen (1/Day) Once a day, as a free action, Vorkstag can activate a mutagen he has brewed inside of himself. For one minute, he gains +2 to his AC and +2 to all Strength abilities, saves, and attacks. It is assumed he uses this on the first round of combat and so this is reflected in his AC and all of his actions below. Remember to adjust if more than a minute passes.
Potion Master. Vorkstag can drink a potion as a bonus action. In addition, he can drink multiple potions at one time without suffering ill effects and spell-like effects he is granted via potions do not require concentration.
Actions
Mace. Melee Weapon Attack: +6 to hit, reach 5ft., one target. Hit 7 (1d6 + 4) bludgeoning and the target must make a DC 11 Constituion save or take 10 (3d6) poison damage or half on a successful save.
Alchemical Bomb Vorkstag throws an alchemical bomb at a square he can see within 30 feet. The bomb explodes, forcing anyone on that square or within 10 feet of it to make a DC 13 Dexterity saving throw or take 10 (3d6) damage, or half on a successful save. For the type of damage, roll a d4 and consult below:
- 1: Fire damage, and anyone who failed the save takes an additional 1d4 fire damage at the start of their next urn.
- 2: Acid damage, and anyone who failed the save is blinded until the end of their next turn.
- 3: Poison damage, and anyone who failed the save is poisoned until the end of their next turn.
- 4: Cold damage, and anyone who failed the save has disadvantage on the first weapon attack made before the end of their next turn.
Potions
Blur, Bull's Strength, Climbing (DMG 187), Fire Breath (DMG 187) Healing Potion (common) x3 (DMG 188), Invisibility (DMG 188), Jump, True Strike, Water Breathing (DMG 188).
Thunderstone
Wondrous Item, Uncommon
This item can be thrown at a space within 30 feet. When it strikes the ground it unleashes an ear-splitting boom. Every creature within 5 feet of the targetted space must make a DC 13 Constitution save or become Deaf for one minute and lose their concentration.
Tanglefoot Bag
Wondrous Item, Common
This bag of tar and other sticky residues can be thrown at a creature within 30 feet. The creature must make a DC 12 Deterity save or become restrained. The creature can use their action on their turn to attempt to break free with a DC 14 Strength roll. On every round after the first one they are stuck, they have advantage on the roll.
E5: Loading Bay
- The 12 vials of acid, in addition to their uses on page 148 of the PHB, could be used at the DM's discretion to melt a door lock or some other clever thing. The 12 vials of nushadir can neutralize a small amount of acid or prevent 1 acid damage per vial if used within 6 seconds of the damage being dealt, but otherwise has no use. The 3 Thunderstones and 3 Tanglefoot Bags are detailed later on in this conversion.
Vorkstag and Grine Tactics
- Grine prefers to attack opponents in the Vats where he has more room to move around and use darkness. Because he can see through his own darkness with Blindsense, he will cast it either in a precarious location, like the vat catwalks or on himself, so he can move the darkness on top of opponents and gain advantage on all his attacks while they have disadvantage on theirs. He only fights to 10 hit points; after being reduced to this he retreats to E9 to retrieve his homunculi before fleeing by climbing out of the tower. If caught while fleeing, he will surrender rather than die.
- If Vorkstag is not caught off guard, he drinks his potions of blur, bull's strength, and spider climb before engaging in combat. He prefers to fight at long range with his bombs. He will use his healing potions anytime he falls below 45 hit points but will save his potion of invisibility for when he falls below 20 hit points. After drinking it, he will retreat to E13 and await any pursuers, planning on ambushing them with his Chymickal Zombies. If no one pursues, he will take the Chymickal Zombies and hunt them down. This time he fights to the death or until subdued.
- When fought together, Vorkstag and Grine make an intimidating pair. Grine will try to seperate one party member from the others and tends to focus on one at a time, while Vorkstag uses his bombs to deal damage to as many as possible. They fight far apart, forcing players to split their attentions to different parts of the room.
- Grine has none of the gear listed in the module except for the Thieve's Tools. Vorkstag doesn't have any of his gear aside from the potions listed in his stats, alchemist's tools, a vial of serpent venom (DMG 258), and the keys to the factory which unlock all doors including E8.
- Clue: The Caiman Bite Automatically discoverable on Vorkstag once he is defeated, as long as the body hasn't been destroyed (ie. by falling into the vats or being destroyed by fire magic).
E6: Grine's Butchery
- The jar of acid deals 1d6 acid if someone grabs the key out of it without first taking some preventative measure, like pouring nushadir inside.
- Grine's strongbox is trapped with Ungol Dust, which goes off unless opened with the key (DC 20 Dexterity check with lockpicks to open without the key). Someone looking for traps can detect it with a DC 12 Perception roll. It takes a DC 15 Dexterity check with thieve's tools to disable it.
- The trap targets anyone within 5 feet of the strongbox, forcing them to make a DC 12 Constitution save or take 11 (2d10) poison damage and become poisoned for 24 hours. Success cuts the damage in half and doesn't inflict the poison condition.
- Inside the Strongbox is everything described in the module (antitoxin is on page 151 of the PHB). The other items in the room are too heavy to be carried out without significant use of magic, but perhaps the knowledge of their location could be bartered in town.
- To clarify, there are not four more antitoxin in the room, the antitoxin is all contained in the strongbox.
E7: Vorkstag's Study
- Without the key, the door to E8 requires a DC 25 Dexterity check with Lockpicks to unlock.
- The lab and the books are too much for a party to carry with them without significant use of magic, but are worth what they are described to the University or a scholar if they are told of their location.
- The flash powder is listed below. Alchemical Grease is the same as Oil of Slipperiness (DMG 184).
E8: The Cabinet of Skins and Faces
- While searching the skins, if someone succeeds at a DC 25 Perception check, they find the false back to the closet.
- The treasure here is as listed. The necromantic alchemical elixir can only be recognized by someone with proficiency in Alchemist Tools and only then by a DC 15 Arcana check.
- DMs may wish to expand on Vorkstag's ledger. This is where it can more clearly be defined as to how he knows about The Beast. Auren Vrood should specifically be listed as an agent of the Whispering Way who has recently asked about Count Caromarc and the Seafarer's Bane. Vorkstag will actually leave an open ended comment after this, wondering whether Vrood had anything to do with the sudden appearance of The Beast and the theft of the Bane.
- If Vorkstag hasn't been encountered yet, this is possibly the most dramatic moment for him to arrive, as the players are investigating his cabinet of horrors.
Flash Powder
Wondrous Item, Common
Can be thrown at a creature within 15 feet. That creature must make a DC 12 Constitution save or be blinded for 1d4 rounds.
E9: Tower of Curios
- The Snapjaw Homunculi are 2 Humonculi (188) who are a little sturdier: they have 16 hitpoints and 16 (+3) Strength and are immune to stun. They use a stronger bite attack (see below).
Snapjaw Melee Weapon Attack +5 to hit. Hit 6 (1d6 + 3) piercing damage and the target must succeed on a DC 11 constitution saving throw or be poisoned for 1 minute. If the saving throw fails by 5 or more, the target is instead poisoned for 5 (1d10) minutes and unconscious while poisoned in this way.
- The Homunculi flee when they have 5 or fewer hit points.
- The treasures are exactly as described (except bull's strength is replaced with enhance ability). The artifacts can be identified with a DC 13 History check.
E10: Top of the Tower
- There is 1 Homunculus (188) here with the same stats as the Snapjaw Homunculi, above. It does not flee from combat.
- The sound burst trap goes off when the trapdoor to E9 is opened. The trap can be discovered if someone is looking for it with a DC 19 Perception check and disbled with a DC 19 dexterity check with thieve's tools.
- If the trap goes off it inflicts 7 (2d4 + 2) thunder damage on everyone within 10 feet of the door and anyone who doesn't make a DC 10 Constitution save also gains the stunned condition for 1 round.
E11: Lower Storage
- The door to E4 is locked and requires a DC 18 Dexterity check with lockpicks to unlock.
- The secret door is pretty easy to spot: DC 14 Perception check because it is used so often.
- The treasure here consists of the following alchemical materials (see below): 5 doses of Bladeguard, 3 doses of Fey Dust, 5 doses of Silver Sheen, 5 doses of Adamantine Blanche.
E12: Secret Distribution Room
- The grate to the sewer can be opened with Grine's key or with a DC 18 Dexterity check with lockpicks. The grille otherwise has AC 20, HP 60, DC 25 Strength check required to rip it out of the wall.
- The treasure has changed. Aside from the ledger (which can be used as a Clue) the other object is a Scroll of Gentle Repose.
Bladeguard
Wondrous Item, Common
This oily substance, when poured over a weapon, item, or armor acts like a second layer of iron, protecting the item from incurring any damage for 1 hour. It also prevents the item from being targetted by the spell Heat Metal. Otherwise, it offers no extra protection to the user of the item, weapon, or armor and does not protect against conditions, like Petrify. Disintegrate bypasses the bladeguard and can destroy objects as described in the spell.
Sewer Encounters
| D20 Result | Encounter |
|---|---|
| 1 | A crazed and missing student, an Apprentice Wizard (VGM 209) clutching a random trinket and mumbling about how he must protect it and bring it back to the university. |
| 2-3 | ld6 + 2 swarms of rats (MM 339) |
| 4-6 | 2 Crocodiles (MM 320) |
| 7-9 | 2d4 thugs (MM 350) |
| 10-12 | ld4 + 1 cult fanatics (MM 345) who worship the Whispering Way but aren't actually members |
| 13-14 | 2d8 stirges (MM 284) |
| 15-16 | ld12 zombies (MM 311) |
| 17 | 1 Ghost (MM 147) |
| 18 | The players stumble into a 20 foot long patch of Green Slime (DMG 105) that blocks the entire passage. |
| 19 | 1 Cambion (MM 36) in disguise using alter self |
| 20 | Players find the secret hideout of an Assassin (MM 343). |
Fey Dust
Wondrous Item, Common
This pixie dust, when spread over a weapon with a bonus action, gives it the magical property, allowing it to bypass appropriate damage resistances and immunities. After one successful attack, the effect wears off. If this attack does not occur within an hour, the effect is wasted.
Silver Sheen
Wondrous Item, Common
This silvery oil (which looks like liquid metal) gives a weapon the silver property when poured over it as a bonus action, allowing it to bypass appropriate damage resistances and immunities. After one successful strike, the effect wears off. If this attack does not occur within an hour, the effect is wasted.
Adamantine Blanche
Wondrous Item, Common
This material, which looks like a thick mud, hardens quickly when spread over a weapon as a bonus action, and gives it the adamantine property, allowing it to bypass appropriate damage resistances and immunities. After one successful strike, the effect wears off. If this attack does not occur within an hour, the effect is wasted.
Sewer Adventures
It is not detailed in the module, but if clever players seek to get into the factory another way, then the sewers might make for an interesting detour.
Players who seek entry through the sewers will need darkvision or a light source and will have to succeed at three DC 16 Survival checks (each one representing fifteen minutes of travel) to navigate the maze of tunnels and find this entrance, then figure out how to get past the grille (bashing away at it or ripping it free with Strength should alert Grine and Vorkstag).
Every two survival checks that are made, roll on the Encounter Table on the following page, rerolling any repeated events.
E13: Cadaver Pool
- The iron door here can be barred from the outside. Vorkstag may try to lure the players inside while invisible, then lock them in with the zombies. Once barred, it is AC 19, HP 20.
- The water in the room is 4 feet deep and the entire room counts as difficult terrain.
- The two chymickal zombies use the statistics of Martial Arts Adepts (VGM 216) with the following additions: they ignore difficult terrain, they are immune to poison damage and conditions. In addition, they have Undead Fortitude (see Zombie in the MM 311).
- The chymickal zombies will flee to warn Vorkstag and Grine if they are both reduced to under 10 hit points. If locked in here with the players, they fight to the death. If Vorkstag and Grine are dead, follow the scenario as described in the module.
Leaving the Chymickal Works (optional encounter)
Once Vorkstag and Grine have either been killed, captured, or have escaped, the players are interrupted by Auren Vrood. He had come here to quietly dispose of the two wayward fey and currently has greater invisibility cast on himself. Upon seeing the players he is caught off guard. Not yet knowing their strength, he decides not to attack them for now and instead casts Mislead to create an image of himself to address the players while he remains invisible.
He is haughty at this meeting and tells the players to beware of "meddling in things they do not understand." He also says "the one you serve is sending you to your graves. Be wary of listening to them. They know who they send you to face." He tries to trick them into telling him something about their motivations and anyone they serve, because he actually doesn't know and that disturbs him.
If the players attack Vrood, they'll discover the image is an illusion. The real Vrood will escape before they can find him.
Capturing Vorkstag or Grine
Grine is more likely to surrender than Vorkstag if cornered as his desires for self-preservation outdo his propensity for violence. Either may be knocked unconscious and bound, however. If captured, the GM should roleplay out the encounter. Use Charisma based skill checks to determine if the players can break Vorkstag or Grine into confession. If they confess, they can tell the players every detail of their operation and (if using the suggested additional plot material) will mention that they do work for the Whispering Way and that the Whispering Way wanted the Seafarer's Bane. If Vorkstag and Grine confess and are put in prison, they are found dead at the conclusion of this adventure with no clear explanation for how they died, except that their jaws and throats have been disintegrated, rendering them incapable of being contacted via Speak with Dead (it is in fact revenge ennacted by the Whispering Way for them breaking their vow of silence).
The Trial of the Beast
The trial works as a series of DC 19 Persuasion checks, one made for each piece of evidence the PC presents to the court along with a thoery on its meaning. This roll is modified by the quality of the evidence. Advantage can be given if the player roleplays a particularly empassioned or compelling presentation of their argument. At trial's end, tally up the successful checks and see the appropriate section below.
- Note that gaining permission to use magic during the trial requires a DC 18 Persuasion check. Only relevant magic will be allowed, such as using Speak with Dead to gain evidence of how someone died.
Extraordinary Evidence
The following items can be introduced on any day of the trial, once the players discover it.
- Tracing the surgeon’s tools found in Morast to Vorkstag (+0 on check)
- Displaying the Shambling Man skin (+6 on check)
- Displaying Vorkstag’s blood caiman bite scar (+4 on check)
- Presenting Vorkstag’s Cabinet of Skins and Faces (+10 to check)
- Getting Vorkstag or Grine to confess (either in person, via speak with dead, or through a third party witness like the Crooked Kin) (auto-success).
- Presenting the ledgers which show what Vorkstag and Grine were doing (+6 to check)
- Having a PC take the stand to report a confession from Vorkstag or Grine (Advantage on Diplomacy check, no other bonus as the court may not take their word for it).
- If the players have the poacher's face from Morast, they can present it along with any of the above checks to gain advantage on the check.
Day 1: Morast Evidence
Today's goal for the players should be to cast doubt on the Beast's involvement in the murders at Morast, hinting that perhaps a third party is involved.
- The robbed graves (+0 on check)
- The Beast can see in the dark so that was not its camp, it didn't need the alchemy potion (+2 on check)
- The Beast doesn't bear the Blood Caiman scar (+4 on check)
- Presenting the removed face of the poacher (+0 on check, but this is a difficult piece of evidence to work with as it simply makes the beast look like a monster who rips off faces and keeps them as a trophy. Players have disadvantage on their persuasion check in presenting this evidence. See above for a better use of the face).
Day 2: Hergstag Evidence
Today the goal of the players should be to prove that something else killed the children at Hergstag. Throughout this day, the crowd becomes more and more upset. A DC 15 insight check reveals this about the crowd.
- Why did the Beast bring Ellsa's body back? (+1 to check)
- Making the Beast cry (showing that this is the same sound he made that the villagers mistook for laughing) (+6 to check)
- Karin's time of death doesn't match when the Beast was there (+8 to check)
- Karin's window was not forced open (+0 to check)
- The wall outside Karin's house is impossible to climb (+0 to check)
- Recovering the bodies of the children to show how they really died (+4 to check, or a +8 if a clever player uses a DC 15 Medicine check to explain to the crowd as an expert witness how they died)
- Having used Speak with Dead on the children earlier and now reporting the results (advantage on check)
- Using Speak with Dead on any of the children in the court (this will not go as hoped: most of the children's spirits are now malevolent and angry and will try to obfuscate the truth, leading to an automatic failure).
- Ellsa's spirit is the only one who will always tell the truth about what happened. If speak with dead is used on her, this is an automatic success.
Mob Justice
- Use the table in the module to determine the size of the mob and use the module's decription of the mob's tactics to determine how the assault is carried out. Note that the speak with dead penalty is a little confusing: if the players used the spell on the children, they get the penalty. If they used it to speak with Ellsa, it cancels out the penalty.
- It takes a DC 12 intimidate check to cow the guards into following the commands of the players
- Dispering the mob through speech requires a DC 13 Diplomacy or DC 15 Intimidation check. Each check disperses 1d4 townsfolk.
- The townsfolk use Commoner (MM 345) stats, each with 8 hitpoints. The ringleaders use Thug (MM 350) Stats, but the only weapons they have are clubs (PHB 149).
- When the militia arrives, it is made up of 40 Guards (MM 347) and 1 Knight (MM 347).
- The effect on the trial remains as described in the module.
Day 3: Sanctuary Evidence
Today's trial is where the players should focus on how Vorkstag and Grine were the actual killers at Sanctuary (and possibly at Morast).
- Karl admits that Vorkstag and Grine occasionally visited the Sanctuary (+3 to check)
- Karl describes how the shambling man skin matches the beast that attacked them (+8 to check)
- Establishing that Brada knew Vorkstag and Grine (+5 to check)
- Having used Speak with Dead earlier on the Doctor and now reporting the results (advantage on check)
- Using Speak with Dead in the courtroom on Brada's head to have him report the truth (auto success, though if yesterday's trial involved this spell and it led to pandemonium, the check required to get the court to allow its use is at disadvantage).
Aftermath of the Trial
- Caromarc can be identified with a DC 12 History check.
- If you have added information to the Vorkstag and Grine investigation to tie together them, the Whispering Way, The Beast's attack on the university and Schloss Caromarc, then players will have plenty of reason to investigate the old castle and have it feel like less of a tag-on to the end of the adventure. In this case, you may not require Judge Daramid to push them further in this direction.
Schloss Caromarc
- It takes a full day of travel (12 hours, includes two short rests) on foot to reach Schloss Caromarc. If you wish to roll random encounters during this journey, use the Vieland table at the end of the conversion.
- Researching the castle beforehand is a History check, with results on DC 10, 12, and 15, as described in the module. In addition, everyone in town knows the story that some uncertain tragedy befell the count's wife and after this incident he became reclusive and strange.
- It takes a DC 20 climb check to scale the castle walls, and a DC 22 check to scale any of the slippery cliffs.
- Doors can be smashed down, they have AC 15, HP 15. The windows cannot be broken except by powerful magic or something huge slamming into them.
- Falling in the river deals damage based on the heights pointed out in the module (remember to disregard 20 feet when calculating fall damage). It is a DC 15 swim check to keep swimming against the raging tide and avoid being pulled over the waterfall for more falling damage.
- If someone does fall into the water and survives, their best options for rejoining the adventure are to attempt to swim to one of the rock outcroppings and scale the cliffs and castle walls (requires at least two separate climb checks) or to hike all the way back to the entrance of the Manse and proceed from there. Either option takes time: climbing speed is one-half of a player's normal speed (like difficult terrain) so you can use that to calculate the number of rounds it takes to climb up the castle. Going the land route takes at least an hour.
F1: Outer Gate
- The wooden gate has AC 15, HP 25.
- For the 2 Trollhounds, see the next page.
F2: Gateway
- The barricade is AC 10, HP 30 and can be dismantled with two successful Strength checks of DC 23 (each check attempt requires an action). It is vulnerable to fire damage.
- Exmaining the barricade automatically reveals the guard uniform.
- There are 3 Goblins (MM 165) and 2 lesser Trolls who are Trolls (MM 291) with 40 hit points. The creatures act as described in the module. The trolls can replace two of their attacks with throw rocks, hurling large chunks of granite at the players. The range is 20/40. They have a +4 to hit with them for 8 (2d6+1) bludgeoning damage.
- A DC 15 Religion check reveals the symbol of the Whispering Way for what it is.
- The treasure is as described. The Staff of Swarming Insects is described on page 203 of the DMG.
F3: Inner Gate and Terrace
- The enemies here are 1 Trollhound (see next page) and 1 lesser Troll (MM 291) with 40 hit points.
F5: Southwest Gatehouse Tower
- Grork is a Troll (MM 291) with 90 hit points. He has disadvantage on spotting anyone approaching from the South with Perception checks. The spyglass is worth 400 gold.
G1: The Low Bridge
- The Hound is a Flesh Golem (MM 169) with the following changes: it has 65 hitpoints, speed 40 ft, a strength saving throw of +7, Athletics +7, and it can replace one of its slam attacks with the following:
Bite: Melee Weapon Attack: +7 to hit, reach 5ft., one target. Hit 15 (2d10 + 4) piercing damage and the target must make a DC 15 Strength save or be knocked prone.
- The Flesh Hound will try and use the shove action on its first turn to knock someone off the bridge, if possible. Details on this action are found in the PHB page 195.
- It bears the mark of the stylized "C" that Vorkstag and Grine's hound showed, as well as the Beast. An Investigation 10 check reveals that this must be Caromarc's symbol, marking the craftsmnaship as his own.
Resting inside Schloss Caromarc
- Short resting inside Schloss Caromarc is possible, but if the players have not cleared out all of the enmeies in their section first, they will be found by them and attacked unless they have secured a safe place to sleep somehow (barricading themselves in a room, climbing to a spot the enemies can't reach, using magic, etc).
- Long resting is harder to justify, since the players are on a bit of a time limit before Count Caromarc dies of starvation. My suggestion is to allow them one or two long rests after they enter the castle, depending on how badly injured they are, and as long as they have cleared the area of enemies first.
- During their first rest, long or short, the players are visited by the invisible hommonculi Waxwood (see section L2) who leaves a note scribbled in charcoal on the stone beside them, begging them to come quickly to the lightning tower where the master of the castle is in need of help. This should impress upon them that time is of the essence.
- If the players attempt to take too many rests, short or long, consider having more Trolls show up and start taking over the castle. As the players have cleared the rooms behind them as they've gone, the Trolls now have an easy way in. Having the players' sleep be interrupted by a troll attack is a good way to impress upon them that they are in a dangerous situation!
Trollhound
Medium beast, chaotic evil
- Armor Class 15 (natural armor)
- Hit Points 45 (7d8 + 14)
- Speed 30ft.
STR DEX CON INT WIS CHA 18 (+4) 13 (+1) 15 (+2) 4 (-3) 11 (+0) 6 (-2)
- Skills Perception +6
- Senses Darkvision 60 ft, passive perception 16
- Languages None
- Challenge 2 (450 XP)
Keen Hearing and Smell. The hound has advatage on wisdom (perception) checks that rely on hearing or sound.
Regeneration. The hound regains 5 hitpoints at the start of its turn. If the hound takes acid or fire damage, this trait doesn't function at the start of the hound's next turn. The hound only dies if it starts its turn with 0 hit points and doesn't regenerate.
Actions
Bite. Melee Weapon Attack: +6 to hit, reach 5ft., one target. Hit 8 (1d8 + 4) piercing damage plus 7 (2d6) poison damage and the target must succeed on a DC 13 Strength saving throw or be knocked prone.
G2: The Great Door
- The iron door (AC 19, HP 40) is locked. A DC 20 Dexterity check with lockpicks can unlock it.
- A DC 15 Perception check notices the hidden bell pull.
- The trap is very difficult to spot and to disarm: DC 22 Perception while searching for traps to notice the arcane runes carefully etched into the drawings, DC 15 Arcana to recognize what they do (summon an air elemental) and a DC 20 Arcana check to properly deface them so that they do not activate. Failure on this last check springs the trap.
- The Air Elemental (MM 123) has 105 hitpoints and is huge in size.
G3: The Great Hall
- The hobbling hook clawed apparatus is detailed below. Players will note it has the stylized "C" on it.
- Anyone looking closely at the painting can make an investigation check, seeing and understanding the bridge clue with DC 15 and seeing and understanding the monster clue with DC 25.
Hobbling Hook Clawed Apparatus
Large construct, Neutral
- Armor Class 16
- Hit Points 57 (5d10+30)
- Speed 30 ft.
STR DEX CON INT WIS CHA 22 (+6) 8 (-1) 22 (+6) 4 (-3) 10 (+0) 1 (-5)
- Damage Immunities poison; bludgeoning, piercing, and slashing from nonmagical attacks that aren't adamantine
- Condition Immunities charmed, exhaustion, frightened, paralyzed, petrified, poisoned
- Senses Darkvision 60 ft, passive Perception 10
- Languages understands orders of its creator but cannot speak
- Challenge 4 (1,100 xp)
Magic Resistance. The Hook Clawed Apparatus has advantage on saving throws against spells and other magical effects.
Actions
Multi-attack. The Hook Clawed Apparatus makes two slam attacks.
Slam. Melee Weapon Attack: +8 to hit, reach 10ft., one target. Hit 10 (1d8 + 6) slashing damage.
G4: Library
- DC 20 Perception while looking for secret doors spots the secret door.
- Reading the books here and passing a DC 10 Investigation check will reveal engineering notes on the castle and will give advantage on checks made to find secret doors in areas F through J. Passing the check at DC 20 will reveal a map to the Schloss and players can now be shown the full map on page 49 of the module.
G5: Smoking Room
- DC 20 Perception while looking for secret doors spots the secret door.
G8: Dining Room
- DC 20 Perception checks notice the build up of dust.
- DC 20 Perception checks while searching for secret doors finds the two to the south.
- A DC 12 Perception check spots the secret door to the west, even if players are not looking for secret doors.
G11: Guest Bedrooms
- Unlocking the door requires a DC 18 Dexterity check with lockpicks.
G13: Master Bedroom
- The cupboard is discoverable with a DC 25 Perception check. Seeing the trap is a DC 15 Perception check while searching for traps. Diasbling it requires a DC 15 Dexterity check with Thieve's Tools. Failing the roll triggers the trap.
- The trap makes a +7 attack roll against the person who triggers it, dealing 1 piercing damage and forcing the target to make a DC 15 Constitution saving throw, taking 24 (7d6) poison damage on a failed save, or half as much damage on a successful one.
- The figurine of Ivory Goats is described on page 169 of the DMG.
The Alchemy Wing
H1: Narrow Walkway
- Because of its precarious nature, the bridge counts as difficult terrain.
H2: Precarious Alchemy Workshop
- Simplify the checks to notice the hazard. A DC 10 Perception check shows that rust is covering nearly everything in the lab. A DC 15 Investigation check (automatically successful if the player has proficiency in mason's tools) will reveal the structural damage done to the building itself and give the hint that maybe they shouldn't use big destructive magic in here.
- The hazard can create collapsing squares in this room. If a player is on a collapsing square, they must succeed at a DC 13 Dexterity save or fall 100 feet into the water below. The way the map depicts this area is a little confusing, it looks like the alchemy workshop is perched on a stone island. It used to be, but the recent explosion caused part of this perch to collapse. Do not ignore 20 feet of falling damage as described by the module if a player falls through one of these holes, as they bounce and strike off of support beams and collapsed pieces of the island.
- Collapsing squares are caused by magical effects that deal damage in an area-of-effect radius or cause undue stress (like Gust of Wind or Thunderous Smite, DM makes final call on this). Anytime such a spell is cast, there is a 10% chance that the affected area collapses.
- Collapse may also be triggered by creatures larger than medium, collapsing the squares underneath the creature on the following percentile: 10% for large, 20% for huge, 40% for gargantuan.
- There are 3 Rust Monsters (MM 262) here, and because of all of the equipment in the room, they can hide as a bonus action on their turn. They focus mainly on consuming metal, though they will try to knock players unconscious in order to have free attacks on their metal belongings. They flee if reduced to 6 or less hit points.
- The Rod of Fire Extinguishing has been converted to a Rod of Frost, see below.
Rod of Frost
Rod, Uncomon
This rod is cool to the touch. It holds a maximum of 12 charges. As an action, a charge can be spent and it can be pointed at one target, which begins to become chilled and covered with frost. If the object is a fire, the fire will be put out in a five foot area. For every additional charge spent another five feet will be put out. If the object is a creature, they must make a DC 13 Constitution saving throw. On a failed save, the target takes ld6 cold damage. This damage can be increased by 1d6 for each additional charge spent, up to a maximum of 3d6. The wand regains 1d6+2 charges at dawn each day. If ever the rod is reduced to 0 charges, roll a d20. On a roll of 1, the rod freezes over and loses its power forever.
I: Rope Bridge
Moving on the bridge requires a DC 13 Acrobatics check before movement is attempted to avoid falling off. Dashing causes the roll to be made at disadvantage. If the roll is failed, the player gets one chance to succeed at a DC 13 Dexterity save or else fall into the water 150 feet below. Success puts them prone, back on the bridge, but their move action is ended.
Halfway across the bridge summoning runes have been scribed into the wood of the bridge floor. It takes a DC 21 Perception check to notice the runes and a DC 18 Arcana check to identify them as a summoning trap. Disarming the trap takes a DC 18 Arcana check to know the proper incantation to dispell it. Failure causes it to activate.
- The summoned creature is an Erinyes (MM 73) but it only uses its three longbow attacks each turn, targeting different players with each shot, if possible. The attack is:
Longbow Ranged Weapon Attack: +7 to hit, range 150/600 ft., one target. Hit: 7 (1d8 + 3) piercing damage plus 4 (1d8) fire damage. If a player is hit by the arrow attack, they must repeat their DC 13 Acrobatics save or be knocked off the bridge (getting their DC 13 Dexterity save, as well).
- The Erinyes will continue to attack players on the bridge but will not pursue them once they have left the bridge and will disappear five rounds after being summoned.
Living Museum
- Throughout this section, any identifying of creatures or other materials (like the spores in J7) requires a DC 13 Nature check to identify them.
- DMs who wish to make Caromarc's backstory more clear may wish to include a painting of his wife inside the museum. She would be pictured as a sad looking woman and her skin would be unnaturally pale (this is because the artist painted her after her illness and internment in the tank). At Caromarc's request, the woman is craddling a baby, one that in real life was never born. In a fit of rage, Caromarc marred the child's face by tearing at the painting with a knife, leaving its face in tatters and unidentifiable. The name "Lady Ceryse" is inscribed under the painting.
J1: Broken Abutment
- When this door is opened, the Faceless Flesh Golem awakens in area J7 and moves up the stairs and into J5, where it begins stalking the museum in search of intruders. Throughout section J, there is a 35% chance every time the players enter a room that the Golem will arrive there sometime before they leave.
- The Faceless Flesh Golem uses Flesh Golem (MM 169) statistics but it has 115 hitpoints, is permanently blind and relies on the six Hommunculi (MM 188) that are bound to and encircle it for its perception checks, using their statistics and rolling perception at advantage if at least three are still alive. These Hommunculi do not attack players, instead using the dodge action on every round. For every Hommunculi killed, the golem takes 11 (2d10) psychic damage. If they are all killed, the Flesh Golem becomes blind.
- Players will note the golem has the stylized "C" on it.
J2: Lobby
- Finding the vials of Violet Venom (see below) requires a DC 20 Perception check.
Vial of Violet Venom
Poison, Common
This poison can be applied to a weapon as an action. The next target that takes damage from this weapon must make a DC 13 Constitution saving throw, taking an additional 13 (3d8) poison damage on a failed save and be poisoned for one hour, or half as much damage on a successful one and not be poisoned.
Each vial contains enough for a single application. If applied to ammunition, it can be applied to three pieces of ammunition. Once applied, the poison retains potency for 1 minute before drying.
J3: Things of the Sea
- A Ningyo is a bogeyman of the sea, small mer-men who live in tropical waters and act similar to pirhana, swarming their prey to drag them under the water and feed on them voraciously. Ningyos have the odd characteristic that they reanimate after they are killed, but only at night (as described in the module). This one is harmless, trapped in its jar, and even if released can't put up enough of a fight on its own to justify stating it out here. It has AC 10 and HP 5.
J5: Beasts of Dark Repute
- A player who has identified the Ningyo can recognize, on seeing the mummy and making a DC 13 Investigation check, that Caromarc is choosing to study creatures with some connection to life after death.
- A player who has been to room J4 and who sees the mimic in this room then makes a DC 13 Investigation check can recognize that Caromarc was also focusing his studies on creatures with shapechanging properties or resistant biostructure, like the Bullete.
- The monsters here are a Mummy (MM 227) and a Mimic (MM 220). They act as described in the module. The Ring of the Ram (DMG 193) is discovered after combat with a DC 18 Perception check.
J7: The Secret Curios
- The Sea Hag's Head: the first player to open the jar sees the head and must succeed on a DC 11 Wisdom saving throw against fright or drop to 0 Hit Points immediately.
- Yellow Mold: the first player to open the jar is sprayed with yellow mold spores and must make a DC 15 Constitution saving throw or take 11 (2d10) poison damage and become poisoned for 1 minute. While poisened in this way, the creature takes 5 (1d10) damage at the start of every turn and can repeat the saving throw at the end of every turn, ending the effects on a successful save.
- Basidirond Spores: The first player to open the jar is exposed to the spores in a puff of green. They must make a DC 15 Wisdom save or suffer the effects of 1 powerful hallucination on the next page (roll a d6 to determine).
| d6 result | Effect |
|---|---|
| 1 | The weapon you are holding or last used has turned into a venomous viper! You must open the door and fling it into the abyss. |
| 2 | Your fellow adventurers are actually demons in disguise. You must strike them down! For one round, attack your fellow adventurers. |
| 3 | Spiders are climbing out of tears in your skin. You need to cut them out! Make a single attack against yourself at advantage as you try and slice away the insects. |
| 4 | The other two jars are evil artifacts that must be destroyed. You grab them and smash them at the feet of your fellows, exposing everyone within five feet of the smashed jars to their negative effects. |
| 5 | The whole building is falling into the river! You flee out the door and up the stairs, but are so unsteady on your feet that if you reach the stairs you must succeed at a DC 13 Acrobatics check or plummet off the edge of the stair and then make a DC 13 Dexterity save or plummet into the river below. |
| 6 | You feel the spores enter your mind and you gain a short term madness for one hour, rolling on the list on page 259 of the DMG to determine the effects of your madness. |
J9: Attic Storeroom
- There are 2 Shrieking Medusa Heads here. See side bar.
J10: The High Attic
- A perception check of 21 as someone climbs into the attic reveals the runes written on the trapdoor. It requires a DC 15 Arcana check to understand that this is a trap that casts some sort of area effect spell and a DC 21 Arcana check to know how to successfully strike out the runes to render it ineffective. Failure activates the trap.
- If sprung, the trap creates a spell of Cloudkill which immediately affects all creatures in areas J10 and J8 and then persists for 1d10 minutes. The DC to save against the effect is 10. It doesn't leave areas J10 and J8.
J11: The Stretching Way
- It is a DC 10 Athletics check to walk the Stretching Way without falling 200 feet to the river below.
Shrieking Medusa Heads
Tiny undead, Neutral Evil
- Armor Class 14
- Hit Points 54 (12d4+24)
- Speed 0 ft, fly 40 ft. hover
STR DEX CON INT WIS CHA 1 (-5) 18 (+4) 14 (+2) 10 (+0) 10 (+0) 19 (+4)
- Saving Throws Cha +6
- Damage Immunities Poison
- Condition Immunities Poisoned
- Senses Darkvision 60 Ft., passive Perception 10
- Languages Understands common but cannot speak
- Challenge 2 (450 XP)
Actions
Petrifying Bite. Melee Weapon Attack: +6 to hit, reach 5ft., one target. Hit 6 (1d4 + 4) piercing damage and the target must succeed on a DC 14 Constitution saving throw or become poisoned. While poisoned, the creature is petrified. At the end of every round, the creature can repeat the saving throw, ending the effect on itself on a successful roll.
Scream (recharge 5-6). The Medusa head lets out a bone-chilling scream forcing each living creature within 30 feet to make a DC 14 Wisdom saving throw or be stunned until the end of their next turn. Once the save is successfully made the creature is immune to the Medusa's scream for 24 hours.
The Drowned Menagerie
- This area has a difficult to read map. The basic idea is that the stairway leading to the upper level is inaccessible, so the players will have to venture into at least one of the four containment cells here to proceed. But the catwalks in each cell have been destroyed and it takes a DC 18 Athletics check to climb the walls and reach the doors. Failure on this check means the player falls 30 feet.
- Further complicating things is the fact that the doors are locked... from the outside! The As such, doors can only be opened by magic or by force: they are iron, AC 19 and 15 hitpoints.
- The water is difficult terrain for any creature without a swimming speed. Unlike what the module states, small creatures don't have to make swim checks to move in it.
- Rules for Underwater Combat can be found on page 198 of the PHB.
K1: The Narrow Vista
- The door requires a DC 19 Strength check to wrench open, at which point water coems rushing in (though it is only a dramatic, not mechanical, effect).
K2: Blocked Stairwell
- The stairwell has 20 feet of literal tons of broken rock blocking it. Without magic, it cannot be bypassed.
K3: Pit of Leeches
- The pit trap cannot be seen underwater. Tapping it with a weapon like a javelin or quarterstaff won't open it but does allow the player to make a DC 18 Perception check to see if they notice the hollow sound from the tapping. The trap can be bypassed simply by swimming over it with a DC 10 Athletics check.
- If the trap is triggered, it is a DC 10 Athletics check to stay afloat in its square.
- The 2 swarms of leeches surprise attack the players the same round that the pit opens. They use the statistics of Swarms of Quippers (MM 338) except that they have a speed of 5 ft on land and 30 ft swim speed. Also, once they successfully hit a target, they attach to that target and move with it, automatically dealing their damage to the target at the beginning of the leeches turn without need for an attack roll. The leeches can be removed with an action. If attacked with a melee or ranged attack (includes spells) while they are attached to a target, the leeches only take half damage from the attack and the target takes the other half of the damage.
K4: Descended from Apes
- The stench in here requires everyone who enters to make a DC 14 Constitution save or be poisoned while they are in the room. The save must be repeated every time a player enters the room, but once the save has been successful, that player is immune to the effects for 8 hours.
- The Girallon Vargouilles are 3 Vargouilles (VGM 195) that are small creatures with 26 hitpoints each.
K5: The Infestation
- The two Violet Fungi (MM 138) are hidden in the walls of the room and surprise attack anyone who begins climbing the walls.
- The Basidirond (see below) pushes its way out of a fold of fungus after combat begins or if the players linger in the room.
Basidirond
Medium Plant, neutral
- Armor Class 15 (Natural)
- Hit Points 67 (9d8+27)
- Speed 20ft.
STR DEX CON INT WIS CHA 18 (+4) 13 (+1) 16 (+3) 1 (-5) 11 (+0) 1 (-5)
- Damage Immunities Poison, Cold
- Condition Immunities blinded, charmed, deafened, frightened, poisoned
- Senses tremorsense 60 ft., passive perception 10
- Languages --
- Challenge 4 (1,100 XP)
Cold Lethargy. After being hit with an attack that deals cold damage, though it takes no damage, the Basidirond has disadvantage on all its attacks until the end of its next turn.
Actions
Multi-attack. The Basidirond can use its Hallucination Spores and then attack twice with spore slam.
Spore Slam. Melee Weapon Attack: +6 to hit, reach 5ft., one target. Hit 13 (2d8 + 4) bludgeoning damage plus 7 (3d4) poison damage.
Hallucination Spores (recharge 6). The Basidirond releases a cloud of invisible spores in a 20-foot raidus. All humanoid and beast creatures within the area must suceed on a DC 14 Constitution save or be poisoned for 1 minute. While poisoned, the target falls to the ground and is incapacitated while it has powerful hallucinations. The creature can repeat the saving throw on itself at the end of each of its turns ending the effect on itself on a success.
K6: Pit of Drowned Guards
- The pit trap cannot be seen underwater. Tapping it with a weapon like a spear or quarterstaff won't open it but does allow the player to make a DC 18 Perception check to see if they notice the hollow sound from the tapping. The trap can be bypassed simply by swimming over it with a DC 10 Athletics check. If the trap is triggered, it is a DC 10 Athletics check to stay afloat in its square.
- The 4 Draugr surprise attack the players the same round that the pit opens. They use the grapple action (PHB 195) and then move to try and pull grappled players into the pit to drown, splitting their focus to attack as many as possible who are in the pit or within five feet of it. If there are no players over or near the pit, they emerge and attack with their melee attacks.
- The Draugr use the stats of Zombies (MM 315) with swim speed of 30 ft and athletics +5. They can breathe underwater.
Alternate Suffocation Rules
There are rules for suffocation presented on page 183 of the PHB. For my own games, I find that these rules work best for non-combat situations, for instance to see if someone can swim to the bottom of a lake, or traverse a gas-filled room while holding their breath. For scenes that are meant to be more tense I use the following house rule: once someone starts suffocating, they start making death saving throws at the beginning of each turn as per the rules on page 197 of the PHB (making these rolls does not prevent them from taking other actions on their turn). If they fail three rolls, they die, having suffocated. They continue to make rolls every round until they either die or stop suffocating. Deciding when a player is or is not suffocating is up to the DM. For the Draugr trap above, I suggest that any player who is simultaneously grappled and underwater is considered to be suffocating, until they surface.
K7: The Transparent Basilisk
- DC 12 Perception check catches that the water gets deeper here.
- DC 10 Athletics check to swim across the deeper water.
- The Basilisk (MM 24) has a swim speed of 30 ft, is amphibious, and has a +3 to stealth checks due to its transparent skin. It can, as a bonus action, use the hide action on its turn. If using this while submerged in water, it has advantage on the stealth check. If the Basilisk gains surprise, it has advantage on its attack.
- The Basilisk is currently hidden but will swim up to attack the first player who enters the deep water, or the closest player if they linger in the room for more than a round or two. Noticing the Basilisk as it surfaces requires a DC 18 Perception check to avoid being surprised.
- Unlike in the module, the Basilisk fights until defeated.
K8: The Thing on the Ceiling
- The doors in this room are solid stone. They have AC 16, HP 30. The easiest way to open them is to use the Knock spell.
- There is a single Black Pudding (MM 241) clinging to the ceiling here: it drops and attacks the first creature that enters.
- DC 10 Perception Check hears the noises from the hidden alcove (see K10).
K9: Upper Corridors
- The alcoves contain items as described in the module. Most of these items are not in the official books and are recreated below for your use. The Potion of Gaseous Form is on page 187 of the DMG.
Potion of Displacement
Consumable Item, rare
For one hour after drinking this potion, you project an illusion that makes you appear to be standing in a place near your actual location, causing any creature to have disadvantage on attack rolls against you. If you take damage, the property ceases to function until the start of your next turn.
Vial of Basilisk Blood
Consumable Item, uncommon
Pouring a vial of this blood, kept fresh and warm through a complex alchemical process, on someone who is petrified instantly cures the affliction. Using this item takes an action.
Potion of Non Detection
Consumable Item, uncommon
For eight hours after consumption, you are hidden from Divination magic. You cannot be targeted by any Divination magic or perceived through magical Scrying sensors.
Wand of Charm Monster
Wand, Rare, requires attunement
This wand, which is a dark red with a top that curls in on itself, carries 6 charges. As an action, its weilder can expend a charge to cast Charm Monster as per the spell (XG 151) on a single target. For each additional charge spent an additional creature can be targeted. The DC for the spell is 14. The wand regains 1d6 charges at dawn every day. If ever the Wand is brought down to 0 charges, roll a d20. On a roll of 1, the wand curls in itself completely and loses all magical properties.
K10: Buried Alive
- The wall is curiously smooth: DC 12 Perception to notice
- The wall collapses automatically if successfully attacked: it has AC 14
- Unless the players specifically state they are readying themselves for attack, they are suprised by the enemies if they break down the wall.
- The enemies are 1 Wight (MM 300) and 3 Zombies (MM 316).
K11: The High Bridge
- Remove the check needed to cross the bridge, but remember it has no handrails in case combat occurs here.
The Lightning Tower
- Climbing the tower to the roof requires two DC 18 Athletics check or the player suffers a fall, to the bridge if they are lucky, or 350 feet into the river below if not.
L1: The Insane Guardian
- The door being locked with arcane lock may be more annoying to your players than anything else, making groups without knock or lockpicks feel forced to make the difficult and dangerous climb up the tower. See below for how I suggest handling this...
- Because of arcane lock, the door is AC 18 and HP 35. It takes a DC 20 Dexterity check with lockpicks to unlock it (this lock is clearly magical, it is in the shape of a skull bound to the door by heavy glowing chains).
- If players start bashing at the door, whether they successfully damage it or not, the Guardian of the Tower starts bashing back, attacking the door from the inside and seeking to break it down. If successful, it chases players, either climbing after them, or chasing them across the bridge and into the Drowned Menagerie. It will chase them all the way to the entrance to Schloss Caromarc, if they run that far.
- The Guardian of the Tower is a Flesh Golem (MM 169) with the following changes. It is a large creature. It has climb speed 30ft. Instead of the Flesh Golem's actions, it has the following actions:
Actions
Multiattack. The Golem makes five attacks: one with its bite and four with its claws.
Bite. Melee Weapon Attack: +7 to hit, reach 5 ft, one creature. Hit: 13 (2d8+4) piercing damage.
Claw. Melee Weapon Attack: +7 to hit. reach 10 ft., one target. Hit: 7 (1d6+4) slashing damage.
- Players will note that embossed in the creature's right pectoral is the stylized "C."
- DC 20 Perception needed to see the pages if the door is open or broken down. Automatic success if the door is intact and closed.
- DC 20 intelligence check to decipher the notes.
L2: The Empty Prison
- The webs act like the web spell (PHB 287-288) with 17 DC.
- A DC 18 Perception check shows the chalk marks. A DC 23 Intelligence check deciphers them.
- Waxwood is a Hommunculus (MM 188). Its ring of invisibility can be found on page 191 of the DMG. Note that the ring is very tiny and cannot be worn by any creature larger than tiny.
- Playing charades with Waxwood is the best way to get its point across, but if players are struggling to understand, they can make Insight rolls at DC 20 for each piece of information it is trying to convey. The DC is lowered by the result of a performance check from Waxwood, cut in half (ie. a performance of 5 lowers the difficulty by 2).
L3: Laboratory of Creation
- The huge iron shutters cannot be damaged by the players.
- Count Alpon Caromarc is a Noble (MM 348) who currently only has 1 hitpoint (out of a total of 16). Otherwise his predicatment is as described. Breaking him out of the Iron Idol takes time but can be automatically done once the Promethean is defeated. Otherwise, it takes too long to do while facing off against the Promethean, unless players come up with some special way to open the idol, maybe with an appropriate spell.
- DC 14 Nature to recognize the blended creatures that make up the Promethean and to realize the threat of the abomination is beyond them.
- The Wand of Speak with Dead is now the Wand of the Whispering Dead (see below). Players who take it should recognize that they are taking Caromarc's method of speaking with his dead wife and taking this may be considered an evil act by the DM.
Wand of the Whispering Dead
Wand, rare
This wand has 3 charges. As an action, you can expend a charge to cast the speak with dead spell (PHB 277).
The wand regains 1d2 expended charges daily at dawn. If you expend the last charge, roll a d20. On a 1, the wand crumbles to dust and is destroyed.
L4: Tower Roof
- There is no climb check needed to climb the ladder, but do describe the pull of the wind as they climb.
L5: The Bondslave Thrall
- Remove the ability to damage and sever the cables, though you may want to keep this as a dramatic beat, where the Promethean severs the cables and breaks the connection between the Beast and the player at a critical moment.
- Activating the Storm Caller requires an action and a DC 15 Arcana check. Once it turns on, the storm begins the following round.
- Once the storm begins, the lightning bolts strike a random character as described in the module each round for 17 (5d6) lightning damage (DC 13 Dexterity save for half, or for no damage if the player is in contact with the Bondslave Thrall). Any creature touching one of the lightning rods atop the spire automatically takes 28 (8d6) damage each round without a save. Remember lightning damage heals The Beast and the Promethean!
- The Bondslave Thrall can be turned on with an action and a DC 18 Arcana check (if the players deciphered the notes in both areas L1 and L2, they have advantage on the roll).
- Once a player turns on the Bondslave Thrall, they become accutely aware of the Beast of Lepidstadt near to the castle gates and they call him. On future turns, if they stay in contact with the Bondslave Thrall, they will be aware of the Beast rushing through the castle, bashing away any of its remaining gaurdians, and soaring through the air above the waterfalls as he leaps from spire to spire in a mad rush to reach the tower.
The Promethean Encounter
The encounter with the Promethean is meant to be more of a story battle than a straight forward challenge. The Promethean is meant to fall to the attacks of the summoned Beast of Lepidstadt. If players take it on directly they are likely to perish. To this end, be careful how you run this encounter. Impress upon the players the power and danger of the Promethean through their arcane roll, its general horror, and through Caromarc himself. Consider having the beast remain hidden in the darkness of the ceiling until the players approach Caromarc's prison, at which point he will whisper to them, terrified: "It is here. You cannot stop it." And then have the Promethean fall from the ceiling!
The description of the Promethean has been adjusted for this conversion. Read the following when the Promethean drops down from the ceiling:
The ceiling itself seems to shift above you and at first you think it is collapsing in on you. But then you realize it is not the ceiling which is falling, but a massive beast which was clinging to it with six long hairy legs. The creature lands in front of you, raising two large clawed apendages menacingly. You see no visible signs of a face, but a mound of dark red orbs which may pass for eyes lies nestled in the dark body. The creature's underbelly is a mass of writhing tentacles dripping with digestive fluids: an open-air stomach. Somewhere deep within those tentacles the creature makes a gurgling sound, like a nightmarish chuckle, as it moves towards you.
Once the Promethean is in combat with the players, they have several options. The module intends them to run away and to find another way up the tower, whether by magic or by climbing or, as a last resort, by opening the shutters that lead to the outside. Just remember that someone will probably need to stay behind to close the shutters, or else the Promethean may climb onto the roof.
If players insist on engaging in combat with the creature, give them a final warning by using description to demonstrate its power as it brushes off their attacks and smashes it way through the room towards them, chortling and growling the whole time. Start with its web and moan attacks then have it claw any unaffected characters and place them in its tentacles. There's less damage dealt to the players that way, but it still should impress upon them how tough this thing is. Hold off on its multi-attack, instead having it use its claws on a single player to show how much it hits for. Let it get easily confused if the players want to hide or use distracting tactics to try and free a grappled friend.
Only if the players actually seem to be intent on fighting it and are dealing decent damage should the Promethean unleash its full power, using both its claws to devastating effect.
When the players make it onto the roof, they should be given a moment to breath. The Promethean won't come after them if the shutter is closed, not until the Bondslave Thrall is started. When it does, the Promethean will start banging on the shutters, clearly trying to smash through. This should be played for dramatic tension. Gauge the health of your players: if they are doing okay, let the Promethean break through and attack for a round or two before The Beast shows up. If they are badly hurt, then have the Promethean burst through and clamber up the tower after them just as the Beast arrives. Once the Beast is on the scene, the Promethean will focus all of its attentions on him, using both its claws on him every turn and not transferring him to its tentacles. The Beast is by far the greatest threat here, and it will recognize this.
As far as fighting The Beast, the two are fairly evenly matched. The Promethean will hit more often but is at a disadvantage, as its attacks are not magical and thus do not pierce the Beast's resistances. The Beast has less of a chance of hitting, but gets more attacks per turn and can break through the Promethean's resistances. In addition, he has the help of any player who is controlling him based on their class:
- Barbarians add their rage bonus to all of the Beast's attacks and damage.
- Fighters and Monks and Rangers let the Beast make one of its attacks at advantage.
- Rogues grant the Beast their sneak attack ability to use once a round.
- An arcane caster can burn a spell slot to grant the Beast a deflection bonus to its AC equal to the level of the spell slot multiplied by three, for one round.
- A divine caster can burn a spell slot to heal the Beast for a number of d8s equal to the level of the spell slot used.
The Abberrant Promethean
Huge Construct, Neutral
- Armor Class 20 (Natural Armor)
- Hit Points 157 (15d12+60)
- Speed 60ft., climb 40ft.
STR DEX CON INT WIS CHA 26 (+8) 16 (+3) 18 (+4) 4 (-3) 15 (+2) 5 (-2)
- Saving Throws Str +12, Con +8
- Damage Immunities Lightning, Poison; Bludgeoning, Piercing, And Slashing From Nonmagical Weapons That Aren't Adamantine
- Condition Immunities Exhaustion, Frightened, Paralyzed, Petrified, Poisoned, Restrained
- Senses Darkvision 60 Ft., passive Perception 12
- Languages None, but it understands anything said by its creator
- Challenge 11 (7,200 XP)
Immutable Form. The Promethean is immune to any spell or effect that would alter its form.
Lightning Absorption. Whenever the Promethean is subjected to lightning damage, it takes no damage and instead regains a number of hit points equal to the lightning damage dealt.
Magic Resistance. The Promethean has advantage on saving throws against spells and other magical effects.
Actions
Multiattack. The Promethean make two claw attacks.
Claw. Melee Weapon Attack: +12 to hit, reach 15 ft., one target. Hit: 22 (4d6 + 8) bludgeoning damage and if the target is large or smaller it is grappled (escape DC 17). The Promethean will not use this attack on a creature grappled by its tentacles (see below).
Tentacle transfer As a bonus action on its turn, the Promethean can transfer any grappled creature to its tentacles, where they remain grappled (escape DC 17). Anyone held by the tentacles takes 13 (2d4+8) acid damage at the beginning of their turn and must succeed at a DC 17 Constitution save at the end of their turn or be paralyzed until the end of their next turn.
Moan (recharge 5-6). The Promethean can emit an infrasonic moan as an action, causing all creatures within 30 feet of it to make a DC 16 Wisdom save or become frightened, repeating the save at the end of each of their turns and ending the effect on a successful save. If a creature fails any of these Wisdom rolls by 4 or more, they are also stunned until the end of their next turn. All creatures that successfully save against the Promethean’s moans cannot be affected by that same moan effect for 24 hours.
Web (recharge 5-6) The Promethean sprays webbing at a point within 60 ft, filling a 10 foot cube. Any creature in the area must make a DC 15 Dexterity save or be Restrained by the webbing. Any creature who enters a webbed space must also make this saving throw or become Restrained. As an action, a Restrained target can make a DC 17 Strength check, bursting the webbing on a success. The webbing can also be attacked and destroyed (AC 10; hp 5; vulnerability to fire damage; immunity to bludgeoning, poison, and psychic damage).
The Beast of Lepidstadt
Large Construct, Neutral
- Armor Class 13 (breastplate)
- Hit Points 161 (17d10+68)
- Speed 40ft
STR DEX CON INT WIS CHA 24 (+7) 9 (-1) 19 (+4) 7 (-2) 11 (+0) 12 (+1)
- Saving Throws Str +11, Con +8
- Damage Immunities Lightning, Poison; Bludgeoning, Piercing, And Slashing From Nonmagical Weapons That Aren't Adamantine
- Condition Immunities Exhaustion, Frightened, Paralyzed, Petrified, Poisoned
- Skills Athletics +13, Stealth +7
- Senses Darkvision 60 Ft., passive Perception 10
- Languages Common
- Challenge 11 (7,200 XP)
Immutable Form. The Beast is immune to any spell or effect that would alter its form.
Lightning Absorption. Whenever the Beast is subjected to lightning damage, it takes no damage and instead regains a number of hit points equal to the lightning damage dealt.
Magic Resistance. The Beast has advantage on saving throws against spells and other magical effects.
Magic Weapons. The Beast's weapon attacks are magical.
Actions
Multiattack. The Beast makes three slam attacks and can use Grip Shock once.
Slam. Melee Weapon Attack: +11 to hit, reach 5 ft., one target. Hit: 20 (3d8 + 7) bludgeoning damage + 7 (2d6) Thunder Damage.
Grip Shock. If the Beast has a target grappled, he can activate his Gloves of Storm Fists to deal 7 (2d6) Lightning Damage to the target.
Double Crossbow. Ranged Weapon Attack: +7 to hit, one target, reach 100/200. Hit 22 (4d10 + 3) piercing damage.
Combat Gear
Special Items worn: Boots of elvenkind (DMG 155), cloak of elvenkind (DMG 158), Gloves of Storm Fists (see above). Note that the people of Lepidstadt were unable to remove his gloves and too scared to take his other items, so he still wears them during the trial.
Gloves of Storm Fists
Weapon, Very Rare, requires attunement
Gloves such as these are constructed by skilled alchemists. They have knobs and dials on them which the users are specifically instructed not to touch. There are straps all over it which can be used to ajdust them to fit any creature larger than tiny and smaller than huge.
In combat the Gloves channel magical energy, making any melee weapon wielded with them (and all unarmed hits) magical. Also, once a turn, you can force a target struck by the gloves or a weapon they carry to make a DC 15 Constitution save or take 10 (3d6) thunder damage.
If the user has a target grappled, they can use a bonus action on their turn to deal 7 (2d6) Lightning damage to the target.
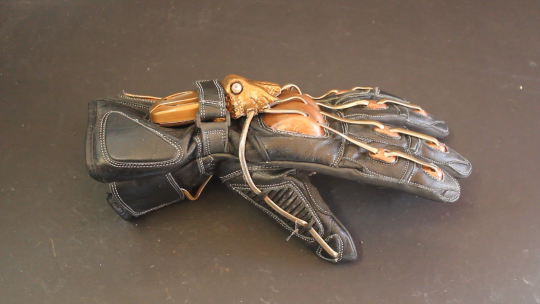
Concluding the Adventure
- The only mechanical addition to the conclusion that I suggest is having the Beast offer the players his Gloves of Storm Fist as a parting gift.
- The ending of this adventure feels emotionally unsatisfying. Left open is the quesiton of the Beast's future, which has been the entire point of the campaign. At this point, The Beast has saved Caromarc's life. It seems fitting that the old inventor finally acknowledge his creation and call him "son," finally giving The Beast the acceptance he has sought his entire life. This will also make players more sympathetic to Caromarc and less likely to turn him in.
- If players insist on delivering Caromarc to the court's justice, they will be forfeiting their monetary reward from him. In addition, who says The Beast will be willing to let them take his father? The Beast's reaction is not addressed in the original module, which seems like an oversight. I would assume players would need to convince The Beast to let his father stand trial, not an easy task considering how the townsfolk treated The Beast while he himself was on trial.
- While the module suggests that players can go straight from Schloss Caromarc to the Shudderwood, consider suggesting they go back to Lepidstadt first to check in with Embreth Daramid (and Kendra, if they brought her from Ravengro). Judge Daramid can offer to let them in on the secrets of the Palantine Eye, but shouldn't offer any gold for their services. This is D&D 5e, where plot rewards are built to be more enticing than monetary ones.
- If players delayed too long or some mishap occured and the Count is dead, then The Beast is distraught. He desires revenge. On the inside of the Iron Doll, they find that Caromarc has scratched a single word into the iron with a small scalpel he had. That word is THE SHUDDERWOOD. It's not much of a clue, but enough to keep the adventure moving forward.
What if the players die?
New player characters can be added to the story at any point during the trial by being investigators of some related crime. Maybe they are hunting Brother Swarm or have a lead on some missing persons case that they have traced back to Vorkstag and Grine. They will be contacted by Judge Daramid and asked to bring what they have discovered to the trial. These re-entry hooks work just as well for total party kills.
You can also have them come in after the trial, just in time to hear of The Beast's fate and they can be hired by Embreth Daramid to track it back to Schloss Caromarc. Or they can start the game at Schloss Caromarc, having been hired by the local magistrate to investigate the odd going ons at the castle... or to locate Count Caromarc, whom the magistrate was supposed to meet with three days ago regarding the disappearance of several engineers who were fixing his castle up (and who were murdered by the Whisperers and set in the wall with the Wight in K10, only to rise as Zombies under the Wight's control).
The hardest place to introduce new characters is mid-way through Schloss Caromarc. But it is possible that they find a new player character locked away inside the Schloss. This player could be a bodyguard to Caromarc, locked away by the Whispering Way, or even a candidate for one of the count's questionable experiments. They could also be a victim of the Whispering Way, the Whisperers having put them here in this death trap castle as a cruel method of killing them.
I recommend that if the players get a total party kill inside of Schloss Caromarc, consider the adventure a failure and move on to Blood Moon. In this case, Caromarc starves to death inside the Misery Idol and the poor Beast wanders the countryside, never able to find acceptance amongst anyone, staying The Beast of legend. Perhaps he even loses his mind and becomes truly beastial. In this case, future parties may be tasked to hunt him down and end his threat forever.
Lepidstadt
This section converts relevant sections of the city of Lepdistadt. For descriptions of NPCs, places, and the history of the town, see the module itself.
General Notes
The players have a few options for where to stay in Lepidstadt:
- The Crooked Kin are happy to provide them a place a to sleep and food in return for their service (though they wouldn't take it amiss if the players offered to pay them).
- They can rent rooms in Lepidstadt. Right now it is hard to find a place because of the trial, so they will have to pay either at the wealthy or aristocratic level for their lodging (for food, they can also find a place to eat and can pay for any level of eating). All lifestyle pricing is on page 158 of the PHB.
- Judge Daramid will not allow them to stay with her under any circumstances. It is too risky that people might draw a connection between her and the players.
- The players can always camp outside of town, as long as they have or purchase the proper gear. There are a number of other people doing this, as well, in order to be here for the trials.
Notable NPCs
NPCs not listed here use the Commoner (MM 345) statistics.
- Embreth Daramid: Noble (MM 348)
- Barrister Gustav Kaple and Prosecuter Otto Heiger: Nobles (MM 348)
- The Judges: Nobles (MM 348)
- The Holy Sister of the Court: Priest (MM 348) with the following additional spells prepared: comprehend languages, detect magic (at will), zone of truth.
- The Herald of the Court: Gladiator (MM 346-347) with 18 AC and using a Greatsword two-handed for all of his attacks, dealing 10 (3d6) slashing damage on a hit.
Items for Sale
The players won't have a lot of time to explore Lepidstadt due to the fast pace of the trial. Most explorations will be related to the trial and investigating clues. The only other thing players are likely to ask about is shopping in Lepidstadt and they should be able to find some time to do this.
Lepidstadt has the distinction, because of its universtiy, of attracting exotic items for sale and it is possible to find a plethora of interesting items here. Mundane items are easy to come by, just use the item prices as listed in the equipment chapter of the PHB. For Magic Items, the following rules apply:
- Use the sytem in Xanathar's Guide, page 126.
- Ignore resources and resolutions in XG. Add +5 to their roll (Lepidstadt is a bastion of magical activity) and (before rolling) players can spend an additional 100 gold to gain a +1 bonus to their roll per 100 gold spent.
- Only one roll on The Buying Magic Items table can be made each day by the group as a whole and the whole process takes 4 hours. The search must occur between the hours of 8:00am and 8:00pm.
- The highest table they can roll on is Magic Table F (page 146 of DMG).
- Players can search for a specific item using the rules on page 126 of XG but they shouldn't be allowed to get an item that isn't on tables A-F in the DMG.
- There is a 10% chance with each item purchased that a complication occurs.
- Magic item prices are listed on page 133 of XG (remember to cut in half for one-time use items like potions and scrolls).
Random Encounter Tables
When rolling for encounters, roll a d20. On a roll of 17 or higher, an encounter occurs. For this module, roll once during every journey from one location to another (ie. Lepidstadt to Schloss Caromarc).
Page 83 of the original module lists two tables for random encounters . These have been converted to the tables below:
Encounters in Canterwall
| d% roll | Result | Source |
|---|---|---|
| 1-18 | 1d6 commoners (farmers) | MM 345 |
| 19-24 | 2d4 needle blights | MM 32 |
| 25-28 | 1 doppleganger | MM 82 |
| 29-35 | 1 dire wolf | MM 321 |
| 36-40 | 1 Yeth Hound (only at night) | VGM 201 |
| 41-43 | 1 Barghest | VGM 123 |
| 44-53 | 2d6 Bandits | MM 343 |
| 54-63 | 1d4 Bat Swarms | MM 337 |
| 64-68 | 1d4 Yellow Musk Creepers | ToA 237 |
| 69-75 | 1d4 Varisian Wanderers | see below |
| 76-84 | 2d4 border guards | see below |
| 85-87 | 2d6 Giant Bats | MM 323 |
| 88-95 | 2d12 Orcs | MM 246 |
| 96-100 | 2d8 Wolves | MM 341 |
Encounters in Vieland
| d% roll | Result | Source |
|---|---|---|
| 1-5 | 1 dryad | MM 121 |
| 6-9 | 1 wight | MM 300 |
| 10-17 | 1d4 boars | MM 319 |
| 18-21 | 1d4 bugbears | MM 33 |
| 22-30 | 1 owlbear | MM 249 |
| 31-39 | 2d6 wolves | MM 341 |
| 40-46 | 1d4 Assassin Vines | ToA 213 |
| 47-55 | 2d4 border guards | see below |
| 56-62 | 1d8 ghouls | MM 148 |
| 63-68 | 2d8 stirges | MM 284 |
| 69-72 | 1 troll | MM 291 |
| 73-78 | 2d4 Giant Badgers | MM 323 |
| 79-82 | 1d6 worgs | MM 341 |
| 83-87 | 1d4 brown bears | MM 319 |
| 88-90 | 1 shambling mound | MM 270 |
| 91-93 | 1 will-o'-wisp | MM 301 |
| 94-95 | 1 Wyvern | MM 303 |
| 96-100 | 1d8 Varisian Wanderers | see below |
Use the description and percentages in the module to discern the nature of the border guards. Border guards are Guards (MM 347) but one is always a Knight (MM 347).
Use the description and percentages in the module to discern the nature of the Varisian Wanderers. Normal wanderers use Commoner (MM 345) statistics, but the Sczarni use Bandit (MM 343) statistics and one is always a Bandit Captain (MM 344). If there is a fortune teller among the wanderers, you can roleplay out this encounter and give the players some bit of clue or information related to their next destination.