The Salvation of Korthos


A Dungeons & Dragons Online Module
for Pathfinder
Contents
Cover Image Credit: Neverwinter Nights
Module Credits: Dungeons and Dragons Online and ddowiki.com
Disclaimer: Some of the text is taken straight from the ddowiki or the Dungeons and Dragons Online game itself, the rest is mine where I used it to fill in the gaps and build on the story. I have made an effort to blend the two and therefore do not quote the original text.
Adventure Background
Two years prior the the events in the Salvation of Korthos, a colony of Mind Flayers discovered a lost Quori artifact... something called a Mindsunder. They soon discovered that this giant green crystal could amplify psionic powers beyond the measure of any artifact they had encountered before. The discovery of the Mindsunder meant a new path for the Mind Flayer colony to the Grand Design - the endeavor to rebuild their lost empire which was overthrown during the Great Revolts thousands of centuries ago. Arrogant Darastrix Achthend immediately took to investigating the Mindsunder as a way to re-establish their Mindflayer Empire.
Darastrix Achthend first took the Mindsunder and moved to the lost continent of Xen'Drik. Here he tested the artifact's power by dominating the weakest willed of all dragonkind, a white dragon. Darastrix broke the will of the white dragon Aussircaex forcing her to be Darastrix’s bodyguard.
Emboldened by his success with the dragon, Darastrix took up residence on an island inhabited by both humanoids and Sahuagin called Korthos Island. His goal on this small island was to investigate how many thralls could be subjected under the power of the Mindsunder. Darastrix, and his dragon bodyguard, made their stronghold in the largest mountain on the island, Misery’s Peak. Once inside the mountain, Darastrix discovered that it contained an operating temple to the evil god the Devourer. He immediately constructed a plan to use the already established evil cult on the island, The Cult of the Devourer, as a means for brainwashing the humanoids in secret. Darastrix used the Mindsunder to take control of the Cult of the Devourer leadership and began converting Misery’s Peak into a horrific laboratory for studying the strength of the Mindsunder.
Adventure Summary
This is an adventure adapted from the Dungeons and Dragons Online video game. The PCs begin at level 1 and should be level 3 by the time they reach Misery's Peak.
After being shipwrecked on their way to continent of Xen’Drik, the PCs awake on a snow covered jungle island. The island is home to the village of Korthos who are being terrorised by the Cult of the Devourer and a White Dragon. The PCs meet Jeets, Talbron, and Cellimas who journey with them through a Grotto of Sahuagin Devourer worshipers to Korthos Village.
As the PCs investigate the town, they learn that the Heyton family has defended Korthos for generations from the Sahuagin, but the village is overwhelmed by the Cult of the Devourer. And to make matters worse the current heir to the line of Heytons, Lars Heyton, has gone missing. The PCs uncover a plot by the cultists to unleash the undead on the town. The first chapter ends with the PCs invited to a town council meeting, where they help to make choices about the defense of the village from a full on Sahuagin raid.
 Credit: Deligaris
In chapter 2, the PCs explore Korthos Island to search for the missing Lars Heyton and rescue villagers kidnapped during the raid. By the end of Chapter 2 the PCs find Lars Heyton, who reveals to the PCs that a mindflayer is controlling the cultists and the dragon with a powerful artifact called the Mindsunder. Now, rather than destroying the evil White Dragon the PCs have to destroy the Mindsunder and set it free to save the island.
After traveling to Misery’s Peak, the location of the Mindsunder, the PCs are given the mission of destroying the Mindsunder while the others distract the Dragon. The PCs journey through a frozen temple devoted to the Devourer and then finally into the inner sanctum, a laboratory where the Mind Flayer Darastrix is conducting experiments on the Mindsunder and brainwashing the villagers. In the final encounter, the PCs destroy the Mindsunder causing the dragon to turn on Darastrix.
Who are the Cult of the Devourer?
The cult is featured as the prominent foe throughout this adventure. They are a group of sahuagin and humanoids who worship a god called the Devourer; the raw destructive power of nature and undeath. The Devourer is a member of a circle of evil gods called the Dark Six. Many sahuagin worship him willingly, but his human worshipers have been brainwash by the Mindsunder.
Prologue: Shipwreck Shore
Many people travel to the newly discovered continent of Xen'Drik each year. Most know that the journey is difficult, but no one expects their ship to be attacked by a White Dragon. This adventure begins with the PCs washing up on island after their ship is destroyed by a dragon. They meet a group of adventures who have been paid to rid some caves of Sahuagin. The PCs learn about adventuring while traveling with the group and eventually arrive at Korthos Village.
Waking on a Beach
You find yourself waking on a shore of flotsam. The wind is chill and icy. Is this Xen'Drik at last? Suddenly, memories of a large white dragon striking your ship come flooding back. Around you the small bay holds many large icebergs. The broken hull of a your ship floats in the distance. As you look around, it is obvious that this island is home to jungle flora, but snows gentilly fall from the darkened clouds above. It’s very cold for a jungle.
A DC 10 Perception check allows for the characters to find some items among the wreckage. After the PCs have been able to gather themselves and explore their surroundings they are approached by a halfling rogue who has been scavenging the wreckage further down the beach.
Slavage
| d4 | Loot Type |
|---|---|
| 1 | 1d100 Copper coins |
| 2 | Potion of Cure Light Wounds |
| 3 | 1d6 Arrows or Bolts |
| 4 | Random Luxury Item |
Meeting Jeets
You are approached by a halfling. “Hoy, were you on that ship that got attacked by the dragon? You're the first survivor we've seen, and sailors been washing up for hours. The name’s Jeets. Its 'right dangerous to walk around in your condition. For my good deed of the day, I can take you to my camp to recover. Come on. Follow me.” Jeets runs towards his camp. If what the halfling said was true, no one but you made it to the island alive. It may be worth following this rogue... for now.
Jeets Shimis (halfling male Rogue 6) is a gregarious and jovial halfling. He tagged along with his companions, Talborn and Cellimas, when they were hired to clear this area of Sahuagin. He cares more about what he can scavenge than about fighting sahuagin. The group is about to venture into the Grotto, a watery cave system that leads to Korthos Village, and are more than willing to help the PCs get there safely.
Campsite
Jeets leads you to a small camp is up on the hill. Three large tents circle a lit fire. The warmth of the campsite is a welcome protection from the icy wind. Around the campsite lay piles of scavenged debris from multiple different shipwrecks.
This is where Jeets, Talborn, and Cellimas made camp a couple days ago looking for an entrance to the Sahuagin enclave. Jeets is willing to trade with the PCs any of the valuables he has collected from the wrecks. Talbron Tewn (Warforged Sorcerer 6) stoically sits on a crate in the camp watching the survivors of the shipwreck. He is friendly and will engage the PCs only if they talk to him. Talron is waiting for Jeets to finish his scavenging, then they will go meet Cellimas who is currently away searching for the cave entrance.
Development
Once the PCs have explored the camp and talked to Jeets and Talborn, Jeets tells them, “Here's the deal. Cellimas is waiting for us in a cave up the path. Go 'n tell her we'll be along shortly, just as soon as we finish with all the... salvage on the beach.”
Jeets Shimis

Credit: Sirick-J-Griffardo
The Grotto
1 Cave Entrance
A cleric stands in front of a mound of large leafed jungle plants covered in snow. It is only when you approach closer that you notice the snow covered plants are concealing the entrance to a cave.
Cellimas Villuhne (Human female Cleric 6) is the leader of the small group, which she leads with both wisdom and intelligence. Upon any prompting by the PCs Cellimas Villuhne tells them, 'I've been hired to clear this cave of Sahuagin. Jeets and Talbron are supposed to help me; I hope they don't tarry too long. If you come with me, you should be comfortable with Sahuagin blood all over that rusty weapon of yours.' Under no circumstances will she reveal who hired her. Jeets and Talbron join the group after a few minutes.
Cellimas Villuhne
 Credit: Josh Calloway
2 The Grotto
This Grotto is damp, dark and forbidding. Strange odors mingle with the cold sea drafts, and whispered chants echo in the distance. It's warmer in here than outside and a small shaft of light projects from the ceiling casting enough light to show a room filled with ankle deep water and a wooden portcullis at the other end. There is a ledge over the portcullis with an alarm bell, obviously some sort of primitive lookout.
The Sahuagin fortified the entrance to their enclave in this grotto. The lever to open portcullis is down the corridor on the other side of the portcullis guarded by an aging sahuagin warrior. The rocks in the grotto allow for a climb up to the observation platform on a successful DC 10 climb check. Fast running water from the ceiling has created a crevasse that can be jumped down to the 1st floor, a successful DC 10 Acrobatics check allows the PC to take no damage, failure causes them to take 1d6 damage.
Portcullis, wooden
The portcullis made of large wooden stakes and is shut. It can be opened with a lever in the tunnel to the north, DC 20 to lift; DC 15 to break, or a Hardness 5; 30 hp to smash.
Development
Once a PC is able to get past the portcullis read:
You hear the shuffling and wheezing of some creature coming from the corridor ahead.
The corridor is filled with, odd fishlike frescos and candles in a fish skull light the way. Before the corridor continues on deeper into the mountain, a corroded lever at the rear controls the gate where everyone else is waiting. An Aging Sahuagin Warrior is guarding the lever. When he sees a PC he yells, 'I'll swim in your blood!' and attacks.
Sahuagin Warrior
This one is quite old (HP 4, see Appendix A).
3 It's a Trap!
The corridor winds with more fish frescos and large whalebone structures. Until you arrive at another large door. Cellimas Villuhne says, 'The evil aura is oppressive. Sahuagin are behind this door.' Allow for perception checks that don't notice anything and for preparation of battle. When the group is ready to proceed read:
Cellimas Villuhne yells, 'CHARGE!' The door opens to a large cavern, water drips from the rock above making the stone floor slippery. The floor itself slopes down gently to the center of the room where a wooden gate covers a pool of water. Off to the west is a heavy door made of metal. Above in the darkness you can see balconies of rock. The room is empty. Jeets Shimis looks confused, 'Hoy, where's the bloody sahuagin?'
After 2 rounds 1d4+1 Sahuagin Warriors (see Appendix A) jump down from the balconies. Then 2 rounds later a second wave arrives (1d4+2 Sahuagin) and jump down from the balconies. The final wave (1d4+3 Sahuagin), arrives another 2 rounds later. The balconies are 12 ft. above the ground the slippery rocks make the climb very difficult. It is a DC 30 to climb the smooth slippery stone.
What are Cellimas & company doing?
Verbally describe that the companions are fighting their own Sahuagin. Jeets doesn't care to fight, he'll probably be checking out the door or stabbing Sahuagin in the back if he has to. Talbron will be slinging Magic Missiles, Scorching Ray, Hold Monster, and the occasional Lightning Bolt. Cellimas Villuhne will cast Prayer, Cure Moderate Wounds, Command, or Searing Light. Or she will use her Heavy Mace to bludgeon foes. Most of all make sure they fight alongside the PCs and are not show stealers.
The Key
The pool of water contains the key to the heavy metal door at the bottom. A DC 16 Perception check finds the mechanism to unlock the wooden gate and a DC 18 Disable Device opens the gate. The pool of water is dark and deep, but not made of stone. It is a metal cage, through which the PC can see the ocean beyond. Swimming down to the bottom takes 2 rounds and another 2 rounds to return to the surface. (See rules for holding breath) Finding the key at the bottom requires a DC 15 Perception check to feel around on the bottom. This takes 1d4 rounds on a successful check. If the character has light, a successful check finds the key without adding additional rounds.
Wooden Gate
The wooden gate is made of large wooden stakes and is shut. It can be opened by finding the unlocking mechanism next to the pool of water; a DC 15 to break, or a Hardness 5; 30 hp to smash.
Metal Door
This is a heavy door made of iron. I takes a DC 30 to pick the lock without the key. It has a Hardness of 10, 60 hp to smash; or DC 28 to break.
4 The Shrine Gate
The dampened cavern corridors wind around through more seascape frescoes and bone carvings. The smell of rotten seaweed becomes more pronounced as you enter another cavern. Water Cascades from the ceiling into this cavern causing it to pool into a foot of frigid water before draining away. At the north of the room is another door composed of iron bars. Cellimas Villuhne says, 'The High Priestess should be up ahead. The onus for much suffering rests squarely upon her slimy webbed hands.'
This gate protects the shrine of the Devourer from the rest of the enclave. It is trapped with a blade trap. If not disarmed first, two large vertical blades jet out from the wall attacking anyone standing directly in front of the door.
Door Blade Trap
CR 1
Type mechanical
Perception DC 20; Disable Device DC 20Effects
Trigger location; Reset manual
Effect Atk +10 melee (1d8+1/×3)
 Credit: http://ddowiki.com
5 The Shrine
You continue on further into the cavern. The sounds of chanting become louder. Then you round a corner to see three Sahuagin chanting over an altar smeared with blood and seaweed. Cellimas Villuhne says quietly, 'There she is... performing some kind of profane blood magic.'
The Sahuagin High Priestess (see Appendix A) and her two Sahuagin Elite Guards (see Appendix A - Sahuagin Veteran) have their backs to the group, but attack as soon as they sense their presence. The alter to the Devourer is in the highest point of the room. Natural stone tiers create large steps from which the altar is approached from the bottom. The High Priestess is performing a ritual is on the highest tier 8 feet from the floor of the cavern.
Knowledge Religion DC 15 identifies the shrine as one of the cult of the Devourer. The Devourer represents the raw destructive power of nature. The Devourer lords over the deep and as such sailors of all walks of life often pay him lip service for safe voyages. Aquatic races such as sahuagin and lizardfolk also revere the Devourer. Shrines to the Devourer are usually built of wood, and many are roofless, allowing rain to enter freely. Others are built on the water itself, either on lakeside barges or in the cabins of seafaring vessels. They stink of blood and are hung with rotting seaweed.
Sahuagin High Priestess
CR 3
- Hit Points 33 (see Appendix A - Priestess)
Treasure
A locked chest DC 13 Disable Device sits deeper in the cavern. The chest contains a Ring of Waterbreathing (see Appendix B), 2d4 × 10 gp, an aquamarine gemstone, and two pearls.
Story Award
Any PC that helps Cellimas cleanse the Altar to the Devourer gains the group an extra 200 XP.
Secret Door to the Village
Far to the west of the cavern is a wall made from common masonry.
Anyone who approached the wall will notice a stiff draft of cold air. A DC 15 Perception notices the secret door, which is activated by pushing a stone in the wall. The stone door slides open to reveal a dusty and forgotten store room in the village of Korthos. Cellimas Villuhne says, 'It looks like we are done here. But first I want to reward you for your assistance.' She gives the PCs a cut of the reward for helping to clear out the cave of the Sahuagin cultist. The cut is 500 gp for the whole group, however she can be negotiated up to 600 gp with a successful Diplomacy check.
The Grotto Map
 Credit: Mjoll
Chapter 1: Devourer’s Night
Stepping out of the grotto, the PCs find themselves in Korthos Village. The Sahuagin have threatened this village for generations - judging from how it looks now, the Sahuagin are winning. However, some hopeful souls still hold out for help to arrive.
Korthos Village
Seaside Village (Currently Frozen Over)
LN village
Corruption +0; Crime –4; Economy –1; Law +2; Lore +1; Society +0
Qualities rumormongering citizens, superstitious
Danger +1; Disadvantages impoverishedDemographics
Government autocracy
Population 187 - This number has been reduced given that a many are being brainwashed into following the cult of the Devourer.
(143 humans, 20 elves, 14 dwarves, 6 halflings, 4 half-elfs)Notable NPCs
Mayor Viggie Storr
(LG male human aristocrat 3/expert 7)
City Watch Ursa Jernsvard
(LN female human fighter 4)
Barkeep Sigmund Bauerson
(N male human expert 4/warrior 1)Marketpalce
Base Value 250 gp; Purchase Limit 1,250 gp; Spellcasting 1st
Minor Items 1d4; Medium Items 1d2; Major Items —
Points of Interest
1. Docks
Giant icebergs block harbor of Korthos Village keeping all traffic from entering or exiting. Captain Valeria Sinderwind Captain, sails to the coastal city of Stormreach regularly but is stuck in Korthos Village. She projects an image of calm authority when speaking to anyone.
Like Captain Sinderwind, Captain Rinar d'Thuranni of the Sojurn is also stuck in Korthos Village because of the sudden climate change. Due to the situation he is irritable and avoids talking to the villagers until the situation is resolved. He irately states, “I can ill afford any more time on this backwater island. But my crew refuses to depart because of that accursed Dragon.” The crew of both ships travels back and forth between the dock and the tavern.
The other resident of the dock is Dryad Willowisp (elf cleric 1), who can usually be found sitting on the edge of the dock calmly praying and contemplating her splendid divinity.
2. Graveyard
The graveyard is where all Korthos’ dead are interred; the only living inhabitant is Jocoby Drexlhand who tends to it. He is a stern and gruff Crypt Keeper and is secretly a member of the cult of the Devourer. It will be learned later in the chapter that he has been sneaking the Sahuagin into the village. The largest structure in the graveyard is Heyton's Crypt, a building dedicated to the family who has defended Korthos from Sahuagin for ages. The quest Heyton's Rest begins here.
3. Korthos Hall
Korthos Hall is the center of political life in the village. This building is warmer than the rest in the village despite having no operating fireplaces. It is the town hall and where mayor Viggie Storr mayor can be found. Viggie has been Mayor for almost fifteen years, and in that time Korthos Village has enjoyed prosperity. The threat of the Sahuagin is something that he is ill suited to counter without the help of the Heytons, and he knows it, but Viggie is hesitant to let anyone else call the shots for the villagers. In the basement is the town's last cannith crystal. The ancient crystal radiates a warm heat that is keeping the town from freezing over. The rest of the crystals have been destroyed in a raid by the cult of the Devourer. If the PCs attempt to talk to him before Chapter 2, he will answer, “Please stranger, leave us be. If the Sahuagin or their cultist spies see me talking to you, they'll say I'm asking you to fight them.”
 Credit: D&D Online
4. Town Center
The town’s center is a circular dirt area in the middle of the village where villagers often meet to exchange wares, share gossip, and play games. It has had considerably less traffic since the jungle island became icy. But a few people still set up stalls to hawk their wares. Dax Boon is a purveyor of many goods. He will buy almost anything the PCs are selling and has a storehouse with most things they might need, however it might not be the best quality.
Bertram Sharpwood is a scrimshaw vendor. He carves the bones of large sea animals, into beautiful pieces of art. When appraising a work of art whether his or someone else's, he prefers to sniff it to determine its quality.
Wilma Oaksworn is a Fishmonger. Although, she sells other tropical food items. Her husband is the best fisherman on Korthos Island. She likes to give people nicknames when interacting with them.
5. Village Gate
This large metal gate is kept locked while the town is under siege from the cult of the Devourer. Many crates have been placed in front of the gate to make it a more defensive position. Its watched over by Ursa Jernsvard (LN human fighter 4) an experience city watchwoman and Askel Bauerson (LN human warrior 3) a young and bold Gate Guard who guards the gate into the Korthos Island wilderness area.
6. Wavecrest Tavern (Inn)
Just off the town center is the Wavecrest Tavern. This two story building timber building is adorned with all sorts of nautical implements, nets, anchors, old navigation tool, flags, etc. A flock of parrots perches on the roof. Inside is furnished with many small tables. Accomodations upstairs consist of several large rooms with beds and straw mattresses and a mezzanine with several wooden cots. The tavern is best known for selling Old Sully's Grog that comes in both the Vintage and Regular variety. The owner is a tall male human named Sigmund Bauerson (N male human expert 4/warrior 1); however, he does not conduct business directly with the PCs, letting his wife, Ingrid, take care of this. His children include Askel, Gunnar, Kaja, and Merla. Merla spends her time waiting tables and chatting with the locals.
Patrons include:
Byron Scoutsword (warforged barbarian 1) Surprisingly calm and collected for a barbarian, Byron awaits your command. - Byron looks down at you with a breathless stare.
Virgil Anvilhands (human fighter 1) Eager and anxious, Virgil fumbles with his weapons in anticipation of adventure. - Virgil awkwardly stands before you.
Elizabeth Cinder (human sorcerer 1) Impulsive and expressive, Elizabeth is especially fond of setting things - anything - on fire. - Elizabeth shifts uneasily back and forth waiting for adventure.
Brother Malden (human cleric 3) , the village cleric and follower of the Silver Flame. He is welcoming and spends much of his time in missionary work as much of the residents of Korthos village are not religious. He does not have a church, and offers services out of a little shack that serves as both his house and a shire to the Silver Flame.
Innif Ross (human warrior 2) is an overly confident city guard who has a few words of advice on weapons mastery but usually gets many of the facts wrong.
Dalsamira Courdry is a friendly candle maker with horrible facial scars. She doesn't like to talk about them.
Additional NPCs
Kaja Bauerdatter is a pretty young red headed woman. She is very social and can be found at many places around town, particularly Korthos Hall, the Marketplace, and the Tavern. Informally, the people of Korthos see her as the heart of the village due to her compassionate nature. She is the source of many rumors and is currently upset by the sounds coming from the Heyton's Crypt. She is also smitten with Lars Heyton who has currently gone missing.
Riana Montague (halfling rogue 1) Riana is wise and skilled for a fledgling adventurer, and especially talented at dealing with locks and traps. She can be found wandering the village looking for somewhere to test her skills.
Baldar the Bold (CG male human ranger 3) is an expert spear fisherman and village daredevil. He is beloved by the village for his wild antics and his eagerness jump to the aid of an endangered villager.
Rumors Around Korthos
For each hour a character spends talking to the villagers, a character can make a DC 10 Diplomacy check to gather information. If the check succeeds, roll a d10 and consult the table to determine what the character learns.
| d10 | Local Rumors |
|---|---|
| 1 | The snows don’t really come from the dragon. They are a punishment from Arawai. (False) |
| 2-3 | I swear to Siberys, there's unholy wailing comin' from Heyton's Family Crypt. |
| 4-5 | The Sahuagin worship the Devourer, sure, but the real trouble was when they started taking our people and brainwashing them into doing the same... and then the Dragon showed up. |
| 6-7 | The Sahuagin say that the Dragon was sent by the Devourer himself. (False) |
| 8-9 | No one has seen Lars Heyton in weeks. The Heyton’s have defended this village from Sahuagin for as long as anyone can remember. Many villages are starting to think he is a coward. |
| 10 | The Cannith Crystals in Korthos Hall help us stave off the cold. But without them, Korthos will freeze over within a week. |
Heyton's Rest
Kaja Bauerdatter asks the PCs to investigate odd wailing sounds coming from the Heyton Family Crypt. This crypt is in the cemetery on the west side of Korthos village. Unbeknownst to everyone the Sahuagin plan to raise the village's dead and use their own dead heroes to attack the town.
Talking to Kaja Bauerdatter
When the PCs talk to Kaja she will tell them that, “there's unholy wailing comin' from Heyton's Family Crypt. No one wants to check on it, for fear of the Sahuagin and their croonies. But what could they want with Heyton's crypt?
Who are the Heytons? My da used to tell me stories of the Heytons. Hundreds of years ago when the Sahuagin first came, Bjorn Heyton fought 'em tooth and nail. And when he died, his children fought them. And when they died, their children fought them. Oh, Lars... Lars Heyton was the last of them, and I was... well nevermind that. He's gone missing, and everyone thinks he's dead. But I know he's still alive. What if this wailing has something to do with it? You have to go and look!
1 Crypt Entrance
For generations, the Heytons protected the village from Sahuagin attacks. But now it looks like the Sahuagin have finally won, for all the Heytons are dead... or so it seems. Coming from deep in the crypt, you hear the strange and unsettling echoes that Kaja spoke of. And by the passage leading in, a grim-faced man glares at you.
As soon as the PCs enter the crypt they notice that everything is sealed off with a large iron gate and guarded by Jocoby Drexlhand (see Page 13). As you approach, he replies: “I haven't seen you before. You're new to Korthos? Hmm... Well, you should go back up to the village. This crypt is falling apart. you could trip on some rubble and... hurt yourself. On a DC 16 Diplomacy or DC 10 Intimidate check Jocoby opens the gate and says, “Fine! Don't come crying to me after you trip in the dark and break your neck!” If pressed further about his job, Jacoby Drexelhand replys, “Heh, who has time for menial chores with Korthos' impending doom? The sahuagin want to destroy the village, and the only safe people are the ones who join their Devourer cult. Mark my words, in a month's time, the only people left in Korthos will belong to the cult.
Jocoby Drexlhand
Part of Jocoby’s flaw is that he will do anything to survive, so he will try to talk his way out of any physical confrontation with the PCs. He is a key figure in the end of this chapter.
After PCs venture into the crypt a few feet, read:
Strange... sarcophagi line the walls, but they're broken open - and empty! Where did the bodies go?
The entrance to the crypt makes an abrupt right angle to the east, but the wall to the West is a secret passage. A DC 14 Perception check reveals a secret passage to the treasure in area 4.
2 Hallway Cultists
Progressing down the hallway to the east you hear voices ahead and down a short flight of stairs. Devourer Acolyte says, 'Hurry it up! The sahuagin need more corpses!'
When the voices come into view the PCs see a Devourer Disciple (see Appendix A) trying to move a body that has been recently removed from a sarcophagi. A Devourer Acolyte (see Appendix A) is standing over the disciple barking orders. When the Devourer Acolyte sees the PCs he says, 'What... no one from the village is supposed to be in this crypt! Kill the spy!'
The end of the hallway turns into a T-intersection with one passage heading south and immediately ending in a closed wooden door (Crypt Chamber A); the other passage heading north.
Other Cultist Hallway Encoutners
A Devourer Acolyte is ordering around two Devourer Disciples. Devourer Acolyte says, 'Put your backs into it! The bodies inside won't get themselves out!'
A Devourer Acolyte is conversing with a Devourer Disciples. He says, 'What do the Sahuagin need these corpses for anyway?' Devourer Disciple says, 'They're gonna get reanimated into undead. Then the sahuagin will set 'em loose on Korthos.
Two Devourer Disciples are busy arranging bones on the floor of the crypt into a skeleton.
Heyton Family Crypt

Credit: Mjoll
3 The Three Lesser Crypt Chambers
Through a rotted wooden door, the stone floor ramps down into a lower crypt chamber. This chamber is obviously for someone special… There's a Sahuagin in here, performing some kind of ritual, "Come, dead son of Korthos. Rise and do my bidding!"
Crypt Chamber A
This chamber has a Sahuagin necromancer (see Appendix A) performing a ritual over a profane altar. Nearby is an already awakened Zombie. Atop the altar is a corpse waiting to be awakened as an undead (use the stats for Skeletal Champion) a well as other bodies laying at the foot of the altar. If the altar is not destroyed in 1d4 rounds the corpse on top awakens and attacks the PCs. When the Sahuagin Necromancer dies, he says, 'Korthos will be overrun with its own dead. You can't... stop us.... (gak)'
Crypt Chamber B
This chamber has a Sahuagin necromancer (see Appendix A) performing a ritual over a profane altar. Nearby is an already awakened Skeleton. Atop the altar is a corpse waiting to be awakened as an undead (use the stats for Skeletal Champion) a well as other bodies laying at the foot of the altar. If the altar is not destroyed in 1d4 rounds the corpse on top awakens and attacks the PCs. The Sahuagin croaks, "Kragwulf Heyton, in life you served the light... or the Sahuagin Necromancer says, 'More bodies, human! Bring me more bodies!'
Crypt Chamber C
This Sahuagin necromancer is dead. Apparently his new skeletal champion (use the stats for Skeletal Champion) had no loyalty to him. The glowing red fury in his eyes say that he is not loyal to much any more. The skeletal champion took damage from his fight with the necromancer and down to 14 hp. Nearby are two already awakened Skeletons.
Altar of the Devourer
An altar of the Devourer stats are: hardness 5, HP 20. Altars of the Devourer are inanimate objects that need to be destroyed. Destroying the altar also prevents the Heytons from being raised as undead foes. Because of their evil alignment, weapons and abilities that do extra damage to evil creatures (such as good-aligned weapons or the paladin's Smite Evil ability) will bypass hardness.
 Credit: DDO
Treasure
Luxury items have been interred with the dead and the occasional 1d10 gold pieces in a urn. The champions carry a masterwork weapon of the same nature of one of the PCs. Although, some might see this as grave robbing.
Story Award
Award the PCs 300 XP each time they prevent Kargwulf, Bjorn, and Kyleanne Heyton from being raised as undead.
4 Treasure Chest
A chest! It's out in the open and unprotected... and that's probably what the dead cultist by the chest thought.
A treasure chest sits in the middle of the hallway outside Crypt Chamber C. An acolyte of the devourer lies dead next to the chest. A DC 10 Intelligence check can determine that the chest is there to deter greedy grave robbers. A DC 10 Heal check can observe acid marks all over the dead acolyte’s body. A DC 20 Perception check can notice something odd on the wall: a sculpture of a face with fresh acid in its mouth. If the chest is open before it is disabled, acid sprays out of the wall as the gate slams shut.
Acid Spray Trap
CR 1
Type mechanical
Perception DC 20; Disable Device DC 20Effects
Trigger proximity; Onset Delay 2 rounds; Reset automatic (after 10 minutes) Effect spell (two acid splash spells per person; +5 ranged touch; 1d3 acid damage)
The treasure chest contains 2 copper coins as an insult to potential graverobbers.
5 The Final Crypt
A magical barrier blocks the way, and behind it another Sahuagin performs unholy rituals at a Devourer Altar! This barrier appears linked to a mural on the wall that depicts a cleric healing healing the wounds of injured villagers. Sahuagin Necromancer says, 'The Heytons have ever been a nuisance. I shall enjoy perverting their remains against their own cause!'
Solution: Lowering the barrier takes a casting of a cure spell on the mural. The barrier radiates a conjuration aura on a casting of detect magic.
This chamber has another Sahuagin necromancer (see Appendix A) performing a ritual over a profane altar. Nearby are two already awakened Zombies. A Devourer Acolyte (see Appendix A) is prostrated worshiping the altar and the necromancer. Atop the altar is a corpse waiting to be awakened as an undead (use the stats for Skeletal Champion) a well as other bodies laying at the foot of the altar. If the altar is not destroyed in 1d4 rounds the corpse on top awakens and attacks the PCs.
Treasure
The remains of Kyleanne Heyton d'Cannith carry a +1 steel shield in addition to a masterwork weapon.
Development
After the quest the villagers will want to know if the PCs encountered Lars Heyton in the crypt.
The Raid on Korthos
"Hero". It is on the people's lips as you walk by. Cautious looks have become friendly nods. Then word comes that your presence is requested in the tavern.
Desperate Counsel
Given the PCs' reports of Heyton's Crypt, the continuing raids against the village, and new rumors of the cults invasion. The leaders of Korthos Village call a council meeting to determine what should be done. As the most capable adventurers in town, the PCs are invited. The meeting takes place during the day. Mayor Storr summons the PCs to Korthos Hall, where Sigmund Bauerson, Baldar the Bold, and townwatch Ursa Jernsvard are waiting.
You are all gathered in the sitting room of Korthos Hall, there with you are Mayor Storr, Sigmund Bauerson, Baldar the Bold, and townwatch Ursa Jernsvard. “Well, you all know why we're here,” Storr says without preamble. “We have word of another raid by the Cultist of the Devourer. If they succeed this one could break the village.”
This is a chance for the players to throw in their own advice about how Korthos Village should meet the threat .The council members have their own opinions.
Sigmund: There is a traitor here in the village. Someone who has given himself to the Cult willing... mad as that is. We now know what his next move will be. The fool is planning to attack the Tavern, and kill me. But when he arrives with his Sahuagin allies, he won't find me. He'll find (the PCs)! Don't worry. We will ambush most of the Sahuagin before they get near the place. But make sure you kill the Traitor! Under no circumstances allow him to get away. His name is Jacoby Drexelhand.
Baldar the Bold: The cult came and destroyed our Cannith Crystals. We tried to stop them... Vogel was hit pretty bad, and I think I broke my ankle. But we got away with one crystal. Just one. We put it in the basement of Korthos Hall. They'll come back for it tonight, and we're in no shape to stop them. We must protect the crystal! These crystals were holding back all this unnatural ice. With the one remaining, we might still be able to stave off the cold. But without it, Korthos will freeze over within a week.
What happen to Jeets, Talbron and Celllimas?
They were hired by Lars Heyton and are off doing another job for him uncovering the mystery of the dragon. The PCs will meet them again in Chapter 3.
Ursa: It's her job to execute whatever decision the council makes, so she particularly divided as she argues “any defense of the docks will prevent the cultists from getting to you Sigmund or the Cannith crystal. Sure the human cultists will sneak in other ways, but the dock is where we will stop their Sahuagin masters.”
Mayor Storr: Flustered and indecisive.The mayor doesn't really know what to do, he mainly warns that many people in Korthos appear to be normal villagers, but don Cultist robes when their Sahuagin masters arrive. He insists that they are still people of Korthos and that they have been brainwashed, but he doesn't know to what extent. Please restrain from harming them, maybe we can find a cure. What do you think?"
This is an encounter best resolved through roleplaying. Let the players argue their case for whichever response they favor. If You feel they have argued persuasively, their position should carry the day. Since the PCs are probably arguing for a position favored by at least one of the council members, all they really need to do is convince the other two who hold solid positions-the mayor is undecided , and Ursa doesn't want to bully him into agreeing with her. Sigmund is unfriendly toward characters who try to argue against his plan of capturing the collaborator and assassin. The consequences to the plan the PCs devise are detailed in consequences during each event.
Story Award
Award the PCs 400 XP if they succeed in persuading the council to adopt their preferred course of action.
Night Raid on Korthos
The raid happens the night of the meeting in Korthos Hall. There is not much time for the villagers to prepare. During the raid the cultists attacking from the docks as well as from a hidden entrance in the Wavecrest Tavern, where Jacoby lets the cultists in. The order of the events depend on how the PCs decided to defend the village.
Any time throughout the raid if the PCs are outside they can see a white dragon flying in the sky. The white dragon looms menacingly above in the cold night air. It locks eyes with one of the PCs as they run through the center of town. In reality the mindflayer is watching the raid through the dragon and keeping tabs on his minions.
Event 1: Substitute for Barkeep
By nightfall, many of the villagers have gone to sleep. Still the Collaborator hasn't shown with his Sahuagin. Suddenly, you hear sounds of battle down by the docks, and the figure of Jacoby Drexelhand steps out of the door from the basement into the tavern. He is visibly disappointed to see you in place of Sigmund, but he recovers quickly, “Sahuagin blame me for your heroics. I'm sick of your tampering!”
Jacoby orders the Sahuagin and the cultists to attack the PCs, while disappearing back into the cellar. “You'll be too busy with the Sahuagin to fight me!”, he snears. The battle inside the tavern consists of two Devourer Disciples (see Appendix A), two Sahuagin Warriors (see Appendix A), and one Sahuagin Adept (see Appendix A).
A DC 15 Perception check reveals a small lockbox behind the counter and a DC 15 Disable Device opens the lockbox. Inside, are coins that Sigmund has taken recently from the tavern partons: 54 gp, 70 sp, and 132 cp.
If the PCs follow Jacoby into the cellar they find it empty. Drexelhand isn't here. However, webbed footprints on the ground betray the location of a secret passage. A DC 15 Perception check reveals the footprints leading up to a wall and the secret door. The chamber beyond the secret passage looks ancient, predating Korthos village. Four more Devourer Disciple (see Appendix A) and one Sahuagin Warriors (see Appendix A) wait in the passage that travels through this ancient chamber and ends in a grotto with a small pool that connecting it to the sea. A profane altar to the Devourer has been erected here and Jacoby Drexelhand is kneeling praying for victory. For a more difficult fight add two Sahuagin Warriors (see Appendix A) with him.
Consequences
If the PCs come here second Sigmund is injured (he is currently dying at -4 hit points) and Jacoby flees. If the come here last Sigmund is dead and Jacoby has already retreated to the secret passage.
Story award
If Sigmund survives uninjured, award the PCs 400 xp.
Jocoby Drexlhand
CR 3
XP 800
CE Medium humanoid (human)
Init +5; Senses Perception +1Defense
AC 18, touch 13, flat-footed 15 (+1 Dex, +5 Armor, +2 Deflection)
Hit Points41 (5d10+10)
Fort +5, Ref +2, Will +2
Defensive Abilities Heavy FortificationOffense
Speed 30 ft.
Melee sickle +8 (1d6+2) or unarmed strike +7 (1d3+2)Tactics
Before Combat Jocoby drinks a potion of Sheild of Faith.
Statistics
Str 14, Dex 13, Con 12, Int 10, Wis 12, Cha 15
Base Atk +5; CMB +7(+9 grapple); CMD 18(20 vs. grapple)
Feats Improved Grapple, Improved Initiative, Improved Unarmed Strike, Weapon Focus (Sickle)
Skills Bluff +7 , Intimidate +10 , Survival +6
Languages Common, Sahuagin
Combat Gear potions of cure light wounds (2), potion of enlarge person; Other Gear Devourer Chain Shirt, sickle, 37 gp
Jocoby Drexlhand

Event 2: Protect the Cannith Crystal
You can feel the life saving heat emanating from the magical crystal Baldar spoke of. But from the shadows approach those who would doom Korthos by destroying it.
The basement of Korthos Hall is filled with crates and supplies. In the back corner of the large room is a blue crystal about the size of a man. The cultists attack 1d4 rounds after the PCs arrive. There are 10 cultist total who descend on Korthos Hall to attack the cannith crystal, 7 of which are Devourer Disciples (see Appendix A) and 3 are Devourer Acolytes (see Appendix A). The cultist need not attack all at once but can come in waves.
Consequences
If the PCs come here second both the Mayor Storr and Baldar are injured (each at 2 hp). If they come here last, the crystal is destroyed and the two are still injured.
Story award
If neither character is injured and the crystal is not destroyed, award the PCs 400 xp.
Event 3: Invasion at the docks
Ursa and the village militia take up a defense of the docks because that is where she believes the brunt of the sahuagin forces will attack from. Indeed when the raid begins, contingent of sahuagin erupt from the icy waters and onto the dock. Ursa and the militia are able to hold off the first wave of sahuagin warriors.
Round 1
Three Sahuagin Warriors (see Appendix A) jump out of the sea and onto the docks. A fourth Sahuagin Warrior reaches up from the water and pulls in one of the village militia. All of the other Sahuagin engage anyone nearby in combat with their tridents. Being so close to the sea, the prefer to work together to push people in the water.
Round 3
Three more Sahuagin Warriors (see Appendix A) and one Sahuagin Veteran (see Appendix A) climb onto the docks. The Veteran has the throw anything feat and enjoys throwing urchins and octopi into the surrounding chaos.
Round 6
The final wave of Sahuagin leap from the ocean, two Sahuagin Veteran (see Appendix A) and two Sahuagin Warriors (see Appendix A). These Veterans, like the one before, have the throw anything feat and also gain pleasure from throwing urchins and octopi into the chaos.After the defeat of all the Sahuagin Veterans, Ursa yells to the PCs that she and the militia have the docks under control. If the PCs are here before Events 1 and 2 she urges them to go check on the rest of the town. If they are here last, she still urges them to go check on the rest of the town, but 2 minutes after the PCs leave Kiv Nerl lurches out of the water starting event 4.
Consequences
Ursa and the villager militia are able to hold their own against the invasion of Sahuagin, but if the PCs are not here last when Kiv Nerl arrives, Ursa is gravely injured (she is at 0 hp and is in the process of dying).
Event 4: Kiv Nerl
A Sahuagin in armor made of seashells lurches out of the sea and on to the docks. Immediately it begins ordering the cultists and Sahuagin “take those villagers”, or attack those armed ones. Many of the raider seem inspired by the presence of this new sahuagin.
Kiv Nerl (see Appendix A - Sahuagin Stalker) has come with his Reefclaw pet to make sure that the village is sufficiently razed and that they return with new humans to convert or sacrifice to the Devourer. During this last event, the dragon circles even lower, menacingly appearing to as if it will land and reek havoc on the village at any moment.
Kiv Nerl
CR 4
- Melee +1 greataxe +8 (1d12+6/x3)
- Combat Style (two handed)
- Feats Power Attack, Cleave, Improved Initiative
Aftermath of the Raid
As the raid winds down and victory by the villagers is assured, the dragon makes one final swoop over the town so low that it knocks the chimney off of one of the cottages. You watch as the dragon flies toward Misery’s Peak without even looking back. Your victories have made the village much safer, but only temporarily. It’s time to take the fight to the Sahuagin - out in the wilds of Korthos Island.
Reward
Mayor Storr offers the PCs Fintan’s Bite (see Appendix B), Thera’s Rapier (see Appendix B), a Pearl of Power (1st), and 10 platinum pieces for helping to defend the village.
Chapter 2: Sacrifices
Korthos Island
Korthos Island, one of the many Shargon’s Teeth Islands, lies north of the continent of Xen drik. It's known for its abandoned Cannith Manufactury and Misery’s Peak, its highest peak. The village of Korthos lies to the north. The island is 140 square miles with Misery's Peak rising from its center. The main force of the Sahuagin invaders are camped in the wilderness throughout the island, along with the brainwashed Devourer cult members bound to serve them. Any PC with tracking can track the Sahuagin to their lair with a DC of 15 right outside Korthos Village to a DC of 10 near the Cannith Aqueduct.
You step outside the Village Gates into the jungles of Korthos Island. A group of monkeys sits in the trees shivering from the cold. The trail ahead leads deeper into the island.
Abandoned Cannith Manufactury
Ruins of a once great building are scattered across the jungle floor. Chilled water and chunks of ice flow down from the upper levels of the ruins. This is where Lars Heyton has chosen to hide out. The Sahuagin and cultists have intensified their search for him here. There is 1 Sahuagin Veteran (see Appendix A) and 3 Devourer Disciples (see Appendix A). Sahuagin Veteran says, 'Humans, spread out! A reward for the first to find Heyton!' A grand staircase lies past a dilapidated courtyard. The staircase leads up to a small water garden and finally to a mangled sewer grate. The grate is the entrance to Lars Heyton's hideout.
Adventurer's Camp
The PCs come across a makeshift camp. A scraggly dwarf is sitting on a log, trying in vain to keep warm. Ves the Peddler tells them, 'Come, sit, share my fire. 'Tis some harsh weather we're having, eh? Baw, ha, ha! Well, I'm a traveling merchant, so if you left something at home, I can probably sell it to ya.' Really, Ves has come to Korthos Island to scavenge what he can from the Abandoned Cannith Manufactury and then return to sell his prizes in the Stormreach markets. He became trapped on the island when dragon arrived and froze over the oceans.
'Are you out here by yourself? Aren't you afraid of the Sahuagin and their cultists?'
Ves the Peddler tells them, 'Naw, as long as I stay outta their way, they leave me be. Well, after I smashed a bunch of their skulls in with Matilda here.'
Algid Falls
The rumbling falls converge into a small body of water. Frozen sheets of ice cover the running waters of this river beneath. An Ice Mephit named Zeer has made its home in the freezing waterfall. The ice on the river is very slippery and makes for difficult terrain.
Cannith Aqueduct
The ancient Cannith Aqueduct towers overhead. It used to carry water across the island, but has long since dried up. An entrance in the side of the mountain follows the aqueduct further underground.
A DC 10 Survival near the Cannith Aqueduct reveals Sahuagin tracks leading into the aqueduct complex. A small shrine to the Devourer has been constructed outside the entrance, where frozen blood and humanoid bodies have been sacrificed.
Shrine to the Devourer
Followers of the Devourer make sacrifices to their evil god at this fell shrine.
A very tall shrine to the Devourer has been erected in the jungle. Large branches have been tied together to make the symbol of the Devourer. A Devourer Acolyte (see Appendix A) commands, 'Bow down and sacrifice your life to the Devourer.' Four Devourer Disciples (see Appendix A) are on their knees chanting loudly.
Tree of Sacrifice
An enormous tree sit on an island in the middle of the bay. From where you stand, you can see a cavity has been carved out at the base of the tree where the Sahuagin have turned this tree into a site for sacrifices to the Devourer.
From the shore a DC 10 Perception check can make out a Sahuagin Priestess (see Appendix A) and an Elite Guard (see Appendix A) praying at the shrine inside the tree. At low tide the water between the shore and the island is knee deep, which counts as difficult terrain. For anyone looking out into the water a DC 15 Perception check reveals three Sahuagin Warriors (see Appendix A) hiding in the deeper parts of the water. There is a body of a humanoid here that still holds a ring of protection.
Watchful Vigil
Huge stone remnants of another ruined building are scattered across the top of the hill. Among the vegetation covering the stones lies an Assassin Vine. From this vantage point the PC can look out over the frozen ocean and the Tree of Sacrifice. To the West they can see the tops of the buildings in Korthos Village. Through the trees they can make out the ruins of the Cannith Manufactury. To the East the PCs can make out the snow covered Misery's Peak in the distance. Closer they can see culists and Sahuagin down below the aquaduct.

Sacrifices to the Devourer
Dozens have been taken from Korthos village, never to be seen again except as slaves of the Devourer, lusting only to spill the blood of their former neighbours. Mayor Storr approaches the PCs after the raid on the town and wants their help to save the villagers who were abducted during the raid. He weeps as he tells the PCs that his daughter Arissa and Kaja Bauerdatter were among those villagers who were kidnapped. He says, “I beseech you, heroes! Something terrible has happened... my daughter Arissa has been kidnapped! We heard her scream during the raid, but by the time we got to her room... she was gone. I think she's being held with other prisoners at the old Cannith Aqueduct—they're being taken there one-by-one for indoctrination. The Cannith Aqueduct is on a rocky cliff at the Easternmost tip of Korthos Island. To get there, you will need to cross all of this island's wilderness. Then, you will need to find a path to climb up, and gain entrance to the Aqueduct at the top of the cliff. It's our only chance to rescue the prisoners. I beg you, hero - bring my little 'Rissa back to me!
Any PC with tracking can follow the Sahuagin to their lair with a DC 15 Survival check immediately outside Korthos Village and then another DC 10 Survival check near the Dilapidated Aqueduct. The trip to the Aqueduct will have the PCs travelling for a few hours through the jungles of Korthos Island, which they might want to explore along the way. When the PCs approach the ancient Cannith Aqueduct it towers over them. They can follow a trail up the mountain to a spot where aqueduct travels inside the mountain and further underground.
Entrance
Resilient spiderwebs block your path. They don't look capable of withstanding blows from your weapon, though.
Six Large Brown Spiders nest here (use the stats for Giant Crab Spider. Webs cover most of the hallway from floor to ceiling. The entire area of the web is considered difficult terrain. Anyone moving through the webs must make a combat maneuver check or Escape Artist check as part of their move action, with a DC 14. PCs that fail lose their movement and become grappled in the first square of webbing that they enter. Any creature that has at least 5 feet of web between them and an opponent gains cover.
At the end of the spider infested corridor is a wooden door that has been mostly rotted through. Large pieces of wood have fallen from the top half and lay rotting on the floor. The door is not locked.
First Holding Room
In the center of this room is a large pool of clear sea water. A studry looking wooden bridge crosses the pool to the other side of the room. The cells in this room hold a number of desperate Korthos villagers. Voices call to you from behind iron gates both to the East and to the West, “Help us! Please, get us out of here!”
The pool is 40 feet deep. Inside the pool is a Shark that the Sahuagin have been training. A DC 10 Perception check notices the shark swimming in the depths of the water. Any debris kicked into the water arouses the shark. The pool can be navigated by either a wet 11 inch lip that encircles the pool or a series of wooden bridges. It takes a DC 12 athletics check to navigate the lip, failure means falling into the water with the shark. However the lip to the West is blocked by a significant amount of debris, it is only possible to travel to the East.
There are six prisoners total with three in each of the cages guarded by three Devourer Disciples (see Appendix A) resting in the open hallway beyond to the north. If they hear the noises of the bridges being raised and lowered they will come to inspect the source of the noise.
Bridge puzzle
The gates in this chamber are locked and can be opened with a DC 30 Disable Device check. They can also be unlocked by throwing a series of levers. Across Bridge 1, on the north wall, is the first lever. Bridge 1 is currently down and crosses the pool of water from north to south. Flipping the first lever on the North wall raises Bridge 1 and lowers Bridge 2. Bridge 2 is parallel to Bridge 1 but further to the west allowing access to a second lever on the South wall. This second lever is on the other side of the debris from the rotted wooden door. However the PCs manage to get to this lever, throwing it opens a secret passage on the North Wall. A third lever there opens the cages of the prisoners.
Treasure
At the bottom of the pool is a locked iron door. Unlocking the door requires a DC 20 Disable Device check. Beyond the door is a submerged room that the Sahuagin use as an armory. It contains tridents, spears, underwater crossbows, and one masterwork net. There is a treasure chest in the corner of the room that contains: a potion of aid, a potion of cure minor wounds, a violet garnet and 310 gp.
Aqueduct Underground

Credit: Delphis
Sahuagin Tunnels
Rounding a corner you stand at the edge of a large room. A mossy wooden ladder leads down to the room's floor, which is covered in a shallow pool of water. Over to the north, you see a treasure chest gleaming in an alcove high above the floor.
This room has two levels it is 40 feet long and 30 feet high. The ladder descends 20 feet down to the room at the bottom.
Ground Level
The rooms floor is filled with cold water only a little over ankle deep, but still making it difficult terrain. To add to this, the ceiling is crumbling and debris is scattered in piles around the floor. Three large pipes lead out to the ocean. These pipes are another entrance used by the Sahuagin into this lair. One round after the PCs set foot down here six Sahuagin Warriors (see Appendix A) emerge from the pipes and attack. They work together to gang up on one or two individuals and getting flanking bonuses. At the far end of the room is another 20 foot ladder that ascends to another hallway that leads deeper into the lair.
Top Level
To get to the treasure chest the PCs need to make a series of four 5 foot jumps, between 2 foot wide beams requiring a DC 15 Acrobatics check between jumps. The beams are wide enough that a balancing check is not needed, but should it become important it is a DC 5 Acrobatics check. Failure means a 20 foot fall to the floor below. Instead of jumping the players could navigate a small 8 inch lip on the far wall DC 10 acrobatics check. Occasionally the beams are cluttered with light debris (increasing the DC by 2). When the PCs reach the small alcove, they notice the treasure chest along with the bones of a skeleton. The Arcane Skeleton (see Appendix A) stirs to life as soon as the first person sets foot in the alcove.
Treasure
This treasure chest contains a pair of Runic Gloves (see Appendix B), a bronze dagger set with bloodstone, a scroll of Detect Secret Doors, a Wand of False Life (9 of 50 charges), and 230 gp.
Trapped Hallway
Another worked stone hallway curves around and you can hear chanting up ahead mixed with screams for help.
This 30 foot long hallway has two traps. The first is a Spiked Floor Trap that ejects spikes from the floor and covers the whole hallway. The second is a Wall Scythe Trap that attacks anyone walking on the right side of the hallway. The two traps work together so that anyone walking on the right side of the hall gets hit by both floor spikes and a wall scythe.
Spiked Floor Trap
CR 2
Type mechanical
Perception DC 20; Disable Device DC 20Effects
Trigger location; Reset automatic reset
Effect floor spikes (Atk +10 melee, 1 spike per 2 feet for 1d6+2 damage each); multiple targets (all targets in hallway)
Wall Scythe Trap
CR 2
Type mechanical
Perception DC 20; Disable Device DC 20Effects
Trigger location; Reset automatic reset
Effect Atk +20 melee (2d4+2/×4)
Spillway
The PCs enter the spillway from the west. A large wall divides the center part of the room so that they cannot see the east wall. A ramp leads up to the north where more prisoners are kept. Two Sahuagin Warriors and one Sahuagin Veteran (see Appendix A) reside in this room. They use the center wall for cover and surprise if they hear the traps set off or the PCs in the hall. The two guards from the Prison Cells come down the ramp to the north 2 rounds later if they hear sounds of battle. To the east is an iron gate that is unlocked. Any PC listening can hear a woman’s voice coming from beyond the gate. The woman’s voice is Arissa, but the PCs have never met her and don’t know the sound of her voice.
Prison Cells
There are six prisoners total with three in each of the prison cells guarded by two Sahuagin Warriors (see Appendix A). Unlocking the cells requires a DC 20 Disable Device check or a rusty key held by the Sahuagin Veteran in the Spillway.
Treasure
The Sahuagin Veteran holds a rust key that opens all the prison cells.
The Devourer’s Altar
Behind the metal gate is another short corridor. A steep ramp ends at an altar that casts an eerie blood red glow. You have breached the Devourer's sanctum. From ahead, you hear a woman's plaintive cry for help! A ‘No, no more! Please don't hurt me!'
The Devourer’s Altar at the end of this room is causing an eerie blood red glow to suffuse the area. The unholy altar is tended to by a powerful necromancer Drenyl Fallow. Drenyl is getting ready to sacrifice Arissa Storr on the altar when the PCs arrive. If Drenyl has been warned by the Sahuagin, when the PCs arrive he activates the (Sacrificial Altar) haunt and attacks. If the PCs linger too long the in Prison Cells he sacrifices Arissa in 1d4 rounds.

Credit: Guild Wars 2
Sacrificial Altar
CR 5
Type LE haunt; Caster Level 6th
Perception DC 20 (to hear low chanting)Effects
Trigger proximity; Reset 1 day
Effect Each creature in the location is affected by a dominate monster spell (DC 16) urging it to take part in a blood rite. Any creature that fails its save immediately climbs onto the altar, where ancient torture tools animate and attack. The tools attack each round, targeting only creatures on the altar that have failed their saves; they make a single attack with a +10 bonus against each affected creature and deal 1d10 points of damage on a hit. Affected creatures receive a new saving throw each round to end the effect. Once any creature is killed (resulting in its entrails being removed) or 9 rounds pass, the chanting fades away and the affected creatures come to their senses.Destruction
If all six tools on the altar are destroyed, the haunt is also destroyed. Each tool has hardness 10 and 10 hit points. When animated, the tools have an AC of 10.
Drenyl Fallow
CR 4
XP 1,200
LE Medium humanoid (human necomancer 5)
Init +2; Perception +6Defense
AC 17, touch 13, flat-footed 14 (+4 Armor, +2 Dex, +1 dodge)
Hit Points 43 (5d6+18)
Fort +5, Ref +3, Will +5Offense
Speed 30 ft.
Melee dagger +2 (1d4/19-20)
Special Attacks grave touch (6/day), power over undead ~ command undead
Wizard Spells Prepared (CL 5th, concentration +8):
3rd — vampiric touch (2), Empowered Shocking Grasp (1)
2nd — Acid Arrow, false life (already cast), ghoul touch (DC 15)
1st — Shocking Grasp, cause fear (DC 14), mage armor (already cast),
0 — Acid Splash, detect magic, light, read magic, touch of fatigue (DC 13)
Opposition Schools - Illusion, EnchantmentStatistics
Str 10, Dex 14, Con 14, Int 17, Wis 13, Cha 11
Base Atk +2; CMB +2; CMD 15
Feats Combat Casting, Command Undead, Dodge, Great Fortitude, Empower Spell, Scribe Scroll, Toughness
Skills Acrobatics +7 , Fly +10 , Knowledge (Arcana) +11 , Perception +6 , Spellcraft +11 , Swim +5
Languages Common, Dwarven, Elven, Sahuagin
SQ amphibious, track +1, wild empathy +0
Combat Geardagger, potion of cure moderate wounds, ring of counterspells (contains magic missle) Other Gear 100 gp worth of crafting supplies, 35 gp
Arissa Storr
Arissa Storr is very grateful to the PCs and thanks them profusely. If the PCs mention her father. She tells them, 'My father? They told me he was afraid. They told me he'd abandoned me.'
Story Award
For every prisoner saved award the PCs 50 XP and for saving Arissa Storr from being sacrificed award the PCs 100 XP.
Redemption
Lars Heyton has had numerous attempts on his life since the dragon showed up. At first, he hid in the abandoned Cannith Manufactury out of cowardice for fear of his own life. As time wore on, he decided to use this place as a sanctuary where is could discover the reason for the dragon’s presence and the increased power of the Cult of the Devourer. With the help of Cellimas, Jeets, and Talbron, he has discovered that the dragon’s presence and the rising power of the Cult of the Devourer are no coincidence. The mindflyer, Darastrix Achthend, has obtained a powerful artifact called the Mindsunder and is using it to dominate both the cultists and the dragon.
Entrance
A mangled sewer grate leads to an old abandoned Cannith Manufactury. The large bars have been bent outward creating a gaping hole in the grate. The hole appears large enough for a medium humanoid to squeeze through.
Passing through the small tunnel, the smell of mold and stagnant water is strong as it opens into a large room. Debris from the slowly collapsing structure litter the half submerged floor. Far to the east, a small flight of stairs lead out of this section of the sewer, but the doorway has been boarded up. Oddly, the work looks very recent.
The sewer as well as the Cannith Manufactury have not been used in decades. With a DC 10 Knowledge (History) or (Local) the PCs can remember that House Cannith often protects its holdings with arrays of ingenious traps. In addition to this, a DC 15 Knowledge (History) reveals this section as one of the laboratories where, decades ago, House Cannith first imbued mystical life into automatons. Much later, these automatons became the Warforged.
Wooden Barricade
The barricade is made of large wooden planks nailed together. It can be opened either by smashing it (Hardness 5; 30 hp to smash) or breaking it (DC 15 Strength to break).
Trapped Corridors
This corridor is lined with traps and the PCs must make a choice which way to go. Around a corner the PCs can see a blade drop from the ceiling and then lift back up only to fall again seconds later. This is the Continual Guillotine Trap. Three of them are placed together making the trap more difficult to pass. The first trap requires a DC 14 Reflex save, the second a DC 16 and the third a DC 18. Down a second corridor, a wet substance sprays out of the wall only to be collected again by a drain on the other side of the hallway. This is the Venom Spray Trap. There are two venom spray traps in this corridor and each one can be disabled by discovering secret door with a valve behind it.
Three Rusty Iron Defenders (see Appendix A) individually patrol the trapped corridors, however if they hear intruders or sounds of battle they will come to the aid of the others.
Continual Guillotine Trap
CR 3
Type mechanical
Perception DC 18 to notice control box; Disable Device DC 20Effects
Trigger location; Reset automatic reset
Effect sharpened iron gate (2d4+2); multiple targets (all creatures crossing the hallway); DC 14 Reflex avoids.
Venom Spray Trap
CR 3
Type mechanical
Perception DC 15 to notice the secret doors; Str Check DC 10 to turn the valves offEffects
Trigger location; Reset automatic reset
Effect (1d6 acid damage, DC 20 Reflex save for half damage); multiple targets (all targets in a 10-ft. Cone crossing the hallway), Poison (Ex); save Fort DC 12; frequency 1/round for 4 rounds; effect 1d2 Strength damage; cure 1 save.

Cannith Manufactury
 Credit: Mjoll
Main Room
The wooden double doors to the main chamber have no locking mechanism and remain unlocked. The PCs wind through hallway packed with crates, at the end of which opens up into a large wearhouse. Three doors lead from this room: the South door is blocked by a magical barrier and leads to Lars Heyton, the West door is a closed wooden door that leads to the Treasure room, and the North door is an iron gate that leads to the crystal cooling chamber.
(South Door): A magical barrier, humming with compressed energy, resolutely blocks your path. You hope you can find a way to disable it somewhere.
(North Door): On the other side of this locked gate, you see a familiar sight... Cannith Power Crystals, like the one you saw in Korthos. But what are these ones powering?
This main chamber is an old storage area and generator room. There are boxes piled up everywhere, however if opened they boxes are either empty or reveal nothing of use. Inside this room are two more patrolling Rusty Iron Defenders (see Appendix A). Behind the gate is the Crystal Cooling chamber. The Cannith Crystals can easily be recognized if the PCs defended the one in Korthos Village. A DC 10 Knowledge Arcana or 14 Intelligence check can surmise that the crystals are powering the magical barrier. The all of the crystals must be disabled in order to bring down the magical barrier.
Iron Gate
The Iron Gate is most easily picked with a DC 18 Disable Device. It has a Hardness of 10; 60 hp to smash, and a Strength check of DC 28 to force it open.
xxxx
Crystal Cooling
Icy jets of some alchemical compound coat these humming Cannith Power Crystals in a hard, protective layer. You also notice several valves of varying sizes spread around the room.
The cannith crystals are powering the magical barrier and must be removed by the PCs, however the cooling jets must be turned off first. If the PCs come in contact with the jets of freezing water, the Effect is (3d6 cold damage, DC 20 Reflex save for half damage). There are 7 valves, 4 of which can be seen without a Perception check. A DC 10 Perception is required to find the 3 remaining valves. Upon turning the first valve, the PCs hear a definite alteration in the pitch of the hiss as the gas struggles to flow around your obstruction. When all the valves have been turned off the PCs notice that without the alchemical jets coating the Cannith Power Crystals, they can now easily destroy them or remove them from their housings.
As the last crystal shatters, the hum of power slowly fades into a heavy silence.
Treasure Room
This room contains a giant steel cage at the center. Inside the cage are two Rusty Iron Defenders (see Appendix A) and a large treasure chest. The treasure chest is trapped with fire jets. When the trap is triggered while there is grease on the floor the room turns into a fiery inferno.
Iron Gate
The Iron Gate’s lock can be picked with a DC 22 Disable Device. In addition to this, the gate is stuck and requires a Strength check of DC 24 to force it open or the use of lubrication. It has a Hardness of 10; 60 hp to smash.
Treasure
This treasure chest contains Engineer’s Workgloves, 6 Gold Ingots, a Transparent Elemental Gem, and a Bag of Holding Type I.
Fire Jets Trap
CR 2
Type mechanical
Perception DC 22; Disable Device DC 22Effects
Trigger opening chest; Reset none
Effect Burning jets of fire project up from the floor around the chest, as the spell effect (burning hands, 2d4 fire damage, DC 11 Reflex save for half damage); multiple targets (all targets in a squares adjacent to the treasure chest).
Heyton’s Hideout
Beyond where the magical barrier once stood, is an old office that has been converted into a small library and living space.
Lars Heyton has been hiding from sahuagin ambushes in the old Cannith Manufactury, while protected by his bodyguard, Amalgam. Lars Heyton is a descendant of the famous Heyton bloodline of Korthos Village who has protected the island for many generations. Although unwilling to follow in his ancestor's footsteps at first, saying that the villagers of the island are nothing but ingrates, he can eventually be roused into action by the PCs to follow in his ancestor's footsteps and once again save the island from certain doom.
Lars Heyton:
Who in the Flame are you? You, what have you done? My protections are gone! There's nothing stopping the sahuagin now!
Stopping them from what?
They're hunting me, you fool. And you've just cleared the way for them!
The people of Korthos need your help. Then you've wasted your time! generations of my family fought and died, while those selfish wretches did nothing. Those villagers just want me to stand in front of the Sahuagin tide so they don't have to.
But what about Kaja Bauerdatter
Oh no... the Sahuagin found me! (Start battle)
 Credit: ElfsDeathBox360
xxx
Sahuagin Assassination
Suddenly, the air shimmers with Devourer magic. The Sahuagin have followed you in, and are attacking! Heyton's life is in your hands now.
Round 1
Three Sahuagin Berzerkers (see Appendix A) and one Sahuagin Adept (see Appendix A) assault Heyton's hideout. They have orders to kill Lars Heyton but can't really tell the difference between humans. They focus their attacks on Lars and any other human male PCs.
Round 4
Two Sahuagin Elite Guards (see Appendix A) and Murm Dul (see Appendix A - Sahuagin Stalker) arrive four rounds later. Murm Dul is the real assassin. Like the other Sahuagin he can't tell Lars from any other human male, so he targets the human with the least cover with his human bane arrows. The Elite Guards defend him as he tries to slay all of the humans.
Heyton’s Redemption
With the last Sahaugin felled. Lars Heyton laments, "Will it never end? The Sahuagin will keep coming until I'm dead."
Lars Heyton is friendly after the PCs help him defeat the Sahuagin. A DC 12 Diplomacy check moves his attitude to helpful, at which point he reveals what he has learned about the Dragon. Mentioning Kaja gives the PCs a bonus +2 to the check.
If we work together, we can drive the Sahuagin from Korthos Island once and for all.
I've heard talk like that before. But everyone who's stood up to the sahuagin and their pet Dragon is dead!
What about Kaja? Are you going to let her die, too? The Sahuagin have taken her... to the mountain.
Don't you talk about her! No! No... this can't be happening. I won't let it happen. Alright, Alright - I will help you. I've been doing research about the dragon, and I've come to a startling conclusion. I have discovered that the Dragon is not here of its own free will. It is being controlled by a creature most terrible - a Mind Flayer from the depths of Khyber! But therein lies the key... and I have a plan which might just turn the tables. I will meet you at the base of Misery's Peak.
Story Award
Award the PCs 400 XP for keeping Lars Heyton alive during the sahuagin assassination atempt.
Return to Korthos Village
If the PCs return to Korthos Village at any point after the redemption of Lars Heyton, read:
Your finding Heyton transformed the village. It seems as if all of Korthos were holding out for news of your next great victory with bated breath.
Chapter 3: Misery's Peak
Misery's Peak... the very name dampens resolve and bodes ill of things to come. What few return from this place are broken, twisted, deranged slaves of the Devourer. This once blasphemous temple to the Devourer has been converted by the mind flayer Darastrix Achthend into a disturbing laboratory for experimenting with the Mindsunder.
Misery's Peak
Credit: Neverwinter Nights
A bone chilling breeze emanates from the mouth of Misery's Peak as you follow long snow covered canyon to its base. The jungle plants have withered and turned brown from frostbite. Up ahead you see Lars Heyton and the your former party companions, Cellimas, Jeets, and Talbron. They are waiting outside a black stone temple entrance built into the side of the mountain.
The Plan
The temple is made a blacked stone and upon closer look hosts ornate gargoyles set into various menacing postures. The ambient temperature drops to 30 degrees at the mouth of the temple.
Lars Heyton calls the PCs closer to explain his plan:
Lars Heyton says, "You're here! Come, there isn't much time! I believe you are acquainted with my associates. They will be the right hand that draws the enemy out. You will be the left hand that inserts the dagger into the Mind Flayer's back. Metaphorically speaking, of course."
Mind Flayer? What has that to do with the Sahuagin?
Listen. Without the dragon and the cult, the Sahuagin are no more dangerous than they ever have been, and in time we will be able to drive them back into the sea. But as long as the dragon remains, Korthos is doomed. Our hope is that we now know the true story. Just like the cultist villagers, the dragon is not helping the Sahuagin of its own free will: it is being controlled by a Mind Flayer.
How is that possible? I thought Dragons were immune to such things. That is the key my friend. The Mind Flayer is using a magical Quori artifact to magnify its power... something called a Mindsunder. If we can destroy that Mindsunder, the dragon will be released from its control. Then... maybe Korthos will have a chance.
So... you want me to destroy the Quori Mindsunder artifact?
Yes. Cellimas and her group will cause as much ruckus as they can, hopefully drawing off the majority of the enemy forces. Meanwhile, you will find that Quori Mindsunder and shatter it.
1. Guardhouse
Murals depicting nature's wrath adorn the black stone walls of this large chamber. Several humanoid figures surround a glowing ice covered pedestal. Their putrid forms are frozen in contorted poses; their faces set in silent, eternal screams. Two exits, one to the left and one to the right are blocked by a wavering magical barrier. Lars Heyton gestures toward the left doorway and says, “Cellimas and her group will head that way and the other one is for you.”
The Devourer cultists have set 16 zombies in all to watch over the entrance, two Zombies for every person (PC and NPC). The rune is covered in ice casting a purple glow that refracts imperfectly around the chamber. A good hit of the ice will break it but any smashing or melting of the ice also breaks the ice around all of the frozen zombies, who attack immediately. A DC 20 Knowledge (Arcane) or Spellcraft remembers the hand gestures and magical words that shut off the rune. Once it is shut off magical barrier over the two corridors dissipates in a crackle of magic energy. If none of the PCs are able to bring down the barrier then Lars Heyton gives it a try.
2. Cavern of Ice Spiders
After a few minutes of winding through frozen tunnels made of both rock and worked stone. You step into a very large beautiful ice cavern. At one point sizable amounts of water must have flowed through here; a frozen waterfall has created a huge wall of ice down the middle of the cavern. It's obvious that you are not in the main temple anymore.
Three Ghouls and one Wight, Jacoby Drexelhand, wait to ambush the PCs but their ghoulish hunger and the smell of fresh meat makes them impatient. The PCs will remember Jacoby Drexelhand as Heyton's Rest crypt keeper from chapter 1.
On the far side of the cavern a heavy stone door is locked by a pair of Signal Crystals. The control mechanisms are in this cavern: a red one in an alcove on the second floor and a blue one in an alcove on the third floor.
Second Floor
A walkway has been worked into the stone creating a flat ramp that ascends to the second level. The walkway is wide enough for the PCs to travel up single file. The second level is 40 feet above the floor of the cavern. Its floor is mainly made of sheets of slippery ice. This level is where Frostbite and her brood live. The are six Ice spiders (see Appendix A) total scurrying about on this floor. Two have made a nest next to the red lever.
Third Floor
Another shorter walkway has been worked into the stone ascending to a third level. The third level is 20 feet above the second floor and is only a small alcove where Frostbite has made her lair. If the PCs spend 4 rounds fighting the ice spiders she comes down to investigate the noises. The second lever is here. Flipping it turns on a magical signal crystal on the wall. With the second signal crystal activated, the PCs hear the stone door at the base of the cavern rolling open.
Frostbite is an ice spider the size of a horse. She is very stealthy and will crawl silently among the ice looking for an opportune time to strike at the PCs.
Treasure
Frostbite’s lair contains the body of an adventurer. In his pack is a potion of invisibility, scroll of comprehend language, scroll of disguise self, scroll of identify, scroll of tiny hut, wand of cure light wounds (20 charges), a silver mirror (worth 1,000 gp), and 63 gp. His gear includes: +1 leather armor, masterwork dagger, amulet of natural armor +1, and a cloak of resistance +1.
The most important object here is the scroll of comprehend language. It will be useful for the PCs to read the Mind Flayer’s notes later.
Photo Credit: jjpeabody

Frostbite
CR 3
XP 800
N Large vermin
Init +2; Senses darkvision 60 ft., tremorsense 60 ft.; Perception +4Defense
AC 16, touch 11, flat-footed 14 (+2 Dex, +5 natural armor, -1 size)
Hit Points 37 (5d8+15)
Fort +7, Ref +3, Will +1
DR 5/Bludgeoning; Immune mind-affecting effects; Resist cold
Weaknesses fireOffense
Speed 30 ft., climb 30 ft.
Melee icy bite +6 (1d8+6 plus 1d6 cold/19-20)
Ranged freezing ichor +5 (1d4)(
Space 10 ft.; Reach 5 ft.
Special Attack ice web (+4 ranged, DC 19, 5 hp)Statistics
Str 19, Dex 15, Con 16, Int -, Wis 10, Cha 2
Base Atk +3; CMB +8; CMD 20 (32 vs. trip)
Skills Acrobatics +10, Climb +24, Perception +4, Stealth +10 (+21 when stationary); Racial Modifiers +8 Acrobatics, +16 Climb, +4 Perception, +4 Stealth (+15 when stationary)
SQ strong webs, critical strikerSpecial Abilities
Strong Webs (Ex)
A Frostbite's webs are stronger than other spiders, she gains a +4 bonus to the DC to break or escape. Critical Striker (Ex) Frostbite gains a +4 bonus on rolls to confirm critical hits. She also doubles its critical threat range with her icy bite.
3. The Dragon
Chills run down your spine as you finally come face to face with the dragon that has been terrorizing Korthos. Even at rest, it is a truly awesome beast. The once sleeping dragon awakes upon your entry. It looks hungrily in your direction.
The Dragon is sleeping and wakes when PCs enter the cavern. The ceiling is low and there is no room for the dragon to fly in this cavern. Only a small but very deep gorge separates the PCs from the Dragon. The gorge itself is 10 feet wide, jumpable for any foolhardy PCs. The dragon looks hungrily at the PCs and is about to breath ice on them when Cellimas and crew attack him from behind. Leave enough time for the PCs to wonder what happened the Cellimas before introducing them. They fight the dragon for a few moments and then run away with the dragon giving chase.
The door at the rear of the cavern pops open. Cultists, attracted by the roar of combat, rush out to confront you.
Four Devourer Disciples (see Appendix A), one Devourer Acolyte (see Appendix A), and three Zombies confront the PCs. The cultists let the zombies engage in melee while they use ranged attacks.
Treasure
This Acolyte has in his possession a odd shaped Tiger Eye (yellow-brown) gemstone that radiates Transmutation magic. The stone fits in the portal puzzel in the Summoning Chamber.


xxx
4. Catacombs of Honor
Bodies partially frozen in ice are interred into small alcoves in the walls of these catacombs. Are they victims of the cultists or members?
These catacombs are a small maze for the PCs to navigate containing both dangers and treasure. The halls themselves are a narrow 3 feet wide with many of small alcoves in the walls to inter the dead.
Upon entering the catacombs a DC 10 Perception check reveals scratch marks on the walls. These scratch marks are from the ghouls in area E. Another DC 10 Perception check reveals marking or primitive jewelry signifying the Devourer on the bodies. This should be enough for the PCs to assume that they bodies are members of the cult. The bodies are put here as storage, for later use in animating them as undead. Being animated as undead is seen as an honor among the cultists of the Devourer.
The truth path through this maze is regularly traveled by the cultists or the undead in the catacombs, a successful DC 15 Survival check at each intersection is enough to learn the correct path.
Dead End A
This dead end leads to a haunt. So many undead have been created in these catacombs that the hunger for flesh is palpable.
Ghoulish Uprising
CR 4
Type obsessed
Perception Wisdom DC 13 (to notice a sudden increase in the stink of rotten flesh); hp 8Effects
Trigger proximity; Reset automatic (24 hours)
Effect As the ghouls reach for the haunted PC, she must make a DC 16 Will save to shake off the vision and regain her senses. If she fails, the ghouls grab her and begin to tear and bite at her flesh. Observers see the haunted PC jerk and thrash in the air as if she were being shaken by a mob, and suddenly deep red claw and bite wounds appear on her flesh. The haunted PC takes 6d6 points of damage from the assault (half on a DC 16 Fortitude save), and must make a DC 16 Fortitude save to resist catching ghoul fever.
Dead End B
A lower alcove contains a body still wearing excellent quality boots. The boots can be detected as magical with a detect magic spell and radiate an aura of Transmutation. A DC 18 Perception check notices the boots look much nicer than the other clothes.
These boots are Anger’s Step (See Appendix B).
Hallway C
This is a long hallway contains more alcoves with dead interred into the walls. The ice, however hasn’t as heavily entombed these bodies. Bones shift in one of the alcoves as the PCs walk down the hallway (the movement of the bones is innocuous and is to set atmosphere). At the far end of the hallway. an eerie red light glows from a Devourer altar ahead. The altar is tough to see until the PCs get closer, and is covered in bloodstains. The wight of Drenyl Fallow uses this altar to animate the dead for the cultists. He waits in Dead End D for all the PCs to approach the altar then will attack them from behind.
Dead End D
The Wight Drenyl Fallow waits in this alcove. Before combat he yells at the PCs for disturbing the holy sacrum of the Devourer. When he recognizes them as the ones who stopped his sacrifice of Arissa Storr from the Sahuagin lair he becomes more enraged. Perceptive PCs will remember Drenyl Fallow as the necromancer they defeat to save Arissa Storr.
Dead End E
Two Ghouls have dragged a body in here and are feeding. When they hear adventurers, possibly battling Drenyl Fallow, they will come out to investigate.
Dead End F
Four Zombies frozen in ice. Their expressions of horror still cast in ice. Their eyes track the PCs as they wander into this area but can't break free of the ice on their own. Drenyl Fallow or a ghoul may escape a losing fight to this area and free the zombies for reinforcements.
Catacomb Map

5. Ice Bridge
A Disciple of the Devourer yells from atop what appears to be a platform made of ice, “Don't let them pass! Don't let them get to the summoning chamber!” Other Disciples begin raining arrows down on you.
Tactical Encounter: Five Devourer Disciples (see Appendix A) shoot at the PCs from atop an ice bridge, PCs must run under the ice bridge to get to the stairs 40 feet down a slight slop at the other end of cavern. At the end of the tunnel is a locked stone door. Stairs made of ice backtrack up to the ice platform. Jumping up to the platform is nearly impossible as it is 15 feet above the PCs and is made of slippery ice. Once atop the ice bridge the PCs will find a lever that opens the stone door.
Upon pulling the lever you feel fresh, frozen air gust in from the newly opened door below.
6. Dragon Distraction
As the PCs journey further into the mountain they come upon an ice cavern. Here they see the dragon chase after Cellimas, Jeets and Talbron below them.
The ground quavers, and you look down to see a tunnel beneath the translucent ice. The dragon roars as it thunders after Cellimas, Jeets and Talbron. The ruse is working!
A DC 12 acrobatics check keeps the PCs from slipping and falling down on the ice as the dragon passes through the cavern below.
7. Summoning Chamber
The caves open to another large room built from worked stone. Flags are hung from the ceiling to give the room a feeling of importance. From atop a large circular dais, a Devourer Acolyte says, 'Our foe is upon us! Summon the demon now!' Five acolytes continue their chanting, until seconds later all exclaim, 'So cold...' as they turn to ice and shatter. Cold mists emanate from the frozen shards, finally congealing into an ice demon at the center of the summoning circle.
An Ice Flenser is summoned and attacks the PCs immediately. If they are having an easy time fighting the Ice Flenser, the two Devourer Acolytes (see Appendix A) come through the portal to the transformation chamber to check out the commotion.
Ice Flenser

Portal Puzzle
Toward the back of the summoning chamber lies an empty rune carved stone archway. In front of this archway sits a pedestal and a stone bowl. On further inspection of the pedestal, there are nine slots arranged in a 3x3 grid; six of the slots contain a gemstone. The bowl is made from bone and holding a single Obsidian gemstone.
There are nine gemstones total, six of which are in the pedestal, the three that are missing are the Obsidian which is in the bowl, the Tiger Eye (yellow-brown) which is carried by the acolyte from The Dragon chamber, and Malachite (green) which is in the brain laboratory. The portal in the stone archway doesn't activate until all but two of the stones are removed from the slots - the Labradorite stone and one other. Only the labradorite with one other stone will produce an effect. Solving the puzzle requires a casting of detect magic and a DC 15 Spellcraft check to determine the stones’ auras. Or the PCs can play around with various combinations of stones until they get one combination right.
The Solution: There are three correct solutions: the large labradorite stone must go in the center and only be placed with one other stone. The labradorite and the Quartz (clear) activate the portal leading to the Laboratory, the Tiger Eye (yellow-brown) leads to the Transformation Chamber, and the Malachite (green) gemstone found in the Laboratory leads to the Inner Sanctum.
Effects: If all stones are inserted then there is a blast of force energy that ejects all of the stones and does 2d6 damage to all in a 10 ft. radius. A successful DC 12 Reflex saves for half damage. Other wrong combinations of three or more don't produce any effect. The Lapis Lazuli (blue) gemstone produces a birds eye view of Korthos Island between the stone arch. It is actually a portal, but falling through would cause fatal damage. The Bloodstone (black-red) and Obsidian (black) activate the shocking grasp trap. Finally, the Opal (rainbow) produces a illusionary portal. When walked through nothing happens. (See Portal Puzzle chart.)
Ice Flenser
CR 6
A pair of frozen, multifaceted eyes coldly judge all before this towering, demonic monstrosity.
XP 2,400
CE Large outsider (demon, evil, extraplanar, chaotic)
Init +6; Senses darkvision 60 ft., see invisibility, Perception +19Defense
AC 21, touch 11, flat-footed 19 (+2 Dex, +10 natural, -1 size)
Hit Points 70 (7d10+28)
Fort +9, Ref +7, Will +3
Defensive Abilities DR DR 2/cold iron or good; Immune cold; Resist acid 5; SR 17
Weaknesses fireOffense
Speed 30 ft.
Melee bite +11 (1d8+5 plus chilling attack)
Melee (primary) +12/+12 (1d8+5 plus 1d4 cold)
Space 10 ft.; Reach 10 ft.
Spell-Like Abilities (CL 4th)
At will -Ray of Frost
3/day - Ice Spears (DC 12), Ice Shards (DC 12)
1/day - Ice StormStatistics
Str 21, Dex 14, Con 18, Int 12, Wis 13, Cha 14
Base Atk +7; CMB +13; CMD 25
Feats Combat Reflexes, Improved Initiative, Multiattack, Simple Weapon Proficiency, Weapon Focus (Claw)
Skills Acrobatics +6 , Climb +6 , Disable Device +12 , Escape Artist +12 , Perception +19 , Sense Motive +11 , Sleight of Hand +12 , Stealth +16
Languages Abyssal, Celestial, Draconic, Telepathy100 ft.
SQ aligned (chaotic, evil), darkvision 10, immunity to coldSpecial Abilities
Chilling Attack (Su)
A hit from an Ice Flenser bite induces numbing cold. The opponent must succeed on a DC 14 Fortitude save or be affected as paralysis.
Ice Shards (Sp)
Ice shards works the same as the spell burning hands, with the difference being the Ice Flenser shoots ice shards from its hands in a 15 ft. cone instead of flames. The ice shards deal 4d4 damage with a DC 12 Reflex saving throw for half damage.
Shocking Grasp Trap
CR 2
Type mechanical
Perception DC 20; Disable Device DC 20Effects
Trigger location; Reset automatic reset
Effect Atk +10 melee (2d6)
Hints: You can allow characters to make Intelligence checks to represent their ability to solve the puzzle. A DC 15 Intelligence or 10 Knowledge (Arcana) check reveals the stone archway can become a portal if the right stones are put on the pedestal. After using detect magic on the gemstones, a DC 20 Intelligence or 15 Knowledge (Arcana) check reveals the each of the gemstones represent one of the schools of magic. A DC 10 Perception check notices that the Labradorite stone is larger than the rest and the center hole on the pedestal grid is larger.
Portal Puzzle
| Stone Color | Magical Aura | Location or Effect |
|---|---|---|
| Carnelian (orange) | Abjuration | None |
| Labradorite (blue-yellow) | Conjuration | Activates Portal |
| Lapis Lazuli (blue) | Divination | View of Korthos Island |
| Malachite (green) | Enchantment | Link to Inner Sanctum |
| Bloodstone (black-red) | Evocation | Trap |
| Opal (rainbow) | Illusion | False Portal |
| Obsidian (black) | Necromancy | Trap |
| Tiger Eye (yellow-brown) | Transmutation | Link to Transformation Chamber |
| Quartz (clear) | Universal | Link to Brain Laboratory |
8. Transformation Chamber
This portal opens to an elongated worked stone chamber. Alien looking crystal containers line the walls, each holding a single prisoner. It appears as though they are trying to speak to you.
The mind flayer imprisons people here for testing the capabilities of the Mindsunder. The transformation chamber contains 20 cells, ten on each side. The crystal of the containers muffles any sound from the prisoners. This prison is guarded by two Devourer Acolytes (see Appendix A). They will be alarmed when the portal opens if they did not already leave to help the Ice Flenser fight off the PCs.
A DC 25 disable device check unlocks the alien looking containers. Some house humanoids and others Sahuagin but all the prisoners are unconscious. Upon waking the prisoners there is a 50% chance that the are insane. An insane prisoner gains the confused condition permanently. The other prisoners are disoriented but thank the PCs for saving them. Some of the prisoners were not from Korthos Island but were brought here after their ship had been attacked by Aussircaex.
Story Award
For every prisoner saved award the PCs 50 XP.
9. Laboratory
The portal opens to balcony atop a long flight of stairs. From the vantage point you can survey a large chamber, cold and rocky much like the rest of the mountain. You can only assume that you are still inside Misery's Peak. This chamber appears to be some sort of profoundly disturbing laboratory. Inhuman art hangs from the wall, in an alien attempt to give the room a homelike feel. The chamber has been divided in two by an ovaloid hole in the floor at the center of the chamber. One half is an office with desk, bookshelves, and unusual jars. The other half is a laboratory, with strange instruments, and a humanoid is strapped to a wooden post. Your presence has disturbed something, noisy rustling emanates from the hole in the floor in the center of the chamber.
This room is divided into two parts, the brain library and the laboratory, separated by a deep pit. The rustling is coming from this pit which is filled with Cranium Rats.
Brain Library
Mind flayers do not collect books, but study still living brains. Vats of throbbing brains and other assorted organs line shelves of this section. Some are in more ornate containers, revealing their exceptional nature. Others of various sizes sit in dirty, bloody, or slime covered jars. One very large jar at the center is host to a still living brain devoid of any features at all save for four short, clawed legs, and a body that looks like a large, glistening brain. This is a gaunt Intellect Devourer, with 50 hp and the fatigued condition. Despite its torchered state, should the PCs set it free, it will most certainly over power them and try to steal one of their bodies.
Only one shelf contains books in this whole library, most of which are unreadable. The books are written in a form of written language called Qualith, which consisted of patterns of four lines imbued with psionic energy, capable of conveying not only text but also the author's thoughts. Without the use of magic, the books are extremely difficult to read for non-mind flayers and usually required magic such as a comprehend languages spell to decipher.
A DC 10 Perception check notices items stashed inside the desk in the corner of the chamber, notes and a green gemstone. The notes are written in Qualith detail the use of the Mindsunder in the brainwashing experiments, catalogues of the prisoners in the “transformation chamber”, bodies recovered from shipwrecks caused by the Aussircaex, and of the benefits of using the gullible cultists. The gemstone is Malachite (green) and radiates an aura of enchantment. This gemstone is the key to the Inner Sanctum.
Darastrix Achthend's Note
The Mindsunder appears to be a very powerful artifact; capable of enslaving more than a hundred humanoids. I have cause to believe that it could enslave an entire city, but in order to test this hypothesis I must move to the city of Stormreach. I will find a new cult to dominate and start again on a grander scale. This is the beginning of a new Illithid Empire.
Laboratory
This is where Darastrix Achthend performs most of his experiments. Blood is frozen to the floor, a long table is set into the wall contains surgical tools haphazardly strewn across its surface. Eight tall wooden posts have been driven into the ground. Chains hang empty from the top of posts, except for one. Kaja Bauerdatter is strapped to one of the posts and is unconscious. Upon being woken, she is exhausted from mental torture, but mentally stable. A DC 25 Disable Device check unlocks her chains, while breaking them requires a Strength check (DC 26).
Story Award
Give the PCs 1,200 xp for finding and deciphering the notes on the desk. And another 800 xp for freeing Kaja Bauerdatter.
10. Inner Sanctum
Waves of psychic energy pound into you as the portal opens into a very large cavern. Covering the floor of the icy cavern are piles of gold coins and gemstones. The Mind Flayer, Darastrix Achthend, is on a dias, locked in a contest of wills with the ancient white dragon. Darastrix Achthend commands, 'OBEY'. You spot a green crystal on the ledge ahead. At last! This must be the Quori Mindsunder! Darastrix Achthend again commands, 'YOU WILL OBEY'. This could be your chance to destroy the Mindsunder!
This is the PCs chance to destroy the Mindsunder and free the dragon. Each round Aussircaex will make a DC 27 Will Save against the Mind Flayer’s domination at initiative count 20. She has to obtain 4 successful Will Saves before she receives 3 failures. If she fails 3 times the Mind Flayer has won the contest of wills and reasserts his will over the dragon. This will end badly for the PCs who will now have to contend with an ancient dragon and a Mind Flayer.
Some PCs can aid Aussircaex in her attempts to resist domination by the Mind Flayer by using the Aid Another action and beating a DC 10 Will Save or by using spells such as Resistance, Guidance, etc. When the Mindsunder is destroyed, the save against the Mind Flayer’s domination becomes a DC 17.
Aussircaex’s Skill Challenge
Ancient White Dragon (Will +16): The GM rolls for Aussircaex on initiavite count 20. She must succeed against a DC 27 (or 17 without the Mindsunder's influence) four times before three failures.
Mindsunder (Artifact)
Hardness 0, HP 54, DR 5/ Magic
Effects
Effect When attacked the Mindsunder releases a psionic pulse. Everyone within 10 ft. takes 2d6 points of damage from the psionic pulse (half on a DC 16 Fortitude save).
If the PCs succeed aiding the dragon read:
The Mind Flayer shrieks as it loses the Mindsunder's power. The dragon reasserts its will... and looks very annoyed. Aussircaex breathes out a cone of ice freezing the mind flayer solid. Seconds later, the frozen body shatters into a thousand tiny shards of ice and flesh. The ancient white dragon growls as it approaches you, “You think I owe you gratitude? I was seconds from breaking myself free. You have destroyed the Mindsunder and my plans! I owe you nothing but death.”
Dragon Negotiation
She is unfriendly by nature, a DC 23 Diplomacy check is required to improve her attitude. Despite this surly nature, the PCs still gain a +10 circumstance bonus for destroying the Mindsunder and setting her free. If they succeed at improving her attitude to indifferent she decides let's the PCs live. If they beat to DC by more than 5, her attitude improves to friendly and she will reward them with treasure from her horde. In parting she tells the PCs that she wants to be rid of this place and plans to go back North soon.
Treasure
Dragon hoard: Aussircaex’s has only been building her hoard since she and the mind flayer moved into Misery's Peak so its relatively small. She has a much larger hoard in a place far to the North called Aussircaex’s Valley. The hoard contains 12,000 cp, 1,600 sp, 400 gp, 19 pp, three amethyst gemstones, two jade statues, holy symbol made of platinum (500 gp), a golden mask (450 gp), Protector's Brooch (see Appendix B), Devoted Necklace (see Appendix B), and 5 masterwork weapons or armor. Aussircaex’ is willing to offer the PCs 4,400 gp worth of coins and jewels, plus the two magical items Protector's Brooch and Devoted Necklace.

Concluding the Adventure
Jeets Shimis yells from behind you, "Hey! Over here! Follow me! Heyton wants a word with you. By the way, Next time, you fight the Dragon and I'll break the crystal."
Jeets leads the PCs back through the portal to the Summoning Chamber, not before stealing a large jewel from the Dragon’s hoard first. In the Summoning Chamber, Lars Heyton is with Cellimas and Talbron who look very beaten up. Lars greets the PCs:
Lars Heyton greets you with a look of astonishment , “You are a wonder. To be truthful, I did not actually think this plan would work. I was ready to die in a blaze of glory.”
Yes, we won. I wonder what will challenge me, now that I've faced a Dragon.
Ha! Well don't worry, there's always a bigger evil beyond the horizon. In fact, speak with Rinar d'Thuranni if you truly fancy an adventure. He's at the village pier, and he can take you to Stormreach. You'll find plenty of evil there, haha!
I'll seek him out at the Korthos docks. Thank you, and farewell, Lars Heyton.
Here, take this portal, so you won't have to walk back.
What will become of you now?
I will return to be with my people in Korthos and remain at watch, should the Dragon return.
nnn
Lars Heyton configures the portal to take the PCs back to Korthos Village. The portal opens with a view of the Village Gates.
And like magic, the snows stopped. "Savior of Korthos!" they cheer as you return. But destiny has greater plans for you than just this small village.
Continuing the Campaign
Heading to Stormreach
Stormreach is the largest city located on the newly discovered continent of Xen’Drik. The fledgling city was built atop the ruins of an ancient city believed to be a lost civilization of giants. Stormreach boasts a population of over 11,650 half of whom are humans. Currently, Stormreach is governed by five nobles called the Storm Lords. The Storm Lords often finance expeditions into the continent of Xen’Drik to discover what riches it has to offer.
Hunting Down the Sahuagin
If the PCs stay on Korthos Island, a group of rebel Sahuagin contact them, revealing that not all of their kind are bent on dominating the Shargon’s Teeth Islands and sacrificing landwalkers. The PCs help the Sahuagin rebels restore the balance of power in their underwater kingdom by traveling to the underwater city, and attempting an insurrection that deposes the Sahuagin’s corrupt Prince.
Appendix A: Bestiary
This appendix details monsters the that PCs will encouter thoughout their adventure on Korthos Island. The monsters that appear here are not found anywhere else in the Pathfinder Bestiaries or on the web.
Korthos Island Random Encounters
| Roll | Encounter |
|---|---|
| 1 | 1d3 Dire Rats |
| 2 | 1d4 Devourer Cultists |
| 3 | Ice Spider |
| 4 | 1d3 Sahuagin Warriors |
| 5 | Venomous Snake |
| 6 | 1d6 Zombies |
Sahuagin
Ravenous and cruel, the sahuagin are, unfortunately, among the most prosperous oceanic races. Great cities raised by these creatures darken the deep ocean trenches, and many are the near-coastal fortresses where they launch endless raids against their air-breathing enemies who dwell in close proximity to the shore. Warlike and proud, the sahuagin rarely ally with others, and view most other aquatic races such as the aboleths, the merfolk, and their ilk as competitors. The only creatures they seem to respect and adore apart from their own kind are sharks, for in these relentless predators the sahuagin see much of themselves. A sahuagin stands 7 feet tall and weighs about 250 pounds.
Sahuagin Warrior
CR 1/3
XP 135
LE Medium monstrous humanoid (aquatic)
Init +1; Senses blindsense 30 ft., darkvision 60 ft.; Perception +3Defense
AC 13, touch 11, flat-footed 12 (+1 Dex, +2 natural)
Hit Points 7 (1d10+2)
Fort +4, Ref +1, Will -1
Weaknesses light blindnessOffense
Speed 30 ft., swim 60 ft.
Melee trident +2 (1d8+1)
Ranged heavy crossbow +2 (1d10/19–20)
Special Attacks blood frenzyStatistics
Str 14, Dex 13, Con 14, Int 10, Wis 9, Cha 10
Base Atk +1; CMB +3; CMD 14
Feats Great Fortitude
Skills Perception +3, Swim +13
Languages Aquan, Common; speak with sharks
SQ amphibious
Gear trident, underwater heavy crossbow with 10 boltsSpecial Abilities
Blood Frenzy (Ex)
Once per day, a sahuagin that takes damage in combat can fly into a frenzy in the following round. It gains +2 Constitution and +2 Strength, but takes a –2 penalty to its AC. The frenzy lasts as long as the battle or 1 minute, whichever is shorter.
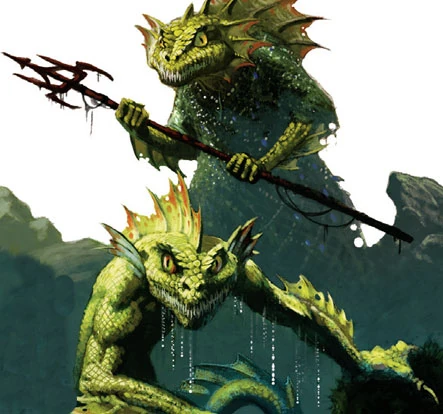
Sahuagin Items
Bag of Urchins
Some sahuagin carry bags of these diminutive sea creatures to throw at enemies. When struck by a sea urchin a creature must make a Fortitude save or be poisoned. Posion - injury; save Fort DC 12; frequency 1/round for 6 rounds; effect 1d2 Dex and reduce movement speed by 10 feet (to a minimum of 5 feet); cure 1 save.
Throwing Octopi
Octopi are a favorite of Sahuagin throwers. When thrown at an enemy combatant the octopus either preforms a tentacle +3 (grab) or a bite +5 (1d3+1 plus poison). More information on Octopi can be found in the Bestiary.
Sahuagin Veteran
Sahuagin Veteran
CR 1
XP 400
LE Medium monstrous humanoid (aquatic)
Init +2; Senses blindsense 30 ft., darkvision 60 ft.; Perception +3Defense
AC 15, touch 12, flat-footed 12 (+2 Dex, +3 natural)
Hit Points16 (2d10+4)
Fort +2, Ref +2, Will +1
Weaknesses light blindnessOffense
Speed 30 ft., swim 60 ft.
Melee mwk trident +5 (1d8+3)
Special Attacks blood frenzyStatistics
Str 16, Dex 15, Con 14, Int 10, Wis 9, Cha 10
Base Atk +1; CMB +4 (+8 trip); CMD 16
Feats Improved Trip or Weapon Focus
Skills Perception +3, Swim +13
Languages Aquan, Common; speak with sharks
SQ amphibious
Gear masterwork tridentSpecial Abilities
Blood Frenzy (Ex)
Once per day, a sahuagin that takes damage in combat can fly into a frenzy in the following round. It gains +2 Constitution and +2 Strength, but takes a –2 penalty to its AC. The frenzy lasts as long as the battle or 1 minute, whichever is shorter.
Variants
Elite Guard
Feat: Improved Trip
Tactics: During Combat The Elite Guard like to trip their foe. They will always move into a position to put themselves between their priestess and danger. Morale As long as the priestess lives they will fight to the death.
Berzerker
Special Ability: Rage (8 rounds/day)
Tactics: During Combat The sahuagin enters a rage as soon as combat starts. Morale These sahuagin are careless and will fight to the death.
Thrower
Feat: Throw Anything
Tactics: During Combat The Thrower will throw objects like octopi, sea urchins, and tanglefoot bags into combat. (See Sahuagin Items)
Sahuagin Priestess
Sahuagin Priestess
CR 3
XP 800
LE Medium monstrous humanoid (aquatic)
Init +0; Senses blindsense 30 ft., darkvision 60 ft.; Perception +8Defense
AC 15, touch 12, flat-footed 12 (+2 Dex, +3 natural)
Hit Points27 (3d10+6)
Fort +2, Ref +2, Will +6
Weaknesses light blindnessOffense
Speed 30 ft., swim 60 ft.
Melee Spear +3 (1d8+2)
Special Attacks blood frenzy, channel negative energy 3/day (DC 11, 1d6), destructive smite (+2, 6/day)
Domain Spell-Like Abilities (CL 2th; concentration +5)
7/day—icicle (1d6+2 cold)
Cleric Spells Prepared (CL 2th; concentration +5)
1st — cure light wounds, magic weapon, inflict light wounds, true strike D
0 (at will) — bleed (DC 14), detect magic, guidance, resistance
D - Domain spell; Domains Destruction, WaterStatistics
Str 15, Dex 10, Con 14, Int 12, Wis 16, Cha 11
Base Atk +1; CMB +3; CMD 12
Feats Brew Potion, Combat Casting, Toughness
Skills Knowledge (Religion) +8, Perception +8, Spellcraft +11, Swim +15
Languages Aquan, Common; speak with sharks
SQ amphibious
Combat Gear wand of cure moderate wounds (11 charges); Other Gear dagger, gold unholy symbol (worth 100 gp), 37 gpSpecial Abilities
Blood Frenzy (Ex)
Once per day, a sahuagin that takes damage in combat can fly into a frenzy in the following round. It gains +2 Constitution and +2 Strength, but takes a –2 penalty to its AC. The frenzy lasts as long as the battle or 1 minute, whichever is shorter.
Sahuagin Wizard
Sahuagin Wizard
CR 2
XP 600
LE Medium monstrous humanoid (aquatic)
Init +1; Senses blindsense 30 ft., darkvision 60 ft.; Perception +5Defense
AC 18, touch 11, flat-footed 17 (+1 Dex, +4 armor, +3 natural)
Hit Points19 (3d6+6)
Fort +2, Ref +3, Will +3
Weaknesses light blindnessOffense
Speed 30 ft., swim 60 ft.
Melee trident +3 (1d8+3)
Special Attacks blood frenzy
Wizard Spells Prepared (CL 3rd; concentration +6)
2nd — protection from arrows, false life
1st— magic missile, mage armor
0 (at will) — acid splash, cold ray, message
Bloodline arcaneTactics
Before CombatThe wizard uses her wand to cast mage armor.
Base Statistics Without mage armor, the wizard's statistics are AC 12, touch 12, flat-footed 10.Statistics
Str 15, Dex 13, Con 12, Int 17, Wis 10, Cha 8
Base Atk +1; CMB +2; CMD 13
Feats Combat Casting, Point-Blank Shot, Scribe Scroll
Skills Acrobatics +4, Climb +2, Knowledge (arcana) +9, Perception +5, Spellcraft +9 (+11 to identify magic item properties)
Languages Aquan, Common; speak with sharks
SQ amphibious
Combat Gear potion of cure light wounds, 1st level scroll Other Gear spellbook, 113 gp
Variants
Necromaner
Special Attack: 6/day—grave touch (1 round)
Tactics: During Combat The necromacer orders his undead to attack while casts ranged spells.
Adept (Evoker)
Special Attack: 6/day—force missile (1d4+1)
Tactics: During Combat The evoker casts missile spells from a distance.
Sahuagin Stalker
Sahuagin Stalker
CR 4
XP 1,200
Sahuagin Ranger 2
LE Medium monstrous humanoid (aquatic)
Init +3; Senses blindsense 30 ft., darkvision 60 ft.; Perception +9Defense
AC 18, touch 13, flat-footed 15 (+3 Dex, +5 natural)
Hit Points40 (4d10+18)
Fort +7, Ref +9, Will +5, +2 vs. ongoing effects
Weaknesses light blindnessOffense
Speed 30 ft., swim 60 ft.
Meleemwk longspear +8 (1d8+4/×3), bite +2 (1d6+3) or 2 claws +7 (1d4+3), bite +7 (1d6+3)
Ranged mwk underwater heavy crossbow +8 (1d10/19–20)
Special Attacks blood frenzy, combat style (archery), favored enemy (humans +2)Statistics
Str 17, Dex 17, Con 18, Int 14, Wis 15, Cha 6
Base Atk +4; CMB +7; CMD 20
Feats Point Blank Shot, Precise Shot, Rapid Reload
Skills Handle Animal +5, Knowledge (geography) +9, Knowledge (nature) +9, Perception +9, Stealth +10, Survival +9, Swim +18
Languages Aquan, Common; speak with sharks
SQ amphibious, track +1, wild empathy +0
Combat Gear potion of cure light wounds, +1 human-bane bolts (3); Other Gear mwk longspear, mwk underwater heavy crossbow with 20 bolts, agate earring worth 25 gp, pearls (7, worth 100 gp each), 18 gpSpecial Abilities
Blood Frenzy (Ex)
Once per day, a sahuagin that takes damage in combat can fly into a frenzy in the following round. It gains +2 Constitution and +2 Strength, but takes a –2 penalty to its AC. The frenzy lasts as long as the battle or 1 minute, whichever is shorter.
Devourer Cultists
Brainwashed villagers who commune with destructive powers of nature and undeath find themselves shunned by the fearful residence of Korthos Island and branded heretics. Acolytes and Disciples are the rank and file of the Devourer cult. They tend to go down quickly.
Devourer Acolyte
Devourer Acolyte
CR 1
XP 400
LE Medium human Sorcerer 2
Init +2; Senses Perception +0Defense
AC 16, touch 12, flat-footed 14 (+4 armor, +2 Dex)
Hit Points11 (2d6+4)
Fort +1, Ref +2, Will +3Offense
Speed 30 ft.
Melee sap +2 (1d6+1 nonlethal) or mwk spear +3 (1d8+1/×3) or unarmed strike +2 (1d3+1 nonlethal)
Spells Known (CL 2nd; concentration +4)
1st (5/day)— magic missile, mage armor
0 (at will) — acid splash, ray of frost, detect magic, message
Bloodline arcaneStatistics
Str 13, Dex 14, Con 12, Int 10, Wis 10, Cha 15
Base Atk +1; CMB +2; CMD 14
Feats Combat Casting, Eschew Materials
Skills Intimidate +7, Knowledge (religion) +2, Spellcraft +5
Languages Common
SQ arcane bond (spear), bloodline arcana Combat Gear sap, bonded masterwork spear, priestly robe, 13 gp

Credit: D&D Monster Manual
Devourer Disciple
Devourer Disciple
CR 1/3
XP 135
NE Medium human Adept 1
Init +1; Senses Perception +1Defense
AC 14, touch 11, flat-footed 13 (+3 armor, +1 Dex)
Hit Points5 (1d6+2)
Fort -1, Ref +1, Will +3Offense
Speed 30 ft.
Melee morningstar +0 (1d8) or silver dagger +0 (1d4/19–20)
Ranged longbow +1 (1d6)
Adept Spells Prepared (CL 1st; concentration +2)
1st — bless, cure light wounds
0 — guidance, light, mendingTactics
During Combat The adept attacks with her morningstar and cast cure light wounds if needed.
Statistics
Str 10, Dex 12, Con 8, Int 9, Wis 13, Cha 10
Base Atk +0; CMB +0; CMD 11
Feats Weapon Proficiency (longbow), Toughness
Skills Heal +7, Spellcraft +3
Languages Common
Combat Gear scroll of cure light wounds, scroll of sleep, alchemist’s fire; Other Gear studded leather, morningstar, silver dagger, shortbow, healer’s kit, holy symbol, smokestick, spell component pouch, tindertwig, 9 gp
Ice Spider
Ice Spider
CR 1/2
A spider the size of a man crawls silently among the ice.
XP 200
N Medium vermin
Init +2; Senses darkvision 60 ft., tremorsense 60 ft.; Perception +4Defense
AC 13, touch 13, flat-footed 11 (+2 Dex, +1 natural armor)
Hit Points11 (2d8+2)
Fort +1, Ref +2, Will +0
Immune mind-affecting effects Resist cold
Weaknesses fireOffense
Speed 30 ft., climb 20 ft.
Melee icy bite +2 (1d4 plus 1d4 cold)
Ranged freezing ichor +3 (1d4)(
Special Attack ice web (+3 ranged, DC 11, hp 2)Statistics
Str 10, Dex 15, Con 12, Int -, Wis 10, Cha 9
Base Atk +1; CMB +1; CMD 12 (24 vs. trip)
Skills Acrobatics +10, Climb +24, Perception +4, Stealth +10 (+21 when stationary); Racial Modifiers +8 Acrobatics, +16 Climb, +4 Perception, +4 Stealth (+15 when stationary)
 Credit: Dragon's Dogma
Arcane Skeleton
Arcane Skeletons are usually regarded as the most dangerous type of skeletons adventurers will encounter due to their powerful spellcasting. Luckily, for them the arcane skeletons have few hit points. Skeletons are the animated bones of the dead, brought to unlife through foul magic. While most skeletons are mindless automatons, arcane skeletons possess an evil cunning imparted to them by their animating force—a cunning that allows them to cast deadly spells.
Arcane Skeleton
CR 2
XP 600
NE Medium undead
Init +7; darkvision 60 ft.; Perception +5
Aura Death Aura (DC 14)Defense
AC 15, touch 13, flat-footed 12 (+3 Dex, +2 natural)
Hit Points 25 (1d8+4d6+4)
Fort +1, Ref +4, Will +8
DR 5/bludgeoning; Immune cold, undead traitsOffense
Speed 30 ft.
Melee quarterstaff +5 (1d6+3)
Special Attacks grave touch, power over undead ~ command undead
Wizard Spells Prepared (CL 3rd; concentration +7)
2nd — scorching ray, ghoul touch (DC 16)
1st— magic missile, cause fear (DC 15) , chill touch (DC 15) , *ray of enfeeblement (DC 15)
0 (at will) — acid splash, ray of frost
Opposition Schools - enchantment, illusionStatistics
Str 13, Dex 15, Con -, Int 17, Wis 14, Cha 10
Base Atk +2; CMB +3; CMD 13
Feats Command Undead, Improved Initiative, Scribe Scroll, Spell Focus (Evocation, Necromancy)
Skills Perception +5 , Spellcraft +8
Languages none
SQ arcane bond
Combat Gear none
Other Gear quarterstaff, spellbookSpecial Abilities
Death Aura (Su)
The Arcane Skeleton is surrounded by a 10 ft. aura of negative energy that deals 1d4+4 points of damage. A successful DC 13 Will save reduces the damage by half.
Iron Defender
While resembling a dog in form, the iron defender could never be mistaken for a living creature. Composed of iron plates and bars, this construct creature has become increasingly easy to find among ruins and dungeons of Xen'drik. Wizards and sorcerers have long used them to protect hidden stores of treasures for years, but of late adventurers have reported finding these cheaply-produced constructs in areas where no intelligent life could be found, still patrolling and following the orders of some long-lost creator.
In combat, the iron defender relies almost exclusively on its bite, using a mouth filled with blades of serrated metal. In Xen'drik, the common variety of iron defenders has been upgraded; a small pouch just behind the iron defender's mouth can spew out a layer of slippery grease out before a foe.

Rusty Iron Defender
CR 1/2
The creature resembles a dog, but its body is formed from iron plates and bars. It stands about two feet high at the shoulder. Its mouth is lined with serrated blades of steel.
XP 200
N Small Construct
Init +2; Senses darkvision 60 ft., low-light vision; Perception +4Defense
AC 15, touch 13, flat-footed 13 (+1 size, +2 Dex, +2 natural)
Hit Points 11 (1d10+5)
Fort +0, Ref +2, Will +0
Immune constructOffense
Speed 50 ft.
Melee Bite +5 melee (1d6+3 plus trip)
Special Attack Grease breathStatistics
Str 16, Dex 15, Con -, Int 8, Wis 11, Cha 7
Base Atk +1; CMB +4; CMD 16 (20 vs. trip)
Feats Weapon Focus (Bite)
Skills Perception +4, Stealth +3Special Abilities
Grease Breath (Ex)
The iron defender breathes out grease covering a 10 ft. square. Any creature in the area when the iron defender uses its breath weapon must make a successful DC 12 Reflex save or fall down. This is usable once every 1d4 rounds.
Appendix B: Magic Items
Anger's Step
Aura minor transmutation
Slot feet; Price 4,950 gp; Weight 1 lb.
DESCRIPTION
These sturdy boots enable the wearer to gain quick boosts of spped, granting a +3 competence bonus on Acrobatics checks when jumping. Twice per day, the wearer may cast the spell Expeditious Retreat on themselves as a standard action.
Feather Cloak
Aura faint transmutation
Slot back; Price 1,500 gp; Weight 2 lb.
DESCRIPTION
This cloak is feels lighter than most. Once per day, the wearer may cast the spell Feather Fall as an immediate action.
Fintan’s Bite
Aura minor conjuration
Slot none; Price 1,400 gp; Weight 2 lbs.
DESCRIPTION
This masterwork scimitar bestows a temporary hit point when it deals a critical hit. The sword wielder gains 1d10 temporary hit points each time it critically hits. These temporary hit points last for 24 hours.
Pathfinder's Boots
Aura faint transmutation
Slot feet; Price 2,500 gp; Weight 1 lb.
DESCRIPTION
These soft boots enable the wearer to move nimbly about in virtually any surroundings, granting a +2 competence bonus on Acrobatics checks and an increased Movement +5 ft.
Ring of Waterbreathing
Aura faint transmutation
Slot finger; Price ; Weight —
DESCRIPTION
This ring feels wet to the touch. Once per day, the wearer may cast the spell Water Breathing on themselves as a standard action.
Runic Gloves
Aura faint divination
Slot hands; Price 2,200 gp; Weight —
DESCRIPTION
These gloves are covered in bright blue runes. The wearer of these gloves receives a +3 competence bonus to Use Magical Device checks and can employ detect magic while holding an object. A faint aura corresponding to its magical school will glow around the object if it is magical.
Thera’s Rapier
Aura minor conjuration
Slot none; Price 1,250 gp; Weight 2 lbs.
DESCRIPTION
This masterwork rapier is keyed to monsterous humanoids. If it strikes such a creature it deals an extra 1d6 damage. To any other creature it acts as a normal masterwork rapier.
Troubleshooter's Goggles
Aura faint divination
Slot eyes; Price 2,500 gp; Weight —
DESCRIPTION
The lenses of this item are made of special crystal. When placed over the eyes of the wearer, the lenses enable her to see much better than normal granting her a +2 competence bonus on Disable Device and Perception checks. Both lenses must be worn for the magic to be effective.
Dragon's Hoard
Devoted Necklace
Aura faint conjurgation
Slot neck; Price 9,575 gp; Weight —
DESCRIPTION
This necklace feels mildly warm to the touch and grants the wearer a +2 competence bonus to heal. In addition to this, the necklace is inlaid with a prayer bead of healing. Once per day, the wearer may cast the spell of his choice: cure serious wounds, remove blindness/deafness, or remove disease.
Protector's Brooch
Aura faint transmutation
Slot amulet; Price 4,500 gp; Weight —
DESCRIPTION
This appears to be a piece of silver jewelry in the shape of a small shield. In addition to the mundane task of fastening a cloak, the brooch also offers magic protection in the form of a +1 resistance bonus on all saving throws and a +1 insight bonus to AC.