


Contents
Extras
Created by /u/AeronDrake.
You can find my other homebrewery works here.
Current Version: 1.0
Cover image: Made with Flowscape.
Introduction
The idea of this document is to (hopefully) create a nice tutorial for using the homebrewery for giving your brews a pretty nice design, similar to the Player's Handbook. I'll try to detail how I create my brews using the amazing page called The Homebrewery which simplifies a lot the design part. In fact, this document was created in the homebrewery.
What you will need
Here are all of the tools and resources you should get to follow this guide.
- The Homebrewery, created by Scott Tolksdorf.
- Paint.net, a free and simple image and photo editing software for everyone who doesn't have Photoshop or similar.
- The Unearthed Arcana Google Drive. In that amazing drive you will find Photoshop brushes, templates, fonts and more.
- My homebrewery stains, which are a series of images I created for blending other images.
- For the cover logos, you can use my alternate D&D logos. Additionally, you can download and install the Veracruz-Regular font, which I will use for the description at the bottom of the cover page.
- Imgur or any other image hosting.
- Extra: You can use this userstyles design created by Koba0100 for darkening the code side when you're creating or editing your brews (It's good for your eyes!)
- Extra 2: The compress option from ILovePDF page after creating the pdf using this program. With that you will reduce the filesize without loosing too much quality!.
What you will learn
In this guide I'll explain some tips and tricks for:
- General formatting tips.
- Creating the cover page.
- Creating and modifying the Table of Contents.
- Image blending.
Give Credits!
If you use content from other user, like pieces of art or content from another brew, remember to give credits to all of them! Sometimes just mentioning the name of the artist/user in a credits section will do.
Formatting Basics
Here are some things I use when creating my brews to give them a better design. You can also see the whole code of this brew in this link.
Basic Markdowns
Bold
If you write between 4 asterisks (two at the start and two at the end) the text will be bold. For example, if you write **Bold** in the code, you will see it on your brew as Bold.
Italics
This works in the same way if you use 2 asterisks for italics. For example, if you write*Player's Handbook* in the code, you will see it on your brew as Player's Handbook.
When you write a spell name or another book in a paragraph you should write them in italics.
Headers
Headers are pretty easy to use, just add a number of # (hashtags) followed by a space at the beginning of the text you want to be a header.
One hashtag for the biggest header. When you use this, the first letter of the starting paragraph will be the big letter (just like the H in the left).
Two hashtags for the same header used in this section. This is used in the race names and the class names in the Player's Handbook
Three hashtags for the header with the yellow underline. Commonly used as the title for the racial traits and class features
Four hashtags for the small red header. This is used for the subraces names, some sub-features from classes and other things like the spell and magic item names.
Five hashtags for the black header. This is used for the titles in notes and tables.
Spacing Text
Normal Spacing
When you write some text and you want to divide some paragraphs, you need to separate both paragraphs with a line between them.
Text 1
Text 2
Text 3
Text 4

As you can see, the first line of the first paragraph you add under a header have a different margin compared to the other lines and paragraphs. If you want a paragraph or line to have the same margin as the first line, you can add a double space at the end of the paragraph and then write on the next line of the brew or add the <br> tag in the line below the paragraph and then write the next paragraph.
For example, this paragraph have the same margin as the first paragraph under the header, and the previous paragraph ends with a double space. Additionally, in the following paragraph I used the <br> tag.
Random paragraph to show how the <br> tag works. You can also add various <br> tags to add more spaces between each paragraph.
This text is under two <br> tags.

(The white square in the image are the two spaces!)
___ (3 underscores)
If you add three underscores before a text you will get the same result as using two <br> tags.
Text 1 (underscores below this)
Text 2
Text 3
Text 4 (underscores below this)
Text 5
Uses
This is commonly used in the spells description, just under the level and spell type line (see example below)
Your Amazing Spell Name
7th-level illusion (underlines below this)
- Casting Time: 1 action
- Range: 30 feet
- Components: M (a small doll)
- Duration: 1 hour
The magnificent description of your balanced spell.

Vertical Spacing
You can also create some spacing between texts using the vertical spacing found in the editor button (just under the naturalcrit logo). To modify the spacing, change the margin-top pixels. For example:
<div style='margin-top:40px'></div>
Text 1 (markdown below this line, margin-top at 40px)

Centering Text
If you want to center text, you need to use the following tag:
<div style="text-align: center">
All the text you put here will be centered.
</div>
This is used in the spell save dc and spell attack modifier formulas:
Spell save DC = 8 + your proficiency bonus + your Charisma modifier
Spell arrack modifier = your proficiency bonus + your Charisma modifier
Tabbing Text With
You can create some tabbing text to modify the margins for each paragraph using at the beginning of each paragraph, as shown below
Text 1
Text 2 (normal tabbing)
Text 3 (1 before the text)
Text 4 (2 before the text)
Text 5 (3 before the text)
This also works great on tables, so you can create some subdivisions like the equipment as you can see in the Player's Handbook
used for listing ammunitions and the arcane focuses
| Item | Cost | Weight |
|---|---|---|
| Abacus | 40 gp | 2 lb. |
| Acid (vial) | 20 gp | 1 lb. |
| Alchemist's fire (flask) | 50 gp | 1 lb. |
| Ammunition | ||
| Arrows (20) | 1 gp | 1 lb. |
| Blowgun needles (50) | 1 gp | 1 lb. |
| Crossbow bolts (20) | 1 gp | 1½ lb. |
| Sling bullets (20) | 4 cp | 1½ lb. |
| Antitoxin (vial) | 50 gp | ─ |
| Arcane focus | ||
| Crystal | 10 gp | 1 lb. |
| Orb | 20 gp | 3 lb. |
| Rod | 10 gp | 2 lb. |
| Staff | 5 gp | 4 lb. |
| Wand | 10 gp | 1 lb. |
| Backpack | 10 gp | ─ |
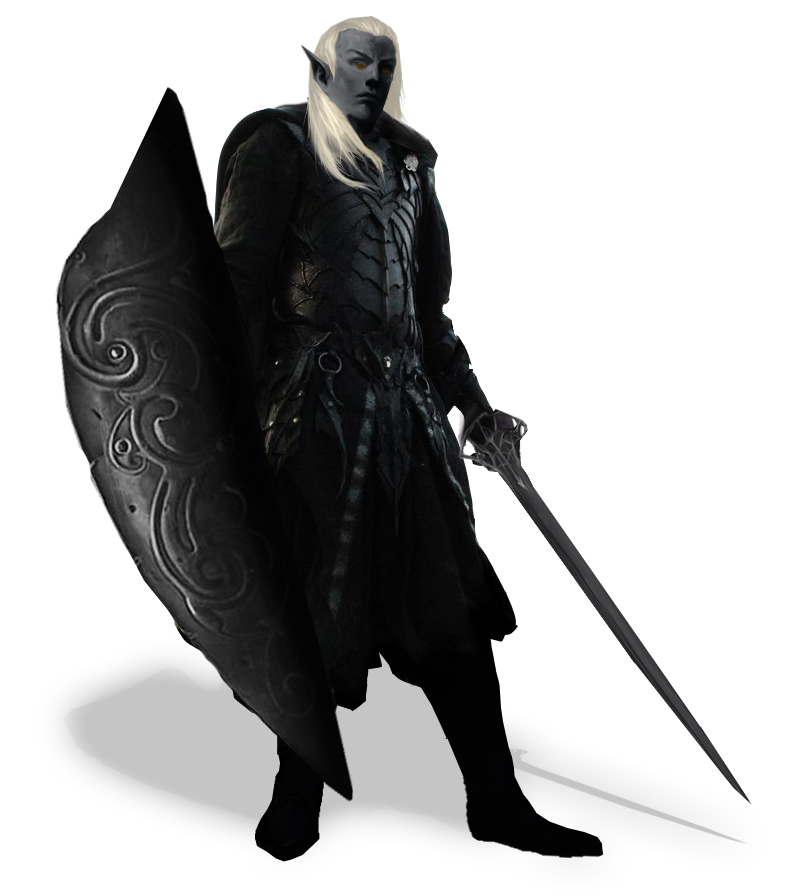
Wrapping Text Around an Image
Using the double spaces and/or <br> you can wrap the text around an image to blend it with the image border. It’s not so difficult, here's an example using double spaces (and then enter to divide each line for wrapping it with the image).
Weapons
Your class grants proficiency in certain weapons,
reflecting both the class’s focus and the tools you
are most likely to use. Whether you favor a
longsword or a longbow, your weapon and your
ability to wield it effectively can mean the
difference between life and death while
adventuring.
The Weapons table shows the most
common weapons used in the fantasy
gaming worlds, their price and weight, the
damage they deal when they hit, and any
special properties they possess. Every
weapon is classified as either melee or
ranged. A melee weapon is used to
attack a target within 5 feet of you,
whereas a ranged weapon is used to
attack a target at a distance.
Image used:
"Dark Elf Warlord (1st iteration)"
by Tanorax

Images
In general, in the images for in my brews I add to them to the style the Position:absolute; This allows you to put the image on any part of the page. You control the position and size adding the following lines:
- For Y axis, use top:Xpx; or bottom:Xpx;. For example: top:40px;
- For X axis, use left:Xpx; or right:Xpx;. For example: right:-220px;
- For setting the image size, use width:Xpx;. For example: width:510px;
For the X and Y axis lines, you can use negative values too, and for the image size, you can use "%" instead "px".
For example, an image code using those markdowns would be something like this:
style='position:absolute;top:-40px;right:20px;width:800px;'/>
You can also flip an image adding transform: scaleX(-1); to the image style. The X makes the image flip horizontally, and you can replace to Y to flip the image vertically. You can add both to the style like this: transform:scaleX(-1) scaleY(-1);
Images With White Background
When you have images with a white background (like a character) you can add a special filter to the image to remove the white background called mix-blend-mode:X; This allows you to add any blending mode to an image.
You need to replace the X with darken or multiply to remove the white background for the image. This is not 100% accurate, but it works great if you don't know how to use Photoshop or any other editing software to remove the white background.
Example Image Code With Darken
<img
src='http://orig08.deviantart.net/9a3c/f/2012/287/5/6/agail_enthess_by_rhineville-d5hrur2.jpg'
style='position:absolute;bottom:10px;right:-30px;
width:480px;mix-blend-mode:darken'/>
To learn more information about the blending modes, click here (css-tricks.com link)
Example Using Multiply
Original image (left)
With darken as blending mode (right)

"Agail Enthess" by rhineville
The Cover
The cover is pretty important for me when I'm creating a big homebrew with lot of content inside, since it's the first look of what is inside your brew (and also the brews looks pretty cool with a nice cover).
The Basics
If you want to create a cover similar to the 5th Edition books, you need the following elements:
- A background image
- A name for your brew
- A small description for what's inside
- The red logos and the red underline
Before You Start
Before adding the images to the cover page, you should add the following code at the beginning:
<style>
.phb#p1{ text-align:center; }
.phb#p1:after{ display:none; }
</style>
That code removes the yellow line at the bottom of the first page of your brew.
Background Image
Feel free to choose whatever image you want. The important thing for me is the image should fit what's inside the brew. For example, if you brew is about an adventure in a forgotten temple the jungle, search a jungle, a Mayan temple or similar that fits the brew theme.
After you choose an image, make sure its resolution is big enough for the brew to avoid getting a pixelated image.
Example Cover Image
I used the following code for the cover image of this brew, created by dleoblack.
I'm using the position:absolute to allow the image cover the whole page and the width:100% to use the image at its original size (996x1500 pixels).
You can play with the width to change the size of the image, and with top and left values to move the image.
Px and % for Images
When modifying the image style, you can use both px and % for the top/bottom, left/right and the width. In general I use pixels because it allows move and resize the images as I need, pixel by pixel.
You can also use negative values for moving the image.
Brew Name
Choose a nice and interesting name that resumes your brew. In general I try to keep it simple and small, using 3 words as maximum.
For example, this brew is called "Homebrewery Formatting Guide"
Creating your Base Title
The font used for the titles is called Nodesto Caps Condensed, and you can find it in the Unearthed Arcana Google Drive Folder. Download it and install it.
To create a title and give it a 5e look, go to Paint.net and create a new document (File - New...)
I used this for creating both the title and the description for this brew:

Change the background color to something else than white using the paint bucket tool and choosing a color in the bottom left window. I used the dark-brown color.
After that, you need to create a new layer first for writing your title.
In the bottom right side you can see a small window called "Layers". Click the first icon (the square with the green + sign). A new layer should appear above the background layer.

Then, make sure you have selected the new layer you've just created. Go to the top left panel and select the Text tool and search for the Nodesto Caps Condensed font.
Then, write your brew title using white and a big size (I used 144px) and center it as much as you can. You should get something like this:

Next, you need to delete the background clicking on the background layer and then on the red X on the layers window. After deleting, save it as a .png image for keeping the transparency (File - Save As... - Choose a location, a name and select .PNG from the list).
Adding to the Homebrewery
You need to upload the image with the title to somewhere (I use imgur.com to upload all the images I use in my brews), then add it as an image. Unfortunately, paint.net doesn't have an option to create the black outline for the title like the books, but this will work just fine for most of the covers.
<img
src='http://i.imgur.com/UmbROaN.png'
style='position:absolute;top:700px;left:10px;width:816px'/>
Description
The description is the brief text found at the bottom of the title screen, resuming in two lines what's inside.
In general, all of these descriptions ends with "for the world's greatest roleplaying game", so you should write it too.
For this I'll be using Paint.net again. Create a new document using the same sizes as the title (2500x400 pixels), paint the background layer with another color, then create a new layer, choose the text tool and then search for the Veracruz-Regular font if you downloaded (if not, you can choose other font like Cambria). Use the center align and a smaller font than the title (I used 72px).
Same as the Title, delete the background, save it as a .PNG file and upload it, then add it to your brew. Here is the code I've used for this brew:
1st Description Image
<img
src='http://i.imgur.com/hFMbK8D.png' style='position:absolute;bottom:30px;left:80px;width:700px'/>
Logos and the Underline
Finally, for the red logos you can use the album I've created here. There you can find some variants of the original logo (because copyright things). The top and bottom red logos have a black shadow around, and you can make it using the drop-shadow filter. Here're the codes I've used in this brew.
Top Logo
<img
src='http://i.imgur.com/YRAeIcj.png'
style='position:absolute;left:320px;top:10px;width:20%'/>
Red Underline
<img
src='http://i.imgur.com/SGYtcP2.png' style='position:absolute;top:150px;left:85px;width:80%'/>
Bottom Logo
<img
src='http://i.imgur.com/UNR8ilF.png' style='position:absolute;bottom:180px;left:0px;width:50%'/>
The Table of Contents
The table of contents is the easiest way to resume everything inside your brew. The ToC I'm using in this brew was originally made by /u/calculuschild, and it’s great because it almost the same of the one you can find on the Player's Handbook, and every part is clickable, so for example, if you click on the "Spacing Text" you can go instantly to that section of the brew. You can make one using this base code and then modifying the parts of the content to fit your brews. I'll explain how.
Style
All the code parts inside the <style> </style> tags are the base of how the table of contents handles the text and is used to keep the text, dots and numbers. Don't touch that unless you know what you're doing!.
The Table Itself
To edit the table, you need to change, add or delete the lines inside the <div class='toc'> </div> tag. It's pretty simple to use.
Every line have four essential aspects you need:
- Hashtags: At the beginning, depending on what type of line you want to add you will need 3, 4 or 0 hashtags. This follows the same rules as the headers, so for example, a 3 ### will add a red text with yellow underline.
- First <span>X</span>: This changes the number at the end of each line in the table of contents.
- Second <span>TEXT</span>: Inside this span you will write what you want to be on that line.
- (#pX): This part makes the magic when you click the line and you are moved to that page. For example, if a line have the (#p5) you will be moved to the fifth page of your brew.
The ToC lines can be divided in various types:
Red Text With Yellow Underline
I use this line for the big headers inside my brews brew, such as the introduction and the chapters.
Here's an example of code for this type (used on this brew):
- ### [<span>3</span><span>Introduction</span>](#p3)
Sidenote: In the Player's Handbook they are also used for each part (Mostly for the pretty images with the Part X at the beginning of each section of the book), while the chapters use the next type.
Red Text
I use this for the headers with two hashtags (eg: ## Style).
The code used for this type is the following:
- #### [<span>3</span><span>What You Will Need</span>](#p3)
Note: In the Table of Contents, this line needs a space before the score or its margin will be aligned with the first type!.
Black Text
I use this code for all the headers in my brews with three hashtags, which are all the red text with yellow underline headers (eg: ### Adding to the Homebrewery)
The code used for this type is the following:
- [<span>4</span><span>Normal Spacing</span>](#p4)
Contents (ToC Example)
Image Blending
While you can easily remove the white
background for images using the
blend modes, some other images can
be blended with a bit more of work.
This idea was created originally by /u/QalarValar, and you can see his amazing resource here
Here's a different method for blending images, simpler and quicker, but it’s limited by the images you use. In this case, I took the background image you can find in the Unearthed Arcana Google Drive folder and edited it, erasing some parts of the background, allowing to show some image under it with better stains and a nicer look. With this method, you need to make sure the edited backgrounds you use for blending are at least 816 pixels width, so it covers the whole background image.
I think this is a nice way to have a nice blending look for images, and it's great for everyone who doesn't know how to use Photoshop or any other editing software. You can also resize, flip and rotate the edited Player's Handbook background to fit your needs.
How This Work
The process is pretty simple: you need to put the image you want to blend and then you just add the edited background image below the base image.
The background images I've created are in the same link you can find on the 3rd page of this guide! If you missed it, and they are a bit bigger (1275x1650), so you can resize them from 816px to a bigger size, and then moving it to fit the images you want to blend (and the text you're using).
Test (Random text)
Lorem ipsum dolor sit amet, consectetur adipiscing elit. Sed lobortis erat vel quam pharetra condimentum. Phasellus sed dapibus lacus, vitae pulvinar nisl. Nullam nec erat eget nisi viverra semper rhoncus vel tortor. Nullam dictum tellus elementum, egestas mi sit amet, molestie neque. Vivamus vel blandit ligula, et placerat lorem. Aliquam consequat suscipit nisl, at gravida ante auctor mollis.
Test text
Morbi scelerisque suscipit ligula, id consectetur tortor scelerisque id. Cras imperdiet orci ac diam mollis, ac hendrerit velit cursus. Phasellus fermentum finibus blandit.
Cookie Tastiness
| Tastiness | Cookie Type |
|---|---|
| -5 | Raisin |
| 8th | Chocolate Chip |
| 11th | 2 or lower |
| 14th | 3 or lower |
| 17th | 4 or lower |
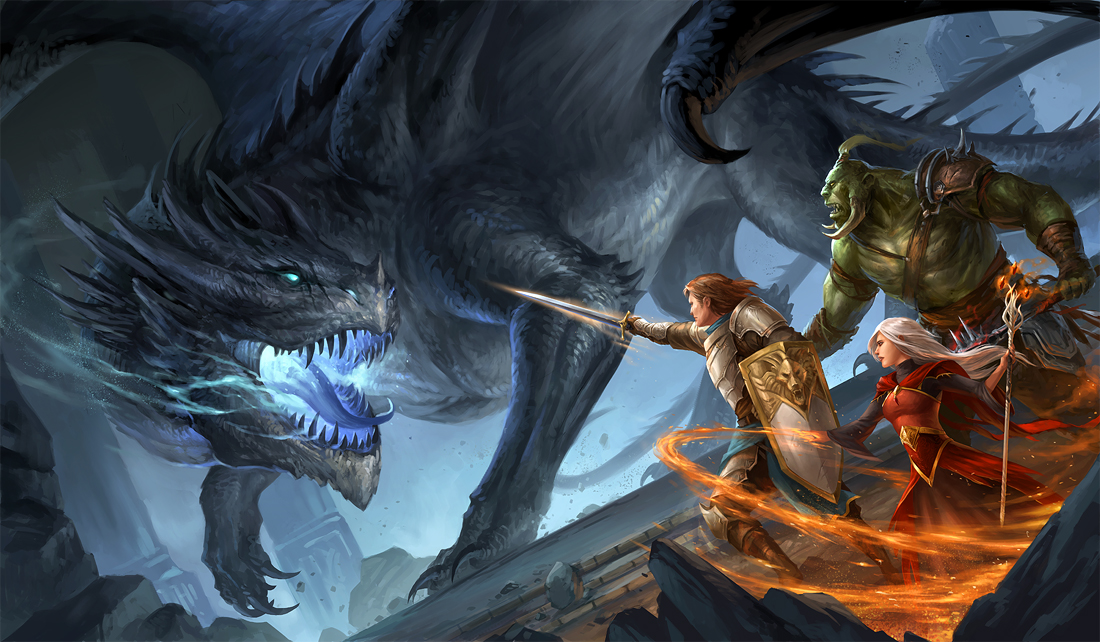
Image used:
"Adventurers" by Sandara
A Bit More of Randomness
Nunc blandit consectetur lorem, vel
fringilla nisl accumsan vel. Morbi tempor enim sed sodales rhoncus. Aliquam vel venenatis turpis. Sed felis turpis, dignissim id purus at, iaculis pulvinar metus. Ut consectetur lectus at lectus dictum scelerisque. Phasellus vitae egestas metus. Nunc consequat, metus lobortis egestas varius, nunc nisl facilisis lorem, a fringilla orci lorem a odio. Pellentesque habitant morbi tristique senectus et netus et malesuada fames ac turpis egestas. Fusce egestas, nisl ac faucibus finibus, dui risus fermentum erat, hendrerit aliquet dolor diam eget est. Ut nec faucibus dui.
Heal Bad Hygiene
5th-level transmutation
- Casting Time: 1 action
- Range: 30 feet
- Components: S
- Duration: Concentration, up to 10 minutes
A flame, equivalent in brightness to a torch, springs from an object that you touch. The effect look like a regular flame, but it creates no heat and doesn't use oxygen. A continual flame can be covered or hidden but not smothered or quenched.
Here you can see the codes for the images used in this page. As you can see, the adventurers’ image is first on the code, followed by the modified background.
Image I Want to Blend
<img
src='http://orig14.deviantart.net/0522/f/2015/166/7/d/adventurers_by_sandara-d8xgvqg.jpg'
style='position:absolute;top:-80px;left:0px;width:816px' />
Modified Background
<img
src='https://i.imgur.com/VxJ8X1u.png'
style='position:absolute;top:0px;left:0px;width:916px' />
'Make sure the background image below is at 816 pixels width'
