The Legend of Zelda:
Era of the Wilds
A handbook designed to facilitate playing 5th Edition adventures in the world of the popular game, Legend of Zelda: Breath of the Wild


Contents
Legal Information
This book makes use of some content inspired by The Legend of Zelda: Breath of the Wild and Hyrule Warriors: Age of Calamity. Written material in this work is the creation of Kyle Hall, and is not intended for reproduction or sale, and any copy of the work can be freely shared. The work contained within this title is intended to fall under fair use, without infringement of copyright.
DUNGEONS & DRAGONS, D&D, Wizards of the Coast, the dragon ampersand, all other Wizards of the Coast product names, and their respective logos are trademarks of Wizards of the Coast in the USA and other countries.
The Legend of Zelda and Breath of the Wild, Nintendo, all other Nintendo product names, and their respective logos are trademarks of Nintendo of America, Inc. in the US and Nintendo Company, Ltd. in Japan and other countries.
Age of Calamity and its respective logos are trademarks of Nintendo of America, Inc. in the U.S.A and Nintendo Company, Ltd. in Japan and other countries, and developed with the assistance of Koei Tecmo Games Co., Ltd.
Artist Credit
All images used are copyright of Nintendo Company Ltd., its affiliates, and related companies. They are intended as fair use, being used in a non-commercial manner without intent to generate profit or impede the copyright.
Social Media
Further links to the author's work can be found in the following locations:
Patreon- https://www.patreon.com/kylehall
Tumblr-
https://5ecardaday.tumblr.com/
Twitter-
https://twitter.com/5ecardaday
The Era of the Wilds
Ancient Hyrule
Ten thousand years ago, the land of Hyrule stood as a shining beacon of technological progress. With the cooperation of all of Hyrule's people, both magic and invention flourished, enriching their lives beyond anything their ancestors could have dreamed of. But at the moment when Hyrule's rising star seemed to shine brightest, a dark stain began to spread– the prophecy of Calamity, and the dark beast known as Ganon, whose terrible power could spell the end of Hyrule.
Working together, Hyrule's people established safeguards against Calamity Ganon– an army of guardians, powered by the light; four Divine Beasts, entrusted to champions selected by destiny's hand from the four corners of the continent; and leading them together, the warrior endowed with a hero's soul and the princess blessed by the light. Against these protections even the vast power of Calamity Ganon could not succeed, and as the prophecy came to pass, Ganon was defeated and sealed away...
The Return of Calamity
Though Ganon was defeated, Hyrule was not yet safe. Its monks, given foresight by the goddess Hylia herself, foresaw that one day Ganon would return again, and threaten their peaceful land once more. Knowing that Ganon's power would be formidable, but unsure of what the descendants lives would be like, the protectors of Hyrule hid away the guardians and the Divine Beasts, hiding them in legends for the day they would be needed once more.
Millenia later, at the signs of Calamity Ganon's return, the people of Hyrule turned to their legends for comfort. In these they found the answer to their prayers– maps hidden in words, helping them to find the hidden guardians, and unearth the Divine Beasts from their slumber. Coming together oncemore, the people of Hyrule prepared themselves to face Calamity Ganon's might once again, armed with the legacy of their ancestors.
Unfortunately, in his time sealed away beneath the earth, Ganon had also schemed and plotted, and found a solution of his own. When he awoke, Calamity Ganon used his dark magic to take control of the guardian army, turning them against Hyrule's people. And in the ensuing chaos, Ganon sent his dark minions to swarm the Divine Beasts, splitting his own calamitous essence to defeat the chosen champions and end their lives.
The Fall of Hyrule
Just as the end seemed near, the goddess-blessed princess and the heroic champion set out to Hyrule Castle to face Ganon directly. In the end, they were overcome, and the champion nearly killed. Both were saved only by the sudden awakening of the princess's own powers, allowing her to rescue the champion, and seal Calamity Ganon behind the thick walls of Hyrule Castle.
The story does not end here, however. Injured in the fight, the champion was sealed away, left to recover from his wounds. Calamity Ganon lives still, locked in an eternal struggle with Princess Zelda. And across Hyrule, its people slowly rebuild, living in the shadow of the abandoned castle
100 Years Later...
Nearly a century after Calamity Ganon's return, the people of Hyrule continue to survive. Its largest cities have been long since destroyed, and much of its lands returned to wilderness. The people live every day lives in small towns and villages, aware that they exist on the brink of extinction. Monsters run rampant through the mountaisn, forests, and valleys, kept at bay only by the four minor kingdoms that rule the four corners of the continent.
And though it seems that this tenous peace could last forever, there are rumblings of change– the people grow restless, the arrival of regular Blood Moons indicates the rise of a dark power, and from Hyrule Castle emanate shadowy figures and monstrous noises. The Era of the Wilds is here, and it remains to be seen whether its end approaches, or if it is destined to continue forever.
Gaming in the Wild
This handbook is designed to help GMs to run games of the 5th Edition of Dungeons & Dragons that are set in the world of Breath of the Wild, the popular open-world addition to the Legend of Zelda franchise. Known on the nebulous Legend of Zelda timeline as the Era of the Wilds, this book explores two different possibilities for playing games in this world.
The first possibility is playing games set prior to the resurrection of Calamity Ganon, in the time when the Kingdom of Hyrule still flourished, and the Hylians and their neighbors were just beginning to rediscover the powerful Sheikah technology left to them by their ancestors. With less of a focus on wilderness survival, games in this period are likely to deal with preparations for Ganon's arrival, and preparing for the fulfillment of the Calamity prophecy. Games in this period are best inspired by the game Hyrule Warriors: Age of Calamity.
The second possibility is to play a game in the period of Calamity Ganon's return, and the fall of Hyrule Kingdom. With a greater focus on wilderness survival, playing a game in this time period is likely to mean fewer NPCs, a greater sense of mystery, and long periods of wilderness exploration. Games in this period are best inspired by The Legend of Zelda: Breath of the Wild itself.
Chapter 1: Hyrule Historia
THIS FIRST CHAPTER OF THE AGE OF THE WILDS
compendium deals with how to start setting D&D games in the world of Breath of the Wild, whether that means playing before or after Calamity Ganon's appearance. This includes tips on how to capture the feeling of the Age of Calamity and Breath of the Wild games, as well as alternate rules and other changes that will help you and your players to create the experience you're looking for.
A Guideline to Hyrule's History
Those familiar with the Legend of Zelda series are probably also familiar with the game's tumultous and sometimes confusing timeline. With 35 years of game history, over twenty-five different games spanning seven different console generations, and a number of animation- and manga-based spinoffs, the Legend of Zelda is one of the largest and most successful video game series in history.
However, the various games in the series were not originally created with the intention of telling a sequential story. Because of this, the way different games explore the lore behind the Legend of Zelda sometimes conflict with each other. Large parts of this conflicting lore have been stitched together in the official Legend of Zelda: Hyrule Historia book, using the concept of time-travel and alternate timelines.
The Legend of Zelda: Breath of the Wild is the first mainline Legend of Zelda game released since the creation of the Hyrule Historia timeline, and immediately bucks the trend by being deliberately unplaceable in the existing lore. Its version of Hyrule is vastly different than any other before it, and the game itself is set 10,000 years after events that have never been explored or mentioned in other Legend of Zelda games.
This is both a blessing and a bane to Dungeon Masters that want to run games in the world of Breath of the Wild, because it allows more creative freedom, but also means that the only canonical source for information about the game world exists in the dense (and sometimes inscrutable) lore of Breath of the Wild itself. And because of this, some things in the game, and in this handbook, might conflict with lore that exists elsewhere in the franchise.
If you're struggling to fit your game into the confines of the Era of the Wilds, remember that as the Dungeon Master, you have the final say in what works in your game and what doesn't. If you choose to ignore lore presented somewhere in this handbook, that's fine. In the same vein, if you choose to include lore from a different Legend of Zelda game that isn't talked about here, that's fine too! As with all games of Dungeons & Dragons, the most important thing is for both you and your players to have fun.
The Age of Calamity
Taking its name from the 2020 pseudo-sequel to Hyrule Warriors, the Age of Calamity is the unofficial name for the period during, and just prior to, the appearance of Calamity Ganon and the fulfillment of the Calamity prophecy.
The Calamity prophecy is the legend handed down to the people of Hyrule from their ancestors, foretelling the reappearance of Calamity Ganon at an unspecified point in the future, following his original defeat by the amassed forces of Hyrule and their army of guardians. Since Calamity Ganon's first defeat, ten thousand years or more have passed in Hyrule. When the people of Hyrule begin to recognize the signs of Calamity Ganon's return, they turn to the stories of their ancestors for help. Here they find hints that guide them to the locations of buried armies of guardians, the robotic defenders of ancient Hyrule, as well as the four Divine Beasts, massive war-machines created to fight Calamity Ganon and his armies of monsters.
Focus Points for the Age of Calamity
When playing a game set during the Age of Calamity, these are the important points to focus on:
- A Sense of Foreboding and Preparation. The people of Hyrule are beginning to work towards defending themselves from Ganon and his monsters. Prior to this point, everyone has only needed to defend themselves from the occasional wandering band of monsters, or settle minor disputes between the kingdoms that control the land. Full-scale war isn't something they are likely to have experienced before.
- A Search for Answers. The people of Hyrule are experiencing first-hand events that they've only heard of before in legends. While their ancestors left clues behind to help them, no one really knows what's happening for sure, or what the world will look like after Calamity Ganon arrives. The only thing that everyone knows is that it's all about to change forever.
- Advancing Toward the Past. Before the first archeaological digs that uncovered the Sheikah towers, guardians, and other bits of Sheikah technology, even the oldest people of Hyrule have spent their entire lives with only rudimentary levels of technology. Basic smithing techniques, gear systems powered by wateror manual labor, and the occasional bit of steam technology are as far as they've gotten. Now that they suddenly have technology that's just as much magic as it is science, there are people dedicating their lives to learning all they can, and putting what they learn to immediate use for themselves and their neighbors.
- Defending What Exists. As Calamity Ganon's arrival draws near, monsters have begun to appear with greater and greater frequency. Though they have always been dangerous, the monsters are made more deadly with the arrival of the phenomenon known as the Blood Moon, which has the power to resurrect every monster killed since its last appearance.
Hyrule In the Age of Calamity
Games played in the Age of Calamity have the potential for a great amount of heroism on the part of the characters used in the campaign. At the time of the arriving Calamity, Hyrule is stretched to its breaking point. The prophecy of Ganon's return is common knowledge, and while Hyrule is doing everything it can to prepare by digging up the guardian army and the Divine Beasts, Hyrule's different cultures remain fractured.
People are scared for the future, and even if Ganon himself hasn't appeared yet, the signs of his arrival are everywhere, including in the increasing number of monsters spreading across the land. Games set during the Age of Calamity can focus on a variety of topics: military preparations for the war with Ganon, defensive preparations to keep people safe and healthy, efforts to stem the tide of monsters, and even missions to recover lost sheikah technology that could be the missing key needed to save the day.
In many ways, a campaign set during the Age of Calamity works very similarly to any other Dungeons & Dragons campaign, which assumes a world in which people are constantly in danger, and oftentimes where a world-spanning threat hangs over the heads of everyone.
Telling the Story
When you intend to run or play in a game set during the Age of Calamity, its important to first acknowledge the elephant in the room– the story told in the campaign, and the actions the players take, ultimately won't change the outcome of the Calamity unless you intend to include alternate histories or time travel as a plot point.
The start of Breath of the Wild requires the guardian army to turn on Hyrule, for Link to be critically injured in the final battle, and for Princess Zelda to seal both herself and Calamity Ganon inside Hyrule Castle to try and keep the world safe.
Running a game in the vein of Hyrule Warriors itself, where none of these things happen and the final outcome changes, is definitely possible. But both types of stories will have very different implications when they conclude, and discussing with your players which one you want to tell will be important.
Working with Hyrule's Army
An important aspect of the Age of Calamity is the impending feeling of momentous events, beyond the control of any single person. Calamity Ganon is not just a person, but a force of nature– a dark thing that will, if victorious, utlimately change Hyrule forever. To counteract this force, the people of Hyrule need to unite in their efforts to save the world.
Each of Hyrule's four corners, and the civilizations located there, are preparing their defenses and will be on guard from any strangers. Every inch of Hyrule was once home to the sheikah technology that the Hylian King, Rhoam Bosphorus, hopes will be able to save them, and so everywhere holds the potential for archaeological importance. Hyrule has only the one continent, and there are no other countries, so the monstrous enemies they face come from within their borders, meaning that each village and town is constantly under threat.
Whether you want to run a campaign where the players get involved with Hyrule's army or not, it's still likely to play an outsized role in the story.
Obtaining Proper Supplies
Unlike the Hyrule that exists in Breath of the Wild, the Hyrule of Age of Calamity is interconnected at a deep level, with towns that trade frequently with each other, and rely on smaller villages for the raw materials they need to do their work. In the Age of Calamity, the people of Hyrule can almost always obtain whatever they need, through a series of complicated but robust trade routes.
This ability to get their hands on almost anything extends to players as well. Shops are common and well-stocked, with a variety of weapons, clothing, armor, travel supplies, food, and more. Because Hyrule is preparing for war, some things might still be harder to find than others, and those that are available are going to be more pricey.
If you are playing a campaign set during the Age of Calamity where the players are not part of the army itself, you can choose to modify shop prices based on the presence (or lack thereof) of Hyrule's soldiers in the nearby area.
Price Alteration
| Distance to Hyrule Army | Price Modifier |
|---|---|
| Very Far (2 weeks+) | Half as expensive |
| Far (1-2 weeks) | Normal price |
| Close (4-9 days) | Normal price + 1d10 extra |
| Very Close (3 days or less) | Twice as expensive |
If the players are part of Hyrule's army, and moving with large portions of these forces, its assumed that most of their needs will be met, including food and shelter, as well as very basic weapons.
Variant Rules: Large-Scale Combat
Included below are a number of alternate rules useful for playing 5th Edition Dungeons & Dragons games set in Hyrule during the lead-up to Calamity Ganon's reappearance. Each of these rules was designed to help evoke the feelings of tension and triumph found in Age of Calamity.
Using these rules is not necessary– playing without them will not hinder your group in any way, and they are entirely optional, but if you want to emulate the "hack'n'slash"-style combat found in Hyrule Warriors, these rules will help you to do that.
Large-Scale Combat Goals
In Hyrule Warriors: Age of Calamity the player chooses one of dozens of different characters originally found in Breath of the Wild, and uses that character to smash through waves of enemies in order to secure their goals, leading an army of soldiers to victory over Ganon's forces.
While large-scale combat is the core gameplay element of Age of Calamity, playing out battles like these goes against the fundamental game design of 5th Edition, which is focused on allowing a small group of characters to fight a roughly equal number of enemies. Thankfully, the feeling of the large-scale battles found in Age of Calamity can be convincgly replicated using Large-Scale Combat Goals.
Instead of playing out the full elements of combat between armies, large-scale combat goals are designed to focus on giving the player characters specific missions that help turn the tide of battle, and allow their allies to claim victory. Examples of large-scale combat goals include specific location- and event-based objectives, assigned at the beginning, or during the course, of battle. Examples of Large-Scale Combat Goals include "Defend the Gate from Moblins", "Defeat the Hinox at Fort Hateno", or "Escape the Enemy Guardian."
Each Large-Scale Combat Goal should involve a single, standard 5th Edition D&D encounter, rated appropriately for the level of the player characters. By stringing several of these goals together, you can convincingly replicate the feeling of large-scale battles found in Hyrule Warriors: Age of Calamity.
Creating Large-Scale Combat Goals
When designing a large-scale combat for your players, you can use the "Creating a Combat Encounter" section of Chapter 3 of the Dungeon Master's Guide. Large-Scale Combat Goals should be assigned a difficulty just like any other encounter, with the number of goals needed to achieve victory in a particular battle determined by the XP Threshold of your player characters.
If you design a Large-Scale Combat Goal that includes a specific mission like "Light the Four Torches" or "Escort Princess Zelda", and not just combat against a number of monsters, treat this mission as an additional encounter with an XP rating based on its difficulty. For example, in the missions listed previously, "Light the Four Torches" might be an Easy encounter, while "Escort Princess Zelda" could be a Hard or even Deadly encounter based on the character's levels and the amount of resistance they will face.
Moving Between Combat Goals
In Hyrule Warriors: Age of Calamity, the time between completing specific goals is filled with minor fights against dozens of enemies at a time. Attempting to replicate this same circumstance in D&D is not only likely to bog down the game, but might also end with the early and untimely deaths of your PCs.
Instead, when running a large-scale combat, consider having the player characters move automatically between the locations of their Large-Scale Combat Goals instead. While this might at first feel like a cop-out, remember that unless you plan to reward your players appropriately for the effort their characters put into a fight, it isn't fair to require them to use resources like hit points or spell slots.
If you still want to include combat in between your Large-Scale Combat Goals, consider using the Mobs and Generals variant rule found next in this section. But be sure that you include these encounters when totalling up the XP threshold of your party, and don't forget to award the player characters XP, treasure, and other resources as appropriate.
Resting Between Combat Goals
When the characters in Age of Calamity fight their way through entire armies of moblins and lizalfos, they are able to do so because vanquished enemies and broken barrels will give them food that heals their wounds throughout battle. Unless they're using potions, characters in Dungeons & Dragons don't have this same luxury. Instead, they require periodic rests in order to heal up.
When using Large-Scale Combat Goals in your campaign, it is recommended that you use the variant rules for Healing Surges, Epic Heroism-style rests, or both, from Chapter 8 of the Dungeon Master's Guide. Healing Surges will allow characters to continue fighting for longer periods at a time without worrying about their safety, while the Epic Heroism resting variant will ensure characters have access to important daily resources like spell slots, ki points, and other abilities between encounters.
Running large-scale combat without either of these variant rules is possible, but would require allowing the PCs to take frequent rests ranging from 1 to 8 hours, and is not recommended as it would slow down the pace of the action, and go against the heroic spirit normally associated with fights in the Legend of Zelda series.
When using the Epic Heroism variant rule, it is usually assumed that no changes happen to the overall landscape of the battle while the players are resting– their allies, including other important figures in the battle, help to keep the enemy forces at bay, waiting for the player characters to catch their breath before tossing themselves back into the fray with force. Alternatively, the period during which PCs are resting can be used to set up new Large-Scale Combat Goals. If the PCs successfully complete a goal like "Capture the Roadside Fort", the time spent on a short or long rest might be enough to allow Ganon's forces to muster a counterattack, creating the new goal of "Hold the Roadside Fort Against Invaders".
Monster Mobs
In Hyrule Warriors: Age of Calamity, another major element of gameplay is pitting the player against dozens or even hundreds of minor enemies, defeated with a few quick attacks, interspersed with tougher boss-style monsters. While replicating the ability to fight hundreds of monsters at once isn't feasible in D&D, it can be approximated with this alternate rule, which allows you to designate certain enemies as "mob monsters".
A mob monster is a monster with the same statistics as those normally found in the D&D 5e Monster Manual or any other source, except that its hit points are greatly reduced– in fact, mob monsters have only a single hit point! Mob monsters also have a few other other rules specific to them:
- Mob monsters have only 1 hit point, so any attack roll higher than their AC is enough to reduce them to 0 hit points.
- A mob monster never makes death saving throws. If a mob monster is reduced to 0 hit points, it is killed outright.
- If a mob monster succeeds on a saving throw against a spell or effect that would normally deal half damage, that spell of effect deals no damage instead.
The largest benefit of this rule is allowing you to pit your players against a larger number of enemies in combat, especially large-scale battles like those found in the Hyrule Warriors series. When using this variant rule, be sure to communicate that information to your players. Knowing that certain enemies will fall in one hit is important for making sure not to waste certain attacks or spells attempting to deal with much weaker enemies.
Mobs in the Era of the Wilds
You don't have to be playing a game set during the Age of Calamity to use the Monster Mobs variant rule. This rule is also useful in any other campaign where you expect your player's characters to regularly face larger number of foes, or intend to focus more on elements of large-scale warfare in your game.
This variant rule can also be useful for playing a game set in the Era of the Wilds. In Breath of the Wild, one of the challenges Link regularly encounters in his journey are monster camps, where a large number of bokoblins, lizalfos, moblins, and other monsters congregate. While challenging, if Link can defeat these enemies, he is often rewarded with access to a special monster chest containing valuable rewards.
In your own game, you can replicate the feeling of monster camps and allow your players to conquer them using the Monster Mobs variant rule, letting them fight upwards of 9 or 10 enemies at once in order to claim victory and be rewarded, perhaps with valuables rolled from the Treasure Horde tables found in the Dungeon Master's Guide, rather than the Individual Treasure tables.
The Era of the Wilds
The Era of the Wilds is the name for the 100-year period after Calamity Ganon successfully destroyed the Kingdom of Hyrule, before being stopped in his tracks by the power of Princess Zelda. When Calamity Ganon took control of the guardian army, and killed the four Champions selected to pilot the Divine Beasts, he ensured the downfall of Hyrule.
Cities were destroyed, towns were leveled, and the majority of Hyrule's population was devastated. Though the games do not talk about it directly, its important when playing a D&D game set during this period to keep in mind just how much was lost as a result of Calamity Ganon's arrival. The ruins of the old world fill the valleys and plains, equally as lost to time as the technology of the Sheikah people is, with the newest generations having no memory of the world that came before.
When you create a game set during the Era of the Wilds, you can choose just about anywhere within the 100-year time period to set the game. If you're playing just after the Calamity, you can play off of character's grief at the loss of what was, and their struggle to adapt to the world as it now is. If you choose to set your game later in the period, you can instead focus on themes of survival as a daily part of life, the slow rebuilding of the world in the form of small towns and villages, and the recovery of Hyrule over the passage of time.
Focus Points for the Era of the Wilds
When playing a game set during the Era of the Wilds, these are the important points to focus on:
- The Struggle to Survive. In the Era of the Wilds, nothing is guaranteed. The monsters from the Age of Calamity still exist, eager to prey on the weak and the helpless. The economy of the former kingdom is long gone, and to survive, people have to rely on what they can grow or forage for themselves.
- Rediscovering What Was Lost. In the same way that the technological powerhouse of ancient Hyrule faded into myth before the events of the Age of Calamity, the world as it existed before the Calamity has also become lost to legend. Treasure hunters, enterprising merchants, and those filled with the spirit of adventure are drawn toward what remains of the previous world, hoping to find intrigue, prosperity, or both.
- Building the Future. Not everywhere in Hyrule has suffered equally from the effects of the Calamity. Though deadly monsters and environmental cataclysm are found everywhere, some places still manage to thrive day-to-day, and are in the process of rebuilding. These towns continue to grow, expanding their borders and producing extra resources that allow them to trade with each other and offer a glimpse at what the whole world might look like if it can be pulled back from the brink.
- The Beauty of Exploration. Though devastating, the remains of the world after the Calamity can, in some ways, be beautiful. There is a contemplative peace to be found in some parts of the world, and though survival rests on a knife's edge, there is a freedom to be found in the lack of burden that living day-to-day can provide. Some of the places in Hyrule have remained entirely untouched since the Calamity, and the remains of people's lives there, as well as the wilds that have begun to take over, are an endless source of excitement and exploration.
Hyrule in the Era of the Wilds
A game set during the Era of the Wilds is likely to be less immediately heroic than one set during the Age of Calamity. Following the betrayal and crushing defeat of the Hyrule Army by the guardians, Calamity Ganon and his monsters were able to destroy large swathes of Hyrule. Many important towns, including the city that once sat below Hyrule Castle, have been reduced to ruins and their people killed or driven away, and forced to make new homes at Hyrule's edges.
Since Zelda succeeded in sealing both herself and Ganon in the castle, Hyrule's people have spent the past century slowly rebuilding. Only a few traders travel the roads now, and most areas keep to themselves. People remain afraid of the monsters lurking in the wilds themselves, but know that these same monsters rarely venture close to the safety of the towns.
In the Era of the Wilds, the focus is not on defending Hyrule against a greater threat, but on surviving the daily trials that everyone faces. Some people are hoping to recover the lost glory of Hyrule in its heyday, but most are just hoping to live happy and prosperous lives. But whether they're looking to survive or thrive, both require protection from the dangers left behind after the Calamity.
Moving Through Hyrule
While creating an adventure or series of adventures focused on a smaller section of Hyrule is possible, the majority of a full D&D campaign during the Era of the Wilds will likely focus on a variety of different places. Travel will be a constant companion for the players, as the dangers present in Hyrule come and go.
In addition, Hyrule as it exists now is a land of wonder and intrigue as much as it is one of peril. Every corner of Hyrule holds a secret, and no one knows what they might find. If you want to play a campaign set during the Era of the Wilds, there are two highly recommended methods.
The first is to use a classic "hexcrawl" style map, like those that have been popular in D&D since the beginning. A hex-grid overlayed on the available map of Hyrule from Breath of the Wild works very well for this. In addition to hiding features present in the game version of Hyrule beneath certain hexes, you can also feel free to include your own additions, such as new ruins, enemy camps, and even dungeons.
The second option is to use the Wilderness Travel option included in the "World of Hyrule" section of this book. That section lays out easy to follow rules for generating your own interesting experiences for characters traveling through dangerous wilds, including random monster encounters, interesting scenery, roleplay encounters, and hidden secrets within the world.
Variant Rule: Action Climbing
In Breath of the Wild, an important element of Link's traversal of Hyrule is his ability to climb literally anything. By jumping on the wall of a building, a sheer cliff face, or even a large tree, Link automatically begins to climb it. While Link can't climb indefinitely, and his speed never really changes, as he grows stronger he can climb for longer durations.
In the normal rules of 5th Edition, climbing anything normally requires a creature to spend 1 extra foot of movement for each foot that they climb, unless they have a climbing speed. In addition, when scaling a difficult surface such as a sheer or slippery slope, the creature might need to make a Strength (Athletics) check to keep from falling. This is a lot slower than the climbing Link does in Breath of the Wild, and this variant rule helps to fix that.
When using this rule, unless a creature has a base climbing speed, it's able to climb at a speed each turn equal to its Athletics score– its Strength modifier + proficiency modifier if proficient in Athletics, or just its Strength modifier otherwise. Additionally, once a creature starts climbing, it can continue climbing for a number of rounds equal to its Constitution modifier. At the end of a creature's turn after its spent a number of rounds climbing equal to its Constitution modifier, it automatically falls, taking any falling damage as normal. Climbing creatures don't need to make Strength (Athletics) checks to climb difficult surfaces, but might still need to make one in order to climb a slippery surface.
The largest benefit of this rule is incorporating more verticality into your combat, letting both players and enemies climb structures to gain a stategic advantage; as well as including climbing-based challenges in your players' exploration of the world, letting them access places like cliffside caves and monster nests that you might not think to include otherwise.
Living Off the Land
Following the Calamity, the trade routes that Hyrule's people had spent centuries building up collapsed almost overnight, as roads that once allowed easy access from one region to another turned into dangerous, monster-filled traps. Locations that relied on a steady flow of outside goods had to begin producing their own, or in cases of larger towns that couldn't keep up, leave behind their homes for greener pastures.
In the Era of the Wilds, most of Hyrule's people are farmers or hunters. The exact number of people focused on producing food varies from culture to culture; whereas most hylians are farmers, with a few specialty workers doing things like smithing or stitching, almost all gerudo are hunters or traders, with little farming to be done in the arid desert.
For the most part however, those living both inside and outside of what remains of civilization have to rely on gathering resources from the world around them, including hunting deer and boar for meat, or gathering mushrooms and root vegetables. And of course, these gathered resources are only the base ingredients of an incredibly valuable skill found in the repertoire of any person living in Hyrule– the art of cooking.
More information on the methods of Hylian cooking can be found in Chapter 2: The World of Hyrule, under the section titled Hylian Cooking.
Chapter 2: The World of Hyrule
THE SECOND CHAPTER OF THIS HANDBOOK DEALS
with the world of Hyrule itself as it exists in the Age of Calamity and the Era of the Wilds. It explores the eight major regions of Hyrule as defined in Breath of the Wild, both as they exist in the Age of Calamity and the ways they changed following the 100 year progression into the Era of the Wilds.
Each region includes a short overview and description of the area, as well as a more in-depth looking at its major geographical features, towns, and other points of interest. A few regions also include sections on Myths and Legends, giving brief details on some of the more mysterious elements of the region, which might act as inspiration for your own quests, adventures, or campaigns.
Later in the chapter, the various plants and animals found in each region are expanded with a section titled Hylain Cookin, which details the prestigious art of cooking in Hyrule. Included in that sections are rules for searching out ingredients, cooking meals, crafting elixirs, and how to get the most out of each.
The Eight Regions
Hyrule is a vast and varied land, spanning from the mountains of the north to the seas of the south, and the deserts of the west to the oceans of the east. For the most part Hyrule is made from eight different regions, each of which is divided further into subregions. These regions are:
- Akkala
- Eldin
- Central Hyrule
- Faron Jungle
- Gerudo Desert
- Hebra Mountains
- Lanayru Province
- Necluda
The distinction between regions is based on a variety of factors, including the terrain, weather, who lives there, and some basic geographic boundaries like rivers and hills. The lines are not entirely distinct however, and at the borders where regions press up against each other, these various features can start to blend, and passing from one region to another can happen suddenly and unexpectedly.
Traveling Hyrule
Each of the eight regions of Hyrule are connected not only geographically, but culturally and historically as well. In the years leading up to the Age of Calamity, trade between Hyrule's various cultures and areas flourished, and dedicated roads and paths were laid and carved to facilitate this. Prior to the Calamity, goods from one part of Hyrule were easily purchased almost anywhere else, and major towns and cities like Castle Town and Zora City relied on trade to supply their growing populations.
After the return of Calamity Ganon and the near-destruction of Hyrule Kingdom, many of these areas were cut off from each other. Trade and travel became dangerous, as monsters flooded the wilds and corrupted guardians patrolled the roads, searching for any remaining sign of resistance. As the guardians wore down, and Ganon's power faded, the paths of previous generations opened up once more. In the current Age of the Wilds, travel and trade are difficult, but seen as a necessity– some of Hyrule's bravest souls make their living by taking the risk of shuttling goods from place to place, enabling the people of Hyrule to once again access goods from far-off regions, though at a fair price.
Taming Horses
To get from place to place in Hyrule, most lone travelers or small groups rely on horses. Larger caravans or special travel groups will often use a combination of on-foot travel and carriages and wagons pulled by stronger draft horses.
Because of their popularity pre-Calamity, wild horse populations have exploded post-Calamity, and the descendants of pack carriers and warhorses alike can be found all across Hyrule. Taming a true wild horse can be difficult, but taming a horse descended from generations of domesticated animals is a much easier prospect, and can be done by those with the will and courage to do so.
Taming a horse requires three successful skills checks: a Dexterity (Stealth) check to sneak up on the horse; a Strength (Athletics) or Dexterity (Acrobatics) to climb on to its back; and a Wisdom (Animal Handling) check to calm and tame it. Succeeding on all three checks results in a horse willing to let you ride it, though it may not be fully trained.
Horses in Hyrule come in the same three varieties found in the standard Dungeons & Dragons Monster Manual: draft horses, riding horses, and warhorses. The difficulty of taming a horse, and the DC of the skill checks required, varies depending on which type it is:
Horse Taming
| Type of Horse | Skill Check DC |
|---|---|
| Draft Horse | 12 |
| Riding Horse | 15 |
| Warhorse | 18 |

Akkala
Taking up the north-east corner of Hyrule, the Akkala region is bordered on its north and south edges by rugged highlands, presenting difficult-to-pass terrain that helps keep monsters out, and people in. The western side of the region hugs up against the fiery Death Mountain, with foothills created from ancient lava flows that are still filled with a variety of minor ores and gems.
The eastern side of Akkala juts out at various points into Hyrule Ocean, the large body of water that runs the length of Hyrule's entire eastern side. Many of the people living in Akkala rely on the ocean to survive, building small sailing ships that will take them far enough out that they can catch fish, crabs, and other seafood.
Akkala Highlands
Taking up most of the northern half of the region, the Akkala highlands get their name from the high mountaisn and hills that crest their very northern edge. As the highlands move south, they quickly dip in altitude, creating a large bowl-like valley that is filled with a wide variety of plants and animals.
Akkala Ancient Tech Lab
This building was created centuries ago as an observatory for studying Hyrule's night sky, but became abandoned over time as Hyrule's focus on science lessened, and was eventually left to ruin. When signs of the Second Calamity began to appear, and the people of Hyrule started to study ancient sheikah technology, the building was converted into a research lab.
Run by a sheikah man named Robbie, the Akkala lab is specifically focused on researching the guardian army used by ancient Hyrule to defeat Calamity Ganon the first time, as well as discovering a permanent solution for stopping the Calamity.
In the Age of Calamity
Before the Calamity struck, Akkala was still a lightly-populated area, but one on the upswing. Monsters still made frequent homes in the area, but the forces of Hyrule had made an attempt in recent years to clear as much living space as possible for the people of Hyrule, and allow safer travel along the few roads that crossed the region.
Though Akkala had no official towns on the map, small clusters of farms and fishing huts could be found in areas regularly patrolled by soldiers stationed at the then-new Akkala Citadel. While safety was not guaranteed for travelers in Akkala, some people felt brave enough to take a risk on beginning new lives here, and many were drawn by the promise of a new start and untapped potential in the land itself.
<br>
Skull Lake
The very north-west tip of the Akkalla Highlands is home to Skull Lake, named for its resemblance to a skull when viwed from the sky. At ground level, the resemblance is difficult to see, as the lake is surrounded on all side by sheer cliffs that make it difficulty to traverse the edge.
The lake has three small islands, each of which represent the two eyes and nose of the skull– however, only the "right eye" is really accessible. The nose is less of an island and more of a spiky rock that juts up from the water, and the left eye is a large stone peak, almost impossible to scale. Some people have reported seeing glowing lights coming from the peak late at night, as well as suspicious figures that stand around the lake's edge while staring up at it.
Deep Akkala
Used by the people of Hyrule to refer to the sections of Akkala south of the Akkala Highlands, Deep Akkala comes by its name due to the sudden and sharp drop in altitude as you enter the region. After crossing the mountains that guard Akkala's southern border, steep hills lead further into the region via two paths– a treacherous high mountain road, and the quick drop of a southern valley road.
Other than a few stables and a settlement or two, Deep Akkala is almost entirely uninhabited before reaching the edge of the ocean, and only sparsely so there. It would not be an understatement to say that Akkala as a whole is the least populated region of Hyrule.
Akkala Citadel
A massive stone keep built into an outcrop of rocks that jut up from the land like teeth. Building the citadel was a generations-long project for the people of Hyrule, a joint effort mostly between the hylians and the gorons. Once it was finished, it looked ready to reverse the fortunes of the Akkala region, which had always been overlooked as too dangerous and difficult to settle permanently. The arrival of large contingents of regular soldiers at the citadel made the roads safe again, and helped make the bounties of Akkala's valleys accessible.
When the Calamity swept across Hyrule, Akkala Citadel served as the location for the army's last stand. Here the mixed soldiers of Hyrule– gerudo, gorons, hylians, rito, sheikah, and zora alike– met the oncoming tide of guardians controlled by Calamity Ganon. Most of those who took shelter in the citadel perished, and the building itself was left a burnt ruin of its former self. Only in the final hour was the guardian onslaught stopped, and only by the timely intervention of Princess Zelda's attempt to seal Ganon's power in Hyrule Castle.
In the Era of the Wilds
Before the Calamity, the Akkala Citadel was a testament to the ambitions of Hyrule's varied peoples. During the war, it became their last unfilfilled hope. Now, in the Era of the Wilds, the abandoned citadel still crawls with guardians, and is a symbol of everything that Hyrule has lost.
Most of the guardians at the citadel have long-since deactivated, severed from the ties of Ganon's power, but a few smaller models still roam the corridors and patrol the grounds. Few have attempted to set foot in Akkala Citadel since it was abandoned, and none who took the risk are known to have ever made it back out.
Lake Akkala
One of Hyrule's largest inland bodies of water, Lake Akkala represents a significant portion of Deep Akkala, and nearly every animal,monster, and person in Akkala relies in one way or another on the freshwater of the lake and its tributaries.
Fed from the south by the same waterfalls that deliver water to the zora's domain in Lanayru Province, Lake Akkala is also the lowest point of the Akkala region outside of its ocean-side beaches. Because of this, the water in the lake spreads far and wide, and enriching the ground, particularly on the lake's west side. On this western side is a small, marshy forest called the Torin Wetland. Usually hunted by locals in the day for food, at night the Torin Wetland is avoided for fear of the many monsters who also take advantage of its abundant resources.
The Torin Wetland also hides the remains of a few ancient structures, dating back to a time even before the Second Calamity. In the Era of the Wilds, these stuctures present an enticing mystery for archaeologists, but groups of roving guardians that never venture far from the ruins make approaching them a difficulty prospect at best.
Rist Peninsula
Remarkable for its shape and size, the Rist Peninsula curls in on itself in an unusual spiral shape, often compared to the shape of a lizalfos tail. The section of sea kept mostly enclosed by the peninsula is called Malin Bay, and both it and the peninsula itself are a favored hangout of boblins, lizalfos, and octoroks. Because of this, the few people living in Akkala never venture onto the peninsula, and travelers are warned to give it a wide berth.

Myths and Legends of Akkala
As a mostly unexplored land, there are a number of legendary places said to be hidden in Akkala– locations shrouded in mystery, some of which haven't even been proven to exist, but which persist in popular conscience all the same. Stories about these places, their origins, and the role they've played in Hyrule's history are popular fireside tales during warm summer nights and cold winter storms alike. Some of them are known only to long-time residents of Akkala and the closest surrounding regions, while others are spoken of all across Hyrule.
The Great Fairy Fountain
Exceedingly popular even among those with little knowledge of Hyrule's legendary past, the great fairies are powerful beings said to watch over Hyrule and all of its people at the behest of the great goddess Hylia. Unlike the smaller fairies that can sometimes be found across the rest of Hyrule, the great fairies are apparently bound to small lakes hidden across the Hyrulian countryside– four lakes in total, if the legends are to be believed.
No one knows exactly where these lakes can be found, but some stories allude to one of them being found in Akkala. This legend has spurred on dozens of treasure hunters both before and after the Calamity, who came to Akkala to search for the great fairy's fountain, sometimes sticking around to settle the area afterwards.
Although most legends point to Lake Akkala as being home to Akkala's own fairy fountain, there is little evidence to support this theory. The lake itself doesn't seem to have any magical properties. Normal, smaller fairies are known to make their home in a grove not far from the lake– but explorations of this area have revealed only some unusual plants. However, the plants growing in the grove are difficult to find in the rest of Akkala, making a trip to the area worth it for those seeking rare ingredients.
Great Fairy Fountains
Whether you choose to include the Great Fairy Fountains as a prominent location in your own game is up to you. In Breath of the Wild, the great fairies indicate that their power has waned greatly since the return of Calamity Ganon. Whether this means they could have any influence on a campaign set before Link's return to the world is up to you, as is what role they might play in such an adventure.
For Link, the great fairies provide an essential service in upgrading his armor, given the right components to do so. In a D&D game set in Hyrule, if the great fairies make an appearance at all, it might be to provide the characters with magic items, or perhaps even upgrade the ones they have now, turning +1 weapons into +2 weapons, or increasing the number of available charges on a rod or staff.
Lomei Labyrinth Island
Looming over the horizon in the far northeast of Hyrule, the Lomei Island Labyrinth is an almost terrifying enigma. Its massive stone walls prevent access to all but the most foolhardy and dedicated, and what lies inside of its fortress-like exterior is a complete mystery. Few recorded adventurers have ever made the difficult journey to the island, and fewer still have successfully scaled the walls to enter the labyrinth. The stories brought back by those who returned indicated an impossible maze– perhaps designed to protect whatever mystery lies at its center.
The Lomei Labyrinth Island is one of three ancient labyrinths found in Hyrule, but is by far the least accessible. The other two, found in the Hebra Mountains and the Gerudo Desert, are slightly easier to reach but no less difficult to navigate. The only proof that the island holds a labyrinth are the just-visible patterns of a maze, viewable from the high peak where the Akkala Ancient Tech Lab now sits.
The purpose of the labyrinth island, who built it, and how old it is are questions that remained on the minds of explorers for centuries. And for the people of Hyrule, it may be centuries more before the answers are revealed.
Spring of Power
Somewhere in Hyrule there exists three great springs, ancient wells of power hidden away from the common people of Hyrule for their protection. Even though their existence is openly acknowledge, the actual location of each spring is closely guarded by the royal family of Hyrule, and given only to their most trusted companions, advisors, and champions. In spite of this circle of silence, a few key details about each spring and their locations have filtered out over the years.
Each spring is aligned with one of the three "Great ideals" of Hyrule– Wisdom, Power, and Courage. These are the qualities embodied by the three Golden Goddesses said to have created Hyrule in mythical ages long past, and the three qualities which the goddess Hylia determined to be necessary for the perfect hero. Members of the royal family occasionally make pilgrimages to the springs, including the Spring of Power, to meditate on the greatness of Hylia and draw strength from their waters.
Fragmented rumors and legends point to the Spring of Power being located somewhere in the Akkala region, but no one is exactly sure where.
Eldin
Found at the very northern edge of Hyrule's borders, the region of Eldin is one of Hyrule's largest, but also one of its least-populated. Home to Death Mountain, an active volcano whose heat permeates every inch of Eldin, most of the region is inhospitable to all save the gorons. In fact, Eldin is the goron homeland, and most choose to make their home in the goron city found just below Death Mountain's rim, next to the lake of magma that flows from its core.
Almost all of the Eldin region consists of nothing but Death Mountain's foothills, and the rocky cliffs of the mountain itself. But a small section of Eldin in the south flattens out enough for easy travel, with a group of hot springs located near enough to Death Mountain's bottom to be accessible for travelers. There are said to be more hot springs in the north (plus the goron's magmatic "hot springs" in town) but getting there requires a great deal of effort, and existing maps are spotty.
Death Mountain
The biggest feature of Eldin, in terms of both size and prominence, its almost impossible to separate the legacy of Death Mountain from the Eldin region itself. This formidable volcano has also played an outsized role in Hyrule's history, being the location of various temples, shrines, dungeons, and legendary battles in Hyrule's many myths and stories.
Death Mountain's largest role in modern history is as the resting place for the Vah Rudania, the Divine Beast given to the goron people. Since Calamity Ganon was sealed in Hyrule Castle, Vah Rudania has been quietly lurking within the magma pool at the top of the volcano. However, as time continues to pass, Vah Rudania shows signs of awakening once more, moving through the magma and causing small earthquakes in the Eldin region.
Goron City
As its name would seem to imply, Goron City is the home of the goron people, and the largest goron settlement in Hyrule, both before and after the Second Calamity. Prior to Calamnity Ganon's reappearance, Goron City is heavily populated by goron traders, smiths, jewelworkers, and miners. But like most of Hyrule, the people of Goron City suffered greatly in the Calamity, and many lives were lost, leaving the city a ghost of its former self.
In spite of this, Goron City still represents one of the largest towns in Hyrule. However, its proximity to Death Mountain's active lava flows prevents all but the most prepared of non-goron travelers from approaching it. Even the gerudo, adapted as they are to the desert heat, almost never venture into Goron City itself, preferring to do business closer to the base of the mountain instead.
Both before and after the Calamity, almost every service one could ask for is offered in Goron City. Despite their lack of travelers, Goron City does have an inn for people to stay. Two sets of rooms exist– normal rooms for traveling gorons who don't have a residence in the city, and specially cooled rooms kept deep underground and away from any lava pools to keep the temperature at a (somewhat) manageable level. Restaurants also abound in Goron City, as gorons love to eat, but travelers are usually warned to bring their own food– most of the dishes available are rock-based, and heavily seasoned with ultra-hot goron spice.
Lake Darman & Darunia Lake
Although referred to as "lakes" these are not bodies of water, but deep pools of free-flowing magma created over centuries by the wear and tear of Death Mountain. Both lakes are named after ancient heroes of goron legends, and are connected at their middle point by a small waterfall of magma. Taken together, these lakes are so large that they make up the majority of Death Mountain's north-eastern side.
The Northern Mine
The most extensive mine constructed by the gorons to date, the Northern Mine is actualy several smaller mines found in the vicinity of Darunia Lake, and connected by underground passages dug out over the years. While the gorons have a variety of smaller mines scattered across Eldin, and even a few in some of the neighboring regions, the Northern Mine is their most successful. Though it has been worked for generations, the mine continues to yield rich bounties of metallic ores and precious gems for the gorons to sell, as well as minerals that make for an incredibly varied goron diet.
The numerous entrances for the Northern Mine are surrounded by powerful cannons, used to keep away rock octoroks and lizalfos, as well as fight back the occasional igneo talus.
In the Era of the Wilds
As Calamity Ganon stirs beneath Hyrule Castle, growing in power once more, the pieces of his dark essence scattered across Hyrule also awaken. Some of this essence is found in Vah Rudania, which grows more active as time passes. Vah Rudania's thrashing stirs up the deepest part of Death Mountain's magma lakes, increasing the temperature of the surrounding area to levels untenable even for the gorons.
The Northern Mine is the most important area affected by these temperature shifts, forcing the gorons working in the area to abandon the mine as temperatures rise, return once they've dropped back off, and then flee again when they rise once more. If the situation doesn't change, the Northern Mine will eventually be rendered inaccessible, cutting off a major source of exports and income for Goron City.
Eldin's Flank
Eldin's Flank is a broad and empty area, as rugged and wild as it gets, and includes the large ridge on Eldin's northern end, as well as the flat rock shelves in the area past that. The gorons almost never travel to Eldin's Flank, as the heat from Death Mountain drops off sharply here; outsiders never visit because it's only accessible by passing through the heat of Goron City, or the dangers of the Akkala Highlands to the east. Together, this makes Eldin's Flank possibly the least-populated area in all of Hyrule, with even fewer residents than Akkala and almost no one who has a permanent residence in the area.
Eldin Great Skeleton
The most common reason for anyone to visit Eldin's Flank is the fossilized skeleton of an enormous creature, embedded in the ground near the canyon shelf in the most northern section of the area. Generations of archaeologists, naturalists, and historians have planned and attempted the treacherous journey to see and study the skeleton, hoping to pull some knowledge from its monolithic remains. For now however, the source of the skeleton remains unknown, and the difficulty in reaching and surviving Eldin's Flank has dissuaded most further attempts to study it.
Unnamed Canyon
The only other locations of note in Eldin's Flank include an expansive pool of hot springs surrounding an unnamed stone pillar, and a flat rock shelf that drops off into a vast and unnamed canyon. This canyon serves as the natural northernmost border of Hyrule, and though expeditions have been mounted to cross the canyon and visit the other side, there have been no reports of anything worth discussin within at least a months' worth of travel. While the deep canyon has no official name, local residents and even most maps refer to it as Unnamed Canyon, which seems to have become a sort of unofficial name for this far northern border in a vast and empty locale.

Central Hyrule
The largest region of Hyrule, with the exception perhaps of the Gerudo Desert, Central Hyrule is exactly what it sounds like– a region consisting of everything within Hyrule's central-most area, as well as a few smaller offshoots to the north, south, and west. Once upon a time, Central Hyrule was the continent's most populated region, filled with settlements, villages, towns, and cities of all sizes. While Central Hyrule was the native home of the hylian people, its proximity to the other regions and abundance of resources have made it a melting pot of cultures since time immemorial.
Central Hyrule was also the region most strongly affected by the Calamity, as its borders held the bulk of the guardian army. The people of Hyrule knew that Calamity Ganon's prophecied escape was supposed to happen near Hyrule Castle, and so made most of their preparations for the final showdown in Hyrule Field and the surrounding areas. It was this collection of strength that would be their undoing, as once corrupted by Ganon's Malic, the guardians were able to quickly wipe out the majority of Hyrule's military forces before anyone even knew what was happening.
With nothing to stop them, and no one able to stop Calamity Ganon, the guardians ran amok, not only destroying the armies of Hyrule, but wrecking every town and village in Central Hyrule, eventually tearing down everything short of Hyrule Castle itself.
In the Age of Calamity
Prior to the resurrection of Calamity Ganon, Central Hyrule had not only the largest population of any area at the time, but the largest concentration of wealth, and the largest number of scientists, artists, and merchants. If you are planning to run a game set in pre-Calamity Hyrule, the area surrounding Hyrule Castle will likely be host to any number of quest-givers and important patrons looking for adventurers to aid them in carrying out their plans and accomplishing their desires.
Hyrule Field
The center of the center as it were, Hyrule Field is the middle location of Central Hyrule, and makes up the largest portion of the region. Before the Calamity, it was here where most hylians could be found living, as well as large numbers of Hyrule's other people as well. Some villages catered more directly to Hyrule's other people, attempting to make them feel more at home outside of their native regions, while others leaned heavily into the natural intermingling of Central Hyrule. Even in its most populated areas, Hyrule Field reamined a bountiful place, filled with shops and stores of every type, but allowing easy access to any number of natural resources within a short day's travel.
In the Era of the Wilds
Following Calamity Ganon's return, all that remains of Hyrule Field is a ruined testament to Ganon's devstating power. Every building in the area was razed to the ground, leaving only broken foundations and crumbling walls. What was once a cherished gathering place for all of Hyrule's people is now avoided at all costs, with travelers and traders using the surrounding roads to skirt the area as best as possible.
The guardians in Hyrule Field remain highly active, still powered a century later by the lingering influence of Ganon's Malice, which seeps and pours from the battered stones of nearby Hyrule Castle. Monsters of all types are also drawn by the visceral feeling of wickedness, and spend their time wandering among the ruins, scrounging for food while being largely ignored by the corrupted guardians.
Ancient Tree Stump
All that now remains of a truly massive tree, this ancient tree stump can still be seen from most of Hyrule Field, but in its heyday the tree that grew from the stump was tall enough to be seen from almost every part of Central Hyrule, and even from some other nearby regions. Like most of Hyrule Field, the tree suffered greatly in the attack of the guardian army, and was felled by their efforts.
Once Ganon's army of monsters took over Hyrule Field, they made quick work of the tree's remains, tearing it apart bit by bit as an easy source of wood to fuel their campfires. While this reliance on the tree's remains has spared most of the wood of the Great Hyrule Forest from the same fate, it also means that no sign remains of the tree beyond its stump.
The top of the ancient tree stump is accessibly by a shoddy rope bridge, constructed by the monsters in Central Hyrule and visible even from far away roads due to its length. The top of the stump itself seems to have been converted into a garbage dump of sorts, where monsters regularly dump refuse, broken weapons, spoiled food, and petty ores.
In the Age of Calamity
Prior to the destruction of Central Hyrule, a small town existed at the base of the ancient tree. Having been established only a century prior when the other woods at the tree's base were cleared, this treeside town was amongst Central Hyrule's most prosperous, known especially as a bastion of artistic progress where musicians, painters, sculptors and more gathered to share their creative energy.
This town was one of early the casualties of the Calamity, and when the ancient tree was cut down, the protection provided by its branches was lost, allowing heavy rainfalls to collect in the basin around its roots. With no life in the tree, the roots failed to absorb the water, leaving the town's remains to be swallowed beneath a newly-formed lake.
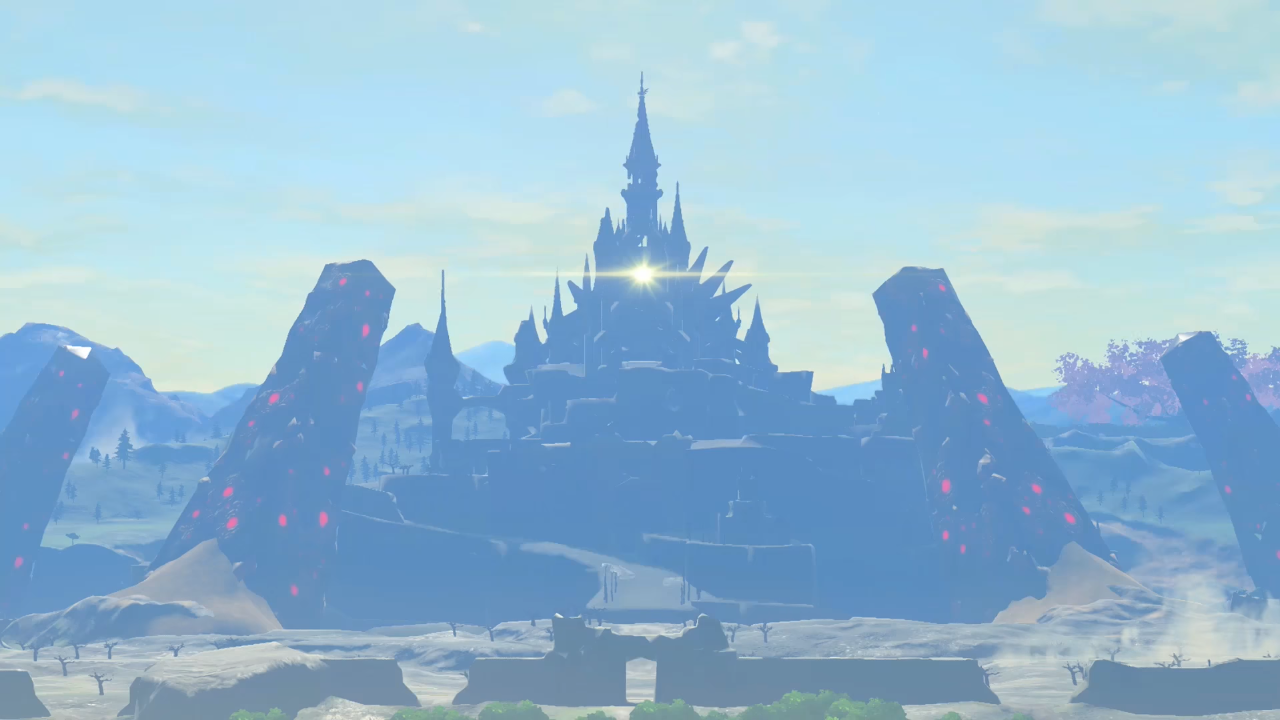
Hyrule Castle
Central Hyrule was also the continent's seat of power, home to the capital of Hyrule Kingdom and the home of its royal family, Hyrule Castle. While the gerudo, gorons, rito, sheikah, and zora are all considered free peoples and the rulers of their own regions, they are each technically a part of Hyrule Kingdom as well. Hyrule Kingdom, ruled by King Rhoam Bosphoramus Hyrule, was the major power on the continent for thousands of years, since before the first Calamity.
Only the Second Calamity, the return of Calamity Ganon, and the destruction of Hyrule's forces by the guardians could be a great enough disaster to finally cause the fall of Hyrule Kingdom. Even still, many hylians remain loyal to the idea of Hyrule Kingdom, even though most of them are too young to remember a time when the kingdom existed. The longer-lived races of Hyrule, such as the gerudo and zora, still have people who lived through the Calamity and remember the peace, prosperity, and safety that a centralized Hyrule Kingdom brought to the continent.
Lake Hylia
In the furthest southeast point of Central Hyrule, bumping right up against the border of the Faron Jungle, one can find the grand Lake Hylia. The largest single body of water in Central Hyrule, Lake Hylia also serves as an important water source for those living in the region. Stocked to the brim with fish of all sorts, the banks of the lake also contain a wide variety of mushrooms and trees whose branches are filled with nuts.
Bridge of Hylia
A massive bridge that spans the length of Lake Hylia between Central Hyrule and the Faron Jungle, the Bridge of Hylia has played an important role in the trade of Hyrule since its construction centuries ago. The current bridge is somewhere between 500 and 600 years old, and was actually built to replace the previous Bridge of Hylia that sat in the same spot. Some fragmentary records recovered by scholars from the depths of Hyrule Castle and the Eastern Abbey indicate this previous bridge wasn't even the first, and that bridges of stone or even wood have bounded the waterway for almost as long as the area has been populated.
Both before and after the Calamity, the Bridge of Hylia is an important point of travel for anyone trying to travel north and south through Hyrule. It offers the easiest passage from the Faron Jungle to Central Hyrule, where the Faron Jungle is sometimes the optimal route for traders from the eastern half of Hyrule hoping to make a profit on the area's luxurious goods.
In the Era of the Wilds
Before the Calamity, the Bridge of Hylia was one of the architectural jewels of Hyrule Kingdom, a testament to the kingdom's skill in engineering and construction. Damage in the events of the Second Calamity, the bridge has since fallen into disrepair, with many of the supporting columns having long ago fallen into the water as a result of wear and tear or the attacks of monsters.
In spite of its appearance, there is still a lonely grandeur to the sight of the Bridge of Hylia, and travelers who make use of its span also look forward to the bridge's appearance on the horizon. For them, it is not only a testament to what was lost during the Calamity, but also a sign of what might someday be recaptured.
Great Plateau
Found on the far southern side of Central Hyrule, the location known only as the Great Plateau is one of Hyrule's most unique areas. Almost like a version of Hyrule in miniature, within the plateau can be found snow-covered mountains, temperate forests, open hills, and wide lakes with a few small rivers. No one knows how old the Great Plateau is, as archaeological surveys of the area have turned up ruins that are thousands of years old, and perhaps even older than the First Calamity.
Hylian legends say that the Great Plateau is where the Kingdom of Hyrule was first founded, and the location of the first Hyrule Castle and its surrounding town. No one knows whether this is true, or when the hylians moved their kingdom's seat of power farther in to Central Hyrule, but there are dozens of speculations all supported by a variety of evidence.
The abundance present in Central Hyrule is replicated to an even greater degree in the Great Plateau, with fruits and vegetables a common sight along every road and in every wooded clearing, and animals of all types wandering freely through the area. As the supposed location of the first Kingdom of Hyrule, the Great Plateau was a sacred place for the hylians, who worked hard to keep it free of any sign of monsters.
At some point during the Second Calamity, many of the survivors from Hyrule Field fled to the Great Plateau for safety, afterwards blocking off the plateau's only entrance with boulders and flooding the resulting valley. This attempt does not seem to have stopped the guardians from climbing the plateau's borders, and the monsters who snuck into the plateau during the chaos of the Calamity seem to have been the survivor's undoing. In the Era of the Wilds, no sign remains of any civilizations beyond the boblins.
The Eastern Abbey
One of the two most impressive buildings found in the Great Plateau, and one of only two that remain standing after the Calamity, the Eastern Abbey was once the original Castle Hyrule, just as the plateau itself is said to be the original boundary of the first Kingdom of Hyrule. The relative quality of the abbey's preservation prior to the Second Calamity allowed historians familiar with ancient Hyruler's languages and construction styles to confirm the age of the abbey, essentially proving its status as the original castle.
In the Era of the Wilds
The Eastern Abbey was one of the victims of the guardian's presence in the Great Plateau, and evidence abounds that survivors fleeing Hyrule's destruction originally came here to seek protection. The arrival of the corrupted guardians put an end to this, and in the Era of the Wilds many inactive and decayed guardian stalkers can be found inside of the abbey, while several guardian scouts can usually be seen wandering the grounds nearby. The walls of the Eastern Abbey, which survived for hundreds of years, are now nothing but crumbling stones– a grim reminder of the rest of Hyrule Kingdom's fate.
Forest of Spirits
The northern half of the Great Plateau is covered with extensive woodland, named the Forest of Spirits. For countless generations, the people of Hyrule came to the Forest of Spirits to seek enlightenment, believing many different things about the woods. Some felt that within its darkness, the spirits of the dead could be summoned to speak; others insisted that hidden paths in the forest could lead one away from Hyrule and into alternate worlds.
Whatever the truth, there can be no denying that a certain air of mystery hangs above the Forest of Spirits. At its edges can be found a wide variety of woodland animals, which never seem to reduce in number no matter how many hunt them for food. But closer to the center, the trees crowd in such a way as to block out most of the sun's rays, and the sounds of the animals draws to an eery quiet.
West of the forest is a small body of water, affectionately called Hopper Pond for the large number of frogs that make their home in the muddy banks. During the day, the frogs can be seen warming themselves on the logs and rocks that jut out from just beneath the pond's surface, while at night their melodic croaking fills the air. It's said that at the Forest of Spirits center, the sound of the frogs from Hopper Pond is the only noise that reaches from the outside world, and the moment you stop hearing them is the moment you've left Hyrule behind.
Temple of Time
Among the most enduring of Hyrule's legends is the story of the Hero of Time, a brave warrior who saved Hyrule from destruction at the hands of a beast called Ganondorf. Some draw a relation between this Ganondorf and Calamity Ganon, noting that both apparently have their origins in the gerudo, but most scholars claim its only a circumstance of Hyrule's people giving the name from one to the other as a sign of fear.
The actual story of the Hero of Time is among Hyrule's most variable, with each region having a different telling of the story, varying in even the most basic facts, such as whether the hero was a boy or a man, whether he lived or died following his encounter with Ganondorf, and even when and where the final confrontation took place.
The Temple of Time is a both an actual building found in the Great Plateau, and a fixture in the Hero of Time's story. Some tellings say the hero trained in the Temple of Time for years, waiting to fight Ganondorf until his powers had grown; others say the Temple mystically granted the hero control over time and weather. If the legends are true, the temple at the Great Plateau might be the actual building found in the stories; but it's just as likely that the Temple of Time simply inspired the legend's original creator.
In the Era of the Wilds
The Temple of Time is one of only two buildings left in the Great Plateau following the Calamity, with the Eastern Abbey being the other. The Temple has, for some reason, fared much better than the Abbey; the only signs of damage don't seem to be a result of violence, but rather the simple passage of time.
Great Hyrule Forest
Sticking out from the nirth side of Central Hyrule and separating the Eldin region from the Hebra Mountains, the Great Hyrule Forest consists of a vast wooded land with Lake Mekar at its center. In the middle of this lake is a large island where the trees grow especially close, called the Koorok Forest, or sometimes the Lost Woods.
The very furthest north section of the region is best characterised by rolling hills, filled with goats and buffalo, which stretch off into the distance until they meet Hyrules' far northern border. Further south, large groves of clustered trees in all shapes and sizes fill the land, reaching all the way to the rivers that border Hyrule Castle.
In the period before the Calamity, the trees of the Great Hyrule Forest filled the area, and dozens of small footpaths criss-crossed their way through the woods. Deer and fox were incredibly abundant in the forest, enough to feed the citizens of Hyrule who came here to hunt, while also allowing knights and other nobility to use them for sport. But following Calamity Ganon's return, much of the forest was burned by guardians seeking out soldiers and townsfolk who fled to the mass of trees for protection. Once Hyrule Kingdom collapsed, and the monsters who flooded Central Hyrule burned through the remains of the fallen ancient tree, they turned their sights on the few remaining old growths of Great Hyrule Forest. Now, many years later, all that is left are small twisted trunks surrounded by saplings.
Lost Woods
Situated on the large chunk of land that fills most of Lake Mekar, the land technically called the Korok Forest has always been known as an eerie place, best avoided in favor of the easier hunting and smaller trees of the rest of the Great Hyrule Forest. Popular stories about children gone missing in the area, only to reappear generations later without having aged at all, seem to be the source of the alternate name of the Lost Woods. Some of these same legends even involved the souls of children becoming trapped in the roots, branches, and trunks of the Lost Woods' trees and becoming a living part of the forest.
Lake Mekar itself serves as a sort of moat around the Korok Forest, preventing easy access to the area except by the small land bridge at the southwest corner of the island. This inaccessibility has never been much of an issue however, as even before the Calamity few but the most bold would dare venture into the forest. Following the destruction of Hyrule Kingdom, the only residents of the area left to try are booblins and hinox, who seem to have learned the same lesson as the previous residents and avoid the woods like a plague. Even the fearsome guardians, the few that still remain active, give the Lost Woods a curiously wide berth.
Mekar Island
Like Korok Forest, this island is located in the waters of Lake Mekar. But unlike the former, Mekar Island is a true island, accessible only by crossing the lake's blue waters. No one in living memory has bothered to due so however, as a result of the island's terrifying history.
Before the Calamity, the island was a popular setting for ghost stories, of a rather deadly variety. Even looking at Mekar Island was enough to send chills down the spine in the middle of summer. Once the Calamity came to pass, dozens of monsters seem to have attempted taking the island as a camp for themselves, with little success– their bones can often be seen sitting on the island on a clear day, poking up from the dirt and brush, or lying just beneath the waterline of the shore.
Not many pass near Lake Mekar these days, as it draws so close to the foreboding Hyrule Castle, and only rito and gorons traveling to each other's domains would have need of the route. But the few stories that brave travelers bring back speak of haunting clacking noises and cackling laughter drifting from across the lake at night, and one story of a traveler who accidentally passed Lake Mekar during a Blood Moon involved a small army of undead creatures dancing across the scrubby land.
Typhlo Ruins
North of the Lost Woods sits another large stand of trees, surrounding a patch of ruins very dissimiliar to any find elsewhere in Hyrule. With strange motifs involving birds and spirals, the design of the Typhlo Ruins stands in stark contrast to the eye-based symbolism of most hylian and sheikah ruins. The origin of the ruins has been a prominent question among Hyrule historians for generations, with no surviving records of who built them or why.
Surrounded by a putrid bog, access to the Typhloy Ruins is very difficult for the unprepared, and the easiest method of approach is found on the western side at a crossing created by a small stone bridge. Making matters even more difficulty, the ruins and the woods and water surrounding them are all shrouded in an impenetrable darkness, present both day and night. No light except that produced by fire seems capable of penatrating the shadows, and as not many thought to map out the ruins, navigating the area is now almost impossible.
Shortly before the Calamity struck, research on the Typhlo Ruins was suspended in favor of putting resources towards additional studies of ancient shiekah technology. Because of this, no one was present when the strange darkness cloaking the ruins first appeared. Theories abound as to the cause, ranging from the influence of Calamity Ganon to some sort of ancient failsafe created by the ruins' original inhabitants in the event of the Calamity's approach.
In the Age of Calamity
Little is known about the Typhlo Ruins, making them one of Hyrule's many ancient enigmas. Prior to the Calamity, most of Hyrule's scientists, historians, archaeologists, and various other researchers focused on finding ways to combat Calamity Ganon's return using sheikah technology. Because of this, little funding was leftover to study the newly-present darkness of the Typhlo Ruins. What research was funded mostly focused on attempting to determine if the appearance of the shroud of darkness surrounding the ruins had anything to do with the signs of the Calamity's reoccurence.

Faron Jungle
Pounded by almost constant rainfall and home to dozens of plants and animals not found anywhere else in Hyrule, the Faron Jungle is among the most unique regions of the continent, and the claim that it hosts the majority of Hyrule's biodiversity would not be unfounded. Faron Jungle is also home to a great number of mysteries, from unusual historical ruins to unexplained phenomena.
Making up Hyrule's southernmost edge, the Faron Jungle is also home to a diverse landscape, consisiting of not only the jungle that gives the region its name, but also sandy beaches, rolling hills, and towering peaks.
Faron Grasslands
Making up about one-third of the Faron Jungle region, the Faron Grasslands are on the eastern side of the region, bordering the mountains that surround the Gerudo Desert. The Faron Grasslands have an unusual shape, with a number of flat and wide canyons that run between thin, steep rock faces. The grasslands are best known for the large number of wild horses living there, separated generally into two groups– faster and leaner plains horses suitable for racing or as steeds for messengers, and stouter hill horses best used as warhorses or for heavy farm work.
Some small sections of the grasslands are scattered with old ruins, which were already crumbling long before the Calamity. These ruins share an architectural style with those found deeper in the jungles of Faron, as well as the mysterious Typhlo Ruins in Central Hyrule, and are believed to be remnants of a forgotten people called the Zonai.
Horse God Bridge
This old wooden bridge spans a body of water known as the Lake of the Horse God, said to be home to a guardian deity that watches over and protects the souls of Hyrule's horses. Though relatively small in comparison to some of the other lakes in Hyrule, and even within the Faron region, the Lake of the Horse God does hold an undeniable power. Many travelers say that their horses pause when crossing the bridge, as if they sense something in the water below; some even claim that riding a horse across the bridge brings good luck, and that leading a horse across brings great luck.
Malanya Spring
East of the Lake of the Horse God, on the other side of the Horse God Bridge, the Malanya Spring is a small pool sheltered in the walls of a high peak. Though it sits close to the Faron Jungle, the rocky walls on all sides protect it from the area's frequent rainstorms, granting the spring nothing but good weather and clear skies.
Malanya Spring is one of several ponds worshipped in Hyrule as a home of fairies, and legend says it even serves as home to one of the great fairies. This belief varies from region to region however, as those in and around the Faron Jungle claim that Malanya Spring is actually home to the Horse God, a spirit named Malanya, and from whom the spring takes its name. Some historians who specialize in the study of Hyrule's lore have suggested that Malanya may still be related to the great fairies in some way, though exactly how is not clear.
Malanya the Horse God
The oft-forgotten brother of the Great Fairies of Hyrule, Malanya is no less powerful than his sisters, though the portfolia of those powers is radically different. While the Great Fairies aid Link on his journey by offering to upgrade his armor, Malanya can resurrect the companionable horses that act as Link's steeds.
Like the Great Fairies, what role Malanya plays in your D&D game, if any, is entirely up to you. He could provide a similar benefit to the one given in-game, offering to resurrect lost companion animals in return for a payment of some kind. Or he might act as a powerful, paranormal patron, worshipped by the party cleric or paladin, or granting powers to a player character of the druid or warlock class.
Laverra Beach & Puffer Beach
Made by the lapping waves of the Faron Sea, Laverra Beach is western shore side of where the Menoat River leads out into the ocean, while Puffer Beach is found on the eastern side. Both areas are well known for their beautiful views and remote location, and the interesting rock formations cause by centuries of erosion on the cliffs that once ran here from the eastern Gerudo Highlands.
The Menoat River that runs between the two beaches has its start in Cora Lake, far to the north. Speculated to be connected to Hylie Lake via undeground waterways, Cora Lake is the deepest body of water in the Faron Grasslands. This makes it the primary source of water for the region, and a natural gathering place for the area's many wild horses.
Nautelle Wetlands
When rain pours from the clouds above the eastern mountains of Faron, it runs down the rocks and through the steep valleys to pool at the lowest point, just before the area crosses over into the grasslands. This collected water forms the Nautelle Wetlands, the only part of the area that mimics the landscape and ecology of the Faron Jungle.
The wetlands move through period wet and dry cycles, as winter in the nearby Gerudo Desert causes the wetlands to shrink to nothing but a marshy patch of grass, and summer brings desert storms that cross the mountain boundary to flood the area again. In these moments the wetlands can sometimes expand much farther up the valley's hills, and create a lake that separates the valley from the grasslands.
Pappetto Grove
The road leading from Central Hyrule into the Faron Grasslands splits once it reaches the southern cliffs, heading east to Malanya Spring, while the western path ends at the Pappetto Grove. This small stand of trees was once a much larger forest, consisting of a springy type of tree that proved perfect for the crafting of bows usable from horseback. In centuries past, the grove was a true forest, presenting a natural barrier between the low-lying grasslands and the high-altitude plains of the west.
Years of harvesting the trees eventually shrank the extensive woods to just a grove, and hoping to preserve their home, the people of Faron appealed to the hylian king for an intervention. The king passed a statue allowing only a certain number of trees to be harvested per year, saving the shrinking woods and bringing renewed economic vitality to the grasslands as the price of their rare bows shot up.
As another side effect of the woods' disappearance, the highland horses of the west and grassland horses of the east have slowly interbred, and near the grove can be found a special variation of horses possessing the speed and strength of both, but also an incredible stubbornness.
Faron Woodlands
Home to Faron Jungle proper, the area sometimes called Faron Woodlands holds the jungle itself, as well as the mountains, alkes, and peninsula further to the east. When using the name Faron Jungle, it is usually this stretch of rainforest that people are referring to, but those living inside of the Faron region are more likely to use Faron Woodlands or Faron Rainforest, and distinguish the bordering eastern and western regions with the terms Faron Mountains and Faron Grasslands, respectively.
Dracozu Lake
Also called "The Mouth of the Dragon", this lake is buried deep within the rainforest, hidden from outsiders by steep cliffs on most sides. The lake is fed by the Dracozu River, which serpentines through the jungle from the south, corssing beneath Faron's major road at a couple different points.
Dracozu Lake's name is clearly in some way related to dragons, but the exact connection is a source of disagreements even among those native to the region. Some say the waters of the lake look like a dragon's open mouth, and its body is the river trailing away into the trees; others think the land at the north end of the lake resembles a dragon's claw, which has dragged its way along the ground to dig out the river.
On the shores of Dracozu Lake sits an ancient temple, a place used by residents of Faron both ancient and modern to worship the great dragon said to protect Faron at the behest of the goddess Hylia.
Faron Highroad
The name used for the road that runs east to west through the breadth of Faron, starting at the moutnains bordering the Gerudo Highlands and finishing somewhere just south of Necluda. Long and winding, the Faron Highroad meets up in the middle with the road leading from Central Hyrule to Faron, and so acts as the major trade and travel route through the region. As it spreads through every corner of Faron, the road takes on a number of traits to deal with the varied weather, being made at some points of flexible wood and at others of strong stone and paved bricks.
Lover's Pond
This heart-shaped pool is also called Sweetheart's Pond, and sits at the top of Tuft Mountain in the southeast corner of Faron Jungle. Tuft Mountain's cap is almost perfectly flat, allowing water to gather and pool in the Lover's Pond, as well as giving incredible views of the Faron Jungle to the west and the Faron Sea to the south. Legends say that lone travelers who manage to reach the Lover's Pond by way of the road leading up the side of the mountain will meet their true love when they arrive.
Lover's Pond also has a counterpart in Necluda, called Heartbreak Pond, whose similar shape is marred by a crack down the center.
Lurelin Village
Hidden away deep within Faron, in a cove between the Faron Jungle and Tuft Mountain, Lurelin Village is a sleepy seaside town filled with people who have rarely gone farther than the nearby beaches. While visitors to Lurelin Village are not unknown, they are still enough of a rarity to generate considerable buzz amongst the villagers.
With such a small population, and a lack of natural resources not sourced from the ocean, Lurelin Village doesn't have much to offer in the way of amenities. But the people are kind, and more than happy to share the bounty they pull from the sea. Cut off from the rest of Hyrule by the jungle, Lurelin Village is sheltered from many of Hyrule's woes, leaving its people with a laid-back and carefree attitude. Their preferred methods of entertainment are gambling, beachside parties, and fishing for pleasure rather than business.
The only real trade Lurelin Village maintains is with hateno Village and Zora's Domain, both of which lie to the north beyond the borders of the mountains. In return for a steady supply of coconuts, bananas, and saltwater fish, Lurelin receives shipments of meat and vegetables from Hateno, and fishing rods, reels, and hooks constructed by zora craftsmen.
Spring of Courage
Like the Spring of Power in the Akkala region, the exact location of the Spring of Courage is a secret known only to the royal family of Hyrule and those trusted to keep it. While common knowledge describes the Spring of Courage as being found somewhere in Faron Jungle, attempting to find the spring would be a difficult venture at best– and a potentially deadly one at worst.
The road that runs through Faron Jungle is the only safe path through the region, and if the Spring of Courage is to be found in the region, it would likely be hidden somewhere in the jungle's misty depths. Monsters of all kinds are hidden within the trees, and the jungle is so deep in some areas that not a drop of sunlight passes through the tree-top canopy, even on the brightest summer days. Undertaking the search for the Spring of Courage would no doubt take a great amount of courage to do.
Zonai Ruins
Named after the mysterious culture of people who disappeared from Hyrule long ago, the Zonai Ruins are located deep within the heart of the Faron Jungle, covered in dirt and overgrown plants. Many of the ruins' structures share motifs of spirals, birds, and dragons, similar to elements found in the Typhlo Ruins. Despite decades of study focused on these ruins, no one is sure why the Zonai used these designs.
The Zonai ruins stretch for quite a length through the jungle, roughly following the course of the Dracozu River, and travelers looking to reach Lurelin Village will inevitably pass several of the ruins on the way. Some especially prominent structures and decorations are used as markers and guideposts to keep from getting lost, including a broken tower found at a bend in the river and a statue that seems to depict a bird-like dragon.
What little is known of the Zonai points to them as a wild and untamed people, full of a fierce energy and a combative spirit. Fragments of art, weaponry, and armor found in Zonai sites indicates that they had an equally strong grasp on techniques of stonework and metalwork, and used both to great effect. The biggest mystery involving the Zonai is not who they were, but rather what happened to them.
The records of Hyrule as it stands today, and the people who live on the continent, extend back for thousands of years, and some oral legends are known to be even older. If hylian myths are to be believed, they have lived within Hyrule's borders for their entire existence, meaning ancient hylians must have encountered the Zonai civilization. However, no written records or even oral legends of this event seem to have survived.
Other cultures that have vanished from Hyrule are discussed frequently in the hundreds of hylian legends about their past, but all of them traceable to other sources, or clearly not describing the Zonai culture. While Zonai society might have collapsed or been forced to flee Hyrule, there could be other answers to the mystery of their disappearance still hidden beneath Hyrule's ancient earth.

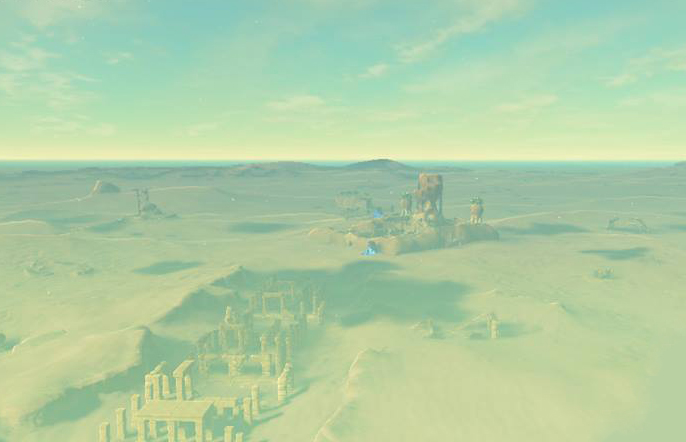
Gerudo Desert
Made up of both the desert itself and the mountainous highlands surrounding it, this region is the historic home of the gerudo people, fierce and independent warriors with a long and storied history. The Gerudo Desert fills the southwest corner of Hyrule, blocked off from the rest of Hyrule by the Gerudo Highlands, which form a sort of wall around the region. It is most easily approachable by a winding path that cuts into the highlands from the east, before opening up into the desert, which stretches out beyond the horizon.
The Desert
The sands of the desert hold the Kara Kara Bazaar and Gerudo Town, but it is otherwise a hot and hostile place. Travelers that risk the desert heat without the proper precautions can quickly find themselves overhwlemed, suffering from heatstroke, and without the strength to either continue on or turn back. Thankfully, the desert itself holds the occasional fruit, flower, or bug adapted to the heat, which can be used for a modicum of relief.
Native creatures include sand seals, used by the Gerudo for transportation, and the molduga, a terrible beast that swims through the desert like a whale swims through the ocean. Pockets of water are known to exist somewhere beneath the sand, refreshing the water sources of Gerudo Town and the Bazaar, and providing the elements necessary for plant life to survive.
Gerudo Desert Gateway
This grand stone archway sits at the very edge of the Gerudo region, marking the boundary between Central Hyrule and the Gerudo Desert. Its imposing architecture is sparsely decorated– surprisingly appropriate for what lays beyond it. After passing through the arch, travelers find themselves in a shadowed and sheltered path running between the mountainous arc of the highlands. This path seems to be natural, rather than having been carved by hand, leading some to speculate that an ancient river or the stream of a melting glacier once passed this way.
Gerudo Town
Central home of the gerudo people for whom this desert region is named, Gerudo Town is a beacon of civilization in an otherwise dangerous and inhospitable landscape. Unfortunately for male visitors, only women are allowed within the walls of Gerudo Town, no matter the reason. Because of this, men are recommended to wait back at the oasis of the Kara Kara Bazaar. In spite of this policy, the gerudo are not unfriendly towards travelers; while they might not be kind, exactly, no one allowed within Gerudo Town's walls is ever mistreated, as long as they adhere to the rules and customs of the gerudo.
Visiting Gerudo Town is an active highly recommended by most female travelers. While the desert itself might be barren, Gerudo Town offers plenty to do, with a vibrant social setting, shops filled with fine jewelry and expertly-crafted weapons, a unique style of architecture, and a fine cuisine focused on lush and thirst-quenching fruits paired with heavily-seasoned meat. The high walls of Gerudo Town, frequent brightly-colored awnings, and the cool mist pouring from its fountains all keep the town at a much more managable temperature.
Outside of town, visitors both male and female can rent trained sand seals, the preferred method of the gerudo for getting around the desert at top speeds. Using a sand seal is difficult, taking a bit of training or a lot of practice, as well as a knack for balance.
Kara Kara Bazaar
A small oasis found along the road between Central Hyrule and Gerudo Town, the Kara Kara Bazaar has been around for awhile, but not nearly as long as Gerudo Town itself. In previous generations, male travelers were recommended to avoid the Gerudo Desert altogether unless totally necessary, as they had nowhere in the desert to rest and resupply. The gerudo helped establish the Kara Kara Bazaar around the existing oasis, providing supplies and workers for making the walls and some of the permanent buildings, hoping it would encourage more traders to visit the desert and exchange goods.
Now the Kara Kara Bazaar holds a variety of shops, some permanent but most temporary, as well as traders that have made the journey from Central Hyrule to the desert, and a relatively comfortable inn. The water at the center of the bazaar seeps into the soft sand throughout the area, which is then dried off by the sun's heat, producing a simple cooling cycle that keeps the oasis cool enough that visitors rarely need to worry about the heat.
In the Age of Calamity
Prior to Calamity Ganon's return and the near-destruction of Hyrule, kara Kara Bazaar was on its way to becoming a real village, just like Gerudo Town. In this time period, several more wood buildings had been ereacted with plans of renovating them to stone, and tents and stalls filled enough of the oasis that some were even forced to set up outside of the bazaar's walls. But following the loss of most of Hyrule's population, the bazaar reverted to its post-Calamity size.
Karusa Valley
This long, thin valley is almost hidden from view until you're right on top of it, and digs its way deep into the cliffs on the northwestern side of the Gerudo Desert. With little of note beyond the unique nature of the valley, few travelers have ever visited the area. But more and more frequently, visitors to the desert are actively warned to avoid the valley, after quite a few stories of those who intend to explore the area have vanished, never to be heard from again.
The disappearances near Karusa Valley are caused by the Yiga Clan, who have been hiding out at the end of the treacherous valley for several generations. Before the Calamity struck, the Yiga were on the backfoot, forced to hide away in the valley or risk their final extermination by the forces of Hyrule. For this reason they kept a strong watch over the valley's entrance, dealing quickly and efficientrtly with trespassers.
As the signs of the Calamity began, Hyrule's armies were diverted to dealing with the rising monster population, and the Yiga Clan became a secondary concern, allowing them to relax and recover. This proved even more beneficial than it first appeared, as the lack of Yiga deaths in the Calamity and the ensuing 100 years have given the Yiga a great buffer, making them perhaps the most successful society of the century.
The Seven Heroines
The name for a group of seven massive stone statues, carved directly into the rock face of the cliffs on the eastern side of the Gerudo Desert. The Seven Heroines themselves are folk heroes of the gerudo, each of whom was blessed with a powerful gift– endurance, flight, gentleness, knowledge, motion, skill, and spirit. These seven heroines worked together in the ancient past to protect the gerudo from harm, and their souls are said to watch over the gerudo to this day.
Before the Calamity, people came far and wide from all over Hyrule to seek the blessings of the seven heroines, who are said to be able to grant their associated gift to those requesting their aid. Most of those seeking the statues were gerudos, but people from other cultures were also known to turn to the statues for help.
The seven heroines are associated with a number of legends and myths, stretching back to a time well before modern history. They are said to have slain moldugas, defended Gerudo Town from armies of monsters, brought water to the starved land to create the oasis at the Kara Kara Bazaar, refreshed the springs of Gerudo Town when they stopped flowing, and even raised the mountains of the Gerudo Highlands from the ground to protect their people from the rest of Hyrule.
Some of the stories involving the seven heroines call back to a time when the gerudo people were still persecuted by the other people of Hyrule, just as the sheikah were once persecuted. The seven heroines helped to save the gerudo from extinction, fighting against hylian forces when required, givign them a somewhat negative stature in hylian culture. In many ways, the seven heroines have taken over the role of the goddess Hylia in gerudo culture, begin protectors of the weak and innocent, which further deepens the divided opinion of hylians on the topic.
In the Era of the Wilds
The Gerudo Desert itself was relatively untouched by the events of the Second Calamity, as the desert sands ghave little protection to the guardians buried there against the ravages of time. The few recovered from the area, mostly around the Divine Beast Vah Naboris, were taken back Central Hyrule for research and repair. Once Calamity Ganon was revived and the Second Calamity began, the mountains of the Gerudo Highlands shielded the region from the worst of Ganon's power, and limited the approach of his monstrous armies.
However, this does not mean the Gerudo Desert did not suffer from the Calamity. Many gerudo warriors were scattered throughout Hyrule at the time of the Calamity, aiding and fighting alondside their allies to the best of their abilities. Most never made it back to their homeland, perishing in battle against guardians and monsters. The lion's share of the gerudo population was lost in the wake of the Calamity, and as a society made entirely of women, it has taken the full century following the Calamity for them to even start to approach the same numbers as their pre-Calamity population.
Gerudo Highlands
The ring of mountains that encircle the Gerudo Desert, closing it off on the north and east sides, are referred to as the Gerudo Highlands. These mountains rise up in sheer cliffs from the desert sands, sudden and imposing, and so tall that they're visible on the horizon from miles away. The shape of these mountains is similar to the high cliffs in Akkala, next to the ocean, making it easy to imagine them looming over a vast sea long ago.
These mountains are equally important to the both the desert and the rest of Hyrule– for the Gerudo Desert, the highlands give a reference point for directions, access to ice and fresh water, stone quarries for building, and defense from inalnd threats. For Hyrule, the mountains help shield their verdant forests from the desert's hot winds, and stops the desert's sands from encroaching on the rest of the land.
The Gerudo Highlands are made up of several different mountain peaks, including Spectacle Rock, Mount Agaat, the Gerudo Summit, Mount Nabooru, and Mount Granajh.
Cliffs of Ruvara
This section of the highlands sits far to the north, and acts as the border between the Gerudo Desert and the Hebra Mountains. In the years leading up to the Prophecy of Calamity, the Cliffs of Ruvara were chosen as a potential site for a joint settlement effort between the gerudo, the rito, and the hylians. Much work was done on setting up the area, including the construction of scaffolds for easy passage through the mountains, and small cabins useful for workers and new settlers.
As the signs of the Calamity grew stronger, the efforts to settle the cliffs were almost abandoned. But in its final days, an attempt to clear a new section of rock revealed an ancient temple, which contained the first set of guardians as well as instructions on finding and recovering the Divine Beast known as Vah Nabooris. It was shortly after this discovery that the monsters of Hyrule began to grow bolder, and the signs of the Calamity began to appear.
Laparoh Mesa
One of the tallest mountain peaks in the Gerudo Highlands, the Laparoh Mesa has a unique geographical shape, with the height of its peak made from several smaller, flat plateaus stacked on top of each other. The shape of this mountain is a result of the weaker sandstone and basalt rock that surrounds the mountain's core, making it very easy to excavate. The mesa is famous for its abundance of opals, as well as the numerous legends that place it as the home of the legendary dragon Farosh.
Vatorsa Snowfield
At the foot of the Laparoh Mesa is a vast stretch of valley, filled year-round with soft and powdery snow. Called the Vatorsa Snowfield, the conditions here are perfect for creating constant powerful but brief snowstorms. The cold of the nearby Hebra Mountains and the rising warmth of the Gerudo Desert below create heavy, almost weekly snowfalls with oversized snowflakes that pile up in every nook and cranny to form mounds many feet deep.
A few times each year, normally at the onset of summer as the Gerudo Desert reaches its rainy season, the snowfalls change into terrible blizzards, strong enough to freeze even a rito in minutes, and so heavy that travelers struggle to see their hands in front of their faces. As the mesa sits right above the entrance to Gerudo Desert, in the days afterwards the heavy snow can sometimes fall into the canyon and melt, creating streams that bring fresh bursts of plant life.
Myths and Legends of the Gerudo Desert
Stretching far and wide across the southwestern corner of Hyrule, large tracts of the Gerudo desert remain unexplored, even after thousands of years of constant occupation by the gerudo people. Hidden within its sandy depths are terrifying monsters, ruined signs of ancient civilizations, and even forgotten clues on the origins of modern day Hyrule.
To explore any one of these mysteries requires a bold soul, a strong sense of adventure, and a hefty dose of preparation. Investigations into the rumors surrounding the Gerduo Desert might mean trekking through the scorching desert heat on the back of a sand seal, or climbing the snow-frosted peaks of the Gerudo Highlands. Either way, the difficulty of such a venture leaves plenty of the region still untouched and undocumented.
Gerudo Great Skeleton
Half-buried in the sand and hidden away in the deepest reaches of the desert, the great skeleton of the desert is supposedly the remains of a massive leviathan, larger even than the molduga that currently call the desert's underbelly their home. One of three such skeletons known to exist in Hyrule, the skeleton of the Gerudo Desert is likely the most well-studied, though only by a slim margin. A few days' travel from Gerudo Town at most, the skeleton can still be difficult to find and reach due to the lack of disntinguishing landmarks guiding the way.
What studies on the skeleton do exist suggest that, like the fossils in Akkala and the Hebra Mountains, the Gerudo Desert skeleton closely resembles the rare skeletons of whales pulled from Hyrule's eastern ocean, though on a much larger scale. Some scholars have taken this as proof of the theory that the Gerudo Desert once held a large saltwater ocean, though others remain skeptical. Either way, the fossil now plays an important role in the desert's ecology, providing shade and shelter for a variety of plants and animals, and a peculiar freshwater spring.
The Great Fairy Fountain
Of the four fairy fountains said to exist in Hyrule, the claim that one exists in the Gerudo Desert at first seems like the most far-fetched. The idea that somewhere out in the dry expanse of the desert there is a miraculous healing fountain seems impossible. But the Gerudo Desert holds many secrets, and a fountain birthed by the magic of the fairies doesn't seem any less likely than the fossilized skeleton of an enormous whale, or an unexplored labyrinth holding a great treasure. If the spring beneath the skeleton does hold a great fairy, it would go a long way towards explaining the bounty of plants and animals found in the same area.
South Lomei Labyrinth
One of the three "great labyrinths" of Hyrule, the South Lomei Labyrinth sits somewhere in the border between the Gerudo Desert and the Gerudo Highlands. The lanyrinth lies low enough in altitude that its reachable from the desert, but also sits at the foot of Daval Peak, in what one might consider the foothills of the highlands. And while the labyrinth is normally subjected to the intense heat of the desert winds blasting over the rock walls surrounding it, during the rainy season it's not unknown for snow to sometimes fall on the valley.
The rocky hollow holding the labyrinth seems to be man-made, with evidence of its excavation with tools marked along the walls. Whoever built the labyrinth seems likely to have carved the valley themselves, though perhaps they simply repurposed a quarry already dug by the desert's most ancient inhabitants. While Hyrule's only existing records of the Gerudo Desert indicate the gerudo as its only inhabitants, their own records claim nothing to do with the labyrinth, and it bears none of the disntinguishing artistic features of ancient gerudo stonework.
Still, the gerudo have come to the South Lomei Labyrinth for generations, using its dangerous and twisting alleys as testing grounds of their own. Gerudo warriors hoping to win the right to join the royal guard must survive three days trapped in the labyrinth, with nothing but their own wits and a dagger to survive, fending off whatever monsters might have chosen the labyrinth as their own stomping grounds.
Statue of the Eight Heroine
The most ancient stories of the Seven Heroines of gerudo legend sometimes speak of an eighth sister, rarely mentioned and never named directly. Scholars familiar with the research of legends and mythology identify this character by the moniker of the "Eighth Heroine"– one that seems to have been deliberately removed from gerudo history millennia before the modern day. The only remaining trace of her involvement in the gerudo stories are fragmentary passages, where unnamed characters provide the other Seven Heroines with advice, wisdom, and other recommendations necessary to save the day.
This Eighth Heroine isn't represented at the same site where the statues of the other heorines sit either, casting doubt on whether the idea really holds any water. But prior to the Second Calamity, a well-funded archaeological expedition sent into the Gerudo Highlands to search for sheikah technology came back with stories of another statue. Shattered and ill-maintained, its pieces scattered across the mountain range, but present all the same. Many believed this might be the Eighth Heroine, and that the statue could provide clues on why the Eight Heroine was erased from the legends. But in the build up to the Calamity, the search for sheikah technology recieved priority; and once the Calamity itself struck, bigger concerns became the main priority of all involved, and stories about the eighth statue were resigned to the sands of time once more.
Gifts of the Heroines
Praying at the Seven Heroines for access to their gifts is a common activity for many people in Hyrule, not just the gerudo. Blessings from the heroines are rare, but not unknown. While most people who've prayed at the statues walk away with only the strength of convinction it provides them, some actually receive access to the heroines' own power.
Adventurers in the world of Hyrule that adhere to the ideals of the Seven Heroines– bravery, strength, and the willingness to sacrifice to help others– might find that praying to the statues of the Seven Heroines will grant them a blessing from the heroine of their choice. An appropriate reward of this type would be one of the Seven Heroine Charms, found in Chapter 4: Treasures of Hyrule.
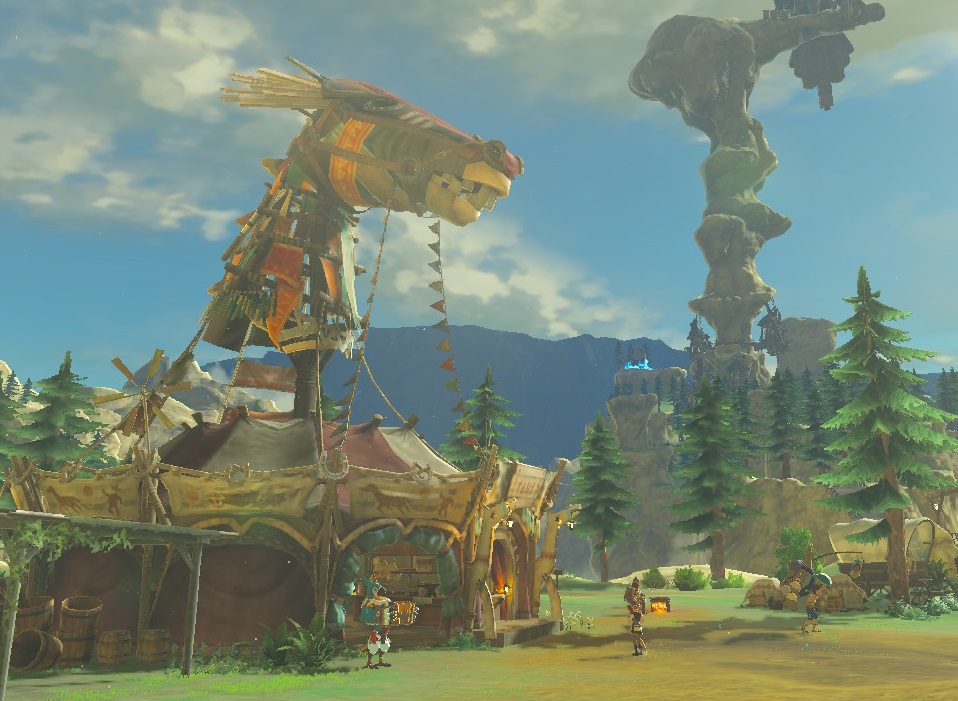
Hebra Mountains
Sitting in the far northwest of Hyrule, the Hebra Mountain region is kept separate from Hyrule at large by Tanagar Canyon. The only road in and out of the region winds far to the north before curving back south, carrying travelers through the southern stretches of the icy Tabantha Tundra, and along the foothills of the snow-covered mountains. Those with the dedication to travel the road are eventually deposited into the more temperate climes of the Tabantha Frontier, an area of sparkling crystal lakes, verdant pine forests, and sheer rock cliffs. The isolation of the Hebra Mountains has played a key role in the way that the rito, the native inhabitants of the region, react to outsiders of all kinds and the role they play in Hyrule at large.
Tabantha Tundra
The Tabantha Tundra is the emptiest section of the Hebra Mountains, marked by a large stretch of open snowfields situated between tall mountain peaks. Large megafauna including tabantha moose, great-horned rhinos, and grizzlemaw bears wander the tundra looking for food and shelter. Bleak, desolate, but fiercely beautiful, there is something about the Tabantha Tundra that sticks with those who visit it.
Survival in the tundra is never guaranteed, but there are those who do their best to exist here all the same. A few boblin communities eke out a living in the hollow shelters made by the mountains, while lizalfos adapted to the cold bury beneath the snow to maintain body heat between hunts. And far to the north, at the point where the tundra stretches past the known maps of Hyrule, lynel have been known to wander the area in search of some unknown desire.
Snowfield Stable
One of the few cold fingers of civlization in the Tabantha Tundra, the Snowfield Stable has been run by the same family for generations. Found next to the road just past the point where it turns south after entering the Hebra region, the Snowfield Stable is a bastion of warmth and good cheer against an otherwise chilling and desolate trip. Travelers heading toward the Rito Village inevitably stop at Snowfield Stable for a night or two to warm their bones, helped along by the hot soup kept bubbling above the fire at all hours of the day and night. Cups of this soup are provided as part of the charge for renting a bed, but bowls can also be bought separately by those who aren't planning to stay more than a few hours– or those looking for second servings.
North Lomei Labyrinth
This giant, diamond-shaped maze is found in the northeast corner of the Tabantha Tundra, and getting to it requires traveling north through the tundra for several days to pass a lone mountain peak, then cutting east through a narrow canyon. Those who make the trip are dropped off right at the labyrinth's front door, with its equally-narrow entrance directly facing them.
Arguably the most accessible of the labyrinths scattered around Hyrule, the North Lomei Labyrinth has been studied extensively, but its secrets remain no less guarded than its siblings. Venturing into the labyrinth reveals an inaccessible central area, kept safe by the impenetrable maze ofthe labyrinth itself. What lies at the center of this maze, and how to get to it, are secrets studied by generations of scholars, their efforts hampered by the biting cold, low visibility, and relative ease with which monsters like lizalfos and bokoblins set up their own camps in the labyrinth's passageways.
Hebra Mountains
The mountains that give this region their name are the deadliest in Hyrule, and countless lives have been lost in the course of attempting to plumb their depths and scale their peaks. While the mountains of the Gerudo Highlands of the Great Plateau might be cold, their frigid temperatures are nothing to the freezing cold of the Hebra Mountains themselves. The temperature here freezes water the moment it touches the air, and the blasting wind cuts through layer after layer of protection. Those unfortunate enough to be caught in the mountains during one of its infamous snowstorms have little choice but to hold out hope for some form of shelter in the mountains many hidden caves, or be ready to face death head-on.
Coldnsap Hollow
Situated somewhere near the center of the Hebra Mountains, the locale locally known as Coldsnap Hollow is a geographic wonder, created by an incredibly particular mix of conditions. Meltwater from the Hebra Mountain snow pools near Coldsnap Hollow in the short summer season, running down the hollow's smooth walls and collecting in the center. Each year the hollow gets just a tiny bit deeper because of this, though not at a rate that any resident of Hyrule could notice over their lifetime.
As this meltwater dugout the hollow, it left the rocky shelf coverings above relatively untouched, creating a sort of "roof" above Coldsnap Hollow. This roof not only shelters Coldsnap Hollow from the worst of the snowy season, but helps block the wind kicked up during snowstorms, and traps heat just enough to make the hollow a little bit more bearable. This might explain why Coldsnap Hollow is such a popular spot for monster camps, as well as base camps for exploratory missions looking to map out and search the mountains.
Hebra Great Skeleton
The third and final great skeleton of Hyrule is unlike its compatriots, in that its existence is more of a myth or a rumor than outright fact. Stories about the fossil go back further even than tales of the other two, detailed by the rito's staunch oral traditions and record-keeping. But the skeleton itself, hidden somewhere in the Hebra Mountains, has never been geographically pinpointed. Most stories place it somewhere near the northern range, but vascilate on whether or not the skeleton is exposed to the open air or hidden in some sort of icy cavern. The likely truth is that, as temperature conditions have changed over the centuries, the fossil has at various times been visible on the mountainside, or covered by deep snow and large formations of ice.
Hebra Peak
The highest point in all of Hyrule, only a few people have ever managed to scale Hebra Peak and reach its summit. In addition to its prodigious size, Hebra Peak is also well-known for the almost perfectly circular hole just below its highest point. The inside section of this hole, the part most interior to the mountain, is made of a strange crystalline material that catches and reflects the light during a few days each year. The phenomenon it produces, called the Crystalshine, lights up the entire Hebra Mountain range and seems to inhibit the formation of snowstorms. Because of this, most expeditions planned for the Hebra Mountains are done so to coordinate with the start and end of the Crystalshine.
Tabantha Village Ruins
Founded a short century before the start of the Second Calamity, Tabantha Village was an attempt to create a waypoint between the Rito Village and the northern half of the road leading into the Hebra Mountain region. Initially the village met with great success, funded by money pulled directly from the vaults of Hyrule Kingdom itself. King Wander Gaepora Hyrule, the grandfather of King Rhoam Bosphoramus Hyrule, chose to fund the creation of the village in the hopes of fostering further trade, and stronger relations, between the rito and the hylians.
Tabantha Village was not directly destroyed in the Second Calamity, but was more a victim of circumstances. With the collapse of Hyrule Kingdom and the devastation of the rest of Hyrule, the people living in Tabantha Village found little reason to stay. Without constant supplies flowing in from the rest of Hyrule, and with trade drying up due to the Calamity, the people of Tabantha Village were forced to survive on nothing but their own wits, with some help from the rito. A few villagers chose to make the trip back into Central Hyrule, hoping to reconnect with lost family members; others couldn't deal with the harsh ordeal of surviving on their own in the mountains, and left for Tabnatha Frontier or elsewhere.
All that remains of Tabantha Village in the modern day are the collapsed ruins of the buildings where people once lived, stalked by winter wolves and ice-breathing lizalfos seeking out their next meals. The area has become a danger, and its proximity to the road into the Tabantha Frontier has further dissuaded trade and travel.
In the Age of Calamity
Before its economic and social collapse, Tabantha Village was the sparkling jewel of the Hebra Mountains. Travelers who passed through the village regularly came back to stay, having become enraptured by the stunning views and stark beauty of the area. No one could travel the road from Central Hyrule to Tabantha Frontier without staying at least a few days in the village, and no one ever regretted doing so. In the period before its abandonment, the Tabantha Village was the one place in Hyrule where rito coexisted alongside hylians. This also gave reason for those seeking training in the use of the bow and arrow to make the trip, hoping to be taught by the expertise of rito marksmen.
Tabantha Frontier
Cut off from the rest of Hyrule by Tanagar Canyon, accessible only via the dangerous road from the north, the Tabantha Frontier is an almost entirely untouched gem of beauty. Difficult for both the guardian army and Ganon's monstrous forces to approach, and guarded by the capable skills of rito warriors, much of Tabantha Frontier got through the Second Calamity without too much suffering.
Contrary to the white sheets of snow that blanket the tabantha Tundra and Hebra Mountains, the defining features of the Tabantha Frontier are its large freshwater lakes and heavy evergreen forests. Though chilly, its temperatures are not frigid, with the exception of the winter season and the higher altitude plateaus that exist at its southern reaches.
Dragon Bone Mire
Apparently the source of all dragonbone used by boblins in their weapons, the dragon bone mire is a swampy collection of ponds on the south side of the Tabantha Frontier. Hidden from the Rito Village by the rising plateaus between them, most travelers don't even know that the Dragon Bone Mire exists. The rito are aware of it, having traveled far and wide across the Hebra Mountains and the rest of Hyrule, but have largely remained content to leave it alone. Their weapons, designed to value weight and speed over power, have little need of the heavy density of dragon bone. Bokoblins and moblins, on the other hand, use broken shards of the dragonbone for their most dangerous weapons, crafting everything from clubs to spears using the seemingly-endless supply. How they break the shards off in the first place, given the material's strength and durability, is unknown.
Great Fairy Fountain
Another of the legendary fairy fountains is said to exist somewhere in the Hebra Mountains, specifically within the range of the Tabantha Frontier. Where it might be located is a question of some importance, and a long-standing dispute between the rito and hylians. Hylians treat the great fairies with almost the same importance they give to the goddess Hylia, and even when they aren't near a supposed fairy fountain, hylians will often pray at small bodies of water for the protection of the fairies.
Rito, on the other hand, rely on nothing but their own skill; they only reverence they hold are for the ancestors spoken of in their legendary stories, those who accomplish deeds great enough to have their names passed down through generations. The rito have also lived in and flown Tabantha Frontier for hundreds of years, and insist they've never seen any sign of a supposed fairy fountain. Who you believe, and for what reason, is largely down to personal preference.
Lake Totori
The largest by volume of the four lakes in the Tabantha Frontier, Lake Totori is also the most central lake, and home to the Rito Village. Surrounded on all sides by sheer cliffs, and with waters so dark and deep that almost nothing can be seen through their surface, Lake Totori is the ultimate protection for Rito Village against invaders. Hylians or gerudo that fall into the lake are sure to drown without help, as the cliff walls provide nowhere to climb out; zora are afraid to swim in the waters, as even their keen eyes can barely penetrate the gloom of the depths. As a whole, Lake Totori is incredibly impsoing, with the rocky pillars that climb out of its waters serving to heighten the eerie effect.
Rito Village
At the center of Lake Totori, a series of stone platforms rise into the sky, culminating in a central pillar that towers hundreds of feet in the air. Built into the side of these cliffs are the wodden homes of the rito, forming the one and only Rito Village. Each home and building sits on its own platform, crafted to allow easy access for flying rito, while not entirely preventing terristrial visitors from exploration.
The Rito Village has existed for hundreds of years, and has served as the home of the rito people for as long as they can remember. The layout of the village changes every so often, as new platforms are built, and old platforms are torn down to make new room. But though it may grow and shrink along with the rito population, the village's foundations still bear the signs of ancient inhabitants, offering a tangible connection between modern-day rito and the legendary ancestors they worship.
Tabantha Great Bridge
Built shortly after the Second Calamity by remant residents of Tabantha Village who chose to move south, the Tabantha Great Bridge was the first, and so far only, attempt to build a travel route passing directly over Tanagar Canyon. Never intended as a permanent solution, the current bridge is a rickety wooden structure, over 75 years old, and already worn by the powerful winds that cut through the canyon. Only the bravest souls attempt to use the Tabantha Great Bridge to enter the region, and most prefer their chances in the temporary cold of the Tabantha Tundra as opposed to the risk of the bridge snapping beneath their feet. All the same, what remains of the Tabantha Great Bridge still serves an important role in connecting the nearby stable to the outside world, and allowing quick access to the Tabantha Frontier for those in a hurry to arrive.
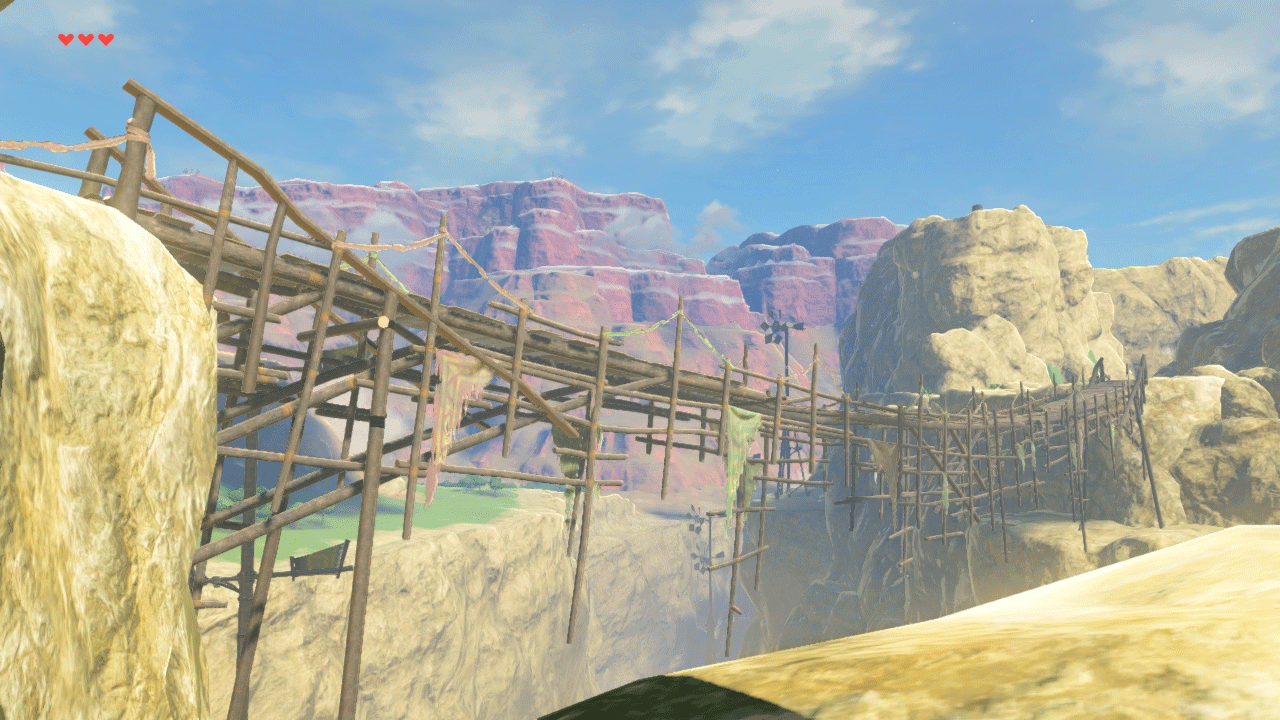
Lanayru Province
On the eastern side of Hyrule, nestled between Akkala to the north and Necluda to the south, the Lanayru province is the ancestral home of the zora, and a place of intense, rugged beauty. The Lanayru Province acts as a watershed for most of Hyrule's lakes and rivers, a gathering place before they empty out into the ocean, and this status is reflected in the sheer number of ponds, lakes, rivers, wetlands, and waterfalls that can be found in the region.
Lanayru Wetlands
Passage into the Lanayru province almost inevtiably requires travelers to go through the Lanayru Wetlands, a marshy area where the rivers of Central Hyrule join together before their final passage into Lanayru proper. Marked by wide-open moorland to the west and north, the central portion of these wetlands is home to dozens of small, mostly unnamed islands. Islands given a name are usually historically important, or recognized as landmarks for travelers to chart their progress on the road to visiting the zora.
The water level in the Lanayru Wetlands varies greatly– in some areas it is only ankle- or shin-deep, allowing travel by foot, albeit slowly; in others it can be deep enough to dive and swim in, usually at points closer to the northern and eastern ends. Water buffalo are a common sight near the shallow ends, and in the migratory season large herds of the creatures can be found moving up and down the moorlands.
Goponga Island
The third-largest island in the Lanayru Wetlands, Coponga Island is also the most central island, and anyone attempting to reach the zora holding's by crossing the wetlands directly will inevtiably have to pass through Goponga Island. Its central locations, relatively firm ground, and fertile soil also made Goponga Island an attractive prospect for settlement, and before the Calamity it was home to Goponga Village, the only major town to be found in the Lanayru Wetlands. Following the Calamity however, Goponga Village suffered the same fate as many of the other settlements in Central Hyrule, and its ruins are now the only remnant of what was once a thriving area for both trading and farming.
Mercay island
The largest island in the wetlands, Mercay Island is marked by the large hill rising from its center, which allows phenomenal views out over much of the wetlands. East of Mercay Island, in an area of deep water often called Mercay Bay, the remains of a pre-Calamity route through the wetlands has been transformed by a group of lizalfos into a powerful base. By setting up additional bridges and floating platforms, the lizalfos here have made a fortified home for themselves, where they can pull fish from the deep water, and have an open view of any threats that approach them.
In the Era of the Wilds
Prior to the Calamity, the floating bridges connecting the lizalfos base to Mercay island and the mainland were constructions built and maintained by residents of Goponga Village, intended to facilitate easier export of vegetables between their home and merchants heading north. In those days, there were only two bridges– one connectign Mercay to a smaller unnamed island, and from this island to the mainland.
By the time of Link's awakening in Hyrule, the lizalfos here have fortified their position and grown insular, attacking anyone that even thinks about attempting to cross through their base. In the years leading up to this however, the lizalfos were seen as an unavoidable evil. While most merchants and travelers preferred to take the long way around the wetlands, extending their trip by several days to do so, some merchants found that by offering the lizalfos some of their stock, they could pass amongst the island unharried, and save themselves a bit of travel time.
Moor Garrison
One of the oldest garrisons in Hyrule, records pulled from Hyrule Castle establish the founding of the Moor Garrison as several hundred years ago, at a time when tensions between the hylians and the zora were much more strained. Though it never saw any actual combat, the garrison was built at the tip of a key passage between the deeper waters of the northern wetlands and the more shallow waters to the south. This let the soldiers of the garrison keep watch for any zora using the wetland's waters to move through the northern river and towards Hyrule Castle.
After centuries of peace between the hylians and the zora, by the time of the Calamity Ganon's return the Moor Garrison was seen as outdated and beyond use, and often kept under-funded, poorly-stocked, and understaffed. In the build-up to the expected final confrontation with Calamity Ganon, much of the garrison was converted to a holding grounds for reserve portions of the guardian army. This mean that, when the army was corrupted by Ganon, the Moor Garrison was among the first to fall.
Wetland Stable
Found right at the edge of what one might consider Central Hyrule, the Wetland Stable is one of the most recently constructed stables in Hyrule. The family that runs it are distantly related to the owners of the Lakeside Stable in the Faron Jungle region, and built the stable only a few years ago. Its proximity to Central Hyrule, and the guardians that still roam there, sometimes makes guests nervous, but as of yet there have been no issues.
Most of the Wetland Stable's supplies are sourced from the wetlands large biodiversity, with heron, duck, and a variety of fish providing the base for most meals. Water buffalo is also sometimes served as a dish, though only rarely, as the stable's owners rely on visitors to hunt the sometimes-dangerous beasts. Building supplies are sourced from fallen trees in the wetlands shallow waters, or sometimes from the village ruins on Goponga Island and Zauz Island.
Zauz Island
As the needs of the Goponga Village residents grew, the town eventually expanded to encompass nearby Zauz Island as well. Prior to the Calamity, only a few buildings were found here, mostly farmhouses using the soft ground to grow crops. These buildings were usually made from wood imported from outside regions, and after the collapse of the village during the Calamity, they rotted quickly in the wet conditions. Now the only tangible sign of any connection between Zauz Island and Goponga Village is a flooded well, and a rickety wooden bridge nearly sunk beneath the marshy waters.
Mount Lanayru
The tallest mountain in the Lanayru mountain range, Mount Lanayru is also the second-highest mountain peak in Hyrule, outclassed only by Hebra Peak. While the rest of the Lanayru Province is characterised by a usually warm and humid climate, Mount Lanayru's height keeps its year-round temperature below freezing. This, combined with the constant humidity of the surrounding lowlands, means that the mountain is subjected to an almost constant snowfall.
Travelers rarely have reason to visit Mount Lanayru, and the cold dissuades the local zora from freequent trips as well, leaving much of the mountain entirely devoid of population.
The Spring of Wisdom
Legends say that one of the holy springs, the Spring of Wisdom, cna be found at the top of Mount Lanayru, somewhere near the peak. This spring's existence is the only one verified by outside reports, as the mountain is difficult to climb, but not impossible. Stories from those who've made the trip indicate the existence of some form of ruins at the peak, surrounded by a pool of water that somehow remains unaffected by the icy temperatures. People who do visit the spring often drink from it or bathe in its waters, hoping to recieve some blessing from the water's powers.
Lanayru Sea
The stretch of ocean that follows the coast of the Lanayru Province is often called the Lanayru Sea– like the rest of the Lanayru Province, its waters are connected to the other rivers and lakes through Hyrule, mostly via waterfalls and underground streams. It also shares the rest of Lanayru Province's natural beauty, with bright cerulean waters and a saltwater bay whose ecosystem rivals that of the Lanayru Wetlands for sheer variety of animals, fish, and plants found there.
Horon Lagoon
This tiny inlet is marked by the presence of a variety of small islands, which trap the outgoing water filtered through the Lanayru Bay and mix it with a variety of silt and sediments. The result is something resembling the Lanayru Wetlands in miniature, and many of the same species found there can also be found inhabiting the lagoon. While the water in the lagoon isn't ocean water, and so can technically be consumed, it isn't recommended to do so without filtering out the dirt and boiling it first.
Lanayru Bay
Lanayru Bay is the main attraction of the Lanayru Bay, and it's easy to see why– every ounce of beauty in the Lanayru Province is seemingly condensed here, offering up the region at its most attractive. The weather is usually calm and pleasant, but even its rainstorms bring a sort of resreshment of their own to the area. If not for the fact that the lands are firmly in the hands of the zora, who are dedicated to maintaining its natural beauty, the Lanayru Bay would likely have been the site of dozens of smaller villages and homesteads. As it is, only one town was ever founded on its shores, which unfortunately was wiped out by a rogue typhoon some decades before the Calamity.
Lanayru Great Spring
The largest source of freshwater in all of Hyrule, the Lanayru Great Spring is fed by glacier melt from the mountain ridge at its north end, and in turn feeds the winding Zora River, the Lanayru Wetlands, and finally the Hyrule River and Lake Hylia. The zora have lived in this area for longer than written records have existed, watching over the water that flows to the rest of Hyrule, and trusted by the people of the continent to alert them to any unusual changes or issues.
Naturally subject to high amounts of rainfall, as the Divine Beast Vah Ruta gradually awakens once more after almost 100 years of dormancy, the water it sprays on the area has caused ceasless storms, leading to massive flooding and stronger currents.
Ploymus Mountain
Looking out over Zora's Domain and the East Reservoir Lake, Ploymus Mountain is the second-highest mountain in the Lanayru Province, and surprisingly difficult to reach. Ascending its heights requires either scaling sheer cliff faces from the Zora's Domain or the East Reservoir, or several days spent in a roundabout route that crosses through Upland Zorana. The top of the mountain levels off into a flat plain, home to nothing but a few large boulders, some hardy boar and foxes, and a few sparse evergreens. Stronger monsters sometimes rest here as well, including lynels, so anyone looking to make the trip is recommended to come well-prepared and well-equipped.
The very top of the mountain drops off in a sudden cliff called Shatterback Point, which hangs directly above the East Reservoir Lake. For generations, young zora have made the dangerous trip to Shatterback Point as proof of their strength, culminating in a leap from the cliff itself as testament to their unflagging courage. While the trip up might take a day, or several if passing through Upland Zorana, this method back down is significantly shorter.
Rutala Dam
This dam holds back the water that forms the East Reservoir Lake, and its run-off spills out to create the Rutala River. While some of the water is a result of the frequent and natural rainstorms that affect the Lanayru Province, the greater portion of it was produced by the magical effects of Divine Beast Vah Ruta. Even a century after Vah Ruta was corrupted and shut-down by Calamity Ganon, the waters it produced have helped to keep the Rutala River flowing. Now, as Calamity Ganon's power grows more active, so does Vah Ruta; too active in fact, as it produces near-constant rainstorms separated only by months, or sometimes weeks, of inactivity. If this trend continues, there may come a day in the near future that Divine Beast Vah Ruta simply never stops, and might threaten to flood the whole region.
In the Age of Calamity
Prior to the excavation of Vah Ruta, the Rutala Dam was much smaller, designed only to hold some of the water from the region's rainiest seasons. Even after Vah Ruta was uncovered, it took quite some time for the dam to be expanded, resulting in a small zora village becoming flooded by the rising tides.
Upland Zorana
These rocky mountains have a distinctive shape to their terrain, with large ridges and boulders punctuating a steep ascent upwards. The shape of the area is a result of hundreds of years of flowing water, which carved deep gouges between the original mountaintops to create the crevasses seen today. At night, the area often emits an eerie, dim glow– the result of large deposits of luminous stones buried beneath the ground, exposed as the constant rainfall erodes the rock surrounding them.
Zora River
The second major river in the Lanayru Province, the Zora River is fed by the waterfalls surrounding Zora's Domain. From the base of Zora's Domain, it runs south and east into the Lanayru Wetlands, taking a few curves and drops along the way. The Zora River can be considered the main thoroughfare of the zora, giving them a direct path to the other parts of Hyrule via the network of rivers it eventually connects to.
Zora's Domain
Built hundreds of years ago, Zora's Domain is the central home of the zora people, an elaborately decorated palace-city with the home of the zora royal family at its heart. The architecture of Zora's Domain expertly blends all of the zora people's techniques in craftsmanship, combining glass, metalwrokign, and stonecarving to produce something more beautiful than any single technique would be capable of. Just as Hyrule Castle and its intricate architecture are the pride and joy of hylians, so too is Zora's Domain the pride and joy of the zora.
The majority of the buildings in Zora's Domain are raised into the air above a basin fed by several waterfalls, each of which pour down the rock face to fill the reservoir below, before feeding into the Zora River. These waterfalls are the result of meltwater from underground glaciers, buried beneath the rock of Upland Zorana. By sitting above the water, the zora ensure that they retain easy access to the waterway below, while also keeping them well-defended against intruders.
Necluda
Nestled between Lanayru Province and Faron Jungle, Necluda is the smallest region of Hyrule, and portions of its eastern half could even be argued as belonging to its neighbors. Sheltered from the extreme climates of the neighboring regions by its surrounding mountains, Necluda is always firmly in a comfrotable rang of temperature, with strong variations caused by the shifting of the seasons. Those who live here often remark how much they enjoy having weather that shifts and changes ever so subtly as the year progresses.
Even though Necluda is the smallest region in Hyrule, before the Calamity it was home to a surprisingly large portion of the population, and this trend continues even into the modern day– the only stable communities of both hylians and sheikah are found in Necluda, in the form of Hateno Village and Kakriko Village, respectively.
West Necluda
This section of Necluda buts up against Central Hyrule, its borders usually marked by the edges of Hyrule River. Passing into or out of West Necluda from the center of Hyrule requires passing over one of four different bridges, though travelers usually prefer to use Proxim Bridge because it lies along the most direct path. The division between West and East Necluda, on the other hand, is usually marked by Fort Hateno, the ruined remains of Necluda's largest pre-Calamity garrison.
Dueling Peaks
The most prominent geographic feature of Necluda, the Dueling Peaks are a pair of mountains situated just a few hundred feet from each other. Both Squabble River and the main road into Necluda pass directly between the mountains, leading into Blatchery Plain on the other side. Legends about the Dueling Peaks say they were once a single mountain, split down the middle by the dragon god Farosh, to forge a path for the people of Hyrule to access the bounties of Necluda.
Fort Hateno
One hundred years ago, it was here that the forces of Hyrule took their last stand, hoping to fend off the onslaught of the guardian army and turn the tide of battle. It was also here, one hundred years ago, where the legendary hero supposedly laid down his life to protect Princess Zelda, and where Zelda's blessings from the Goddess Hylia were awoken. The stories say that in a single moment, Princess Zelda destroyed the guardian army storming the fort, before setting off to Hyrule Castle to defeat Calamity Ganon.
Now, Fort Hateno is a shadow of its former self. Blatchery Plain, the large field at the front of the fort, is scattered with the broken remnants of the guardians destroyed by the princess. Fort Hateno itself, with no one left to command its forces and barely enough soldiers left to staff it, struggled on for a few years before being left for nature to reclaim. The courage of Hyrule's armies, Princess Zelda, and the fabled hero sheltered Hateno Village from destruction, allowing it to survive into the modern day as the last remaining bastion of hylian culture.
Kakariko Village
Tucked away in a small valley surrounded on all sides by steep mountains, Kakariko Village is the final home of the sheikah people, excluding the desert fortress secretly held by the Yiga Clan. Kakariko Village survived the devastation of the Second Calamity by remaining hidden from Calamity Ganon's armies, and too difficult for the guardian army to access. It's grown very little in the century since the fall of Hyrule Kingdom, its people working hard to make sure they remain safe from outside threats, while trying to balance their attempts to help reinvigorate Hyrule as a whole.
Stories about the natural beauty of Kakariko Village have slowly filtered into the outside world, giving it a repuation amongst traders and travelers as a once-in-a-lifetime spot to visit. Some people have even claimed it is the location of one of the four great fairy fountains of legend, though no sheikah traders have ever confirmed or denied this claim.
In the Age of Calamity
Before the Second Calamity, the sheikah could be found in all parts of Hyrule, just like the hylians themselves. They were fully integrated with hylian culture, and people from all cultures, even hylians, sometimes had difficulty distinguishing between the two. Kakariko Village, however, deliberately remained apart from the rest of Hyrule, a well-guarded secret given only to trusted friends of the sheikah. It mostly remained hidden not by refusal to share its location, but because its remote location and small size ensured that it drew very little attention, even from the most curious outsiders.
Proxim Bridge
The largest of the four bridges that connect Necluda with Central Hyrule, the Proxim Bridge is the main thoroughfare for travelers passing into and out of the region. Not quite as large as the Bridge of Hylia, the Proxim Bridge has a similar design; like the Bridge of Hylia, Proxim Bridge has also suffered the ravages of time, and has begun to crumble into the waters below. Proxim Bridge has been defended for several generations by a group of guards descended from the soldiers that survived the ordeal at Fort Hateno, but the numbers of this group have slowly shrunk over time.
Squabble River
This tributary of the Hylia River cuts straight through the heart of Necluda, beginning at its eastern borders, passing between the Dueling Peaks to spill out into Blatchery Plain, then cutting beneath Fort Hateno to end at the foot of the mountains in Eastern Necluda. The Squabble River plays an important role in the nearby ecosystem, delivering freshwater to the whole of Necluda, and attracting any number of merchants, wild animals, and monsters to its shores. The riverbed is surprisingly deep, and this, combined with its narrow channel, creates a current much stronger than it appears on the surfaces, so travelers are warned to avoid swimming in its waters.
East Necluda
The borders of this subregion are normally marked by Fort Hateno in the west, and the small mountain range that rises at the coast of the ocean in the east. Its northern and southern borders are much more fluid, and flow into the nearby Lanayru Province and Faron Jungle, making it difficult to tell where one region ends and another one begins.
Sheltered by Fort Hateno, and protected from the guardian advancement by Princess Zelda's actions there, East Necluda spent many years as host to the last of the hylian people. The rest of their cities, towns, and villages had been decimated by the Calamity; the survivors in these locations fled elsewhere, making minor footholds in the wilds and surviving as long as they could. This left Hateno Village with the distinction of being the only pre-Calamity hylian settlement to survive intact.
Cliffs of Quince
These talls cliffs sit just to the east of Fort Hateno, overhanging the Squabble River. Impressive in their size, the cliffs presented a natural location for the construction of Fort Hateno, and help to keep the eastern valley sealed away from the rest of Hyrule. Wild horses and monsters both live and roam through the flat fields at the top of the cliffs.
Hateno Village
The only fully hylian settlement that still exists following the fall of Hyrule Kingdom, Hateno Village was never an important location before the Calamity. With few exports worth of value and nothing to its name besides the presence of the nearby Hateno Ancient Tech Lab, Hateno Village never grew in population beyond a few dozen households. Even after the Second Calamity, Hateno Village remains rather separated from the rest of Hyrule, occasionally shipping vegetables and fruits to the outside world and importing metal tools from the zora and gorons.
Set atop a high cliff overlooking the village, the Hateno Ancient Tech Lab has existed for longer than the village below it. According to the researchers who've worked at the lab, Hateno Village was founded as a place for lab assistans and soldiers charged with protecting the lab to bring their families, and grew from there. Now however, only two researchers remain inside the lab– Purah and Symin. Both Purah and Symin are dedicated to unlocking the secrets of ancient sheikah technology, which was the original purpose behind the founding of the Ancient Tech Lab. Purah, much older than her appearance would imply, is the foremost expert in sheikah technology, but her younger assistant Symin is an expert in Sheikah Slates in particular.
Necluda Sea
Past the high mountains of East Necluda, the ground drops off suddenly to the shores of the Necluda Sea, the body of water nestled between Lanayru Sea and Faron Sea. Only a small path through the mountains leads from inland Necluda out to the sea, passing not far from the Ancient Tech Lab before winding back and forth down the slopes on the other side of the ridge. The path empties out at Hateno Beach, a sandy horseshoe-shaped beach that wraps around Hateno Bay.
Prior to the Calamity, imports to Hateno Village and the Ancient Tech Lab sometimes came through Hateno Bay via boat– usually pieces of ancient sheikah technology sent from the tech lab in Akkala, or fish and fruit from Lurelin Village in the south. Now the bay sees little use, and is often a popular spot for monsters to set up camp.
Eventide Island
The largest island to be found in Hyrule's oceans, Eventide Island is a wilderness paradise, with numerous plam trees, a freshwater pond, and an inviting beach conducive to arrival by raft or canoe. Though the island is too small to support a real settlement, this hasn't stopped people throughout the ages from trying, and the remains of these attempts can sometimes be found buried just beneath the ground– including old cooking pots, rusted weapons, and broken timbers from abandoned homesteads.
While the cultures of Hyrule gave up on trying to settle Eventide Island long before the Calamity, this hasn't stopped monsters from attempting the same. Bokoblins, lizalfos, and even hinox will sometimes make their way to the island and try to eke out a living in its beautiful wilderness, with mixed results.
Loshlo Harbor
Following the curve of the shore west from Hateno Bay eventually leads to Loshlo Harbor, a small indent in the Necluda Sea where the broken remnants of a once-busy dock lay half-covered by the ocean's waters. Before the Calamity, Loshlo Harbor was the main point of delivery for supplies coming to Fort Hateno via the sea.
Weapons and armor crafted by the gorons in Eldin were transported overland to Akkala, and then by boat to Loshlo Harbor before being loaded onto carts and carried over low-lying roads to the fort. When Hyrule's leadership made the decision to try and speed up efforts to colonize Akkala, soldiers from Fort Hateno were shipped out of Loshlo Harbor to make the trip to the newly-built Akkala Citadel. Now all that remains of this harbor's important historical legacy are the overgrown roads between it and the ruins of Fort Hateno, and the broken shells of ships left behind at the harbor during the soldier's exodus.
In the Era of the Wilds
After the devastation of the Second Calamity, the soldiers at Fort Hateno were left entirely without guidance. With their kingdom in ruins and the last of the royal family locked away inside Hyrule Castle, there were heavy debates among the senior leadship as to what the next course of action should be. Eventually, the major camps were formed. The first chose to remain at Fort Hateno, holding it against the still-present hordes of Ganon's army of monsters. The second, mostly made of soldiers who had grown up in nearby Hateno Village, chose to leave the fort and return to their homes, and try to salvage something of their lives before the Calamity.
The final group, and the one with the most popular support, felt that Hyrule had been lost for good. Rather than sit and cling to the ruins of the old world, they set out for Loshloa Harbor and the ships anchored there, taking numerous supplies with them. They and their families set out to sea, each ship heading in a different direction, following the ancient legends of a land across the sea, still untouched by Calamity Ganon's evil. What happened to these ships, and the soldiers commanding them, is still unknown to this day, as none of them ever returned.
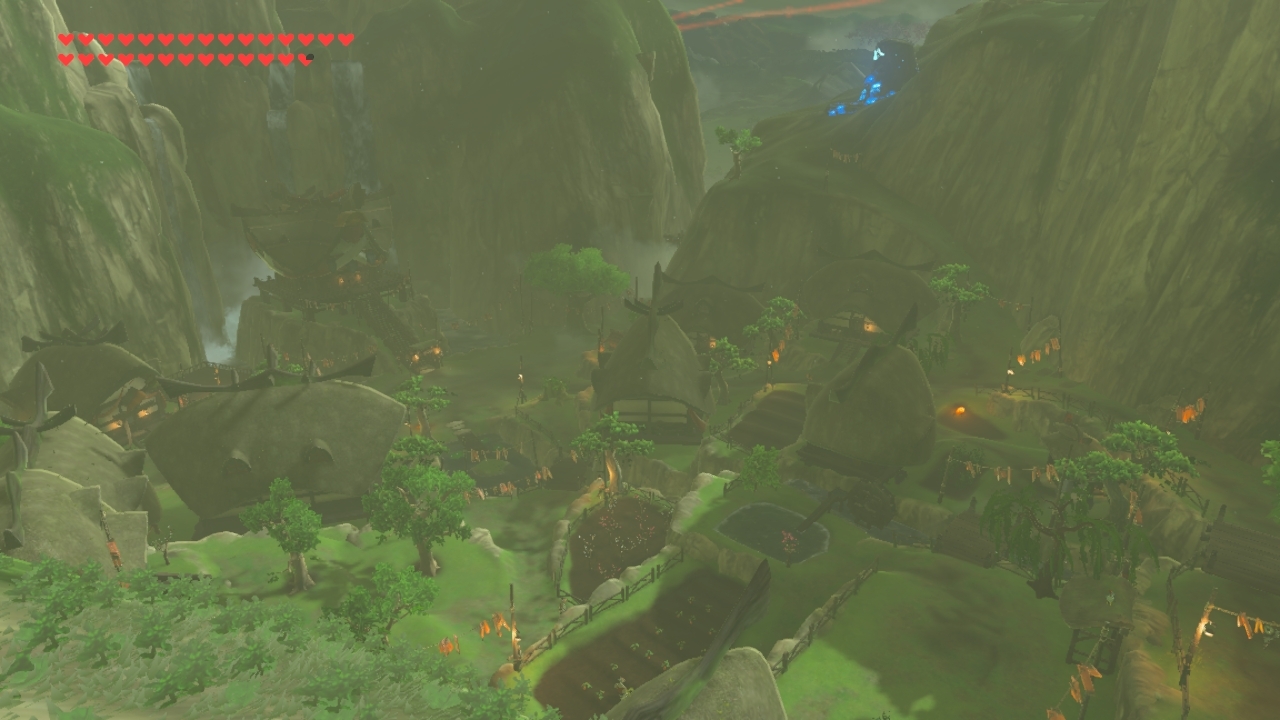
Myths and Legends of Hyrule
The land of Hyrule has existed in some form for hundreds of thousands of years, with the oldest written records stretching back only a fraction of that time. However, dozens of stories from Hyrule's people have been passed down from parent to child, told and retold in hundreds of ways, giving clues as to what the truly ancient past of Hyrule held. Stories about destined heroes, rampaging monsters, vast floods that crushed mountains and spreading darkness that threatened to consume the world.
Which of these are true events and which are fairytales is impossible to discern, but each of them holds a small kernal of truth. Understanding the places and events they allude to can provide greater insight into Hyrule and its many cultures than dozens of dust-covered history books ever could. Included here are just a few of the many hundreds of stories, tales, and legends that reference Hyrule's ancient past.
Divine Beasts
Ancient war machines built ten thousand years ago by the ancient shiekah to stave off the First Calamity and combat Calamity Ganon, the Divine Beasts are awe-inspiring pieces of technology. Their appearance and power are oftened likened to forces of nature, and the idea that they could be controlled by a single individual sometimes boggles the mind. Four Divine Beasts are known to exist, each given to one of the cultures of ancient Hyrule by the sheikah people for safekeeping, and to cement the alliance between Hyrule's people against the all-consuming power of Calamity Ganon.
After the defeat of Calamity Ganon during the First Calamity, the king of Hyrule was gripped by fear of the overwhelming strength of the Divine Beasts, and the power that the sheikah's technology might give them over Hyrule Kingdom. He ordered the Divine Beasts and the guardian army buried beneath the ground, the sheikah people exiled from the kingdom, and the location of the Divine Beasts wiped from all records. In this way their existence passed into legend, forgotten for millennia.
With the imminent return of Calamity Ganon alluded to by an ancient prophecy, King Rhoam Bosphoramus Hyrule followed the clues left by his ancestors to a buried ruin, which held a map describing the location of each Divine Beast. The king had them dug up, given to the selected champions of each of Hyrule's cultures, and prepared for the arrival of the Second Calamity. Unfortunately, Calamity Ganon learned from the mistakes of its past, and used the power of its Malice to take control of the Divine Beasts and turn them against Hyrule.
Now, as Princess Zelda's power weakens and Calamity Ganon wakes one more, the Divine Beasts rampage on and off, wreaking havoc and causing devastation across the continent.
Divine Beast Vah Ruta
Found buried beneath what is now the East Reservoir Lake in Lanayru Province, Vah Ruta was constructed for the zora people. Inside Vah Ruta is a complicated, magical pump capable of producing an endless supply of water, which can then be funneled out of the Divine Beast as wide-ranging rainstorms or strong jets powerful enough to blow the tops off of mountains. Shaped like an elephant, Vah Ruta is trustworthy and enduring, just like Mipha, the zora champion placed in charge of it.
In the modern day, Vah Ruta sends endless gouts of water from its trunk into the sky, causing perpetual storms and mass flooding throghout Zora's Domain and Lanayru Province. As it slumbers on and off, the zora people pick up the pieces of their lives after each flood, never knowing when the next storm will start.
Divine Beast Vah Rudania
Buried deep beneath the magma flows of Death Mountain, Vah Rudania proved the most difficult Divine Beast to pull from its hiding place. Only the gorons, with their heat-resistant skin, could hope to get close; and even then, the temperatures were so high and the heat so intense that it took months of constant work to finally reveal Vah Rudania's control chamber. Daruk, leader of the goron people and the one in charge of Vah Rudani's excavation, was the one to finally activate the Divine Beast and pilot it straight out of Death Mountain's crater. Like Daruk, Vah Rudania is unbelievably tough, and always has strength to spare.
Shaped like a lizard, Vah Rudania spends its time in the modern day crawling across Death Mountain's surface, every so often retreating back into the mountain's crater to rest. While patrolling the mountain, it launches flurries of magma bombs that drive away the goron miners dependant on the area's gems and metals. Each time Vah Rudania first awakens after a retreat, it thrashes and churns within the mountain's belly, running the risk of the volcano erupting and driving Death Mountain's temperatures up to truly unbearable levels.
Divine Beast Vah Medoh
Placed within Lake Totori, hidden in its endless dark waters, the Divine Beast Vah Medoh was impossible for the rito people of the area to reach. Even the zora, stunned by the darkness, pressure, and depths of the lake struggled to make the trip to reach Vah Medoh. Only Revali, the greatest of the rito warriors, had the courage to attempt the trip. Working alongside the bravest zora explorers, Revali was brought to Vah Medoh, where he pentrated its barrier and piloted the Divine Beast back to the skies above Rito Village where it belonged. Like Revali, Vah Medoh is a master of the skies, and its cannons have pinpoint ranged accuraccy.
Once a blessing for the rito, Vah Medoh is now a bane on their people. Hovering in the air above their village, its presence was once a comforting reminder of their people's strength; now, in the periods where Calamity Ganon's Malice activates Vah Medoh's armaments, it is a terror whose cannons threaten to shoot down any rito that flies too high and risks encroaching on the skies.
Divine Beast Vah Nabooris
The first Divine Beast uncovered by the people of Hyrule, Vah Nabooris was buried beneath the loose sand of the Gerudo Desert, within the stone confines of an ancient rock quarry. Immediately upon its excavation, a sudden sandstorm fell upon the expedition, filling the quarry with sand and threatening to bury Vah Nabooris once more. Knowing they could not afford to waste any more time, the gerudo chiefatn, Lady Urbosa, risked life and limb climbing into the rapidly-filling quarry to reach the control room of Vah Nabooris. Once there, she activated the Divine Beast, and stopped the raging storm in its tracks.
Urbosa was also the first champion to recognize that something had gone wrong during the events of the Second Calamity, and before Vah Nabooris was captured, she directed the Divine Beast to walk far out into the desert. There it still sits, and each time it awakens it creates powerful and dangerous sandstorms that, thanks to the fortitude of Urbosa, present only minimal risk to the gerudo.
Sheikah Shrines
Scattered across Hyrule, found in nearly every nook and cranny, the Shiekah Shrines are ancient in age, dating back to just after the First Calamity. Some of these shrines are well-known, situated near Hyrule's densest population centers, and have played roles in local legends for generations. Others are so well-hidden that explorers and adventurers continue to find new, uncharted shrines to this day.
Before the start of the Second Calamity, the purpose of the Sheikah Shrines was unknown– their entrances locked with strange mechanisms, and the secrets they might hold left to the imagination. Once every decade or so, a truly clever adventurer might discover how to open a shrine, connecting seemingly disaparate parts of their environment to some grand master puzzle which could open the shrine's doors. But there is little rhyme or reason in how the different shrines are opened, and for the most part they have remained inscrutable.
When Hyrule rediscovered the technology of the ancient sheikah, uncovering their long-buried secrets, it reinvigorated interest in the shrines. Scholars spent hundreds of hours poring over forgotten scrolls hidden in the library of Hyrule Castle, seeking some clue as to why the Sheikah Shrines were built, and who they were meant for. The answer was varied, and unexpected.
Some of the Sheikah Shrines were built by ancient sheikah monks just after the First Calamity, with the knowledge that a Second Calamity would be inevitable. And that just as with the first, a legendary hero would rise up the challenge Calamity Ganon, and that the monks and their wisdom would be necessary to guide this hero to victory. Others were created to weather the worst, allowing that in the event the Second Calamity or some other disaster threatened the world, they could provide sanctums in which to hide the secrets of the sheikah, resources to rebuild, and more.
Some of the Sheikah Shrines were opened before the Second Calamity, the brightest minds put to work figuring out how to solve their puzzles. Others remained untouched, their uses left to future researchers and heroes to discover. Most of those opened before the Calamity were shelters, or stockpiles of weapons and technology that might have been able to aid Hyrule in fighting Calamity Ganon. What lies inside those still unopened is anyone's guess.
Three Dragon Gods
As a sacred number in hylian culture, many of the beliefs held by the hylians come in sets of three– three pieces of the ancient and all-powerful triforce, three Sacred Springs, and three goddesses that created the world. In addition to these latter three goddesses, ancient hylian myths also speak of the Three Dragon Gods, the protectors who watch over Hyrule and guard the Sacred Springs against trespassers. Each dragon is said to have been blessed by a different goddess, gifted a fraction of their power, and entrusted with the task of maintaining the balance of the world's creation. While the goddess Hylia was created to watch over the people of Hyrule, the dragons were created to watch over the land itself.
The Three Dragon Gods are named Farosh, Dinraal, and Naydra. Each one is depicted differently in the stories and legends, with each one assigned a color and an element.
Farosh, guardian of the Spring of Courage, has thunder running through his scales. His single great horn channels lightning, which follows him wherever he goes. The Faron Jungle is plagued with frequent storms, and lightning is a common sight there. When a storm grows too strong and unruly, the people of Faron Jungle claim that it is Farosh, soaring through the skies, carrying the lightning along his back. Farosh was blessed by the goddess Farore, the source of all life, the spark that brings about the essence of existence.
Dinraal is the guardian of the Spring of Power, and his body burns red with heat, and great gouts of flame leap from his magnificent twin horns. Dinraal's home is said to be the deepest, hottest part of Death Mountain itself. Some even claim the heat of the Eldin region and its magmatic flows are created by the breath of Dinraal as he slumbers. Dinraal was the dragon chosen by the goddess Din, whose strong arms carved the earth and blessed it with the heat of growth.
The final dragon, Naydra, is trusted to protect the Spring of Wisdom. His body is said to be like living ice, his great cluster of horns like a group of icicles growing all the time as they draw moisture from the air. It's said to be Naydra who causes the temperature to drop as you ascend, and creates the snow and the storms that deliver it, wiping the world clean in a blank white slate. Naydra was created with a fraction of the essence of Nayru, the final goddess and the one who determined the ways in which the world would work.
Wicked Spirits
For all of the forces of good in the world, the great fairies and the dragon gods, there are also forces of wicked darkness. Calamity Ganon is the greatest among these, and its power represents a threat to the world. But there are smaller dark spirits as well, less deadly but no less malicious. These beings existed in the shadows of the world after the three goddesses created it, and it was Hylia who was tasked with drawing them out and sealing them away. No records of such spirits really exist, and discussion of their existence was once forbidden, in a time when people were more superstitious.
Some of these spirits, like the goddesses, were worshipped by the people of Hyrule. In exchange for their loyalty, the spirits promised great power, wealth, and strength to Hyrule's people. Some fell to the wickedness, lured in by temptation. Others stood firm, helping to cast the spirits back into the darkness.
One of the only remaining stories about such a spirit comes from the area around Hateno Village, and deals with a being known only as the Horned Spirit. Dwelling in the reaches of the mountains surrounding Hateno Village, the Horned Spirit approached the hylians of the area with a deal. It promised them untold riches, though at a cost. When the goddess Hylia discovered the Horned Spirit, she smote it, trapping it at the foot of the mountains in a tiny statue, as punishment for its greed and hubris. Whether the spirit still exists, whether it existed at all, and whether it still lives within the statue are questions not discussed in the legend.
The Horned Statue
Still found at the fringes of Hateno Village today, the Horned Statue does indeed hold the mischevious creature previously called the Horned Spirit. After being trapped in rock by the goddess HYlia, the spirit tried to continue its dealing with the locals, but to no avail. Only once every few years does someone come along who is willing to make a deal with the Horned Statue, and even more rare are those with the strength necessary to pique the Horned Statue's interest.
When its attention is drawn, the Horned Statue is most notorious for offering an exchange of livelihood for wealth. Those who want money can give the Horned Statue a fraction of their life force, receiving great riches in return. But few know that the Horned Statue's dealing go the other way as well– that those with the money to pay can purchase excess strength from the statue, buying the lifeforce of others who have made the deal in order to extend their own, reducing their age and curing debilitating diseases.
Hylian Cooking
Druing Link's adventures in Breath of the Wild, he collects a large array of materials from all different parts of the world, ranging from stock vegetables and meat to rarities like ocean snails and rhino beetles. Without the ability to cook these ingredients, turning them into a variety of dishes and elixirs, Link's journey would be far more difficult.
Characters in Hyrule have the option to do the same, using materials to make special recipes and elixirs that will provide benefits like temporary boost to their hit points, or increased damage for their attacks. Rules for cooking recipes and creating elixirs are outlined below, as well as a list of materials that can be found throughout Hyrule.
Ingredients and Spoils
Items that can be collected in Hyrule for use in recipes and elixirs fall into two categories: ingredients, and spoils. Ingredients are common food items, such as apples, meat, eggs, sugar, and other things that can be used to create food. Spoils are less food-like, and are used specifically to create elixirs. This category includes things like critters (frogs, bugs, and the like) as well as pieces pulled from larger creatures, such as keese wings, monster horns, or dragon claws.
A full list of both ingredients and spoils that can be found in Hyrule is included later in this section. In order to use materials, characters must first either purchase or collect them. Included in the list of materials is a price for each material that it can be bought at. However, not every material is available for purchase, and not every village in Hyrule is going to have access to every ingredient. In this case, a character may need to spend time collecting the materials they need.
Ingredients and spoils are split into two types, common and rare. Whether a material is common or rare is included in the list of all materials.
Collecting Ingredients
Collecting ingredients is relatively easy, and can be done with just a minor amount of effort. Any character that is proficient in either Nature or Survival can spend time foraging during a short or long rest. A character that forages during a short rest gains no other benefits from the rest, but a character can choose to forage during a long rest without losing any of the rest's benefits. At the DM's discrection however, a character that forages during a long rest might miss out on other light activities, such as talking to NPCs, searching for information, or gambling and eating with friends.
When a character forages during a rest, they must make either an Intelligence (Nature) or Wisdom (Survival) check, the result of which determines how many ingredients they successfully collect based on the table below. If a character is foraging over the course of a short rest, they collect half as many ingredients instead, rounded down. This means that even if a character's foraging check is successful during a short rest, they might return without any ingredients.
If you are using rules for downtime, like those included in the 5th Edition Adventurer's League, a character can also spend 1 day of downtime to forage. Characters using downtime to forage do not have to be proficient in Nature or Survival to forage. When a character forages using downtime, they gain twice as many ingredients as normal.
Ingredient Foraging
| Ability Check Result | Number of Ingredients |
|---|---|
| 5 or below | 0 ingredients |
| 6-10 | 1d4 common ingredients |
| 11-15 | 2d4 common ingredients |
| 16-20 | 1d4 rare ingredients |
| 21+ | 1d6 rare ingredients |
The types of ingredients that a character can forage depend on the location they're in, as certain ingredients are found only in certain regions of Hyrule. In some places, a character may not be able to forage at all, at the discretion of the DM. For example, characters taking a short rest in a dungeon may not be able to forage. This doesn't have to be true, however– characters foraging indoors in places like dungeons and shrines might pull ingredients from old barrels, forgotten chests, or even gear left behind by previous explorers.
When a character successfully forages, they might find only a single type of ingredient, or they might bring back a variety. Which specific ingredients a character brings back from their foraging is up to the DM, though characters can request that they find a specific type of ingredient.
Collecting Spoils
Unlike ingredients, which can be pulled from the abundance of the natural world, spoils are slightly more difficult to get your hands on. Spoils are only obtained when characters defeat a group of enemies. After a group of enemies is defeated, roll a d10. If the result is less than the number of enemies defeated, they leave behind spoils, with the number and rarity determined by the group's average CR based on the table below.
Spoils Left Behind
| Average CR | Number of Spoils |
|---|---|
| 4 or below | 1d4 common spoils |
| 5-10 | 1d4 rare spoils |
| 11-15 | 1d6 common spoils |
| 16-20 | 1d6 rare spoils |
| 21+ | 1d6 common and 1d4 rare spoils |
Like ingredients, spoils can sometimes be bought, but only common spoils such as frogs and bugs. Rare spoils, the parts taken from monsters directly, aren't the sort of thing available to buy in the average shop.
Cooking a Meal
Cooking a meal requires three things:
- Access to cook's utensils
- Proficiency with cook's utensils
- The time necessary to cook
As long as a character satisfies these requirements, they can use ingredients to try and create a meal. A character can cook a meal the same way they gather ingredients– by spending time during a short rest, long rest, or 1 day of downtime. The number of ingredients a character can use in the meal is determined by how long they're spending to cook the meal.
If cooking during a short rest, a character can use only 1 ingredient; if cooking during a long rest, they can use up to two ingredients instead. If a character uses 1 day of downtime (or a full 8 hours if not using downtime rules) the character can cook a single meal with up to three ingredients, or cook two meals with two or fewer ingredients each.
When a character tries to make a meal, they must make an Intelligence (Cook's Utensils) check, with the difficulty of the check determined by the number of ingredients used, based on the table below. The number of ingredients used in a dish also determines how many people can consume the dish to gain its benefits.
Cooking Difficulty
| # of Ingredients Used | Ability Check DC | # of Servings |
|---|---|---|
| 1 Ingredient | 10 | 2 Servings |
| 2 Ingredients | 15 | 4 Servings |
| 3 Ingredients | 20 | 6 Servings |
Multiple characters that are all proficient with chef's tools can work together to make a meal, either granting the character making the ability check advantage on the roll or allowing them to use one more ingredient than they normally could based on the time spent cooking. No matter what, a character can't make a meal with more than three ingredients. At the DM's discretion, a character can also use a different ability score than Intelligence when making the ability check with the Cook's Utenstils.
If a character succeeds on the ability check, they manage to cook a delicious meal. A single meal has all of the benefits associated with the ingredients used to cook it (the benefits for each ingredient are listed in the Ingredients Tables section). A dish can have multiple different benefits associated with it. A character that fails the ability check instead creates Dubious Food, which can be consumed by only one person. Dubious Food restores a single expended hit die, but provides no other benefits beyond the food itself.
Once a meal has been prepared, it must be consumed immediately. When a character consumes a meal, they gain its benefits until the end of their next combat encounter. Keeping track of whether a character is currently benefiting from a meal is important, because this means a character can spend a long rest or downtime creating a meal, and retain the meal's benefits for days until the next time they enter combat.
Creating an Elixir
Creating an elixir requires three things:
- Access to alchemist's tools
- Proficiency with alchemist's tools
- The time necessary to create an elixir
As long as a character fulfills all three requirements, they can use spoils collected from enemies to create elixirs. Creating elixirs work in a similar way to cooking meals, requiring a certain amount of time to create. The difference between meals and elixirs is that elixirs require at least two spoils to create, meaning they can't be created during a short rest. Instead, a character that meets the prerequisites for creating an elixir can make one elixir during a long rest, or two elixirs by spending 1 day of downtime (or a full day's 8 hours of work).
When a character attempts to craft an elixir, they must choose the spoils that they want to use in the elixir. Making an elixir requires either two or three spoils, and at least one common and rare spoil each. The common spoils used in an elixir determines the type of effect the elixir produces, while the rare spoils used determines the effect's duration. Using two common spoils produces an exliri with both effects; using two rare spoils stacks the duration provided by those spoils.
The benefits and durations associated with different spoils are listed on the Spoils Table. No matter what rare spoils are used in an elixir, it's effects can't last for longer than 4 encounters.
Once the character has decided which spoils to use, they must make an Intelligence (Alchemist's Tools) check, with the difficulty determined by the duration of the elixir's effects, based on the table below.
Elixir Difficulty
| Elixir Duration | Ability Check DC |
|---|---|
| 1 encounter | 13 |
| 2 encounters | 16 |
| 3 encounters | 19 |
| 4 encounters | 22 |
Once created, an elixir remains viable for 1 week (or if using downtime rules, until the end of the creator's next long rest.) Only a single creature can consume an elixir, which uses the same rules as potions for determining when an elixir can be consumed.
Ingredients and Spoils
Akkala Region Common Ingredients
| d8 | Name | Qualities |
|---|---|---|
| 1 | Armoranth | Tough |
| 2 | Basic Meat | Restorative 1 |
| 3 | Big Hearty Radish | Hearty 5 |
| 4 | Bird Egg | Restorative 1 |
| 5 | Cane Sugar | Energizing |
| 6 | Hylian Rice | Restorative 1 |
| 7 | Mighty Carp | Mighty |
| 8 | Zapshroom | Elecro |
Akkala Region rare Ingredients
| d4 | Name | Qualities |
|---|---|---|
| 1 | Hearty Bass | Hearty 2 |
| 2 | Hyrule Herb | Restorative 1 |
| 3 | Prime Meat | Restorative 3 |
| 4 | Tabantha Wheat | Restorative 2 |
Eldin Region Common Ingredients
| d6 | Name | Qualities |
|---|---|---|
| 1 | Basic Meat | Restorative 1 |
| 2 | Bird Egg | Restorative 1 |
| 3 | Goron Spice | Fireproof |
| 4 | Hylian Rice | Restorative 1 |
| 5 | Sizzlefin Trout | Spicy |
| 6 | Sunshroom | Spicy |
Eldin Region Rare Ingredients
| d4 | Name | Qualities |
|---|---|---|
| 1 | Bright-Eyed Crab | Energizing |
| 2 | Prime Meat | Restorative 3 |
| 3 | Stealthfin Trout | Sneaky |
| 4 | Tabantha Wheat | Restorative 2 |
Central Hyrule Common Ingredients
| d20 | Name | Qualities |
|---|---|---|
| 1 | Apple | Restorative 1 |
| 2 | Basic Meat | Restorative 1 |
| 3 | Bird Egg | Restorative 1 |
| 4 | Courser Bee Honey | Energizing |
| 5 | Endura Carrot | Enduring |
| 6 | Endura Shroom | Enduring |
| 7 | Fresh Milk | Hearty 1 |
| 8 | Goat Butter | Enduring |
| 9 | Hearty Radish | Hearty 3 |
| 10 | Hearty Truffle | Hearty 1 |
| 11 | Hylian Rice | Restorative 2 |
| 12 | Hylian Shroom | Restorative 1 |
| 13 | Hyrule Bass | Restorative 1 |
| 14 | Hyrule Herb | Restorative 1 |
| 15 | Razorshroom | Mighty |
| 16 | Silent Princess | Stealthy |
| 17 | Stamella Shroom | Energizing |
| 18 | Staminoka Bass | Energizing |
| 19 | Stealthfin Trout | Sneaky |
| 20 | Swift Violet | Hasty |
Central Hyrule Rare Ingredients
| d10 | Name | Qualities |
|---|---|---|
| 1 | Armoranth | Tough |
| 2 | Big Hearty Truffle | Hearty 4 |
| 3 | Electric Safflina | Electro |
| 4 | Endura Shroom | Enduring |
| 5 | Prime Meat | Restorative 3 |
| 6 | Rushroom | Hasty |
| 7 | Stamella Shroom | Energizing |
| 8 | Tabantha Wheat | Restorative 2 |
| 9 | Voltfin Trout | Electro |
| 10 | Warm Safflina | Spicy |
Faron Jungle Common Ingredients
| d6 | Name | Qualities |
|---|---|---|
| 1 | Basic Meat | Restorative 1 |
| 2 | Bird Egg | Restorative 1 |
| 3 | Cane Sugar | Energizing |
| 4 | Hylian Rice | Restorative 2 |
| 5 | Mighty Bananas | Mighty |
| 6 | Mighty Porgy | Mighty |
Faron Jungle Rare Ingredients
| d6 | Name | Qualities |
|---|---|---|
| 1 | Endura Carrot | Enduring |
| 2 | Hearty Durian | Hearty 4 |
| 3 | Hydromelon | Chilly |
| 4 | Mighty Thistle | Mighty |
| 5 | Prime Meat | Restorative 3 |
| 6 | Tabantha Wheat | Restorative 2 |
Gerudo Desert Common Ingredients
| d10 | Name | Qualities |
|---|---|---|
| 1 | Basic Meat | Restorative 1 |
| 2 | Bird Egg | Restorative 1 |
| 3 | Electric Safflina | Electro |
| 4 | Hydromelon | Chilly |
| 5 | Prime Meat | Restorative 3 |
| 6 | Rushroom | Hasty |
| 7 | Spicy Pepper | Spicy |
| 8 | Swift Violet | Hasty |
| 9 | Volfruit | Electro |
| 10 | Warm Safflina | Spicy |
Gerudo Desert Rare Ingredients
| d6 | Name | Qualities |
|---|---|---|
| 1 | Cool Safflina | Chilly |
| 2 | Palm Fruit | Restorative 2 |
| 3 | Prime Meat | Restorative 3 |
| 4 | Sunshroom | Spicy |
| 5 | Zapshroom | Electro |
| 6 | Wildberry | Restorative 2 |
Hebra Mountains Common Ingredients
| d12 | Name | Qualities |
|---|---|---|
| 1 | Basic Meat | Restorative 1 |
| 2 | Big Hearty Truffle | Hearty 4 |
| 3 | Bird Egg | Restorative 1 |
| 4 | Chillfin trout | Chilly |
| 5 | Chillshroom | Chilly |
| 6 | Cool Safflina | Chilly |
| 7 | Goat Butter | Enduring |
| 8 | Hearty Salmon | Hearty 4 |
| 9 | Hylian Rice | Restorative 2 |
| 10 | Ironshroom | Hardened |
| 11 | Tabantha Wheat | Restorative 2 |
| 12 | Voltfin trout | Electro |
Hebra Mountains Rare Ingredients
| d8 | Name | Qualities |
|---|---|---|
| 1 | Bird Egg | Restorative 1 |
| 2 | Courser Bee Honey | Energizing |
| 3 | Prime Meat | Restorative 3 |
| 4 | Razorshroom | Mighty |
| 5 | Spicy Pepper | Spicy |
| 6 | Swift Violet | Hasty |
| 7 | Tabantha Wheat | Restorative 2 |
| 8 | Wildberry | Restorative 2 |


Lanayru Province Common Ingredients
| d10 | Name | Qualities |
|---|---|---|
| 1 | Armored Carp | Hardened |
| 2 | Basic Meat | Restorative 1 |
| 3 | Bird Egg | Restorative 1 |
| 4 | Bright-Eyed Crab | Energizing |
| 5 | Fleet-Lotus Seeds | Hasty |
| 6 | Fresh Milk | Hearty 1 |
| 7 | Hearty Blueshell Snail | Hearty 3 |
| 8 | Hylian Rice | Restorative 2 |
| 9 | Hylian Shroom | Restorative 1 |
| 10 | Silent Shroom | Sneaky |
Lanayru Province Rare Ingredients
| d8 | Name | Qualities |
|---|---|---|
| 1 | Armored Porgy | Hardened |
| 2 | Big Hearty Radish | Hearty 5 |
| 3 | Blue Nightshade | Sneaky |
| 4 | Chillshroom | Chilly |
| 5 | Mighty Carp | Mighty |
| 6 | Mighty Porgy | Mighty |
| 7 | Prime Meat | Restorative 3 |
| 8 | Sneaky River Snail | Sneaky |


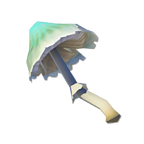
Necluda Region Common Ingredients
| d20 | Name | Qualities |
|---|---|---|
| 1 | Armored Porgy | Hardened |
| 2 | Basic Meat | Restorative 1 |
| 3 | Bird Egg | Restorative 1 |
| 4 | Blue Nightshade | Sneaky |
| 5 | Cool Safflina | Chilly |
| 6 | Fortified Pumpkin | Hardened |
| 7 | Goat Butter | Enduring |
| 8 | Hearty Bass | Hearty 2 |
| 9 | Hearty Durian | Hearty 4 |
| 10 | Hylian Rice | Restorative 2 |
| 11 | Ironshell Crab | Hardened |
| 12 | Ironshroom | Hardened |
| 13 | Mighty Porgy | Mighty |
| 14 | Mighty Thistle | Mighty |
| 15 | Palm Fruit | Restorative 2 |
| 16 | Razorclaw Crab | Mighty |
| 17 | Sanke Carp | Doubles hit points gained from a dish |
| 18 | Sneaky River Snail | Sneaky |
| 19 | Swift Carrot | Hasty |
| 20 | Voltfin Trout | Electro |
Necluda Region Rare Ingredients
| d10 | Name | Qualities |
|---|---|---|
| 1 | Apple | Restorative 1 |
| 2 | Armored Carp | Hardened |
| 3 | Hearty Radish | Hearty 3 |
| 4 | Hylain Shroom | Restorative 1 |
| 5 | Hyrule Bass | Restorative 1 |
| 6 | Prime Meat | Restorative 3 |
| 7 | Silent Princess | Sneaky |
| 8 | Silent Shroom | Sneaky |
| 9 | Staminoka Bass | Energizing |
| 10 | Tabantha Wheat | Restorative 2 |
Common Spoils
| d20 | Name | Qualities |
|---|---|---|
| 1 | Bladed Rhino Beetle | Mighty |
| 2 | Cold Darner | Chilly |
| 3 | Electric Darner | Electro |
| 4 | Energetic Rhino Beetle | Energizing |
| 5 | Fireproof Lizard | Fireproof |
| 6 | Hearty Lizard | Hearty 2 |
| 7 | Hightail Lizard | Hasty |
| 8 | Hot-Footed Frog | Hasty |
| 9 | Red Jelly | Spicy |
| 10 | Restless Cricket | Energizing |
| 11 | Rugged Rhino Beetle | Hardened |
| 12 | Smotherwing Butterfly | Fireproof |
| 13 | Summerwing Butterfly | Spicy |
| 14 | Sunset Firefly | Sneaky |
| 15 | Thunderwing Butterfly | Electro |
| 16 | Tireless Frog | Energizing |
| 17 | Warm Darner | Spicy |
| 18 | White Jelly | Chilly |
| 19 | Winterwing Butterfly | Chilly |
| 20 | Yellow Jelly | Electro |
Rare Spoils
| d12 | Name | Duration |
|---|---|---|
| 1 | Ancient Core | 3 encounters |
| 2 | Ancient Gear | 2 encounters |
| 3 | Ancient Screw | 1 encounter |
| 4 | Eyeball | 2 encounters |
| 5 | Fang/Tooth | 2 encounters |
| 6 | Guts | 3 encounters |
| 7 | Horn | 1 encounter |
| 8 | Tail | 3 encounters |
| 9 | Talon | 2 encounters |
| 10 | Tentacle | 1 encounter |
| 11 | Toenail | 1 encounter |
| 12 | Wing | 1 encounter |
Material Qualities
The materials foraged from the wilds of Hyrule, grown by its people, and collected as spoils from its monsters come in a wide variety of shapes and forms. Each of these materials has a special property, whose essence can be brought out by cooking them into a meal, or mixing them into an elixir.
When an ingredient or spoil is mixed into a recipe or elixir, it grants the effect associated with its qualities. Placing multiple materials with the same quality into a recipe or elixir has no effect, except in the case of Hearty and Restorative items. For these qualities, the benefits provided stack, granting larger numbers when more ingredients are used with that same quality.
Chilly. For the duration of the effect, you gain resistance to fire damage and have advantage on saving throws made to resist the effects of intense heat.
Hearty X. When you consume this dish or elixir, roll X hit dice (up to your hit die maximum) and add your Constitution modifier to the result. You gain that many temporary hit points. This does not expend the hit dice rolled. These temporary hit points last for the duration of the dish or elixir.
Hasty. For the duration of the effect, you gain an additional 5 feet of movement speed, and have advantage on Dexterity saving throws.
Electro. For the duration of the effect, you gain resistance to lightning damage.
Energizing. For the duration of the effect, you have advantage on Strength-based saving throws and ability checks.
Enduring. For the duration of the effect, you have advantage on Constitution-based saving throws and ability checks.
Fireproof. For the duration of the effect, you are immune to fire damage and automatically succeed on saving throws against the effects of intense heat.
Hardened. For the duration of the effect, you gain a +1 bonus to your AC.
Mighty. For the duration of the effect, you gain a +1 bonus to attack and damage rolls made with weapons.
Restorative X. When you consume this dish or elixir, roll X hit dice (up to your hit die maximum) and add your Constitution modifier to the result. You regain that many hit points. This does not expend the hit dice rolled.
Sneaky. For the duration of the effect, you have advantage on all Dexterity (Stealth) checks.
Spicy. For the duration of the effect, you gain resistance to cold damage, and have advantage on saving throws made to resist the effects of extreme cold.
Chapter 3: Character Options
THE LAND OF HYRULE IS FILLED WITH A GREAT variety of people and cultures, giving you access to a number of options that might not be available in other campaign settings. Like the rest of this handbook, these options are based on Breath of the Wild, meaning they may not reflect the entirety of Hyrule's vast history, and some of the information contained in this chapter might conflict with what has been established about the people and cultures of Hyrule elsewhere.
Cultures of Hyrule
In the version of Hyrule that exists in the timeline of Breath of the Wild, there are eight major types of people scattered across the continent. While the majority of the people living in Hyrule belong to the Hylian race– sometimes just called humans, and very analagous to other humans in Dungeons & Dragons– Hyrule is also home to the Gerudo, Goron, Rito, Sheikah, and Zora peoples as well.
While each of Hyrule's four corners is predominantly populated with a different culture well suited to its environment, the people of Hyrule have spent thousands of years intermingling with each other, and members of each race will be found almost anywhere that the players might travel.
Included in this section are the statistics needed to play as members of each of these colorful cultures, as well as rules for playing as both boblins and lizalfos, the much-maligned but not entirely irredeemable species that make up the majority of monsters found in Hyrule.
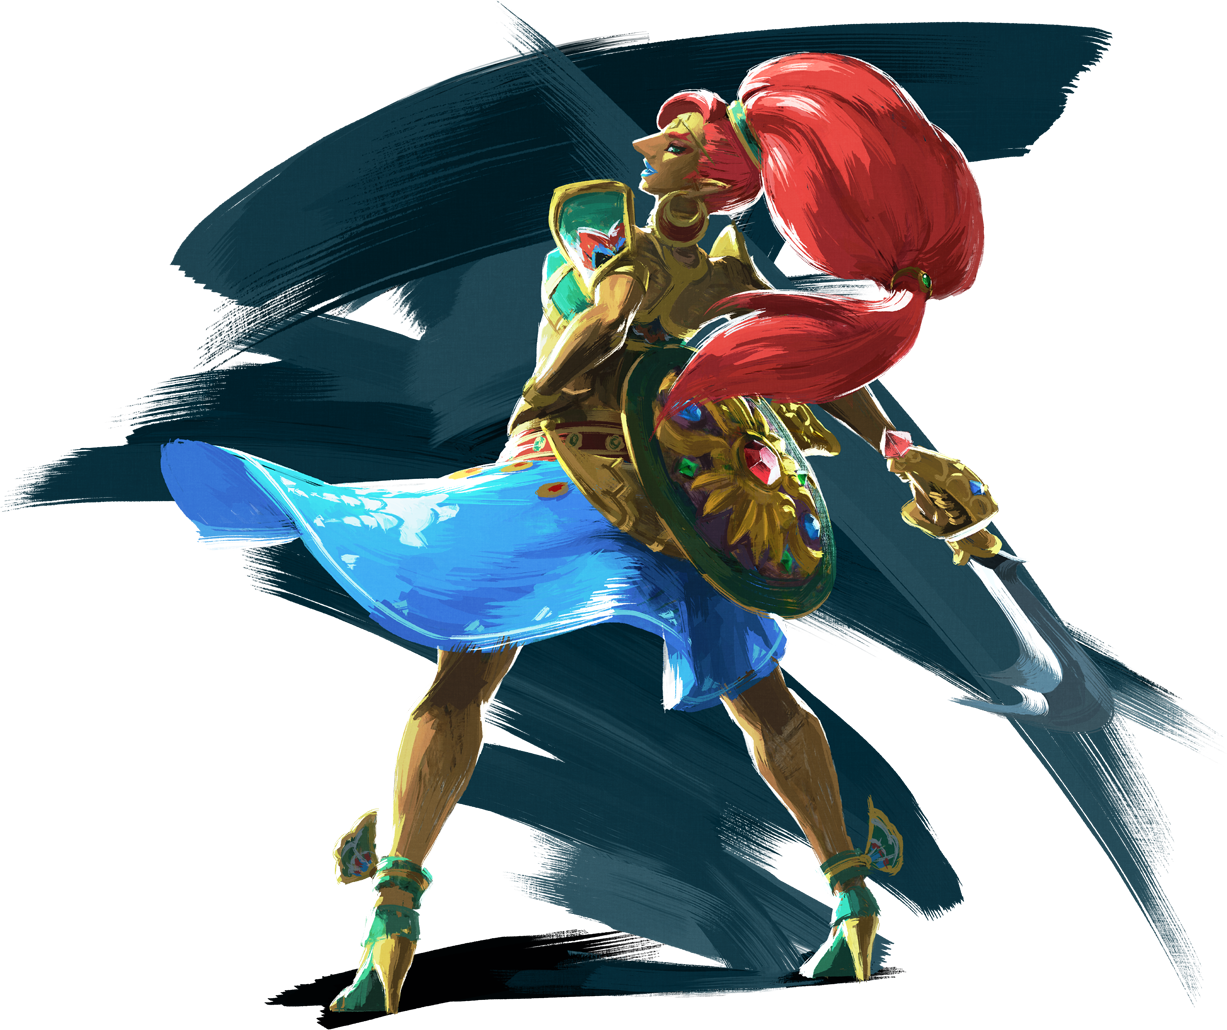
Gerudo
"SAVAQ, VABA. HOW ARE YOU DOING ON THIS
fine morning?" Nukune called in greeting to the older woman, as she pushed past the tapestry covering the home's entrance. As usual, Nukune's grandmother said nothing, acknowledging Nukune only by a slight nod of her head, and a brief pause at the sucking on her lit pipe. Nukune didn't mind however; she knew beneath her grandmother's stony exterior there lay a deep and warm love for her only granddaughter.
Dwelling primarily in the Gerudo Desert, the southwest region of Hyrule named after their people, the gerudo have a strong culture that is at once both fiercely independent, and built on a powerful sense of community.
Fire of the Desert
Standing at least a full head higher than most Hylians, with muscled arms and heads full of thick red hair, the people of the gerudo stand out wherever they go. In their native Gerudo Desert, the high temperature leads the gerudo to wear short and thin fabrics designed to keep them cool, while also allowing the flexibility needed to leap into battle at a moment's notice.
These outfits are often exorbitantly decorative as well, combining bright colors that stand out against the desert sand with bangles and rings of gold set with shining gems. To the gerudo, these bright fashions are beautiful to behold, fulfilling a sense of vanity, while also acting as a declaration to their enemies that the gerudo refuse to hide themselves.
The Ties that Bind
With a society balanced on a strong ideal of mutual aid, the gerudo people exist at all times as a unified force, ready at a moment's notice to cast aside all personal disputes to achieve what is best for their people. While such a powerful bond is not unusual in the people of Hyrule, the gerudo go above and beyond in exemplifying these qualities, and their sense of camaraderie with each other has helped to defend them and the rest of Hyrule from disasters and threats of all kinds.
Unfortunately this strong sense of kinship can also work against the gerudo at times, causing them to believe that the solution to every problem lies in what they can accomplish alone. The gerudo are slow to seek help from the other cultures of Hyrule, though quick to give assistance when asked– what threatens the rest of Hyrule threatens the gerudo as well, and while they are retiscent to admit it, helping the other cultures of Hyrule has never been anything but beneficial for the gerudo.
Vanity and Love
The gerudo race is unusual in that it is made up entirely of women, without a single Gerudo male having been born in thousands of years of their recorded history. While many gerudo find happiness and contentment with other gerudo spouses, those hoping to have children must leave their homes in the Gerudo Desert to seek out partners. Gerudo will often range far and wide in the pursuit of this love, with few options available near home.
This is because Gerudo Town, the only true settlement in the Gerudo Desert and the unofficial capital of the gerudo people, does not allow men within its walls. Skilled women of Hyrule's other cultures that prove themselves to the gerudo are free to come and go, but male visitors must remain outside, regardless of any partnership they might share with a member of the gerudo.
Troubled History
Once upon a time, farther back in the history of Hyrule than most legends reach, the gerudo were terribly mistreatred by the other people of Hyrule, and their culture criminalized. Forced to live on the edges of society, the gerudo grew hard and tough, learning to care little for what others thought of them, and bowing only to the matrilineal leadership of their eldest family members.
Such concerns ended long ago, and the gerudo are not just accepted, but fully welcomed by the other people of Hyrule wherever they go. While these sordid events are buried behind thousands of years of history and powerful alliances with Hyrule's other kingdoms, in a way the gerudo still remember their mistreatment, and their sometimes prickly nature can be traced back to these times.
Slow to Trust
While the gerudo now get along well with the other races of Hyrule, there can sometimes still be a palpable tension in their interactions. After the Calamity, many gerudo withdrew from the rest of Hyrule, leaving the newst generations struggling to adapt to the world outside of their desert home.
Gorons. As the only other people of Hyrule whose culture is made up of a single gender, the gerudo feel an undeniable kinship with the goron, made stronger by the goron tendency to turn up sparkling gems in their mining efforts, and the gerudo tendency to seek out such treasures.
Rito. The rito are the only other race in Hyrule that might be considered as standoff-ish as the gerudo. While this gives them common ground, it also makes it even harder for them to adjust to each other's presence.
Hylians. Many gerudo view Hylians as their "little friends", and are intrinsically drawn to the open and friendly nature of most hylian people. Though their kingdoms have sometimes been at odds, it wouldn't be an exaggeration to say the hylians are the gerudo's closest allies.
Gerudo Traits
Your gerudo character has a number of traits in common with all other gerudo.
Ability Score Increase. Most gerudo are physically powerful, and excellent at quickly reading a situation. Your Strength score increases by 2, and your Wisdom score increases by 1.
Age. Gerudo age slightly faster than humans, reaching adulthood at 15 and living to be about a century old.
Alignment. As a general rule, most gerudo are lawful good. Raised in the community-focused way of their ancestors, gerudo abide by many traditions, and strive to help those around them.
Size. Most gerudo sit at an average height somewhere between 7 and 8 feet tall, while weighing roughly 250 or 300 pounds. Your size is Medium.
Speed. Your base walking speed is 30 feet.
Desert Resilience. You are well adapted for the desert heat, and can at least tolerate intense heat from other sources. You automatically succeed on Constitution saving throws made against the debilitating effects of heat in the desert, and have advantage on Constitution saving throws made due to heat in other locations, such as regions of volcanic activity.
Gerudo Weapon Training. All gerudo have at least a passing familiarity with weapons commonly used by their race. You are proficient with spears, scimitars, longbows, and shields.
Desert Trekking. You are proficient in the Athletics skill, and difficult terrain doesn't slow your group's travel while in the desert.
Tool Proficiency. You gain proficiency with one of the following artisan's tools of your choice: glassblower's tools, jeweler's tools, smith's tools, or weaver's tools.
Practiced Eye. You are considered proficient in the Insight skill for the purposes of determining the value of jewelry and gems, and add double your proficiency bonus to the check, instead of your normal proficiency bonus.
Languages. You can speak, read, and write Hylian and Gerudo. Gerudo is a light and airy language, full of many words that make use of strong consonants combined with soft 'ss' and 'ah' sounds.
Goron
THE SOUND OF HAMMER AGAINST ROCK RANG OUT again and again, a dull thumping accompanied by the occasional ring of metal on metal as the gorons' hammers met veins of iron, copper, gold, and more. Though the air shimmered in the sweltering heat of the mine, none of the workers seemed to take notice, punctuating the rhythm of their work with constant chatter, laughter, good-natured cheer. Though none of them were related, to any casual observer, each worker seemed as identical to the next as a twin brother.
Making their home in the northwest of Hyrule, among the lava flows and burning heat of Death Mountain, the gorons are best known for their hardiness in both body and mind. Always ready to work and quick to laugh, the gorons are both the most industrious and most affable of Hyrule's many people.
Sturdy to the Core
Gorons are universally large and powerful, with rotund bodies and thick muscular arms, contrasted with very short legs. This shape keeps their center of gravity low, allowing gorons to more easily keep their footing when lifting heavy and oversized objects. Goron skin varies relatively little, coming mostly in shades of sandy-brown, though there are some whose skin has strong tinges of red, grey, or even blue.
Each goron has a head, shoulders, and back studded full with rocky growths, created from the minerals that goron consume as their pirmary diet. When they're first born, each goron is very small, and nearly circular, but with teeth immediately capable of grinding through all but the hardest of stones. As gorons grow and continue to eat, the minerals on their back harden, producing a result somewhat similar to hair.
Swings of Emotion
Most people believe that upsetting a goron is difficult to do, mistaking their lackadaisical nature for a tendency to forgive any flaw. But in truth the goron are quick to experience just about any emotion, ranging from anger to happiness and everything in between. The secret to their laid back attitude doesn't lie in a lack of anger, but an in ability to forgive and forget. A goron won't take an insult lying down, but they also recognize that tempers flare at the worst moments, and a proper apology or an act of redemption is all they need to drop the issue.
While the nature of these emotions can sometimes make them difficult for the other people of Hyrule to parse, it also makes them excellent combatants. A goron will happily let the anger they feel for an enemy drive them to battle, but the recognition of the joys in life keep them level-headed and calm as they swing their weapon.
Brothers in Arms
Like the gerudo, the goron people have only one "gender" in their society. Most outsiders to goron culture make the mistake of believing this means all gorons are male, a confusion sometimes driven along by the goron tendency to refer to each other as "brothers". But in actuality, gorons do not experience gender in the same way the other people of Hyrule do. For gorons, gender is a nebulous concept at best, easily disregarded or changed to best fit the situation. Gorons use the term "brother" for each other, because it is the closest word in the Hylian language to describe their relationship.
All gorons are born from the ground, tied intrinsically to the earth in a way that others struggle to understand. In this way, they each come from a shared parent, and are born under the same circumstances. Familial relations are determined by the location of their birth rather than any true bloodline, and the raising of children is treated as a communal responsibility. Because of this, all gorons are accepted on basis of fact into Gerudo Town, a place normally reserved for women; at the same time, they are free to join a variety of rito rituals normally reserved for men (though their earthbound nature means that most goron rarely take the rito up on this offer).
Strong Bonds
The gorons are second only to hylians in their ability to quickly make friends, and form strong bonds with any of the people of Hyrule. While they might have favorites, they rarely show it, and work to treat everyone with an equal level of respect.
Hylians. The bond between the gorons and the hylians is strong, and growing stronger all the time. Following the Calamity, the gorons were the first to reach out to the remains of Hyrule Kingdom, and try to help the hylians rebuild.
Rito. The cloest thing that the gorons might have to an icy relationship, gorons and rito are kept apart by the competing natures of their domains. At the same time, many gorons struggle with the rito tendency toward excessive pridefulness. All the same though, they remain strong friends when the need arises.
Zora. Most gorons avoid the zora domain, since their bodies are too dense to swim and they immediately sink in water. Meanwhile, zora avoid Death Mountain because of the intense heat. All the same, the two cultures share a strong bond in the value of metalwork.
Sheikah. Thousands of years ago, when the sheikah were still mistreated and viewed with suspicion by the other races of Hyrule, the gorons were the first to extend an olive branch, and it was gorons who pushed Hyrule Kingdom to relent on their discriminations against the Sheikah. Neither the gorons nor the sheikah have ever forgotten this bond, and always make for fast friends.
Goron Traits
Your goron character has many innate qualities that are shared among all other gorons.
Ability Score Increase. Gorons are known for being incredibly tough and supernaturally strong. Your Constitution score increases by 2, and your Strength score increases by 1.
Age. Gorons age quickly, reaching adulthood around the age of 10, but also live relatively short lives, reaching a maximum age of between 80 and 85 years.
Alignment. Most goron are neutral good. As a result of the carefree living of goron society, they usually don't enjoy having to restrict themselves by the laws of others, but also don't care for the effort of fighting against them. Goron are also raised to do good, and help others when they're in need.
Size. There is a large variation in the size of individual goron due to age, with young goron standing between 3 and 4 feet, and the oldest reaching up to 7 feet tall. Due to their rocky skin and stout bodies, most goron are very heavy, weighing between 300 and 600 pounds depending on their height. Your size is Medium.
Speed. Your base walking speed is 25 feet.
Goron Diet. Your people derive all of the sustenance necessary for living by consuming mineral deposits like rocks and gems. Although you can consume organic food, you do not need to do so to live. Because of this, your lifestyle costs are reduced by half.
Though Gorons prefer nutrient-rich minerals such as salt and ores, if necessary you can consume any mineral matter, including metals, to sustain yourself.
Darkvision. Accustomed to life underground, you have superior vision in dark and dim conditions. You can see in dim light within 60 feet of you as if it were bright light, and in darkness as if it were dim light. You can’t discern color in darkness, only shades of gray
Volcanic Resilience. Your tough skin is adapted to protect you from the heat and fire of your volcanic homeland. You are resistant to fire damage, and have advantage on Constitution saving throws made to avoid the effects of intense heat.
Natural Armor. Due to the shape of your body and the rocks growing from your arms and back, you are ill-suited to wearing armor. The rocks protruding from your skin do protect you however, giving you a base AC of 14 + your Dexterity modifier, and making you resistant to piercing damage from nonmagical sources. You gain no benefit from wearing armor, but if you are using a shield, you can apply the shield's bonus as normal.
Stonecunning. Whenever you make an Intelligence (Nature) check related to identifying minerals, ores, and metals, you are considered proficient in the Nature skill and add double your proficiency bonus to the check, instead of your normal proficiency bonus.
Languages. You can speak, read, and write Hylian and Goron. Goron is a language with strong consonants, often followed by 'ee' , 'u' and 'ah' sounds.
Rito
AS THE WIND WHISTLED THROUGH HIS EARS AND
pulled at his feathers, Tonse reveled in the freedom he felt. Flight was such a natural part of rito culture, but Tonse had never met another rito who didn't get the exact same blend of nervousness, pride, and euphoria that came along with even a simple trip through the clouds. Catching sight of his friends on a cliff below, Tonse turned one arm slightly and began the dizzying spin down through the air to greet them.
Filled with an unbendable sense of pride, the rito dwell high in the mountains on the northwest side of the Hyrule, spending as much time riding the strong air currents of their mountain home as they do on the ground, keeping an eye out for any danger that might threaten them. The rito are rarely caught unprepared, and their birds' eye view of the world often sets them apart from the concerns of anything outside their immediate area.
Pride of the Skies
Tall and thin, the rito are humanoid birds with arms that double as wings, and large flashy beaks that double as both noses and mouths. Rito vary more greatly in appearance than perhaps any other race in Hyrule, with feathers that come in a panoply of colors, and body features that can resemble just about every species of bird under the sun. While most rito look like anthropomorphic hawks or falcons, there are just as many that look like seagulls, birds of paradise, terns, owls, storks, or even hummingbirds.
These differences in chatracteristics don't seem to be hereditary, or at least not entirely so. Rito with the features of owls do not always have descendants that also look like owls, while the more standard rito that resemble birds of prey commonly have children with varied features, even in singular egg clutches.

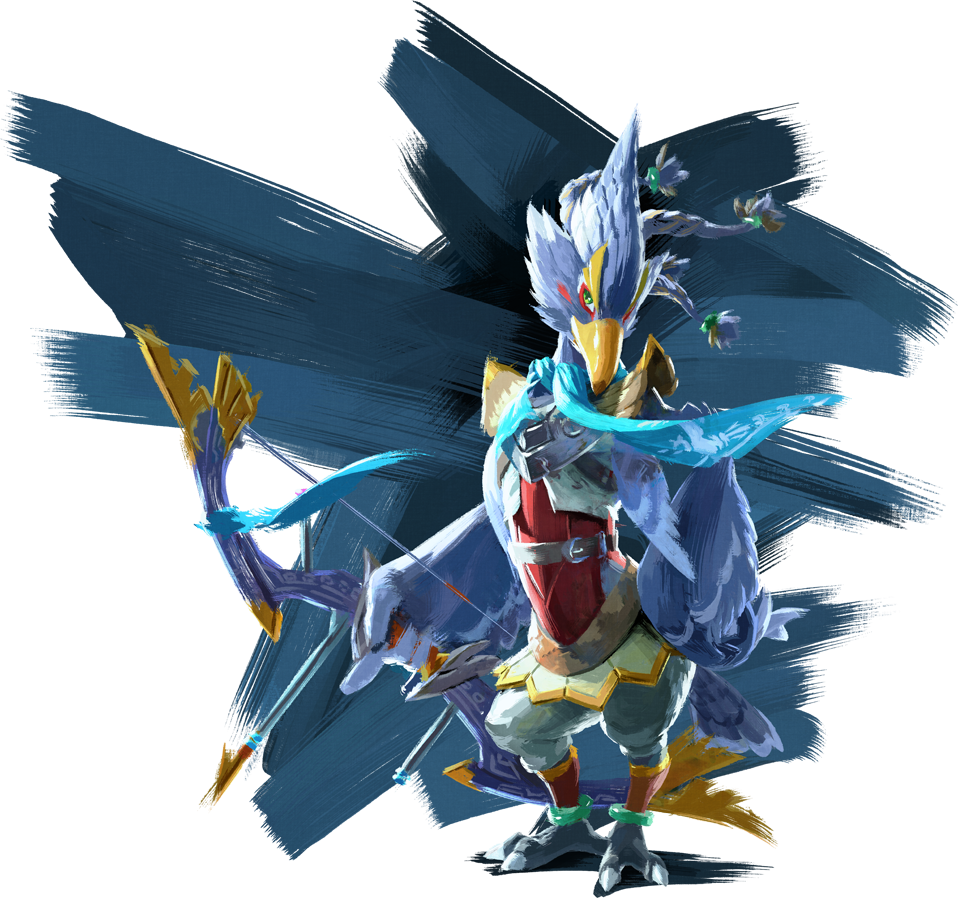
Arbiters of Justice
Perhaps as a result of their literal distance from the world, the rito consider themselves impartial judges; the peak of both wisdom and objectivity. To them, their rulings are iron, and once a rito has made up their mind about a subject it is difficult to change their point of view. In many ways this works to their advantage, allowing the rito to quickly take action the moment they're presented with a dilemma; in others it undermines them, making them difficulty to ally with or to fix misconceptions when they inevitably arise.
Whatever their position on a topic, a rito can always be trusted to act for the greater good. The moral backbone of a rito is as strong as their will, and though no society is without criminals, the rito have no patience for those among them that create problems for the rest of them. This drive made the rito the first in Hyrule to begin preparing for the arrival of the Calamity, but the distance they keep from the rest of Hyrule also made them the last to join the alliance against Calamity Ganon and his monsters.
Champion's Inheritance
In the Era of the Wilds, children of the rito tribe are urged to emulate Revali, the great rito champion who piloted the Divine Beast Vah Medoh, and fell in battle during the Calamity. Revali excelled in all the qualities that the rito most valued– courage, wisdom, strength, speed, and any quality they could ask for in a champion.
Prior to the Calamity, the rito had a vast number of historic champions, each renowned for their unparalleled ability in a single skill. Once they came of age, each rito would choose a champion to dedicate themselves to, working to capture the essence of that champion as best they could, and hone their skills to match. Champions existed for archery, flight, strength, woodworking, and every other technique important to rito culture, as well as more than a few outliers.
Rito Traits
Your Rito has a variety of bird-like traits and qualities shared by all members of the race.
Ability Score Increase. Rito are known for being agile and quick. Your Dexterity score increases by 2, and your Wisdom score increases by 1.
Age. Rito age at the same rate as humans, reaching adulthood at the same time, but pass away more quickly, usually reaching the end of their lives at around 60 to 75 years. However, some rito have been known to live to 120 years or older, though its not known what causes this difference.
Alignment. Rito culture adheres to a strict code of honor, and few risk deviating from the unspoken rules of their people. For this reason most rito are lawful in alignment, and the majority are lawful good.
Size. Rito are tall and willowy, and though their skeletal structures are lightweight, their feathers are thick and weigh them down. Most rito are between 6 and 7 feet tall, and weigh between 150 and 200 pounds. Your size is Medium.
Speed. Your base walking speed is 30 feet.
Flight. You have a flying speed of 40 feet. To use this speed, you can't be wearing armor.
Insulating Feathers. Your feathers are well-adapted to the cold weather of the high mountains, and you automatically succeed on saving throws against the effects of extreme cold.
Rito Combat Training. You have proficiency with the spear, shortbow, and longbow.
Revali's Gale. At 4th level, you master the art of controlling the wind currents beneath your wings. When you take the Dash action, you can instead increase your flying speed to 120 feet until the end of your turn.
You can use this trait a number of times per long rest equal to your proficiency modifier.
Languages. You can speak, read, and write Hylian and Rito. The rito language uses keening sounds similar to the noises produced by birds, mixed with various clacking noises produced by the rito's beaks. Other races can somewhat replicate this with whistles and clicks of their tongues.
Distant Allies
Not winning any awards for kindness, the rito are nevertheless staunch allies to those who win their trust, even if doing so in the first place can prove a challenge. The rito culture also prizes a fierce spirit of competition, and rito are known for bringing this quality to their friendships with other races.
Hylians. As the first race to successfully spread to every corner of Hyrule, including the rito's own mountainous domain, hylians make natural rivals for the rito. While the rito respect the strength and tenacity that hylians show, they deride the hylian capability for softness and luxury.
Zora. Ancient legends say that the rito are actually descended from the zora, but most rito refuse to acknowledge this scandal, much less give it credence. While the rito respect the physical strength of the zora, they believe them too prideful by far– a case of the pot calling the kettle black.
Zora
PEERING NERVOUSLY OVER THE EDGE OF THE CLIFF, Uloh's fins nearly leapt off when Mata slapped his back, the older zora looking down at him with a mischevious grin. Though Mata was only a few years older than Uloh, she had already hit her growth spurt, and towered several feet over the younger boy. "Mata, I don't know about this..." Uloh began, before cutting off with a shout as Mata pushed him once more, sending him over the edge. Uloh caught himself in midair, and managed to turn to dive headfirst into the water. From the top of the waterfall Mata watched, waiting for any sign of Uloh and growing nervous that she'd accidentally harmed her friend. She breathed a sight of relief as Uloh popped his head above the water, shouting "That was amazing! Let's do it again!"
Swimming their way through the rivers and lakes of Hyrule, the zora make their home at the place where they believe all of Hyrule's waterways meet before emptying out into the ocean, in the far southeast corner of the continent. Here they rule their domain with both grace and strength.
Powerful Swimmers
The tallest of Hyrule's races, the zora are lean and powerfully built, with muscular limbs and strong cores that allow them to push through the water with ease. Their muscles seem to be made of tense but springy fibers, letting them remain large and bouyant without sacrificing any physical strength. While this gives them an advantage on land, their athleticism in the water is entirely unmatched by any other creature in Hyrule.
Because of this, the zora consider themselves not just the inheritors of Hyrules' waterways, but their protector as well. This is a responsibility that all zora take seriously, working constantly to make sure that each lake, pond, river, and creek is as clear as possible of the threat of lizalfos, octoroks, and other monsters.
Masters of the Waves
Just like the airborne rito, the zora come in a great variety of shapes and colors, with skin tones that cover the while of the rainbow, but usually focus on cold tones such as blues, purples, light greens, and the occasional red. Each zora shares many physical features with a species of fish, and there have been zora that resemble dolphins, sharks, whales, guppies, barracuda, and more.
While on the surface zora might seem to have a lot in common with saltwater species, they are actually more well adapated to dwelling in fresh water. Their domain sits at the bottom of a massive series of waterfalls, which eventually flow past the tall cliffs protecting their lands to form one of Hyrule's major bodies of water, the Lanayru Wetlands. While zora can process saltwater through their gills as well as freshwater, many zora have compared the act of doing so to other races trying to breathe at high altitudes.
In the Pursuit of Passion
While their dedication to defending Hyrule might make the zora seem serious and stern, nothing could be further from the truth. When not actively patrolling, guarding, or fighting, the zora are keen on living lifestyles full of playful joy.
In zora culture, a dedication to artistic values is held in high regard, and all zora, regardless of social status or occupation, are encouraged to seek out and try hobbies such as decoration, sculpture, metalwork, and especially music. If a zora isn't working or practicing a hobby, they can likely be found relaxing in the numerous pools and lakes around the zora palace, splashing and swimming along with their young.
Before the onset of adulthood, young zora are encouraged to pursue as many activities as possible, spending time wandering the safety of the zora domain and interacting with adults from every walk of life. Though the zora people have close-knit families, the cultural education of young zora is considered to be a shared responsibility among all adults, and no adult zora will ever be caught telling a young one to stop bothering them. In fact, adult zora love to share detailed information about their jobs and hobbies, not only with young zora but with outsiders as well.
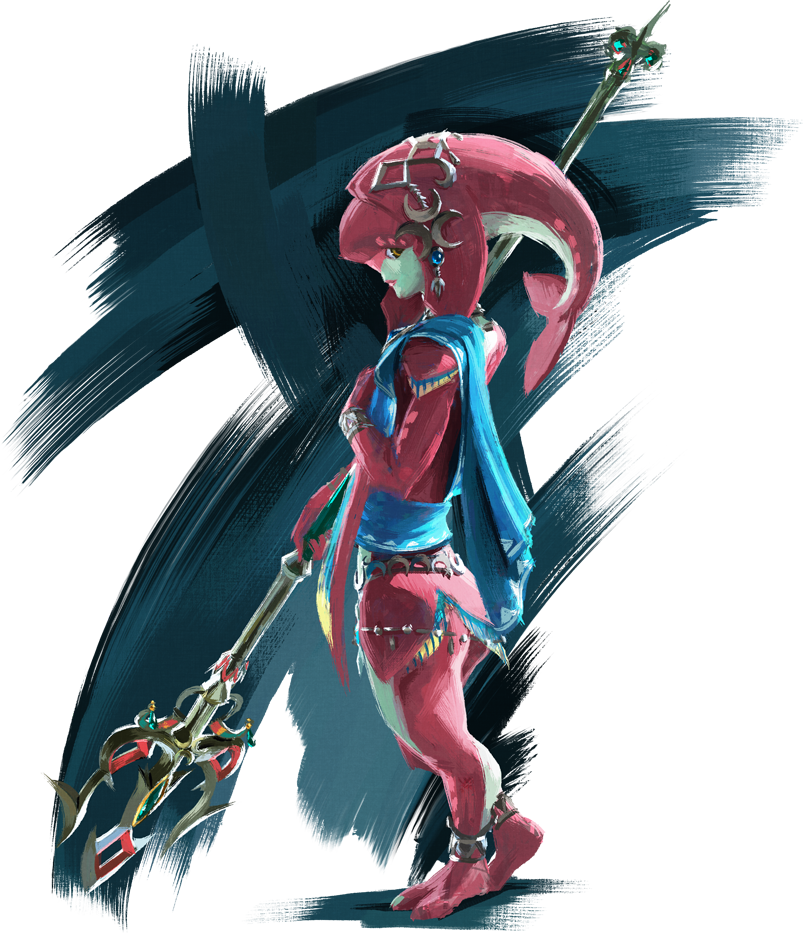
Brave and Bold
Ask anyone in Hyrule what they think of the zora, and the words loud, confident, and unique are likely to be some of the most frequently used terms. The zora are never afraid to speak their minds, and even the wisdom of age doesn't seem to temper their outbursts. If a zora is upset, it quickly becomes obvious; and if a zora is happy, there's no denying the resulting energy they bring to the world around them.
Zora aren't exactly naive– a better word would be self-assured. As a race that spends as many years as a child as some other others get for their whole lives, the zora outlook on the world expertly blends long-term planning with short-term joy. In other words, the zora know that they have all the time in the world to achieve what they want for themselves; but they also know their friends and loved ones from other cultures do not, and any time wasted overthinking the conequences is time they won't get back.
Zora Traits
Your zora character shares a few common traits with other members of the race.
Ability Score Increase. Zora are surprisingly thoughtful in spite of their eagerness to act, and their time in the water gives many of them a muscular build. Your Wisdom score increases by 2, and your Strength score increases by 1.
Age. Members of the zora race can easily live for hundreds of years, usually passing from old age after lives of 400 years or more. Zora do not consider themselves fully-grown or fully-matured until they have their growth spurt, which usually occurs anywhere between 40 and 70 years of age.
Alignment. Zora view the past and traditions of their people with great respect, and will do everything they can to protect their people's future. They are almost always good in alignment, and range anywhere along the spectrum from lawful to chaotic.
Size. The zora are taller than most other races on Hyrule, standing a little over 7 feet tall on average, with some growing to be over 8 feet tall. Your size is Medium.
Speed. You move as quickly on land as a human does, but considerably faster in the water. Your speed is 30 feet, and you have a swim speed of 40 feet.
Amphibious. You can breathe both air and water.
Darkvision. Your eyes are well adapted to seeing in the bottom of deep pools and lakes. You can see in dim light within 60 feet of you as if it were bright light, and in darkness as if it were dim light. You can't discern color in darkness, only shades of gray.
Marathon Swimmer. Your body is well-adapted for swimming long distances, giving you advantage on Constitution saving throws made to avoid exhaustion due to swimming for long distances or long periods.
Proud Heritage. All zora take great interest in the stories of their people, and the history of their own ancestors. You are proficient in the History skill, and you can double your proficiency bonus when making Intelligence (History) checks dealing with zora history.
Zora Weapon Training. Every zora is taught how to fight and defend their way of life, using traditional zora weapons. You are proficient with spears, scimitars, tridents, and nets.
Innate Spellcasting. You know the shape water cantrip. Starting at 3rd level, you can cast the create or destroy water spell a number of times per day equal to your spellcasting modifier. Once you reach 5th level, you can cast the water walk or water breathing spell once per day. Your spellcasting ability for these spells is Wisdom.
Languages. You can speak, read, and write Hylian and Zora. The zora language is similar in sound to the Rito language, except that the clacking noises are made by clacking their teeth, and the whistling noises are deeper in tone, with a breathier quality.
Friends to the End
It's been said that in the very distant past, the zora were split into two different groups– the intelligent zora that now live throughout Hyrule, and a more feral zora that lived only in rivers and murky waterways. In the modern day, no evidence of these monstrous zora remains, and the zora that live in Hyrule's waters maintain friendly relationships with their neighbors.
Hylians. Peace between the hylians and the zora goes back for centuries, farther even than the original Calamity over 10,000 years ago. This bond remains as strong today as it was in the past, though some zora blame the hylians for the fall of Hyrule during the Calamity, and the death of their beloved princess, Mipha.
Sheikah. Apparently the sheikah played a key role in the construction of the zora palace, and remnants of their influence can be seen in its oldest structures. Because of this, the zora have always had a soft spot for the sheikah, even if their alliance weakened after the sheikah were exiled by the hylian king.
Gorons. While many qualities about the gorons and the zora would seem to put them at odds, the two envertheless share an exceptionally strong bond. Both understand what it means to enjoy the little things in life, and never spend too long worrying about what might have been. Both have strong artistic tendencies, and the two cultures have spent hundreds of years trading knowledge back and forth.
Rito. Though quite alike in their emphasis on the importance of responsibility and living life with your chest out, the zora can't help but think that the rito are too serious. Since the rito are one of the shortest-lived people in Hyrule, zora that are friendly with rito tend to fret over them like older siblings; meanwhile, rito tend to take this worry as a form of condescension, making them overly defensive about their own choices.
Humans of Hyrule
THE CLANGOR OF METAL AGAINST METAL FILLED
the air, as sword met shield, and blade met blade. The sheikah warrior and the hylian soldier circled each other warily, backing away for only a moment. A split second later they tossed themslves forward once more, the strength of their blows sending vibrations through the bone and muscle of their arms and deep into their cores. Finally, the whistle came, signaling an end to the sparring match. Taking off their helmets, the two women met again at the center of the training ring, this time exchanging compliments and critiques, smiling and already looking forward to their lunch break together.
In the world of Hyrule, humans are split into two major groups, the hylians and the shiekah. While the hylians make up the majority of Hyrule's population, even lending their name to the continent, the sheikah are much fewer in number. Both have played an important role in Hyrule's recent history, and without either the threat of Calamity Ganon would surely spell the end of the world.
Hylian Resilience
Believing themselves to be the chosen people of the goddess Hylia, the creator of Hyrule itself, the Hylians carry on their shoulders a sense of responsibility for the entire world. While not everyone living in Hyrule views them the same way, the hylians don't often begrudge them for this– in the mind of the hylian people particularly the royal family, this is their obligation, for good or ill.
In spite of this heavy load, the hylians are also among Hyrule's brightest stars, quick to leap into action, ready at a moment's notice to defend what is important to them, and always looking for new friends and allies. In a way, they are the natural leaders of Hyrule, and it is no surprise that the continent was united under them thousands of years ago.
Strength in Numbers
There is no denying that Hylians lack many of the physical gifts naturally present in Hyrule's other people– they are not as strong as the gerudo, as tough as the gorons, and can not fly through the air or cut through the waves. But for all that they lack, the hylians always find a way to make up for it with a resourcefulness that gives them an edge they would otherwise lack.
On top of this, every hylian from their strongest warriors to their most cowardly farmers, have an internal reserve of bravery that always seems to spark at just the right moment, pushing them to do what is right and fight for what they believe in, no matter the odds. This bravery is almost infectious, and with a few well-placed words or a kind favor, a single hylian can inspire dozens of others, hylian or not, to join them in their cause.
Hylian Traits
Though Hylians are varied and adaptable, your character shares these traits with others of their race.
Ability Score Increase. Hylians are known for being strong for their size, and quick to act and make friends. Your Strength, Wisdom, and Charisma scores each increase by 1.
Age. Hylians age at the same rate as the average human, and live to about the same age.
Alignment. Hylians are well known for their good hearts and steady heads, and are most often neutral good. Some hylians are more dedicated to their duties, while others prefer a slower pace of life, making them more alwful or chaotic in nature.
Size. Hylians are the same size and weight as other humans. Your size is Medium.
Speed. Your base walking speed is 30 feet.
Brave. You have advantage on saving throws against being frightened.
Keen Hearing. You have advantage on Wisdom (Perception) checks that rely on hearing.
Goddess Chosen. Hylians are the chosen descendants of the great goddess Hylia, and benefit from her protection. When you targeted by an attack, you can impose disadvantage on the attack roll. You can use this feature three times per long rest.
Languages. You can speak, read, and write Hylian and one additional language of your choice. Hylians often learn additional languages based on the are they live in. For instance, those who grow up near the Hebra Mountains learn Rito, while those in the Lanayru Region will usually learn Zora.

Spark of Genius
Like hylians, the sheikah people do not have the
incredible physical traits given to Hyrule's other
people, and unlike their fellow humans, the
sheikah have never been gifted at forming
tight-knit bonds with those outside of their
homeland. Instead, the sheikah people's
greatest boons lie in their incredible
history, and the complex inner workings
of their minds.
Thousands of years ago, before the first
Calamity, it was the sheikah who created the
divine beasts, the sheikah towers, the guardian
army, and the magical weapons wielded by
Hyrule's armies. Even after the first Calamity, as
the old kings of Hyrule worked to oppress their people
and erase their history, the sheikah managed to hide away the most important elements of their work for future generations.
And once their oppression and exile had ended, what the sheikah hadn't managed to save was quickly rediscovered by their descendantsm after only a brief time working with the bits and bobs of ancient sheikah technology they could get their hands on. Time and again the way of the sheikah has been threatened by disaster, and each time they have hidden themselves away, and survived against all odds.
Trials and Tribulations
In spite of everything the sheikah have done for Hyrule, their cultural history is fraught with stories of near-extinction, sometimes even at the hands of their former allies. Over and over the sheikah have been tasked with keeping records of the methods and rituals needed to save Hyrule from destruction, over and over they have devised new methods of protecting themselves and others, and over and over they have suffered.
In spite of this, many sheikah remain friendly, though not perhaps open, with people from outside their culture. They understand the fear their magic and their technology can bring, but they also understand that only working together can Hyrule be saved. And while they work thanklessly for the good of the whole, they also hope that some day their efforts will be recognized.
Not all sheikah agree with this mentality, however. The Yiga Clan is an offshoot of sheikah that began to work against the interests of Hyrule, swearing fealty to Calamity Ganon as recompense for their people's mistreatment by the hylians. Acceptance and sympathy for their message has waxed and waned through the centuries since their inception, but currently, the majority of sheikah recognize the importance of survivig the Calamity above all else, and the error in the violence that the yiga clan preaches.

Sheikah Traits
Your sheikah character shares some innate qualities
with all other sheikah.
Ability Score Increase. Sheikah are known for being nimble, quick-witted, and wise in all things. Your Dexterity, Intelligence, and Wisdom scores each increase by 1.
Age. Although the members of the sheikah tribe age at the same rate as the average human, they live noticeably longer, with some sheikah living to between 100 and 120 years of age.
Alignment. Above all else, the sheikah are loyal to the traditions and history of their people, causing them to lean towards lawful alignments. Most sheikah are also friendly, but some hold grudges against the other races of Hyrule, particularly hylians.
Size. Sheikah are the same size and weight as other humans. Your size is Medium.
Speed. You are light on your feet, as well as quick. Your base movement speed is 35 feet.
Ancient Technologist. You are skilled in the use of the ancient technology created by your ancestors. You ignore all class, race, and level requirements on the use of magic items. In addition, you have advantage on all Intelligence checks made to interact with and discern the workings of sheikah technology.
Sheikah Stealth Training. You have been trained in the art of quiet observation and hidden movement. You are proficient in your choice of either Perception or Stealth.
Transformation Magic. Using your skill in sheikah magic, you can cast the disguise self spell. Wisdom is your spellcasting ability for this feature. After casting disguise self in this way, you can't do so again until the end of your next short or long rest.
Languages. You can speak, read, and write Hylian and two other languages of your choice. You can also read and write Sheikah. Though the Sheikah language uses a different script than Hylian, its words and pronunciations are similar enough to be mutually understandable.
Humans in Hyrule
The use of the term "human" in the Legend of Zelda is more than a little complicated, and is used to refer to all humanoid races– including hylians, sheikah, and gerudo– and a specific variety of people found only in certain games.
In the context of this book, the word "human" refers to hylians and sheikah together, while "humanoid" consists of all of this book's playable races (including the boblins and lizalfos below). In any other case, the races are referred to using their specific names.
Monstrous Cultures
SCRAPING AT THE DIRT BENEATH THE TREE WITH
his spear, Homblin stopped for a moment and cocked his head, raising one oversized ear to the wind. Was that the sound a warning horn, or just the wind through the canyon? It could be hard to tell sometimes. Deciding it wasn't worth the trouble either way, Homblin went back to digging. He was making slow progress on trying to gently uproot the cluster of truffles he'd found on duty yesterday, right at the end of his shift. Covering them with moss and wet leaves, he'd tried to hide them from any other boblins that might wander by. As long as Homblin could get them out whole, they'd make a tasty treat at the campfire tonight.
Most of Hyrule's people see the monsters that live among them as little more than a threat to the peace and security of their own lives; a pest to be dealt with when the time comes, and avoided at all costs otherwise. But these monsters, particularly the commonplace boblins and lizalfos, have their own cultures and societies. Though many serve the call of Calamity Ganon, hoping to take a piece of the pie for themselves, others are content living nomadic, hunter-gatherer lifestyles at the fringes of Hyrule's other societies.
Keen Instincts
While the major cultures of Hyrule are quick to overlook the boblins and lizalfos, believing them to be crude or uncivilized, the fact of the matter is far less clear. Both boblins and lizalfos have spent all of Hyrule's history alternating between serving the whims of Ganon, and being forced to fight for their own survival. While perhaps unfair, this has given both races a tendency for self-sufficiency that the people of Hyrule might find admirable, under other circumstances.
Many of Hyrule's people would be surprised to find that boblins are Hyrule's second-most successful people, in a way. Only hylians can claim to be more widespread than the boblins, who are known for making their homes anywhere they can forage for food– dense forests, sparse coastlines, rolling valleys, mountainous hills, and even the edge of the Gerudo Desert. Only the most dangerous of Hyrule's environments are capable of warding them off, and even still, in the past several boblin clans have successfully adapted to survival in these difficult conditions.
Survival at All Odds
The porcine noses, spade-shaped ears, and thick fingernails and horns are all common features amongst boblins of all types, and the sight of these features in combination often send a shudder through the spine of Hyrule's people. (In fact, the vague resemblance between pigs and boblins is sometimes given as a reason for the lack of doemesticated swine in Hyrule.) With such a reaction from their neighbors, its unsurprising that even passive boblins rarely appraoch outsiders for help, knowing the odds are stacked against them. Contrary to popular belief, boblins are not stupid; they have survived for thousands of years exactly as they are, and in that time have managed to spread across all of Hyrule.
Boblin Traits
Your boblin character has a certain number of characteristics that it shares with other boblins.
Ability Score Increase. All boblins are hearty, hale, and slightly more resistant to damage than most other races. Your Constitution score increases by 1.
Age. Boblins age quickly, reaching full maturity between 5 and 10 years old, and only live up to 50 years.
Alignment. Most boblins chafe under the restrictions of society, prefering the chaotic nature of living in the wilds. Those raised in service to Ganon tend toward evil, but boblins are not inherently bad, and boblins raised in more peaceful tribes can be found in a wide range of alignments.
Speed. Your base walking speed is 30 feet.
Darkvision. You can see in dim light within 60 feet of you as if it were bright light, and in darkness as if it were dim light. You can't discern color in darkness, only shades of gray.
Boblin Weapon Crafting. As part of a short rest, you can harvest bone and hide from a slain beast, construct, dragon, monstrosity, or plant creature of size Small or larger to create one of the following items: a shield, a club, a spear, a shortbow, or 1d10 arrows. To use this trait, you need a blade, such as a dagger, or appropriate artisan's tools, such as leatherworker's tools.
Environmental Adaptation. Boblins are able to adapt quickly to almost any environment, thriving even in the harshest conditions. You have advantage on Constitution saving throws made to resist the effects of extreme weather.
Languages. You can speak, read, and write Hylian and Boblin. Boblin is a language that uses many deep, guttural sounds, combined with high-pitched squeaks and squeals. Boblin uses its own script, the blin system, which shifts and mutates rapidly as generations pass.
Subrace. There are two major subraces of boblin found in the land of Hyrule: bokoblins and moblins. Choose one of these subraces.

Bokoblin
Bokoblins are the most common boblin subrace, and can be found throughout Hyrule because they adapt well to almost any environment. Most bokobolins live in small tribes with other bokoblins, but have been known to ally themselves with the occasional moblin, or even join with tribes of lizalfos.
Ability Score Increase. Bokoblins are surprisingly agile for their size. Your Dexterity score increases by 2.
Size. Bokoblins are the same height and weight as humans, though they tend to be slightly heavier. Your size is Medium.
Improvised Weapon Proficiency. You are used to picking up and fighting with whatever happens to be at hand. You are proficient with improvised weapons, and when making an attack with an improvised weapon, you use your choice of your Strength or Dexterity modifier for the Attack and Damage Rolls. You must use the same modifier for both rolls.
Additionally, attacks you make with improvised weapons deal 1d6 damage instead of the normal 1d4. Your DM still determines the appropriate damage type.
Skilled Riders. You are proficient in the Animal Handling skill, and while mounted, you have advantage on Dexterity saving throws made to avoid being knocked off your mount.
Moblin
Much larger than their bokoblin cousins, moblins are known and feared for their prodigious strength and aggressive tendencies. While not always the most skilled fighters, the intimidation caused by their size can be valuable to their allies while in battle.
Ability Score Increase. Moblins are much stronger than other boblins. Your Strength score increases by 2.
Size. Moblins are well-known for their large size, and at adulthood they stand between 8 and 10 feet tall, and weigh 400-500 pounds. Your size is Large.
Overhand Toss. While grappling a creature that is Medium or smaller, you can use an action on your turn to throw it up to 30 feet away from you. If the thrown creatures hits an object or another creature, both take 1d8 bludgeoning damage if the thrown creature is Medium, or 1d6 bludgeoning damage if the thrown creature is Small or smaller.
Extra Reach. Weapons you wield with the reach property instead add 10 feet to your reach when you attack with them, as well as when determining your reach for opportunity attacks with them.
Misunderstood Minds
Lizalfos are tall, lanky, reptilian creatures with bulging eyes and a single sharp horn located on the front of their faces. Lizalfos are a culture of great variety, and can be found living just offshore from Hyrules' oceanside beaches, deep in its murkiest swamps, or even on dry desert plateaus. Surprisingly, this great variety is not a specific adaptation– a lizalfos from a desert tribe can easily move to the beach and swim expertly through the water, while a lizalfos raised in the swamp is capable of quickly adjusting to the dry heat of the Gerudo Desert.
Though very different in appearance than most of Hyrule's other peoples, the lizalfos are not unintelligent by any means. In fact, their society places a great level of importance on what they see as "culture"– the three specific ideals of battle, art, and solitude. Lizalfos work their whole lives to master these three ideals to perfection.
For the lizalfos, skill in battle shows an ability to properly contirbute to a group's supplies, either by raids or hunting parties. Art is revered for its imnaginative properties, and painting, sculpture (made by combining wood, stone, and bone), and dance are the most popular forms practiced. Finally, lizalfos acknowledge solitude as the skill of being self-reliant, in a society that places high emphasis on working together for survival. Solitude for the lizalfos is represented by long stretches of time spent camouflaged against the backdrop of nature, silent and unmoving, surviving only on what happens to be available nearby.
Stratified Rankings
The culture of the lizalfos also places a heavy importance on leadership and ranking, and whole societies of lizalfos are run in a manner similar to that of the armies of other races. Each lizalfos has a specific rank within their culture, which determines everything about their daily lives and the tasks they perform for the group. If a group of lizalfos has no members of a specific rank, the duties of that rank are passed down to the next-lowest. Rather than take offense, lizalfos see this as an opportunity to prove their worth in being admitted to a higher rank.
The ranking of lizalfos can usually be determined at a glance through the variable color of their scales, which helps lizalfos to identify command structures in the heat of battle. Lizalfos scale color is highly variable, useful for stealth, but also allowing for on-the-fly promotions in rank, and for new ranks to be created as necessary by assigning an unused scale color to a new rank.
Lizalfos Traits
All lizalfos have the following traits in common.
Ability Score Increase. Lizalfos aquatic lifestyles leave them physically fit, as well as incredibly agile– you choose whether your Strength score increases by 2 and your Dexterity score increases by one, or vice-versa.
Age. Lizalfos age quickly, reaching maturity after only a few years, but afterwards grow very slowly, and can live up to a century.
Alignment. Lizalfos society tends to be very rigid, making most lizalfos lawful in nature. While many serve Ganon and therefore might be evil, they are not inherently so, and outside of Ganon's influence take on a range of alignments.
Speed. Your base walking speed is 30 feet, and you have a swimming speed of 30 feet.
Hold Breath. You can hold your breath for up to 15 minutes at a time.
Chameleon Skin. While standing still, you can use a bonus action to change the color and texture of your skin, causing you to blend in with your environment and granting a +10 bonus to Dexterity (Stealth) checks made to hide. If you move or take an action, this benefit ends, and you can not use it again for 10 minutes.
Lizal Weapons. Lizalfos are trained in the use of special weapons designed by the lizalfos themselves. You are proficient with boomerangs, daggers, halberds, shortbows, and spears.
In addition, whenever you throw a boomerang, you do not need to use your reaction to catch it as it comes back. As long as you have a free hand, you can choose to automatically catch a boomerang that you have thrown.
Fire and Lightning. Lizalfos share a special affinity for both electricity and fire. You choose one or the other, and gain the benefits associated with that choice.
Fire. You can use an action to launch a small fireball from your mouth at a target you can see within 60 feet. The target must make a Dexterity saving throw (DC equals 8 + your Dexterity modifier + your proficiency bonus) taking 3d6 fire damage on a failed save or half as much on a successful one. You can use this feature a number of times per long rest equal to your proficiency bonus.
Lightning. You can use a bonus action to channel electricity through the horn on your face, charging your body and making it dangerous to touch. Until the start of your next turn, your speed is reduced to 0, and any creature that touches you or hits you with a melee attack must succeed on a Constitution saving throw (DC equals 8 + your Constitution modifier + your proficiency bonus) or take 1d8 lightning damage. You can use this feature a number of times per long rest equal to your proficiency bonus.
Languages. You can speak, read, and write Hylian and "speak" Lizalfos. As a language, Lizalfos relies just as much on scent as it does sound, and doesn't have a real written form. Instead, lizalfos can apply their scents to scraps of bark or parchment, along with short messages in Hylian, to communicate much longer and specific messages.
Languages of Hyrule
Many different languages have been created and applied to the world of Legend of Zelda over time. The language used by the game, languages used by specific characters (like the gerudo), and languages that only exist in a written form (like the sheikah alphabet in Breath of the Wild) all have their places in the Legend of Zelda series. The most common form of spoken language, and the one considered to be "spoken" by characters, is Hylian.
In Dungeons & Dragons, language works in a similar way, with Common being the catch-all language spoken by most characters, and a replacement name for whatever language your table happens to use.
Taken together, the decision was made in this book to replace Common with Hylian as the worldwide language used by all characters, and the varying regional languages such as Gerudo and Sheikah replacing common D&D languages like Elvish and Dwarvish. However, there's no reason to stick to this rule if your table doesn't want to.
If your players would rather continue to use Common as a "catch-all" language, and Hylian as a specific regional language, that's fine too! In that case, the only changes necessary as as follows:
- Replace all instances of "Hylian" in each race's Language section with "Common."
- For hylian characters, instead of speaking Hylian and one other language, they are able to speak Common and Hylian.
- Instead of using the alphabet of the language preferred by your table for the Hylian alphabet, consider using a Hylian alphabet pulled from the games, which can easily be found online. There are five different scripts you can use, depending on what era of the game's timeline you want to pull from, but the scripts from either the Sky Era or A Link Between Worlds are recommended for ease of use.
- The Sheikah language, normally mutually intelligible with Hylian, is instead mutually intelligible with Common.
On Magic in Hyrule
As a series, the Legend of Zelda games have always been surprisingly light on magic. Compared to other fantasy-adventure games released around the same time, the original Legend of Zelda has surprisingly few magical elements. There's the obviously magic Triforce, as well as potions, a magic rod, and some magic accessories. In contrast to many other fantasy-adventure series, Legend of Zelda places much more emphasis on Link's skill with a sword. Much of the series' magic comes from the world around Link, with fairies, magic fountains, and wizardly enemies all playing a role.
This tradition continues with Breath of the Wild, whose magic is again limited to wands picked up from wizzrobes and fairies captured in bottles. Instead, the game places greater emphasis on futuristic technology, created long ago by the ancient sheikah and so advanced to the people of Hyrule that they seem like pure magic in their workings. Breath of the Wild uses this to replace Link's classic magic puzzle-solving items with a new magical element in the form of the sheikah slate, giving him immediate access to a number of sem-magical abilities.
Compared to the Legend of Zelda series, the game of Dungeons & Dragons places a much higher emphasis on magic, as entire player classes are devoted to the casting of spells. While this places both games at odds when it comes to magic, it doesn't mean they can't work together when playing a D&D game set in the Hyrule of Breath of the Wild.
Instead, included here are three possible options for how to meld the magic system of D&D in your game with the low-magic world of Hyrule. When running a game set in Hyrule, you can use some or all of these ideas, in whatever combination works best for your game.
Ancient Artifacts
In the time period of Breath of the Wild, Hyrule has existed for untold millennia, with kingdoms and cultures falling to disaster time and again only to rise again hundreds or thousands of years later. This passage of time has left items of great power hidden or forgotten all across Hyrule.
The prime example of this is the technology of the ancient sheikah, which includes the sheikah towers, the guardians, the Divine Beasts, and the sheikah slate. While not strictly magical, the principles governing these items is reminiscent of magic, and they are capable of replicating many magical abilities.
In addition to the technology of the sheikah, the world of Hyrule has seen the creation of a number of magical items, sometimes unique in their abilities and some that replicate powers that have been seen before. Objects like boots that enhance the wearer's speed, gloves or gauntlets that increase the user's strength, and wands that shoot fire and ice aren't uncommon, and have appeared often in Hyrule's history.
Using any of these items, a character could feasibly replicate many of the common aspects of normal spellcasting.
Useful For:
This concept is useful for characters that want to play spellcasting classes like the artificer or wizard, or replacing classic spellcasting with spells and magic produced by magical items. It can also help explain the presence in Hyrule of magic items normally found in Dungeons & Dragons.
Goddess's Blessing
In the world of Hyrule, most of the population worships the goddess Hylia, a deity responsible for protecting Hyrule from disaster and watching over its people. Every town and village in Hyrule has at least one goddess statue, a depiction of Hylia where citizens of Hyrule go to pray for the goddess' blessing.
Hylia was charged with the task of defending Hyrule by the three Golden Goddesses– Din, Nayru, and Farore. While most knowledge of the Golden Goddesses has been forgotten, some traces of their worship still remain. It was the Golden Goddesses who created Hyrule, piece by piece. Din crafted the earth itself, with its mountains and oceans; Nayru developed the laws of the world, responsible for guiding its action and interactions; and Farore made beings who would uphold these laws, helping to protect the natural order. Before returning to the heavens, the Golden Goddesses also made the triforce, a source of great power responsible for many of the conflicts in the Legend of Zelda series.
One method for granting characters access to magic is to have their magical abilites be a result of their worship of the goddesses, either one of the Golden Godesses, or Hylia herself. Hylia has been known to communicate directly with mortals, and grant them blessings such as enhanced strength and fortitude to help them carry out her wishes.
In addition to the goddesses, other powerful beings walk the land of Hyrule, capable of creating powerful bargains with mortals in exchange for goods and services. Examples of this include the Great Fairies, the Horned Statue, the Horse God Malanya, the Seven Heroines, and even the three great dragons.
Rather than worship one of the goddesses, a character might instead have made contact with one of these powerful beings at some point in their past, and received their magic as a result of a deal with that being. These demigods are less interested in protecting the world as a whole, and focus instead on protecting particular aspects or species, or in serving their own interests.
Useful For:
This concept is useful for characters in spellcasting classes that rely on higher powers, like clerics, paladins, some sorcerers, and warlocks. A cleric or paladin in Hyrule could derive power from their faith in the Great Goddesses, Hylia herself, or even the Seven Heroines. A sorcerer could have been touched by the magic of the great dragons, or further back in their lineage by a deal with the Horned Statue. A warlock could cut a deal with the statue itself, or be working at the behest of one of the Great Fairies.
Natural Magic
Magic as an element of the natural world has been present in the Legend of Zelda series since its inception, and has played a role in every game since. Fairies are natural creatures that flit through the world, healing Link and reviving him if he would die; wizzrobes are strange monsters with the power to control the elements, whose wands give Link a fraction of the same abilities; and some characters like Daruk and Urbosa demonstrate innate abilities like magic shields and control of lightning without any given explanation. The Deku Tree, a fixture in many Legend of Zelda games, is a living tree that's existed for thousands of years.
The world of Hyrule is designed to be a magical place, filled with a thousand little mysteries hidden in between its great events and grand monuments. This natural tendency for magic can go a long way toward explaining some of the magical skill that a D&D character might demonstrate. This also means that classic D&D monsters aren't off-limits for a game set in Hyrule, as the creatures that appear in different games are almost never consistent, and there's no telling what sort of monster might be lurking in the nearby forest or around the next bend in the road.
Magic as a natural facet of the world is present in many ways in Dungeon & Dragons' default assumptions about gameplay, as well as many of its written campaign settings, even if they aren't always immediately apparent.
Useful For:
This concept is useful for playing druids and rangers, who might get their magic from a deep connection to a magical place like Korok Forest, or may just have learned from studying other magical creatures. Its also useful for sorcerers, whose inborn magical abilities might not have or need further explanation, and wizards, who could have gained their magic by studying and attempting to replicate the magical elements of Hyrule.
Magical Astonishment
Whatever method or combination of methods you choose to use in your game, when dealing with magic in the Legend of Zelda series, it's important to keep in mind how rarely magic is relevant to the average resident of Hyrule. In Breath of the Wild and Age of Calamity, this rule is bent a little from the norm, as ancient sheikah technology dominates people's lives via the constant (though somewhat distant) threat of the guardians and Divine Beasts.
Otherwise though, most of Hyrule's citizens aren't likely to understand magic, and their incredulity at aspects of Hyrule like the Great Fairies and Dragon Gods is seen frequently in-game. if you like, you're free to ignore this, and have Hyrule's people treat magic as a minor wonder. But having them react to magic and spellcasters as enigmatic and mysterious aspects of the world can help to solidify the illusion, grounding the player's characters as exceptional heroes in a world of danger.
Chapter 4: Treasures of Hyrule
THE LAND OF HYRULE HIDES MANY DIFFERENT treasures, including magical weapons and armor, and other equipment useful for heroes intending to conquer armies of monsters and bring light to a world under the thumb of darkness. From swords and bows, to spears and daggers, shields and boomerangs, there's no end to the variety of tools that Hyrule has to offer warriors hoping to serve the cause of good. This equipment also comes in a wide variety of forms, and made from any number of unexpected materials.
This chapter is split into three parts. The first section covers a number of new magic items for use in your D&D game, inspired by weapons, armor, and other useful tools used by Link in his journey in Breath of the Wild during his journey to defeat Calamity Ganon. Some of the items are also inspired by the equipment used by the various playable characters from Hyrule Warriors: Age of Calamity.
The second section is related to the different standard weapons available in Dungeons & Dragons, and contains a number of tables listing alternate appearances for those weapons, inspired by the ones found in Breath of the Wild.
The third and final sections covers some new variant rules, such as using gliders, replacing magic items with ancient sheikah technology, and rules for having weapons degrade over time as they do in Breath of the Wild itself.
New Weapon: Boomerangs
Though not commonly found on battlefields, boomerangs are popular weapons for adventurers, explorers, and others who live their lives in the wilds. Lizalfos also make and use boomerangs, and are very proficient at fighting with them, either as ranged weapons or makeshift daggers.
Any character proficient with martial weapons is considered proficient with boomerangs as well. In addition, bards, druids, and monks gain proficiency with boomerangs, and boomerangs are considered monk weapons for the purposes of the monk's Martial Arts feature.
Special Quality. When a character throws a boomerang at a creature, regardless of whether the attack hits or misses, the boomerang returns to its previous wielder at the end of the turn. If the creature that threw the boomerang has a free hand, they can use a reaction to catch the boomerang; otherwise it falls to the ground in that creature's space.
If a boomerang hits an object, it does not return, and instead falls to the ground in the object's space.
| Cost | Damage | Weight | Properties |
|---|---|---|---|
| 5 gp | 1d4 slashing | 1/2 lb. | finesse, light, thrown (30/90), special |
Magic Items
The expansive lands of Hyrule hold a wide variety of strange and unusual weapons, enchanted with powerful effects. These weapons can level the field in a fight between a rookie and and a veteran warrior, mean the difference between life and death for an adventurer, or turn the world on its head in the hands of the proper champion.
Some magic items are more common than others, available to purchase from the proper smith or found in the hands of creatures such as wizzrobes and lynels. Others are much rarer, obtained only by those with the bravery necessary to plunge the depths of ancient ruins, or passed down through generations from ancient heroes of the past.
Weapons
This section collects a lareg number of the magic weapons found in Hyrule in one location.
Ancient Weapon
Weapon (any) , uncommon
With blades and heads made from glowing blue light, ancient weapons are sharper and sturdier than their wood or metal counterparts. Whether pulled from the remains of defeated guardians, scavenged from the depths of ancient sheikah ruins, or constructed via advanced techniques by a few rare scientists, ancient weapons are also much harder to come by. Those that manage to find an ancient weapon should be sure to cherish it, and use it when the time is right.
Because of their particular qualities, ancient weapons are also some of the only weapons capable of cutting through the abnormally durable armor of the guardians, and more easily rending the ultra-hard gears, springs, and other pieces that keep the guardians moving.
Ancient weapons weigh half as much as a normal weapon of the same type, grant a +1 bonus to attack and damage rolls made with them, and deal an additional die of damage to guardians.
Ancient Bladesaw
Weapon (greatsword) , rare
Though called ancient, these strange blades only share an appearance with other ancient sheikah weapons. In truth, their manufacture is relatively recent.
You gain a +2 bonus to attack and damage rolls made with the ancient bladesaw. Attacks made with the ancient bladesaw deal an additional die of damage to guardians, and it is considered an ancient weapon for the purposes of attacks made against guardians.
The ancient bladesaw has 6 charges. When you successfully hit a target with an attack using the ancient bladesaw, you can use a bonus action to rev the blade and expend any number of charges, dealing an additional 1d6 slashing damage for each charge expended. The ancient sawblade regains 1d6 expended charges each day at dawn.
Biggoron's Sword
Weapon (greatsword) , very rare
This unwieldy looking sword is half-again as long as a normal greatsword, and impossible to wield without a great deal of strength and the proper training. Only a few of these swords are known to exist, and legends hold that they were crafted ages ago by the largest goron to ever live.
Biggoron's sword has the reach property, and if your Strength score is less than 19, you have disadvantage on attack rolls made with Biggoron's sword. You gain a +3 bonus to attack and damage rolls made with Biggoron's sword, and attacks made with Biggoron's sword deal 2d8 slashing damage instead of the normal damage of a greatsword.
Boulder Breaker
Weapon (greatsword) , rare
Wielded by Daruk, champion of the goron race, the boulder breaker is a massive sword with a blunted edge, useful for crushing rock and enemy armor alike. Daruk's immense strength allowed him to wield it with one hand, but even most other gorons would require the use of both hands to lift and swing it.
You gain a +2 bonus to attack and damage rolls made with this magic weapon. Attacks made with the boulder breaker deal either bludgeoning or slashing damage, your choice, and deal twice as much damage to objects and structures.
If you are a goron or your Strength score is 23 or greater, you can wield the boulder breaker using only one hand.
Daybreaker
Armor (shield) , rare
Used by the gerudo champion Urbosa in conjunction with her famous blade, the small size of the daybreaker belies an incredibly durable shield, designed to withstand even the greatest of impacts. In Urbosa's hands, the daybreaker presented an impenetrable wall.
While holding the daybreaker, you are resistant to lightning damage, and have a +1 bonus to AC. This is in addition to the shield's normal bonus to AC. While holding the shield, whenever a creature within 30 feet of you would take any amount of lightning damage, you can use your reaction to raise the shield aloft and draw the lightning towards yourself, causing you to take the damage instead.
Drillshaft
Weapon (pike) , uncommon
A long spear tipped with a spiked drill bit, the drillshaft is a goron invention, combining the combat capabilities of a spear with the rock-breaking utilities of a mining drill.
Attacks made with the drillshaft deal twice as much damage to objects and structures, as well as creatures made out of stone or dirt, such as earth elementals and gargoyles.
Giant Boomerang
Weapon (boomerang) , uncommon
This enormous metal blade is easily three times the size of a normal boomerang, and weighs eight times as much. The giant boomerang deals 1d8 slashing damage, and has a thrown range of 90/300 feet instead of a boomerang's normal range.
When a creature is hit by a ranged attack using the giant boomerang, it must succeed on a Strength saving throw or be knocked prone. The DC for this saving throw is 8 + your proficiency bonus + your Strength or Dexterity modifier (your choice).
![]()
Great Eagle Bow
Weapon (longbow) , very rare
This powerful bow was the weapon of choice for Revali, the champion of the rito, who utilized it for everything from intense battles to archery competitions. Said to be a bow without equal, the rito have treated the great eagle bow with reverence since Revali's passing, waiting for a champion worthy of using it.
The great eagle bow is a magic weapon that grants a +2 bonus to attack and damage rolls made with it, and attacks made with the great eagle bow beyond its normal range are not made with disadvantage.
The great eagle bow has 3 charges. When you make an attack with the bow, you can expend a charge to instead fire three arrows at once, making an attack roll for each arrow fired. If all three arrows hit, the target takes an additional 1d8 piercing damage. The great eagle bow regains all expended charges each day at dawn.
Guardian Shield
Armor (shield) , uncommon
Found in a variety of shapes and sizes, these shields at first appear to be simple metal discs with handles. However, when the handle is grabbed, a surface made from luminous blue energy springs from the sides of the disc to form a shield.
While holding this shield, you gain a +1 bonus to AC, in addition to the shield's normal bonus to AC. Whenever you would take radiant damage while holding the shield, you can use a reaction to attempt to reflect the damage back at its source by making a Dexterity saving throw. The DC for this saving throw is 10 or half the damage that would be dealt, whichever is higher.
On a successful save you take no damage, and the source of the damage takes radiant damage equal to that amount instead. On a failed save, you take damage as normal.
Korok Leaf
Wondrous item, common
A sturdy leaf, as large as a sword, which seems to have some strange control over air currents. While holding the leaf, you can use an action to swing it and create a powerful gust of wind in the form of a 15-foot cone. Creatures and objects not being worn or carried that are caught in the wind must succeed on a DC 14 Strength saving throw or be pushed 5 feet away from you.
When found, each korok leaf has 1d4 + 1 charges. When you create a gust of wind using the leaf, you can choose to expend any number of charges. Each charge spent this way increases the saving throw DC of the wind gust by 1, and the size of the cone and the distance creatures and object are pushed away by 5 feet.
The korok leaf can still be used as normal once all of its charges have been expended.
![]()
Lightscale Trident
Weapon (trident) , rare
Forged by the famous zora smith Dento, the lightscale trident was created as a gift for the zora princess Mipha on the eve of her birth. It was in part due to her skill in wielding the trident that Mipha was chosen to serve as the champion of the zora people.
The lightscale trident is a magic weapon that grants a +2 bonus to attack and damage rolls made with it. While wielding the lighscale trident, you gain the ability to breathe underwater, and a swim speed of 40 feet. If you already have a swim speed, it is increased by an additional 40 feet.
The lighscale trident has 4 charges. While holding the trident you can expend any number of charges to cast one of the following spells: shape water (1 charge) , fog cloud (2 charges) , or healing spirit (3 charges). Charisma is your spellcasting ability for these spells. The lightscale trident regains 1d4 expended charges each day at dawn.
Lucky Ladle
Weapon (club) , rare
Hidden somewhere in Hyrule to keep it out of evil hands, the lucky ladle is said to bring great fortune and success to whoever owns it. The lucky ladle has 4 charges. Whenever you make an attack roll, saving throw, or ability check while holding the ladle, you can choose to expend 1 charge to grant yourself advantage on the roll.
If the lucky ladle is used as part of a cook's utensils to make a meal, you have advantage on the ability check made to cook the meal. Any creature that eats the resulting meal gains a +1 bonus to all saving throws made for the duration of the meal's benefits, even if the result is Dubious Food.
Lynel Crusher
Weapon (greatclub) , very rare
These heavy metal clubs are wielded by the savage lynels, and their weight and method of construction make them devastating in the right hands.
You gain a +2 bonus to attack and damage rolls made with this weapon, which weighs twice as much as a normal greatclub. The lynel crusher is also capable of destroying armor by the force of its blows. Whenever a creature wearing nonmagical armor or using a nonmagical shield is hit by the lynel crusher, it suffers a permanent and cumulative -1 to its AC. Armor reduced to an AC of 10 or a shield that drops to a +0 bonus is destroyed.
One-Hit Obliterator
Weapon (sickle) , legendary (requires attunement)
A strange weapon with four pronged tips, each styled to resemble one of the four Divine Beasts, and each decorated with a white tassle. When at its full power, the runes carved into the prongs glow with an eerie blue light, and the decorations at the tips of each prong shine in prismatic colors.
Whenever you hit a creature with an attack using the one-hit obliterator, that taregt is automatically reduced gto 0 hit points, regardless of the damage dealt by the attack. However, while attuned to the one-hit obliterator, any amount of damage you take automatically reduces you to 0 hit points.
Scimitar of the Seven
Weapon (scimitar) , very rare (requires attunement)
Named for the Seven Heroines of gerudo folklore, this scimitar was used by the gerudo champion, Urbosa. With its light weight, Urbosa was able to use the blade to make lightning-quick strikes, all while channeling powerful thunder through its edge. In Urbosa's hands, the scimitar of the seven became an unstoppable assault.
The scimitar of the seven is a magic weapon that grants a +3 bonus to attack and damage rolls made with it, and attacks made with the scimitar deal an additional 1d6 lightning damage. While holding the scimitar, you can use an an action to cast the call lightning or lightning bolt spells. Wisdom is your spellcasting ability for these spells. You can use this feature up to three times per long rest.
Sea-Breeze Boomerang
Weapon (boomerang) , rare
These wooden boomerangs are usually painted in bright hues of green, yellow, or red, and affixed with metal decorations depicting scenes of the ocean. Dry or wet, the wood used to craft these boomerangs always smell faintly of salt-water.
You gain a +2 bonus to attack and damage rolls made with this weapon, and the range of thrown attacks made using this boomerang is doubled.
The sea-breeze boomerang has 10 charges, and regains all expended charges daily at dawn. You can use an action while holding the boomerang and expend any number of charges to cast the following spells: unseen servant (1 charge) , gust of wind (2 charges) , skywrite (2 charges) , or create food and water (3 charges) . You can also cast the shape water spell at will. Your spellcasting ability for these spells is Charisma or your own spellcasting modifier, whichever is higher.
Shakalaka Maracas
Weapon (club) , legendary (requires attunement)
This pair of hefty green clubs are topped with golden spirals, each one filled with such a large number of seeds that even a single shake creates a cacophony of music. The decoration on top of each maraca is supposedly modeled after the seeds of the Koroks, forest-dwelling spirits found across Hyrule, who are fond of mischief and games.
Attuning to the maracas requires both of them to be present. The maracas can never be more than 10 feet apart. Any attempt to separate them further than this causes both to magically reappear in the possession of the creature currently attuned to them, or for one to magically appear next to the other.
You gain a +2 bonus to attack and damage rolls made with these weapons. Whenever you successfully hit a creature with an attack from both shakalaka maracas in the same turn, a korok appears in your space. This korok is a Tiny creature, made from wood and wearing a leaf as a mask. It is immune to all damage, and cannot be targeted by spells or abilities. Koroks summoned by the maracas move with you and copy your actions, causing attacks you make with the shakalaka maracas to deal an additional 1 damage for each korok following you.
The maximum number of koroks you can have following you at once is equal to twice your Charisma modifier. Any koroks that are summoned as a result of using the maracas disappear 1 minute after the most recent korok appeared.
You can also use an action to direct any number of koroks currently following you to take one of the following manuevers. Any koroks used in a manuever disappear immediately afterwards. To use a manuever, at least one korok must be following you and be used in the manuever.
- Balloon Boogie. The chosen koroks pick you up and lift you slightly into the air before carrying you forward at high speeds, up to 30 feet in a direction of your choice. While moving in this way, you can pass through other creature's spaces. If you pass through a creature's space in this way, it must succeed on a DC 14 Strength saving throw or take 1d8 bludgeoning damage and be knocked prone. Each korok used in this manuever increases the DC of the saving throw by 1, and the damage dealt by 1d8.
- Slingshot Samba. Each korok used in the manuever fires a cascade of rocks from their slingshot, creating a barrage of missiles in a 5-foot radius, centered on a point of your choice that you can see within 60 feet. Each creature in the radius must make a DC 10 Dexterity saving throw, taking 4d10 bludgeoning damage on a failed save, or half as much on a success. Each korok used in this manuever increases the DC of the saving throw by 1, and the radius of the effect by 5 feet.
- Treetop Tango. The chosen koroks spin at high speeds around a Large or smaller creature or object you can see within 30 feet. The target is lifted 10 feet into the air, and must succeed on a DC 12 Constitution saving throw or be stunned until the end of its next turn. After the manuever is complete, the target falls unless it has some way of staying aloft. Each korok used in this manuever increases the DC of the saving throw by 1, and the distance the target is lifted into the air by 5 feet.
Spring-Loaded Hammer
Weapon (light hammer) , uncommon
This bouncy, springy hammer is incredibly light, and therefore deals very little damage to the targets it strikes. However, the spring-loaded pads on either side of it do excel at knocking away threats and putting distance between dangerous creatures.
Whenever you hit an object or creature with the spring-loaded hammer, if the object or creature is Medium or smaller it must succeed on a DC 14 Strength saving throw or be pushed 10 feet directly away from you. This movement does not provoke opportunity attacks. If the target fails the saving throw by 10 or more, it is also knocked prone at the end of the movement.
Windcleaver
Weapon (longsword) , very rare
A lengthy weapon whose blade has several holes running along its surface, the windcleaver requires a great deal of skill and technique to use properly. Once upon a time, their use was reserved for specially trained sheikah soldiers; in the modern era, they are the weapon of choice for the dangerous Yiga Blademasters, an elite sect of Yiga commanders.
You gain a +3 bonus to attack and damage rolls made using this weapon. While wielding the windcleaver with two hands, you can use an action to swing the blade wide in a horizontal cut, slicing through the air itself as you do so. Each creature in a 10-foot cone must make a Dexterity saving throw (DC = 11 + your proficiency bonus + your Strength modifier) taking 3d10 slashing damage on a failed save, or half as much on a success.
Creatures in the area that are within 5 feet of you have disadvantage on this saving throw. Objects caught in the area take twice as much damage, and if reduced to 0 hit points, they are sliced cleanly in half.
Wizzrobe Wand
Wand, rare (fire, ice, lightning), very rare (meteor, blizzard, thunderstorm)
Primarily found in the possession of the Wizzrobes, these wands confer on their owner a mastery of the elements. The wands come in six different varieties, each associated with one of three elements.
Each wand has 10 charges, and regains 1d10 expended charges daily at dawn. If you expend the last charge from a wizzrobe wand, roll a d20. On a 1, the wand crumbles into ashes and is destroyed.
The saving throw DC for any effect created by a wizzrobe wand is either 15 for fire, ice, and lighting wands; or 18 for blizzard, meteor, or thunderstorm rods.
Fire Rod. While holding this wand, you can use an action to expend a charge and cast the fireball spell (save DC 15) from it.
Meteor Rod. While holding this wand, you can use an action to expend a charge and launch three fireballs from it, which launch forward in a 60-foot cone. Each creature in that area must make a DC 18 Dexterity saving throw, taking 10d6 fire damage on a failed save, or half as much damage on a successful one.
Ice Rod. While holding this wand, you can use an action to expend a charge and fire a beam of icy energy at a target you can see within 100 feet. That target must succeed on a DC 15 Strength saving throw or be frozen in a block of ice and restrained for 1 minute (escape DC 15).
Blizzard Rod. While holding this wand, you can use an action to expend a charge and cast the cone of cold spell (save DC 18) from it.
Lightning Rod. While holding this wand, you can use an action to expend a charge and cast the lightning bolt spell (save DC 15) from it.
Thunderstorm Rod. While holding this wand, you can use an action to expend a charge and cast the chain lightning spell (save DC 18) from it.


Armor & Outfits
In the trying times of the Age of the Wilds, the clothing worn by the people of Hyrule must not only be fashionable, but functional as well. A variety of outfits and accessories exist which are created not only to look good, but to provide a number of survival-enhancing benefits as well.
Amber Earrings
Wondrous item, rare (requires attunement)
These amber earrings come in many shapes, but the most popular kinds are those crafted to resemble shields, autumn leaves, or miniature spears. While wearing the amber earrings you have resistant to nonmagical bludgeoning, piercing, and slashing damage.
Ancient Armor
Armor (halfplate) , very rare
Made from materials taken from the numerous guardians that now stalk Hyrule's landscape, while this armor is called ancient, its construction is actually very recent. While wearing the ancient armor, you gain a +2 bonus to AC, and have resistance to radiant damage. In addition, while wearing the armor you gain an additional +1 bonus to attack and damage rolls made with ancient weapons.
Champion's Tunic
Wondrous item, rare
While simple in design, each of these tunics are decorated with motifs meant to evoke important moments in Hyrule's storied history. While wearing a champion's tunic, you can use a bonus action to study a creature that you can see, learning information about its capabilities compared to your own. The DM tells you if the creature is your equal, superior, or inferior in regards to one of the following categories:
- Strength score
- Dexterity score
- Armor class
- Current hit points
Desert Voe Outfit
Wondrous item, uncommon
Based on truly ancient designs meant to be worn by gerudo males, this outfit expertly blends protection from the heat of the desert with special materials designed to ground the wearer against electric shocks.
While wearing the desert voe outfit, you have advantage on Constitution saving throws made to avoid the effects of intense heat. In addition, while wearing the desert voe outfit, if an effect that would deal lightning damage forces you to make a Dexterity saving throw, you take no damage on a successful save and half as much damage on a failed one.
Diamond Circlet
Wondrous item, rare (requires attunement)
Usually made from precious metals like gold, silver, or platinum and set with a single clear diamond. While wearing the diamond circlet you are resistant to radiant damage, and you can not be surprised.
Flamebreaker Armor
Armor (any metal armor) , rare
Made from heavy, heat-resistant metals, flamebreaker armor is used by those hoping to explore the area around Death Mountain for long periods of time. While the armor provides only minimal protection from the sweltering heat, it does stop the risk of burning air and stray gouts of flame.
While wearing the flamebreaker armor, you are resistant to fire damage; if the flamebreaker armor is heavy armor (such as ring mail, chain mail, splint, or plate) you are immune to fire damage instead.
Hylian Climbing Gear
Wondrous item, uncommon
Usually taking the form of a sturdy belt with a number of attached pouches, hylian climbing gear includes all of the tools needed to overcome sheer cliffs and steep surfaces, and is also magically enchanted to toughen the muscles of its wearer.
While wearing hylian climbing gear, you gain a climbing speed equal to your movement speed, and have advantage on Strength (Athletics) checks made to climb difficult surfaces.
If you are using the Action Climbing variant rule found earlier in this document, hylian climbing gear instead allows you to climb at a rate equal to twice your Athletics score, and doubles the number of rounds that you can continue climbing after you start.
Monster Masks
Wondrous item, uncommon
Found in a wide number of styles and with varying levels of quality, monter masks are helmets specifically designed to resemble some of the most common monsters found in Hyrule. While wearing a monster mask, you have advantage on Charisma (Deception) checks against monsters of a the kind associated with the mask. The types of monster masks available include bokoblin, lizalfos, lynel, and moblin.


Opal Earrings
Wondrous item, uncommon (requires attunement)
Like two shining drops of water, these opal earrings sparkle when they catch the light. While wearing the opal earrings, you have a swim speed equal to your movement speed. If you already have a swim speed, your swim speed is increases by 20 feet instead.
Radiant Disguise
Wondrous item, rare
Made from dark cloth covered in crushed stones, a radiant disguise gives off dim light in a 5-foot radius. The pattern of the crushed stones on a radiant disguise, the source of their luminosity, are usually made to resemble skeletal features, giving you advantage on Charisma (Deception) checks against undead creatures.
Royal Guard Uniform
Wondrous item, uncommon
These outfits were created for the Royal Guard, members of the Hylian Army whose advanced skills led to them being charged with the defense of the Hylian royal family. While wearing the royal guard uniform, your speed is increased by 10 feet, and you have advantage on Constitution saving throws made to maintain a forced march.
Rubber Armor
Armor (hide) , very rare
Usually decorated in black and yellow, with motifs of catfish or dragons, rubber armor sacrifices effectiveness in combat for protection against shocking jolts of electricity. While wearing the rubber armor, you are immune to lightning damage. In addition, whenever a creature within 10 feet of is targeted by a spell or ability that would deal lightning damage, you can use your reaction to cause the spell or ability to target you instead.
Ruby Circlet
Wondrous item, rare (requires attunement)
Usually nothing more than a simple leather band, strung with beads and glass, and hung with a smallbut bright ruby. While wearing the ruby circlet your are resistant to cold damage, and have advantage on saving throws made to avoid the effects of severe cold.
Sand Boots
Wondrous item, common
Specially designed boots made to prevent their wearer from sinking in the soft desert sand. While wearing these boots, you aren't slowed by nonmagical difficult terrain caused by desert conditions.
Sapphire Circlet
Wondrous item, rare (requires attunement)
Usually found in the form of a slender steel or silver tiara, crowned with a single cut sapphire. While wearing the sapphire circlet you are resistant to fire damage, and have advantage on saving throws made to avoid the effects of intense heat.
Sheikah Stealth Leggings
Wondrous item, uncommon
Made for use by ancient sheikah warriors, sheikah stealth leggings are carfted from a special noise-absorbing cloth. The secret behind the weaving of this cloth has, unfortunately, been lost to time. When sheikah warriors needed to move quitely, without sacrificing flexibility or speed, they would wear these leggings and other clothing made from the same cloth.
While wearing the sheikah stealth leggings, you have advantage on Dexterity (Stealth) checks made to move quietly, and don't suffer any penalty to movement while attempting to move quietly.
Snow Boots
Wondrous item, common
Specially designed boots made to prevent their wearer from sinking in deep snow drifts. While wearing these boots, you aren't slowed by nonmagical difficult terrain caused by arctic conditions.
Snowquill Outfit
Wondrous item, uncommon
Each snowquill outfit is made from thick layers of wool, lined with discarded rito feathers and covered with slick, water-resistant skins. While wearing a snowquill outfit you automatically succeed on saving throws made to avoid the effects of severe cold, and you can not be slowed by difficult terrain caused by arctic conditions.
Topaz Earrings
Wondrous item, rare (requires attunement)
Popular amongst the gerudo, these earrings often come shaped like miniature lightning bolts, sand seals, or storm clouds. While wearing the topaz earrings you are resistant to lightning damage.
Zonai Armor
Armor (studded leather) , rare (requires attunement)
Crafted from entirely natural materials including leather, scales, and bone, most sets of zonai armor are heirlooms that have been passed down through dozens of generations. Each set of zonai armor comes with a helm fashioned from the skull of a beast, intended to represent a specific ideal– boars for strength, owls for wisdom, and dragons for courage, among others.
While wearing the zonai armor, you gain a +1 bonus to all attack and damage rolls made with melee weapons. In addition, you gain a +2 bonus to one ability score, determined by the skull used as the armor's helm. In order to gain either of these bonuses, you must be wearing all pieces of the armor.
Zonai Helm Bonus
| Skull Shape | Ability Score Bonus |
|---|---|
| Boar | Strength |
| Deer | Dexterity |
| Bear | Constitution |
| Giant Owl | Intelligence |
| Dragon | Wisdom |
| Tiger | Charisma |
Thunder Helm
Wondrous item, legendary
Based on the design of the Divine Beast Vah Nabooris, the thunder helm is a powerful artifact, and an heirloom belonging to the gerudo chief. The helm is undoubtedly old, though no one knows quite how old, and stories about its creation vary on the point of its age. These same stories claim that the golden metal used to make the thunder helm was mined from the cliffs that surround the Gerudo Desert, after a powerful lightning storm struck the rock of the cliffs and exposed a veing of brilliant gold. The helm's powers are apparently a result of the storm's lightning choosing to remain trapped inside the ore.
While wearing the thunder helm, you are immune to lightning damage. In addition, you can use an action while wearing the thunder helm to cast the call lightning spell up to three times per long rest, and the chain lightning spell once per long rest. Your spellcasting ability for these spells is Charisma or your own spellcasting ability, whichever is higher.
Zora Armor
Armor (any medium or light) , rare
Crafted by zora armorsmiths for use by their land-locked allies, zora armor is sleek and smooth, with curved lines designed to let its wearer cut through the water.
While wearing zora armor, you gain a swim speed equal to your movement speed, and you can hold your breath for twice as long as normal.
Artifacts
While items imbued with magic are a constant feature of Hyrule's landscape, there are a few which stand on another level altogether. Objects of immense power, these weapons have played important roles in shaping Hyrule's history. Wherever they appear, greatness is sure to follow.
Bow of Light
Weapon (longbow) , artifact (requires attunement by a creature of good alignment)
This radiant bow is a gift from the great goddess Hylia, given to the royal family of Hyrule that carries her bloodline. Considered to be a physical manifestation of the divine connection between Hylia and the royal family, it has always appeared in times of great need, a weapon against the darkness which threatens the peace of Hyrule and its people.
Each account of the bow varies in the description of its appearance– some describe wings of light that rise from the bow; others that say the bow is made from a golden metal, unlike any ever pulled from the mountains and mines of Hyrule. All stories of the bow agree on the shining, luminous arrows which it fires, and which appear from midair at its wielders command.
Striking Light. The Bow of Light is a magic weapon that grants a +3 bonus to attack and damage rolls made with it. Attacks made with the bow deal radiant damage instead of piercing damage.
Random Properties. The Bow of Light has two randomly determined major beneficial properties.
Arrows of Light. The Bow of Light does not require ammunition, and instead of normal arrows, it fires arrows made of piercing light. These arrows appear whenever the bow is drawn, and disappear after striking a creature or object, or after traveling to the bow's maximum range.
Because the bow fires arrows made from light, the arrows do not fall after a certain distance, and attacks made with the Bow of Light past its normal range are not made with disadvantage.
Repel Evil. Attacks made with the Bow of Light against evil creatures have advantage, and evil creatures take an additional 2d8 radiant damage from all attacks made with the bow.
If the Bow of Light is used to attack a creature that is possessed or cursed by another creature, such as a target under the effects of ghost's Possession ability, instead of dealing damage to the target, the Bow of Light deals damage to the creature possessing or cursing it.
Destroying the Bow. As a gift from the goddess Hylia, and a manifestation of her power, the Bow of Light can not be destroyed permanently. If the bow is placed in malice produced directly by Calamity ganon or a Blight Ganon, it is temporarily destroyed, reforming 1d100 days later. If the connection between the royal family of Hyrule and the goddess Hylia is somehow severed, the Bow of Light immediately disappears, and will not return to Hyrule until the connection has been re-established.
Fierce Deity Sword
Weapon (greatsword) , artifact (requires attunement)
Considered to be among the most powerful blades to ever grace the surface of Hyrule, the fierce deity sword is a weapon befitting its name. Garced with an equal capacity for either good or evil, its ability to destroy anything in its path is unmatched.
Stories of the fierce deity sword say that its original owner was an unknown and unnamed hero from a far-off land, perhaps even another world. Having unlocked the powers of a god, this hero ended a great evil, at the cost of their own soul. Though the hero's fate is unknown, even the memory of their deeds holds a great power; so great that apparently this sword has only ever appeared to those who know the story by heart.
No one knows for sure if this sword is the same as the one used by the unnamed hero, or a replica created from the power of belief. Whether the two would be any different is another question altogether.
Deity's Strength. The fierce deity sword is a magic weapon that grants a +3 bonus to attack and damage rolls made with it, and attacks made with the fierce deity sword deal an additional 2d6 force damage.
Random Properties. The fierce deity sword has the following randomly determined properties:
- 3 minor beneficial properties
- 2 major beneficial properties
- 1 major detrimental property
Cut Through Reality. Attacks made with the fierce deity sword ignore damage resistances and immunities, and score a critical hit on a roll of 19 or 20.
When you score a critical hit with the fierce deity sword, if the target has less than 100 hit points remaining, it must succeed on a DC 20 Constitution saving throw or immediately die.
Unstoppable Force. The fierce deity sword has 10 charges. While wielding the sword, you can use an action to expend 1 charge and swing the sword, creating a 30-foot long, 5-foot wide magical beam of energy. Any creature caught in the area of the beam must make a DC 20 Dexterity saving throw, taking 6d10 force damage on a failed save, or half as much on a success.
The fierce deity sword regains 1d10 expended charges daily at dawn.
Proven Worthy. Each time a creature attuned to the sword attempts to wield it, it must make a DC 20 Charisma saving throw. On a failed save, the attuned creature falls under the control of the sword's spirit for 1 minute, which attempts to kill any creature it can see that is not lawful good.
At the start of each of the creature's turns while under the control of the sword's spirit, it must succeed on a DC 20 Constitution saving throw or suffer one level of exhaustion. If a creature reaches 4 levels of exhaustion in this way, or if a creature is killed while attuned to the fierce deity sword, the sword determines its wielder to be unworthy, and vanishes in a blinding blast of light.
Goddess Sword
Weapon (longsword) , artifact (requires attunement)
The Goddess Sword and the spirit that inhabits it were created by the goddess Hylia to watch over the world during her abscence. For untold millennia it has worked tirelessly to carry out this duty, guiding the sacred heroes capable of wielding its strength, and aiding them in their struggles to overcome evil.
As a blade trusted with the powers of the goddess Hylia herself, the Goddess Sword has a deep connection to the sky, and was said to have once been capable of letting its wielders travel through the clouds.
You gain a +3 bonus to attack and damage rolls made with this weapon. It has the following additional properties.
Dowsing. The Goddess Sword can be used to detect hidden objects nearby. While holding the Goddess Sword, you can use an action to activate its dowsing properties, and choose a type of creature or type of material (such as wood, metal, water, ruby, etc). Until you make an attack with the Goddess Sword or use an action to end the dowsing, you can automatically detect the location of any material or creature of the chosen type within 500 feet of yourself.
Skyward Loft. While holding the Goddess Sword, you can spend 10 minutes to mark your current location with the sword's powers. At any point afterwards while holding the Goddess Sword, you can use an action to teleport yourself and up to one other willing creature to that location, or from that location and back to your previously occupied location.
You can spend 10 minutes in a new location to mark that location with the sword's powers instead. You can only have one location marked in this way at a time.
Skyward Strike. As an action while wielding the Goddess Sword you can raise the sword aloft, charging the blade with radiant energy, and then unleash it in a powerful blast. When you do, the blade creates a burst of light 30 feet long and 5 feet wide. Each creature in the area must make a DC 20 Dexterity saving throw, taking 6d10 radiant damage on a failed save, or half as much on a success.
Sentience. The Goddess Sword holds the spirit of Fi, guardian of the sword and servant of the goddess Hylia. Fi is lawful good, and has an Intelligence of 20, Wisdom of 14, and Charisma of 18. She has hearing and truesight out to a range of 120 feet.
Fi can speak, read, and understand Hylian and any other language a creature attuned to the Goddess Sword knows. Fi can communicate telepathically with any creature that shares a language with her within 120 feet, and while you are attuned to the Goddess Sword, can appear within 10 feet of the sword as a humanoid-shaped illusion visible only to you.
Personality. Fi speaks very robotically, preferring to stick to known facts, without room for speculation or emotion. In fact, while Fi can detect emotional changes in people, she struggles with understanding them. Fi also tends to speak in terms of statistical analyses for success in a given action.
Destroying the Sword. The Goddess Sword can not be destroyed as long as it is under the protection of Hylia. But if submerged in Malice, Fi is rendered inert for 1d100 days. Until Fi awakens, the Goddess Sword loses all magical properties except its +3 bonus to attack and damage rolls.
Hylian Shield
Armor (shield) , artifact (requires attunement by a creature of non-evil alignment)
This durable metal shield sports a classic appearance, one that has been replicated over and over in various copies. The original hylian shield has played a prominent role in the myths and legends of the realm of Hyrule, always in the hands of the famed Hero of Light. In many stories, it makes up one half of the Hero of Light's classic sword-and-shield arsenal, and is almost as important as the Hero of Light's blade in helping to seal the various evils which have threatened Hyrule.
On the true hylian shield, its blue blackground represents the royal family of Ancient Hyrule, while the red eagle crest near its center is a combination of the royal family's insignia and the symbol of the goddess Hylia. Finally, at the top and center of the shield are three golden triangles, representing the mythological Tri-Force, an artifact whose power is said to be the source of all life in Hyrule.
Legendary Defense. The hylian shield provides a +3 bonus to AC while wearing it, in addition to the shield's normal bonus to AC. In addition, the hylian shield itself is immune to damage, and while wearing the hylian shield you have resistance to nonmagical damage and are immune to the effects of the disintegrate spell.
Random Properties. The hylian shield has the following randomly determined properties:
- 2 minor beneficial properties
- 1 major beneficial property
Fire and Lightning. While wearing the hylian shield, you have resistance to both fire and lightning damage. In addition, whenever you are subjected to an effect that allows you to make a Dexterity saving throw to take only half damage, you instead take no damage if you succeed on the saving throw, and only half damage if you fail.
Reflective Shielding. Any time you are targeted by the magic missile spell, a line spell, or a spell that requires a ranged attack roll, if you are holding the hylian shield you can use your reaction to attempt to reflect the spell back at the caster. To do so, you must make a Dexterity saving throw with a DC equal to 10 + the level of the spell. On a success, the effect is reflected back at the caster as though it originated from you, turning the caster into the target.
Destroying the Shield. The hylian shield can only be destroyed if it is swallowed by a tarrasque, ancient dragon, or other suitably powerful beast. Once swallowed, the hylian shield will break down in the creature's stomach over the course of 1d12 hours.

Master Cycle Zero
Wondrous item (vehicle) , artifact (requires attunement)
The Master Cycle Zero is a strange but powerful artifact, ancient in its design but with capabilities that surpass most modern magical technology. Clearly meant to be used as a steed, the Master Cycle Zero is modeled after a unicorn, with a luminescent blue horn on its front, and a pair of wheels instead of hooves.
Unlike a normal steed, the Master Cycle Zero has the benefit of never becoming exhausted, as it runs entirely on magical energy. However, this energy slowly drains as the Master Cycle Zero is used, requiring it to be refilled at intervals. Up to three creatures can be attuned to this vehicle, and can become attuned to the vehicle at the same time or at different times. A creature that attunes to the Master Cycle Zero automatically learns how to use it.
Magical Steed. The Master Cycle Zero can be used as a mount, and has a movement speed of 60 feet. The Master Cycle Zero also has AC 20, 100 hit points, and is immune to cold, fire, necrotic, poison, and psychic damage, as well as bludgeoning, piercing, and slashing damage from nonmagical weapons.
Easy Storage. While not being used, the Master Cycle Zero can be magically stored for easy portability. A creature attuned to the Master Cycle Zero can speak its command word as a bonus action, causing the vehicle to transform into a small, handheld orb or back again. If there are no creatures within 60 feet of the Master Cycle Zero that are attuned to it, it automatically transforms into an orb, and teleports itself into the possession of the last creature to use it.
Magical Fuel. The Master Cycle Zero requires fuel in order to run. The Master Cycle Zero can store up to 24 fuel points, and it loses 1 fuel point for each hour or portion thereof that it remains in vehicle form. The Master Cycle Zero regains fuel points when objects are placed into its fuel tank. The number of fuel points regained in this way depends on the object placed in the fuel tank. Objects placed into the fuel tank are automatically destroyed, and must be no larger than one square foot in size.
Master Cycle Zero Fuel Table
| Object | Fuel Points Gained |
|---|---|
| Mundane object | 1 point per 100 gp of value (rounded down) |
| Common magical item | 2 points |
| Uncommon magical item | 5 points |
| Rare magical item | 10 points |
| Very rare magical item | 24 points |
Destroying the Cycle. The Master Cycle Zero can not be destroyed as long as it has at least 1 fuel point. If the Master Cycle Zero is reduced to 0 fuel points, and then activated three times without adding more fuel, it breaks and can not be used until it is repaired. Repairing the Master Cycle Zero is difficult, and because of the nature of ist construction, it may not be possible to find anyone with the knowledge to repair it.
![]()
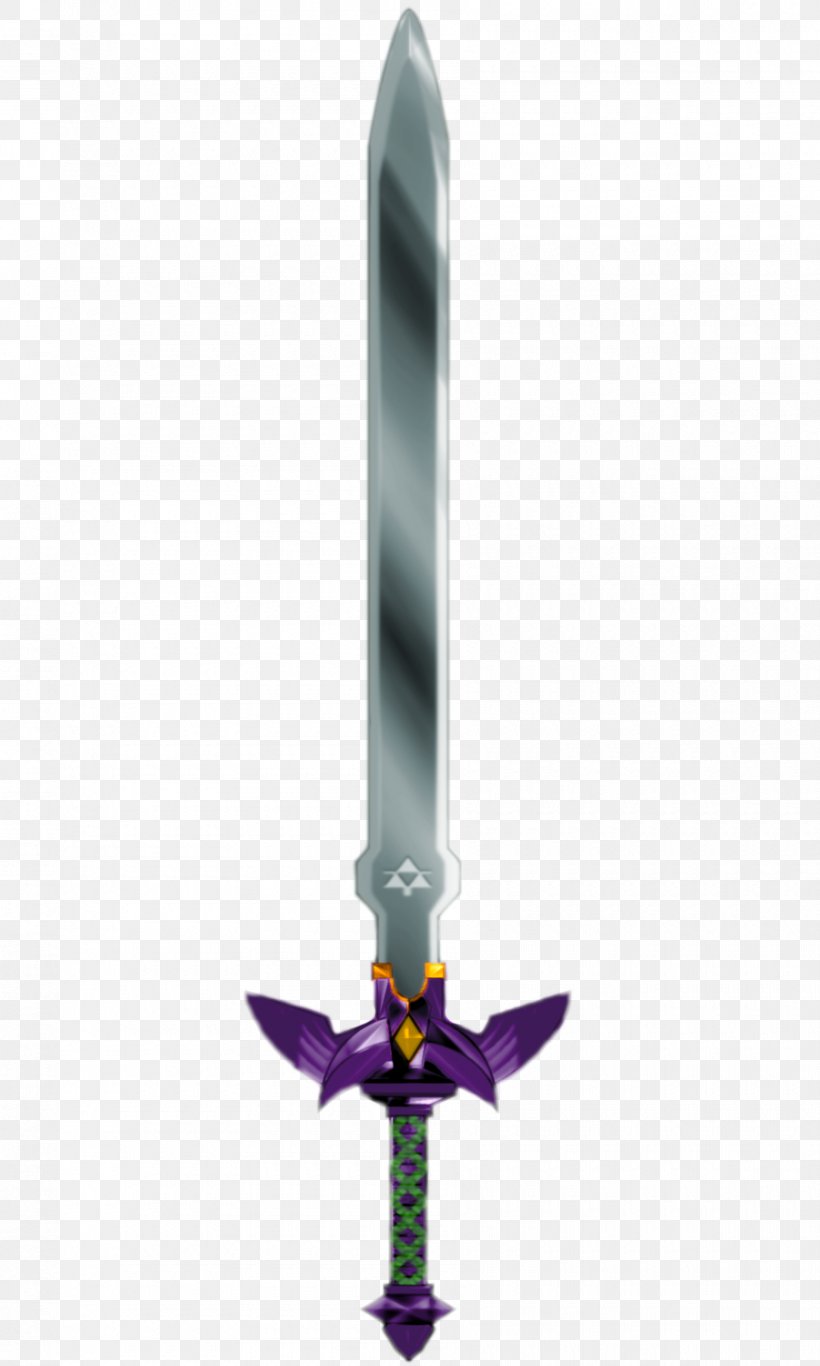
The Master Sword
Weapon (longsword) , artifact (requires attunement by a creature of good alignment)
The Master Sword has had many names among its centuries of existence, including the Sword of Legend, or the Blade of Evil’s Bane. No matter its name, the Master Sword is always a weapon of good in a time of darkness, wielded by a Hero of Light to vanquish evil.
To properly wield the Master Sword requires both a pure heart, and a courageous spirit. The blade itself refuses to follow the command of anyone lesser, and to attempt to force its hand is said to be a sure death.
Magic Weapon. The Master Sword is a magic weapon that grants a +3 bonus to attack and damage rolls made with it.
Random Properties. The Master Sword has the following randomly determined properties:
- 2 major beneficial properties
- 2 minor beneficial properties
Blade of Light. If your current hit point total is at maximum, attacks made with the Master Sword deal an additional 2d8 radiant damage, and you can use an action on your turn to make a Skyward Strike. When you do, make a melee attack with the Master Sword against one creature you can see within 15 feet. If the attack hits, instead of the Master Sword’s normal damage, the target takes 5d8 radiant damage.
Repel Evil. All attacks made with the Master Sword against evil creatures have advantage.
Dispel Darkness. While attuned to the Master Sword, you are under the constant effect of a detect evil and good spell, and can use an action on your turn to automatically detect the alignment of any creature that you can see within 60 feet.
In addition, while holding the Master Sword, you can cast the remove curse spell at will, and dispel magic as a 9th-level spell three times per long rest. When you cast dispel magic in this way, you can only end the effects of spells cast by evil creatures.
Sentience. The Master Sword is host to a guardian spirit, named Fi, which grants the Master Sword sentience. The Master Sword is a lawful good weapon with an Intelligence of 16, a Wisdom of 20, and a Charisma of 20. It has hearing and truesight out to a range of 120 feet, and can understand all languages, though it does not speak.
Personality. The Master Sword itself does not have a personality, but the guardian spirit that lives within the blade does. Known as Fi, this spirit is very blunt, and somewhat emotionless. When she does choose to communicate, Fi always cuts straight to the point, and seems to enjoy providing statistical information on the situation at hand.
Destroying the Sword. The Master Sword can not be destroyed, as long as it remains under the protection of the goddess Hylia; however, it can be severely weakened. Doing so requires finding and killing both the Sage of Wind and the Sage of Earth. If both of the Sages are killed, the Master Sword’s sentience falls dormant and it loses all of its magical properties, except its +3 bonus to attack and damage rolls.
Sheikah Slate
Wondrous item, rarity varies (requires attunement)
Among the most wondrous inventions of the ancient sheikah, the sheikah slate is a powerful and versatile tool, useful in a variety of situations and capable of aiding its user in overcoming nearly any challenge. At its most fundamental, the sheikah slate can be used to connect to and activate other pieces of ancient sheikah technology, as well as provide an aerial map thats invaluable for strategy and planning.
The true strength of the sheikah slate becomes apparent only once it is upgraded, and equipped with various runes. Each additional rune on a sheikah slate gives it access to another powerful, magical ability– creating ice from thin air, freezing objects and creatures in place, carrying and manipulating metallic items, and creating powerful remotely-controlled bombs are all among the capabilities of the sheikah slate.
Each additional rune unlocked on a sheikah slate increases its value, as well as its rarity. Unlocking the use of a new rune can be difficult and perplexing, requiring large amounts of trial and error, a search for the complex instructions needed, or the help of someone who has spent years or even decades studying other pieces of sheikah technology.
Sheikah Slate Rarity
| Runes Unlocked | Rarity |
|---|---|
| 1 | Uncommon |
| 2 | Rare |
| 3 | Very rare |
| 4 | Legendary |
Some of the possible runes and their effects that can be unlocked on a sheikah slate are included below. Other runes may exist, but would be incredibly rare. The five runes included here are those most commonly found in already-activated sheikah slates. You must use an action while holding the sheikah slate to activate an unlocked rune.
A single sheikah slate can never have more than 4 unlocked runes. If you attempt to unlock an additional rune on a sheikah slate that's already at its maximum, you must choose one of the previously unlocked runes to get rid of.
Camera Rune. After activating the camera rune on the sheikah slate, you can point the slate at an object, creature, or landcsape to take a picture of the subject. You can have up to thirty pictures created by the sheikah slate saved at once. If you attempt to take a picture using the camera rune while you already have 30 pictures saved, you must choose a previous picture to get rid of.
While you have a picture of a creature, object, or environment save to the sheikah slate, the slate will provide basic information on the subject of the picture. This allows you to reference that picture to give yourself advantage on Nature or Survival checks related to that subject.
Cryonis Rune. When you activate the cryonis rune, choose a patch of water you can see within 30 feet. A 5-foot cube of ice appears at the chosen point, rising from the water. If the ice appears underneath of a Medium or smaller creature, that creature is lifted up on top of the ice block. If the ice block appears underneath of a Large or larger creature, that creature must succeed on a DC 14 Dexterity saving throw or be knocked prone.
Blocks of ice created by the cryonis rune melt after 1 minute, and can be picked up and moved with a successufl DC 14 Strength check. Up to three blocks of ice can be created at one time using the cryonis rune. If you attempt to use the sheikah slate to create another block of ice, the oldest block of ice shatters and melts back into water.
Magnesis Rune. When you activate the magnesis rune, choose a metal object you can see within 30 feet. The sheikah slate magically grabs that object, allowing you to move it up to 30 feet in any direction you choose. The object remains held by the rune until you use a bonus action to let it go.
If the object targeted by the sheikah slate is being worn or carried, the creature holding the object must make a DC 14 Strength saving throw. If the creature succeeds on the saving throw, the sheikah slate fails to grab the object.
Remote Bomb. When you ativate the remote bomb rune, choose an unoccupied space you can see within 60 feet. A magical, glowing bomb appears in that space, which explodes after 1 minute, or if you use a bonus action to cause it to explode early. The bomb can either be a sphere or a cube, decided by you when you activate the rune.
The blast created by the bomb fills a 20-foot radius sphere, and spreads around corners. Creatures and objects caught in the blast must make a DC 14 Dexterity saving throw, taking 4d6 force damage on a failed save, or half as much on a success.
After activating the remote bomb rune, you can't do so again for 1 minute.
Stasis Rune. After activating the stasis rune, choose a creature or object you can see within 30 feet. Chains of golden light appear around the target, binding it in place and effectively stopping time only for that target. While under the effects of the stasis rune, the target can not move or be moved, can not be targeted by spells or abilities, and is immune to all damage. The target remains under the effect of the stasis rune for 1 minute, or until you use a bonus action on your turn to end the effects.
After activating the stasis rune, you can't do so again for 1 minute.
![]()
Supernatural Gifts
There exist a number of powerful, otherworldly forces in Hyrule– beings such as the Great Fairies and the Horned Statue– that can grant fragments of their strength in exchange for services rendered. These rewards function similarly to the Supernatural Gifts found on page 227 of the Dungeon Master's Guide, giving characters special abilities unique to those beings. While these Supernatural Gifts might include those found in the Dungeon Master's Guide, this section includes several new Blessings and Charms created specifically for characters in Hyrule.
Blessings
As a permanent benefit for the hero that receives it, Blessings are more likely to be granted as a reward for accomplishing something truly great, like slaying a blighted manifestation of Ganon's Malice, restoring a withered fairy fountain, or saving the life of a legendary beast.
Blessing of the Sheikah. You gain the ability to use one of the runes associated with the sheikah slate. You can use the rune's effect three times per long rest, as if you were attuned to a sheikah slate with that rune unlocked.
Daruk's Protection. As a bonus action on your turn or as a reaction when you take damage, you can produce a shield of red energy around your body. This shield grants you 50 temporary hit points. Once these temporary hit points are depleted, the shield disappears, and can't be used again until the end of your next long rest.
Mipha's Grace. If you are reduced to 0 hit points, this blessing automatically restores your hit points up to your maximum. Once it has done so, it can't be used again until the end of your next long rest.
Revali's Gale. As an action, you can use this blessing to produce a gust of air that lifts you 60 feet directly upward. You can use this blessing three times per short or long rest.
Urbosa's Fury. This blessing lets you use an action to summon a storm of lightning, that strikes each target of your choice within a 30 foot radius, centered on a point you can see within 100 feet. After using this blessing three times, you can't do so again until the end of your next long rest.
Charms
The minor, temporary benefit provided by a charm is usually granted as the result of an interaction with some minor magical effect. Charms like these might be given to champions that seek out the help of the Seven Heroines of the gerudo, make deals with beings like the Horned Statue, or successfully conquer the challenge of a Sheikah Shrine.
As a reminder, spells cast through the use of a charm allow you to do so without expending a spell slot of providing any spell components.
Charm of Endurance. This charm grants you the benefits of th Endurance feat. These benefits last for 10 days, after which the charm vanishes from you.
Charm of Flight. This charm allows you to give yourself the benefit of a potion of flying as an action. Once you do so, the charm vanishes from you.
Charm of Gentleness. This charm allows you to cast the animal friendship spell (3rd-level version) or the charm person spell (1st-level version) as an action. Once used three times, the charm vanishes from you.
Charm of Knowledge. This charm allows you to cast the legend lore spell on an object by spending 10 minutes studying that object. Once used twice, the charm vanishes from you.
Charm of Motion. This charm allows you to cast the freedom of movement spell (self only) as an action. Once used, the charm vanishes from you.
Charm of Skill. You gain proficiency with one skill or tool of your choice, and your proficiency bonus is doubled for any ability check that uses that skill or tool. These benefits last for 10 days, after which the charm vanishes from you.
Charm of Spirit. Whenever you make an attack roll or saving throw, this charm allows you to roll a d4 and add the result to the original roll. You can use this charm three times, after which it vanishes from you.
Money in Hyrule
In the world of Hyrule, people don't use coins or paper money to perform transactions. All of their currency comes in the form of small, differently colored gems known as Rupees. Like the various metal coins in traditional D&D, the different colors of rupees equate to different values of the base rupee, just as more or less valuable coins are registerd in amounts of copper, silver, and gold pieces.
This section gives an alternate monetary system for D&D games set in Hyrule, based on rupees instead of metal coins. It lists the various colors of rupees, and their equivalent value in D&D's metal coin system. While these values don't align directly to the value of rupees present in Breath of the Wild, they're adjusted for ease of use with the prices of equipment and services found in the Player's Handbook. Like all variant rules in this book, using this system isn't required, but is an easy way to help root your game in Hyrule.
Rupee Value
| Rupee Type | Monetary Value |
|---|---|
| Green Rupee | 1 copper piece (cp) |
| Blue Rupee | 1 silver piece (sp) |
| Red Rupee | 1 electrum piece (ep) |
| Purple Rupee | 1 gold piece (gp) |
| Silver Rupee | 1 platinum piece (pp) |
| Gold Rupee | 10 pp / 100 gp |

Variant Rule: Gliders
Link's glider is an essential piece of equipment, allowing the hero to leap from high ledges without fear of injury, and cross large gaps and vast distances which would be impractical or even impossible to traverse on foot. While Link's glider never needs to be replaced, its use isn't infinite, as every moment Link remains suspended in the air requires a small sliver of stamina.
If you'd like to bring the same open-world freedom of gliders to your D&D game, this rule is intended to help you do so. In coordination with the Action Climbing variant rule mentioned earlier, this gives characters greater vertical access when in combat or exploring dungeons.
While using a glider, a falling creature descends at only 30 feet per round. To use a glider, a creature must be holding it when they begin to fall. A creature that begins falling can also use its reaction to pull out a glider they have on their person. A creature using a glider can move 5 feet horizontally for every 5 feet vertically that it falls.
Several different types of gliders exist. A creature can use a glider to slow their fall for a number of rounds equal to their Constitution modifier + the glider's durability. At the end of the last round using a glider, the creature then falls the rest of the distance, taking damage as normal from that point. This fall can't be stopped with a glider. If a creature using a glider lands before this happens, it takes no falling damage and can land on its feet.
Gliders
| Name | Cost | Weight | Durability |
|---|---|---|---|
| Wooden Glider | 20 gp | 1/2 lb. | 1 round |
| Hylian Glider | 35 gp | 1/2 lb. | 2 rounds |
| Gerudo Glider | 50 gp | 1 lb. | 3 rounds |
| Rito Glider | 75 gp | 1/4 lb. | 5 rounds |
| Sheikah Glider | 150 gp | 1 lb. | 10 rounds |
Ancient Glider
Wondrous item (sheikah glider) , rare
Made with a sturdy metal frame pressed with an eye pattern, this unusual glider also has small cylinders attached to all sides that can create bursts of compressed air to help redirect the user while falling. When not in use, the ancient glider appears similar to a normal glider, but without a canvas for catching the wind. But when activated, a glowing blue sheet of energy appears between the two halves, which lets the glider ride the wind.
The ancient glider has 20 charges. While using the ancient glider during a fall, you can use a bonus action and expend a charge to push yourself 10 feet in a direction of your choice, including up or down. If the anncient glider runs out of charges, it ceases to function as a glider. if you are using it to glide when this happens, you immediately begin to fall as normal.
The ancient glider regains 1d10 expended charges each day at dawn.
Variant Rule: Equipment Durability
As Link crosses Hyrule on his journey to defeat Calamity Ganon and save Princess Zelda, he comes across dozens of different types of weapons, each with its own use and style of fighting. Unfortunately for Link, these weapons are also subject to degradation over time, taking damage as the hero uses them to strike enemies, until eventually they break. While the weapon durability rules in Breath of the Wild are often viewed with consternation, they do encourage players to experiment with a variety of weapons, matching their styles and damage to different enemies and situations.
This variant rule attempts to do the same, encouraging D&D players to try different weapons as their normal ones break down, and keep an eye out for valuable weapons used by enemies. It also encourages Dungeon Masters to equip their enemies with a wider variety of weapons for their players to find and use.
When using this rule, each time a player finds a new weapon or shield, consult the Durability Tables found on the next page. Each result on an Equipment Table corresponds with a type of weapon or shield found in Breath of the Wild, helping you to describe the equipment, as well as giving it a corresponding durability.
Using Durability
Durability is a measure of how many hits a piece of equipment can deal out or take. The rules vary slightly for melee weapons, bows/crossbows, and shields.
Whenever a player character hits a creature with a melee weapon, subtract 1 from that weapon's durability. If the durability hits 0, the weapon breaks, and can no longer be used. For bows and crossbows, instead subtract 1 durability each time an attack is made with them, regardless of whether the attack hits or misses.
For shields, each time a character using a shield is hit by an attack, subtract 1 durability from the shield; if it reaches 0, the shield breaks, and the character using it loses the bonus it provides to AC.
Magical Equipment
There are two possible ways to handle durability with magic items. If you intend to make magic items a rarity in your campaign, special objects of power not frequently found, consider making magic items immune to the durability rules. If you intend to give your players plenty of magic items, instead use the table below to determine how much additional durability a magic item has.
Magic Item Durability
| Rarity | Added Durability |
|---|---|
| Common | +1 Durability |
| Uncommon | +3 Durability |
| Rare | +5 Durability |
| Very Rare | + 10 Durability |
| Legendary | +20 Durability |
| Artifact | Infinite Durability |
Durability Tables
Whenever a group of players finds a new weapon or shield, find that type of equipment listed on the Equipment Type table below. Then go to the listed Equipment Table, and roll a d100 to determine the equipment's appearance and durability.
Any attacks made with a weapon or hits taken by a shield when used by an enemy before it falls into the player's hands shouldn't be counted against the equipment's remaining durability.
Equipment Type Table
| Equipment Type | Table |
|---|---|
| Club/Light Hammer/Mace | Equipment Table A |
| Dagger/Handaxe/Sickle | Equipment Table B |
| Greatclub | Equipment Table C |
| Javelin/Spear/Trident | Equipment Table D |
| Quarterstaff | Equipment Table E |
| Battleaxe | Equipment Table F |
| Glaive/Halberd | Equipment Table G |
| Lance/Pike | Equipment Table H |
| Greataxe/Greatsword | Equipment Table I |
| Longsword | Equipment Table J |
| Maul | Equipment Table K |
| Rapier/Scimitar/Shortsword | Equipment Table L |
| Trident | Equipment Table M |
| Warhammer | Equipment Table N |
| Shortbow | Equipment Table O |
| Longbow | Equipment Table P |
| Any Crossbow | Equipment Table Q |
| Boomerang | Equipment Table R |
| Shield | Equipment Table S |
Equipment Tables Without Durability
While these Equipment Tables are intended for use with the Weapon Durability variant rule, they can still be used without it. By rolling on the appropriate Equipment Table whenever your players encounter an enemy using that weapon, or when they find that equipment in a dungeon or other setting, you can add a bit of interesting flair to something otherwise used as a primarily monetary reward.
![]()
Equipment Table A
| d100 | Weapon | Durability |
|---|---|---|
| 1-10 | Tree Branch | 2 |
| 11-15 | Bone-In Meat | 3 |
| 16-25 | Bokoblin Arm | 4 |
| 26-35 | Soup Ladle | 4 |
| 36-45 | Boko Club | 4 |
| 46-55 | Lizalfos Arm | 4 |
| 56-65 | Torch | 4 |
| 66-75 | Spiked Boko Club | 7 |
| 76-85 | Wooden Boomerang | 8 |
| 86-90 | Dragonbone Boko Club | 9 |
| 91-95 | Training Sword | 10 |
| 96-100 | Rock Roast | 15 |
If you are including boomerangs as a new weapon type in your campaign, reroll this result
Equipment Table B
| d100 | Weapon | Durability |
|---|---|---|
| 1-10 | Vicious Sickle | 7 |
| 11-20 | Lizal Boomerang | 9 |
| 21-30 | Gerudo Scimitar | 12 |
| 31-50 | Demon Carver | 13 |
| 51-70 | Feathered Edge | 14 |
| 71-90 | Moonlight Scimitar | 16 |
| 91-100 | Kakariko Kodachi | 20 |
If you are including boomerangs as a new weapon type in your campaign, reroll this result
Equipment Table C
| d100 | Weapon | Durability |
|---|---|---|
| 1-5 | Tree Branch | 2 |
| 6-10 | Farming Hoe | 3 |
| 11-15 | Moblin Arm | 3 |
| 16-20 | Boat Oar | 4 |
| 21-25 | Wooden Mop | 4 |
| 26-30 | Boko Bat | 6 |
| 31-40 | Moblin Club | 6 |
| 41-50 | Spiked Boko Bat | 7 |
| 51-60 | Dragonbone Boko Bat | 8 |
| 61-70 | Spiked Moblin Club | 9 |
| 71-80 | Dragonbone Boko Club | 9 |
| 81-90 | Dragonbone Moblin Club | 12 |
| 91-95 | Forest Dweller's Sword | 14 |
| 96-100 | Cobble Crusher | 15 |
Equipment Table D
| d100 | Weapon | Durability |
|---|---|---|
| 1-5 | Boat Oar | 4 |
| 6-10 | Bokoblin Arm | 4 |
| 11-20 | Wooden Mop | 4 |
| 21-30 | Boko Spear | 6 |
| 31-40 | Fishing Harpoon | 6 |
| 41-50 | Moblin Spear | 8 |
| 51-60 | Lizal Spear | 9 |
| 61-70 | Throwing Spear | 10 |
| 71-80 | Traveler's Spear | 15 |
| 81-90 | Feathered Spear | 18 |
| 91-95 | Forest Dweller's Spear | 18 |
| 96-100 | Zora Spear | 20 |
![]()
Equipment Table E
| d100 | Weapon | Durability |
|---|---|---|
| 1-9 | Tree Branch | 2 |
| 10-19 | Moblin Arm | 3 |
| 20-24 | Boat Oar | 4 |
| 25-29 | Lizalfos Arm | 4 |
| 30-34 | Wooden Mop | 4 |
| 35-39 | Boko Bat | 6 |
| 40-59 | Boko Spear | 6 |
| 60-79 | Moblin Club | 6 |
| 80-90 | Spiked Boko Bat | 7 |
| 91-100 | Dragonebone Boko Bat | 8 |
Equipment Table F
| d100 | Weapon | Durability |
|---|---|---|
| 1-14 | Lizal Forked Boomerang* | 12 |
| 15-29 | Lynel Spear | 12 |
| 30-44 | Demon Carver | 13 |
| 45-64 | Lynel Sword | 13 |
| 65-84 | Cobble Crusher | 15 |
| 85-100 | Woodcutter's Axe | 23 |
*If you are including boomerangs as a new weapon type in your campaign, reroll this result
Equipment Table G
| d100 | Weapon | Durability |
|---|---|---|
| 1-4 | Farming Hoe | 3 |
| 5-9 | Boat Oar | 4 |
| 10-14 | Rusty Halberd | 7 |
| 15-19 | Royal Guard's Spear | 7 |
| 20-24 | Spiked Moblin Club | 9 |
| 25-34 | Dragonbone Moblin Club | 12 |
| 35-44 | Lynel Spear | 12 |
| 45-54 | Forked Lizal Spear | 14 |
| 55-64 | Mighty Lynel Spear | 17 |
| 65-74 | Serpentine Spear | 17 |
| 75-79 | Soldier's Spear | 17 |
| 80-84 | Knight's Halberd | 20 |
| 85-89 | Silverscale Spear | 21 |
| 90-94 | Savage Lynel Spear | 22 |
| 95-99 | Woodcutter's Axe | 23 |
| 100 | Royal Halberd | 25 |
Equipment Table H
| d100 | Weapon | Durability |
|---|---|---|
| 1 | Boat Oar | 4 |
| 2-5 | Wooden Mop | 4 |
| 6-10 | Farmer's Pitchfork | 6 |
| 11-15 | Fishing Harpoon | 6 |
| 16-20 | Moblin Spear | 7 |
| 21-25 | Royal Guard's Spear | 7 |
| 26-30 | Spiked Boko Spear | 7 |
| 31-35 | Dragonbone Boko Spear | 10 |
| 36-40 | Spiked Moblin Spear | 10 |
| 41-45 | Enhanced Lizal Spear | 11 |
| 46-50 | Dragonbone Moblin Spear | 12 |
| 51-55 | Lynel Spear | 12 |
| 56-60 | Forked Lizal Spear | 14 |
| 61-65 | Feathered Spear | 17 |
| 65-70 | Forest Dweller's Spear | 17 |
| 71-80 | Gerudo Spear | 17 |
| 81-90 | Serpentine Spear | 17 |
| 91-99 | Soldier's Spear | 17 |
| 100 | Silverscale Spear | 21 |
Equipment Table I
| d100 | Weapon | Durability |
|---|---|---|
| 1-5 | Rusty Claymore | 5 |
| 6-10 | Royal Guard's Claymore | 7 |
| 11-15 | Eightfold Longblade | 12 |
| 16-20 | Lynel Sword | 13 |
| 21-30 | Cobble Crusher | 15 |
| 31-40 | Gerudo Claymore* | 15 |
| 41-50 | Knight's Claymore | 15 |
| 51-60 | Mighty Lynel Sword | 16 |
| 61-70 | Edge of Duality | 17 |
| 71-80 | Royal Claymore | 20 |
| 81-90 | Savage Lynel Sword | 20 |
| 91-95 | Stone Smasher | 20 |
| 96-100 | Double Axe | 26 |
*Called the Golden Claymore in Breath of the Wild
Equipment Table J
| d100 | Weapon | Durability |
|---|---|---|
| 1-4 | Rusty Broadsword | 4 |
| 5-8 | Royal Guard's Sword | 7 |
| 9-14 | Traveler's Sword | 10 |
| 15-24 | Traveler's Claymore | 11 |
| 25-34 | Eightfold Blade | 12 |
| 35-44 | Lizal Tri-Boomerang* | 13 |
| 45-54 | Soldier's Broadsword | 12 |
| 55-64 | Soldier's Claymore | 13 |
| 65-74 | Zora Sword | 13 |
| 75-84 | Knight's Broadsword | 14 |
| 85-90 | Silver Longsword | 15 |
| 91-95 | Forest Dweller's Sword | 18 |
| 96-100 | Royal Broadsword | 18 |
*If you are including boomerangs as a new weapon type in your campaign, reroll this result
Equipment Table K
| d100 | Weapon | Durability |
|---|---|---|
| 1-10 | Moblin Arm | 2 |
| 11-30 | Dragonbone Boko Bat | 8 |
| 31-50 | Dragonbone Moblin Club | 12 |
| 51-70 | Cobble Crusher | 15 |
| 71-90 | Iron Sledgehammer | 18 |
| 91-100 | Stone Smasher | 20 |
Equipment Table L
| d100 | Weapon | Durability |
|---|---|---|
| 1-3 | Tree Branch | 2 |
| 4-6 | Lizalfos Arm | 4 |
| 7-10 | Soup Ladle | 4 |
| 11-25 | Traveler's Sword | 10 |
| 26-40 | Gerudo Scimitar | 12 |
| 41-65 | Lizal Forked Boomerang* | 12 |
| 66-85 | Demon Carver | 13 |
| 85-90 | Feathered Edge | 14 |
| 91-95 | Moonlight Scimitar | 16 |
| 96-100 | Faithful Kodachi | 25 |
*If you are including boomerangs as a new weapon type in your campaign, reroll this result
Equipment Table M
| d100 | Weapon | Durability |
|---|---|---|
| 1-3 | Lizalfos Arm | 4 |
| 4-6 | Boat Oar | 4 |
| 7-10 | Wooden Mop | 4 |
| 11-20 | Farmer's Pitchfork | 6 |
| 21-30 | Fishing Harpoon | 6 |
| 31-55 | Forked Lizal Spear | 14 |
| 56-75 | Soldier's Spear | 17 |
| 76-85 | Zora Spear | 20 |
| 86-95 | Silverscale Spear | 21 |
| 96-100 | Ceremonial Trident | 22 |
Equipment Table N
| d100 | Weapon | Durability |
|---|---|---|
| 1-5 | Moblin Arm | 3 |
| 6-10 | Boat Oar | 4 |
| 11-15 | Bokoblin Arm | 4 |
| 16-20 | Lizalfos Arm | 4 |
| 21-25 | Soup Ladle | 4 |
| 26-30 | Moblin Club | 6 |
| 31-40 | Spiked Boko Club | 7 |
| 41-60 | Dragonbone Boko Club | 9 |
| 61-80 | Spiked Moblin Club | 9 |
| 81-90 | Rock Roast | 15 |
| 91-100 | Iron Sledgehammer | 18 |
![]()
Equipment Table O
| d100 | Weapon | Durability |
|---|---|---|
| 1-10 | Boko Bow | 8 |
| 11-20 | Duplex Bow | 9 |
| 21-30 | Spiked Boko Bow | 10 |
| 31-40 | Wooden Bow | 10 |
| 41-50 | Traveler's Bow | 11 |
| 51-60 | Lizal Bow | 12 |
| 61-70 | Swallow Bow | 15 |
| 71-80 | Forest Dweller's Bow | 17 |
| 81-85 | Soldier's Bow | 18 |
| 86-90 | Silver Bow | 20 |
| 91-95 | Phrenic Bow | 22 |
| 96-100 | Gerudo Bow | 30 |
Equipment Table P
| d100 | Weapon | Durability | |
|---|---|---|---|
| 1-8 | Duplex Bow | 9 | |
| 9-16 | Royal Guard's Bow | 10 | |
| 17-24 | Spiked Boko Bow | 10 | |
| 25-32 | Dragonbone Boko Bow | 15 | |
| 33-40 | Lynel Bow | 15 | |
| 41-48 | Strengthened Lizal Bow | 17 | |
| 49-56 | Soldier's Bow | 18 | |
| 57-64 | Mighty Lynel Bow | 19 | |
| 65-72 | Savage Lynel Bow | 22 | |
| 73-80 | Knight's Bow | 24 | |
| 80-87 | Falcon Bow | 25 | |
| 88-95 | Steel Lizal Bow | 25 | |
| 96-100 | Royal Bow | 30 |
![]()
Equipment Table Q
| d100 | Weapon | Durability |
|---|---|---|
| 1-11 | Boko Crossbow | 8 |
| 12-22 | Spiked Boko Crossbow | 10 |
| 23-33 | Wooden Crossbow | 10 |
| 34-44 | Traveler's Crossbow | 11 |
| 44-54 | Lizal Crossbow | 12 |
| 55-69 | Dragonbone Boko Crossbow | 15 |
| 70-79 | Forest Dweller's Crossbow | 17 |
| 80-89 | Strengthened Lizal Crossbow | 17 |
| 90-95 | Soldier's Crossbow | 18 |
| 96-100 | Knight's Crossbow | 24 |
Equipment Table R
| d100 | Weapon | Durability |
|---|---|---|
| 1-19 | Wooden Boomerang | 8 |
| 20-39 | Lizal Boomerang | 9 |
| 40-59 | Sailor's Boomerang | 10 |
| 60-79 | Lizal Forked Boomerang | 12 |
| 80-95 | Lizal Tri-Boomerang | 13 |
| 96-100 | Heavy Boomerang | 20 |
![]()
Equipment Table S
| d100 | Shield | Durability |
|---|---|---|
| 1-4 | Boko Shield | 4 |
| 5-8 | Lizal Shield | 5 |
| 9-12 | Fisherman's Shield | 6 |
| 13-16 | Pot Lid | 6 |
| 17-20 | Hunter's Shield | 7 |
| 21-24 | Spiked Boko Shield | 7 |
| 25-28 | Emblazoned Shield | 8 |
| 29-32 | Reinforced Lizal Shield | 8 |
| 33-36 | Traveler's Shield | 8 |
| 37-40 | Dragonbone Boko Shield | 9 |
| 41-44 | Lynel Shield | 9 |
| 45-48 | Kite Shield | 10 |
| 49-52 | Royal Shield | 10 |
| 54-58 | Soldier's Shield | 10 |
| 59-62 | Royal Guard's Shield | 11 |
| 63-66 | Shield of the Mind's Eye | 11 |
| 67-70 | Steel Lizal Shield | 11 |
| 71-75 | Forest Dweller's Shield | 12 |
| 76-80 | Rusty Shield | 12 |
| 81-85 | Mighty Lynel Shield | 13 |
| 86-89 | Silver Shield | 14 |
| 90-93 | Gerudo Shield | 14 |
| 94-96 | Savage Lynel Shield | 15 |
| 97-98 | Knight's Shield | 16 |
| 99-100 | Radiant Shield | 18 |
Chapter 5: Enemies of Hyrule
WHILE TRAVELLING ACROSS HYRULE, LINK MEETS
a wide variety of iconic characters with interesting personalities. But in the wild spaces between, he also faces off against a wide variety of dangerous monsters. Though Link's skill with blade and shield are peerless, the enemies he faces are not to be underestimated, as any one of them might spell his doom and the end of Hyrule's chances at being saved.
This chapter provides stat blocks for creatures that are entirely unique to Hyrule, as well as helpful information on using the statistics of existing monsters to represent other foes.
Rise of the Blood Moon
As Calamity Ganon's power continues to grow, it's Malice eventually begins to leak out into the world, escaping the confines of the barrier that has sealed Ganon away. When this malice accumulates in great enough quantities, it can dye the night sky and the moon blood red, resulting in a weather condition known as the Blood Moon.
When the Blood Moon occurs, Calamity Ganon's influence causes the monsters which serve him to grow more powerful, and renews the strength of those weakened in battle. At the start of a Blood Moon, any injured monsters automatically regain all of their hit points. Then, all monsters gain a number of temporary hit points equal to twice their Challenge Rating.
The arrival of a Blood Moon is always presaged by remnants of Malice which float in the air, tinging the sky and clouds red, even before nightfall. As dusk draws closer, these remnants begin to gather and form small pools that stick to surfaces and present a danger to travelers that draw too close. Just before the Blood Moon istelf finally rises, the wind picks up, the scarlet clouds in the sky zip by at great speeds, and the pools of collected Malice hum and shimmer with dark energy.
The Blood Moon and Game Difficulty
The Blood Moon can be an interesting challenge for your game, if used correctly. Instead of randomly punishing your players, use it to include additional difficulty where needed. If you plan to use the Blood Moon, telegraph this fact to the players ahead of time using the details that precede the event.
As an example of the benefits of the Blood Moon, if your players are planning to explore a dungeon, the Blood Moon itself could provide a sense of urgency and a timer on the mission. It can also make for strong choreographed encounters, giving a boss monster an additional boost to keep the battle going just as it reaches its apparent conclusion.
Converted Monsters
While the monsters that inhabit Hyrule's wilds have many elements that make them unique, some of them can be represented by existing statistics found in the 5th Edition Monster Manual. The differences between a monster as it appears in the Monster Manual and as it appears in the world of Breath of the Wild are listed here, as well as any changes that might cause to their statistics.
Using Classic Monsters
While this section aims to help you in running a game set in Hyrule by providing various monsters to challenge your players with, it should by no means be taken as a definitive list. The monster variety in Breath of the Wild relies heavily on slight variations in difficulty between monsters of the same species, using an altered color palette to signify these changes.
If you'd like to use a monster found in another book that's not listed here, feel free! The various games in the Legend of Zelda series have included a much greater variety of monsters than those found in Breath of the Wild alone, and even creatures like mummies, automotons, dragons, and other strange beasts wouldn't be entirely out of place in Hyrule.
Bokoblins
Found all across Hyrule, in every region and climate possible, bokoblins are surprisingly versatile survivalists, capable of cooking and consuming almost any ingredient they find, and willing to use whatever they have at hand as weapons to defend themselves with.
Bokoblins don't tend to gather in very large groups, usually forming roving bands of no more than four or five members. The exception to this occurs when they are led by a stronger or smarter monster that can push larger numbers of bokoblins to work towards a common cause.
At heart, bokoblins do not relish conflict– while they'll defend themselves from attack and march into battle at the command of others, most prefer to turn tail and run if they know they can't win. Rare is the bokoblin with the courage to keep fighting against unlikely odds, though slightly more common are bokoblins lacking the intelligence to realize when the tide has turned against them.
Bokoblins are best represented using the statistics of the basic goblin. Stronger bokoblins, like blue or black bokoblins, might use the goblin boss or hobgoblin statistics instead. The strongest bokoblins, silver and golden bokoblins, are better represented by the statistics of the bugbear. All of these creatures can be found in the Monster Manual.
Lizalfos
Like bokoblins, lizalfos have keen survival instincts, with the ability to adapt themselves to suit any environment. Lizalfos can be found in coastal flatlands, swampy jungles, heat-baked deserts, snow-covered fields, and everything in between. While they aren't as common as bokoblins, lizalfos can make their home just about anywhere, and will settle down wherever is convenient to them.
Unlike bokoblins, lizalfos also have a very strong and rigid social structure, that is heavily reliant on teamwork. When lizalfos create a home for themselves, they usually begin by setting up a central camp, indicated by a watchtower or central sleeping area. This acts as a gathering point for all of the lizalfos in a clan, which could number from anywhere between 4 and 20 individuals.
Each lizalfos has a specific level of leadership, indicated by the color of their scales, which lizalfos can change at will. Low ranking lizalfos use the lizardfolk statblock, while higher ranked lizalfos use the lizard king/queen statblock, both of which are found in the Monster Manual.
Some lizalfos have developed special adaptations for survival in extreme conditions, allowing them to breathe fire or ice, or channel electricity through their scales. Lizalfos with such abilities use the same lizardfolk statblocks, but with one of the following additional actions:
- Fire Breath (Recharge 5-6). The lizalfos exhales fire in an 15-foot line that is 5 feet wide. Each creature in that line must make a DC 11 Dexterity saving throw, taking 10 (3d6) fire damage on a failed save, or half as much damage on a successful one.
- Ice Breath (Recharge 5-6). The lizalfos exhales a blast of cold air in a 15-foot cone. Each creature in that area must make a DC 12 Constitution saving throw, taking 13 (3d8) cold damage on a failed save.
- Channel Lightning (Recharge 5-6). Crackling lightning explodes from the lizalfos, filling a 10-foot sphere around it. Each creatur eother than the lizalfos in that area must make a DC 11 Dexterity saving throw, taking 11 (2d10) lightning damage on a failed save or half as much on a success.
Stalkoblins and Stalizalfos
In the dead of night, under the rising moon, the lingering Malice of Calamity Ganon can sometimes cause other thing to rise too. Bokoblins and lizalfos who lost their lives crawl out from beneath the earth as animated skeletons, eager to seek revenge on the living.
These clattering foes are weaker than living bokoblins and lizalfos, and prone to having their bodies fall apart under the duress of powerful blows. Use the skeleton statblock from the Monster Manual to represent both stalkoblins and stalizalfos.
Hinox
Brawny and powerfully built, but somewhat lacking in intelligence, hinox are incredibly reminscent of the cyclops from the Monster Manual. Like these classic foes, hinox rely entirely on brute force in battle, hoping to squash their enemies with blows from their giant fists, or by utilizing small trees as clubs.
Black Hinox
In addition to the normal red and blue hinox, there are also the much more rare black hinox, whose more advanced age have given them greater strength and durability, as well as more experience in battle. Black Hinox have an AC of 15 (from metal greaves) and 207 (16d12 + 90) hit points, and gain the following additional or altered actions:
Multiattack. The black hinox makes two attacks with its greatclub.
Greatclub. Melee Weapon Attack: +10 to hit, reach 10 ft., one target. Hit: 19 (3d8 + 6) bludgeoning damage.
Bomb Barrel. Ranged Weapon Attack: +10 to hit, range 30/120 ft., one target. Hit: 27 (6d8) fire damage and each creature within 10 feet of the target must succeed on a DC 14 Dexterity saving throw or take 13 (3d8) fire damage.
The black hinox has a Challenge Rating of 9 (5,000 XP) .
Stalnox
The stalnox is made from the skeletal remains of a once living hinox. Like the stalkoblin and stalizalfos, it has been animated by strong amounts of Malice, and appears only at night. The stalnox has the same statistics as a normal hinox, except that it is vulnerable to bludgeoning damage, immune to poison damage, and immune to the exhaustion and poisoned conditions.
Stone Talus
From a distance, a stone talus appears to be little more than a collection of boulders, scattered haphazardly across a small space. But a closer approach risks disturbing the slumber of these hulking stone foes, leaving them ready to punish trespassers with crushing blows. While most stone taluses care very little for anything beyond their own needs, there have been examples of bokoblins or lizalfos luring them to their aid.
The stone talus is very similar to the earth elemental from the Monster Manual, with a few differences. Larger than an earth elemental, the stone talus is Huge, which increases its Hit Die to a d12 and gives it an increased 138 (12d12 + 60) hit points. Additionally, the stone talus loses the Earth Glide trait, and gains the following:
False Appearance. While the stone talus remains motionless, it is indistinguishable from a large boulder or pile of rocks.
Frost Talus
Limited in range to frosty areas like the Hebra Mountains and the upper reaches of the Gerudo Mountains, the frost talus is similar to a stone talus, but coated in a thick layer of super-chilled ice. The temperature of the air around a frost talus is incredibly cold, and even a glancing touch to the surface of a frost talus is enough to risk frostbite.
The frost talus has the same statistics as the stone talus, except that it is vulnerable to fire damage and immune to cold damage. The frost talus also gains the following trait:
Freezing Body. A creature that touches the frost talus or hits it with a melee attack while within 5 feet of it takes 4 (1d8) cold damage and must succeed on a DC 13 Constitution saving throw or have its speed reduced by 15 feet until the start of its next turn.
Igneo Talus
This variation of the stone talus is found exclusively in the Eldin region, near the fiery lavafields of Death Mountain. Like its cooler cousin the stone talus, the igneo talus resembles a pile of living boulders, but ones that appear to have been freshly pulled from burning magma. Coated in a layer of burning fire, even approaching the igneo talus is a difficult task, and coming into contact with one is sure to leave nasty burns.
The igneo talus has the same statistics as the stone talus, except that it is vulnerable to cold damage and immune to fire damage. The igneo talus also gains the following trait:
Heated Body. A creature that touches the igneo talus or hits it with a melee attack while within 5 feet of it takes 7 (2d6) fire damage.
The Yiga Clan
Descendants of the sheikah people that still foster a hatred towards Hyrule for their ancestors mistreatment, the Yiga Clan was formally created 100 years ago, at the time of the Calamity. The sheikah descendants who founded the Yiga Clan intended to assassinate the hylian princess Zelda, and therefore ensure Calamity Ganon's success in the destruction of Hyrule. While their efforts proved unsuccessful, Calamity Ganon's own trickery in seizing control of the guardian army led to his near-success instead.
Knowing the the fabled hero Link still lived and that princess Zelda still kept Calamity Ganon trapped in Hyrule Castle, and seeing how Hyrule itself still survived, the Yiga Clan has spent the century between the Calamity and the current age trying to reclaim the technological artifacts of the ancient sheikah for their own use.
Yiga Clan members are divided into two major ranks, the footsoldiers and the blademasters. Yiga footsoldiers can be represented with the cultist or spy statblock, depending on whether they serve on the front lines of battle or work to infiltrate Hyrule's towns and villages, respectively. Yiga blademasters, on the other hand, might be gladiators or assassins depending on their specific rank and strength in combat. All of these statblocks are available in the Monster Manual.
Creature Compendium
The following pages includes descriptions and statblocks for the more unique denizens of Hyrule, whose skills, strengths, and abilities make it difficult to replicate them using existing statistics.
Included at the end of this section are the different types of mechanical guardians that wander Hyrule, as well as a few enemies whose prowess in combat sets them above and beyond the rest.
Moblins
The taller, lankier, and stronger cousins of the bokoblin, moblins are much like bokoblins in their ability to survive almost anywhere. Moblins prefer an even greater amount of solitude than bokoblins, and finding more than one living in an area is rather rare.
In spite of their strength, moblins aren't very fond of hard work or difficult labor. Some will take up with groups of bokoblins, trading their protection for easy food and shelter. Others sometimes attempt to bully groups of bokoblins into submission, demanding these things as tribute. In such cases, these flunkies will often flee at the first sign of trouble, leaving the mobling to deal with the situation itself.
Moblin
Large Humanoid (Goblinoid)
- Armor Class 12 (natural armor)
- Hit Points 76 (8d10 + 32)
- Speed 30 ft.
STR DEX CON INT WIS CHA 16 (+3) 10 (+0) 18 (+4) 7 (-2) 12 (+1) 9 (-1)
- Skills Athletics +5
- Senses darkvision 60 ft., passive Perception 11
- Languages Boblin
- Challenge 2 (450 XP) Proficiency Bonus +2
Brute. A melee weapon deals one extra die of its damage when the moblin hits with it (included in the attack).
Actions
Greatclub. Melee Weapon Attack: +5 to hit, reach 5 ft., one target. Hit: 16 (3d8 + 3) bludgeoning damage.
Overhand Toss. The moblin throws a creature that it is grappling up to 30 feet at a point of its choice that it can see. If the thrown creature hits an object or another creature, both take 1d8 bludgeoning damage.
Stalmoblin
Like the stalkoblin, a stalmoblin is the animated remains of a dead moblin, brought back to life by the influence of Calamity Ganon. Like many other stal creatures, stalmoblins are fairly fragile, and prone to falling to pieces if hit hard enough. However, moblin bones are thicker and stronger than the bones of bokoblins, giving them a slightly greater durability.
The desire to avoid work remains present in stalmoblins, and with no more need for food and shelter, many stalmoblins will lay down and fall asleep in the same location where their bones were raised.
A stalmoblin has the same statistics as a moblin, except that is it vulnerable to bludgeoning damage, immune to poison damage, and immune to the exhaustion and poisoned conditions. Many stalmoblins lack the weapons they used in life, and to defend themselves, they aren't above removing and wielding their own arms as clubs.
Chuchu
Blob-like creatures that spend most of their time hiding underground, chuchus rise to the surface only when they sense prey walking above them, or if flushed out by a rainstorm. In their natural state, chuchus are a bright cerulean blue, with bulbous red and yellow eyes. Guided purely by instinct, the only drive a chuchu has seems to be in consuming plant and animal matter in order to grow larger.
In spite of their semi-liquid appearance, chuchus can't stand water– even light drizzles seem to drive them wild, and a chuchu immersed in water can't keep its body together, causing it to disperse into mere jelly. Like earthworms and some other underground creatures, a heavy rain can force a chuchu to surface and seek shelter, as its body is forced up and away from the swelling groundwater. Because of this, travelers in Hyrule know to avoid certain roads and hills during the rainy season.
Perhaps the strangest thing about chuchus is their ability to adapt to differing environmental conditions, not in the same way bokoblins and lizalfos do, but by literally changing their cellular makeup in response. A chuchu exposed to freezing cold, burning fire, or powerful electricity will then begin to generate wicked frosts, magmatic heat, or bursts of static in response. This is usually paired with a color change as well, of a deep white, intense red, or shining yellow, respectively.

Chuchu
Large Ooze, unaligned
- Armor Class 11
- Hit Points 60 (8d10 + 16)
- Speed 25 ft.
STR DEX CON INT WIS CHA 14 (+2) 12 (+1) 14 (+2) 2 (-4) 6 (-2) 1 (-5)
- Damage Immunities acid, poison
- Condition Immunities charmed, deafened, exhaustion, frightened, poisoned, prone
- Senses blindsight 60 ft., passive Perception 10
- Languages –
- Challenge 1 (200 XP) Proficiency Bonus +2
Acid Body. A creature that touches the chuchu or hits it with a melee attack while within 5 feet of it takes 5 (1d10) acid damage.
Death Burst. When the chuchu dies, it explodes in a burst of elemental jelly. Each creature within 10 feet of it must make a DC 12 Dexterity saving throw, taking 11 (2d10) acid damage on a failed save, or half as much damage on a successful one.
Elemental Adaptation. If the chuchu is dealt cold, fire, or lightning damage, its body adapts to that element. The chuchu becomes immune to the triggering damage type, it loses this ability, and all instances of acid damage in its statblock are replaced with damage of that type instead.
Actions
Slam. Melee Weapon Attack: +4 to hit, reach 5 ft., one target. Hit: 5 (1d6 + 2) bludgeoning damage plus 5 (1d10) acid damage.
Reactions
Split. When a chuchu that is Medium or larger is subjected to cold, fire, lightning, or slashing damage, it splits into two new chuchus if it has at least 10 hit points. Each new chuchu his hit points equal to half the original chuchu's, rounded down. New chuchus are one size smaller than the original chuchu.
Keese
These monocular, bat-like creatures are infamous for their habit of taking up residence in dungeons, caves and stone nooks, abandoned buildings, and just about anywhere else dark enough to suit their needs and large enough to fit their tiny bodies. Keese have always been a nuisance for the people of Hyrule, but as Calamity Ganon's power grows, so too does the boldness of the keese, who seem strangely in-tune with its effects. Over time, keese have only grown ever more aggressive.
Similar in appearance to a normal bat, a keese is marked by its single shining eye, and lack of any limbs beyond its leathery wings. Each wing has a small hooked claw which, along with its two prominent fangs, the keese uses to attach itself to rough surfaces while at rest. If disturbed while sleeping, a keese will usually move to immediately attack what it sees as a trespasser, hoping to drive them off with bites from its fangs.
With the growing power of Calamity Ganon, many of Hyrule's keese have begun exhibiting even stranger behavior than normal. Some gather in large swarms, actively seeking out larger prey like people and bokoblins to willingly attack. Others have begun to develop strange mutation, their bodies glowing with fiery heat or crackling with electricity. What effects these mutations will have on keese long-term is as yet unknown.
Keese
Tiny Monstrosity, unaligned
- Armor Class 13
- Hit Points 10 (4d4)
- Speed 0 ft., fly 45 ft.
STR DEX CON INT WIS CHA 3 (-4) 16 (+3) 10 (+0) 3 (-4) 12 (+1) 5 (-3)
- Skills Perception +5
- Senses darkvision 120 ft., passive Perception 15
- Languages –
- Challenge 1/8 (25 XP) Proficiency Bonus +2
Flyby. The keese doesn't provoke opportunity attacks when it flies out of an enemy's reach.
Keen Sight. The keese has advantage on Wisdom (Perception) checks that rely on sight.
Actions
Bite. Melee Weapon Attack: +5 to hit, reach 5 ft., one target. Hit 2 (1d4) piercing damage.
Elemental Keese
Some keese have become infused with the power of the elements, resulting in the creation of fire keese, ice keese, and lightning keese. In very rare cases, these elementally-aligned keese can also gather in groups large enough to form swarms.
These keese have the same statistics as normal keese and keese swarms, except that they are immune to damage of their associated type (cold, fire, or lightning).
Swarm of Keese
Medium swarm of Tiny Monstrosities
- Armor Class 13
- Hit Points 33 (6d8 + 6)
- Speed 0 ft., fly 45 ft.
STR DEX CON INT WIS CHA 6 (-2) 16 (+3) 12 (+1) 3 (-4) 12 (+1) 5 (-3)
- Skills Perception +5 Damage Resistances bludgeoning, piercing, slashing Condition Immunities charmed, frightened, grappled, paralyzed, petrified, prone, restrained, stunned
- Senses darkvision 120 ft., passive Perception 15
- Languages –
- Challenge 1/2 (100 XP) Proficiency Bonus +2
Keen Sight. The swarm has advantage on Wisdom (Perception) checks that rely on sight.
Swarm. The swarm can occupy another creature’s space and vice versa, and the swarm can move through any opening large enough for a Tiny keese. The swarm can’t regain hit points or gain temporary hit points.
Actions
Bite. Melee Weapon Attack: +5 to hit, reach 0 ft., one creature in the swarm's space. Hit: 10 (4d4) piercing damage, or 5 (2d4) piercing damage if the swarm has half of its hit points or fewer.
Lynel
Massive creatures with powerfully built bodies, lynels are without a doubt the most dangerous creature on the face of Hyrule. Their lower body resembles that of a horse, though at a much greater size, while their torso is that of an incredibly muscular humanoid. A lynel's head is covered in shaggy fur, and topped with a pair of imposing horns that rise toward the sky. All in all, the sight of a lynel is undeniably as impressive as it is terrifying.
The might of a lynel is compounded by their territorial nature and innately aggressive disposition. Even other monsters fear approaching a lynel, and while groups near a lynel might benefit from travelers avoiding the area, the risk of the lynel deciding the group has gotten too close to its own claim is always present. Occasionally a lynel has been known to more directly ally itself with other, smaller monsters– usually in the pursuit of some obscure goal it can not accomplish on its own– but these partnerships never last long, and one lynel never partners with another.
Overall, very little is known about lynels beyond what can be gleaned in the heat of battle. Some wear armor of a sorts around their ankles, chest, and shoulder; most wield large clubs as tall as a man, while other prefer sweeping greatswords combined with small wrist-mounted shields. Lynels are also incredibly proficiency with bows, and have shown near--pinpoint accuracy at distances unachievable for even the best of Hyrule's archers.
The construction of this leather armor and the forging of these metal weapons alludes to some form of artistic craftwork among these lion-like creatures, and the passing of knowledge from one generation to the next. But what sort of family structure the lynels have, if any, as well as where their knowledge comes from, their history, and even the words of their language are all shrouded in mystery.
Lynel
Large Monstrosity
- Armor Class 15 (natural armor)
- Hit Points 168 (16d10 + 80)
- Speed 45 ft.
STR DEX CON INT WIS CHA 19 (+5) 14 (+2) 20 (+5) 12 (+1) 18 (+4) 17 (+3)
- Saving Throws Str +9, Cha +7
- Skills Athletics +9, Perception +8
- Damage Immunities cold, fire, lighting; bludgeoning, piercing, and slashing from nonmagical attacks
- Senses passive Perception 18
- Languages Lynel
- Challenge 10 (5,900 XP) Proficiency Bonus +4
Brute. A melee weapon deals one extra die of its damage when the lynel hits with it (included in the attack).
Powerful Arms. The lynel can wield two-handed weapons in one hand.
Trampling Charge. If the lynel moves at least 20 feet straight toward a creature and then hits it with a melee attack on the same turn, that target must succeed on a DC 17 Strength saving throw or be knocked prone. If the target is prone, the lynel can make one attack with its hooves against it as a bonus action.
Actions
Multiattack. The lynel makes three attacks in any combination with its crusher or longbow.
Crusher. Melee Weapon Attack: +9 to hit, reach 5 ft., one target. Hit: 18 (3d8 + 5) bludgeoning damage.
Hooves. Melee Weapon Attack: +9 to hit, reach 5 ft., one target. Hit: 16 (2d10 + 5) bludgeoning damage.
Longbow. Ranged Weapon Attack: +6 to hit, range 150/600 ft., one target. Hit: 11 (2d8 + 2) piercing damage.
Fireblast (Recharge 4-6). The lynel slams its weapon into the ground, creating a ring of fire that expands outward to fill a 15-foot radius around the lynel. Each creature in the area must make a DC 17 Dexterity saving throw, taking 22 (4d10) fire damage on a failed save or half as much on a success.
Bonus Action
Flash Step (1/day). The lynel teleports to an unoccupied space it can see within 45 feet.
Reactions
Sweeping Strike. If the lynel reduces a creature to 0 hit points with a crusher attack, it can use its reaction to make an additional crusher attack against a different creature it can see within reach.
Molduga
Gargantuan Monstrosity, unaligned
- Armor Class 16 (natural armor)
- Hit Points 198 (12d20 + 72)
- Speed 20 ft., burrow 60 ft.
STR DEX CON INT WIS CHA 26 (+8) 7 (-2) 23 (+6) 3 (-4) 10 (+5) 4 (-3)
- Saving Throws Con +10
- Damage Vulnerabilities thunder
- Damage Immunities bludgeoning, piercing, and slashing from nonmagical attacks
- Senses tremorsense 120 ft., passive Perception 19
- Languages –
- Challenge 12 (8,400 XP) Proficiency Bonus +4
Sand Breaker. When the molduga reaches the surface after burrowing, if it moved at least 30 feet before exiting, it can jump up to 20 feet into the air and land up to 20 feet away. When it does, each creature within 15 feet of where it lands must make a DC 18 Dexterity saving throw. Creatures that fail this saving throw take 27 (4d8) bludgeoning damage and are knocked prone; creatures that succeed take half as much damage and are not knocked prone.
Actions
Multiattack. The molduge makes two attacks: one with its bite and one with its tail. It can't make both attacks against the same target.
Bite. Melee Weapon Attack: +12 to hit, reach 10 ft., one target. Hit: 24 (3d10 + 8) piercing damage. If the target is a Large or smaller creature, it must succeed on a DC 20 Dexterity saving throw or be swallowed by the molduga. A swallowed creature is blinded and restrained, it has total cover against attacks and other effects outside the molduga, and it takes 14 (4d6) acid damage at the start of each of the molduga's turns.
If the molduga takes 30 damage or more on a single turn from a creature inside it, the molduga must succeed on a DC 21 Constitution saving throw at the end of that turn or regurgitate all swallowed creatures, which fall prone in a space within 10 feet of the molduga. If the molduga dies, a swallowed creature is no longer restrained by it and can escape from the corpse by using 20 feet of movement, exiting prone.
Tail. Melee Weapon Attack: +12 to hit, reach 10 ft., one target. Hit: 21 (3d8 + 8) bludgeoning damage.
Molduga
Dwelling deep within the desert sands of the Gerudo territory, the molduga is the most dangerous creature in Hyrule. Massive in size and with a maw to match, there is nothing that a molduga isn't willing to try and make a meal out of– people, horses, monsters, sand seals, and everything else under the desert sun. Anything and everything is fair game to a molduga. The only difficulty a molduga is likely to experience in life is attempting to find enough food to fill its cavernous belly.
The first sign of a molduga's presence is likely to be the ridge of its bony back protruding from the sand as it digs beneath; followed quickly by its toothy jaw bursting forward to try and nab its prey. In spite of its size, a molduga travel through the soft desert sands is almost eerily quiet, and its burrowing leaves almost no sign of its presence behind. But quiet though it may be, there is no mistaking a molduga for an ambush predator. These apex beasts aren't shy about letting their prey know they're coming, as almost nothing can outspeed them, unconstrained as they are by issues of terrain.
In the rare case that a creature manages to escape the molduga's first attempt to snatch a bite from below, a molduga usually follows up by bringing its entire body up from the ground to get a better sense of its surroundings. At this point the sheer size of the beast becomes obvious, and though its four (relatively) stubby legs might make for a humorous appearance in other circumstances, the surprising speed with which it can re-bury itself quickly dispels any thoughts of laughter. The only guaranteed way to drive a molduga above the surface is through loud noises transmitted through the desert sand, which can upset the molduga's delicate tremorsense.
Octorok
Whether lurking beneath a shady patch of grass, a shallow freshwater pond, or a salty sandbar, octoroks are a constant hidden menace to Hyrule's merchants, border guards, and road patrols. These octopus-like creatures are versatile in their methods of movement, able to dig through the ground as easily as they swim through the ocean– their bodies even contain small, inflatable balloons that let them rise shirt distances into the air.
The same air-filled sac that lets an octorok hover in the sky makes it incredibly sensitive to vibrations channeled through the ground, letting it sense from underground when creatures walk nearby. In this way they can gather detailed information about the size and shape of an approaching traveler, and decide whether its worth the risk to pop out from their hiding place and attack.
When underground or underwater, octoroks can channel calcium obtained by eating snail shells and crab claws into their head, creating growths that resembles shrubs, reeds, rocks, and even treasure chests. Not only does this give them great camouflage, but it makes them dangerous ambushers.
Octorok
Small Monstrosity, unaligned
- Armor Class 12 (13 if concealed by a rock or treasure chest)
- Hit Points 15 (6d6 - 6)
- Speed 30 ft., burrow 10 ft., fly 10 ft. (hover), swim 30 ft.
STR DEX CON INT WIS CHA 7 (-2) 14 (+2) 8 (-1) 3 (-4) 13 (+1) 4 (-3)
- Senses passive Perception 11
- Languages –
- Challenge 1/4 (50 XP) Proficiency Bonus +2
Amphibious. The octorok can breathe both air and water.
False Appearance. While motionless, the octorok is indistinguishable from a shrub, rock, or treasure chest, depending on which one is attached to its head.
Actions
Tentacle. Melee Weapon Attack: +0 to hit, reach 5 ft., one target. Hit 2 (1d8 - 2) bludgeoning damage, and the target must succeed on a DC 10 Strength saving throw or be pushed 5 feet away from the octorok.
Rock. Ranged Weapon Attack: +4 to hit, range 40/100 ft., one target. Hit: 6 (1d8 + 2) bludgeoning damage, and the target must succeed on a DC 12 Strength saving throw or be knocked prone.
Pebblit
The smaller cousin of the heavier, more dangerous talus, pebblit are small rock elementals that spend the majority of their time buried just beneath the earth, with only the smallest portions of their bodies sitting aboveground. Within a certain range of its resting place, a pebblit can detect the movements of anything that passes nearby, which it takes as the opportunity to attack.
Though small in stature, pebblits are surprisingly aggressive, as well as unexpectedly durable. Their rocky bodies resist blows from almost every weapon, and blades and points do little more than chip their surface. However, strong blows from crushing weapons, or high-powered explosives, can quickly shake them to pieces.
Stone Pebblit
Small Elemental, unaligned
- Armor Class 17 (natural armor)
- Hit Points 22 (4d6 + 8)
- Speed 20 ft.
STR DEX CON INT WIS CHA 15 (+2) 8 (-1) 15 (+2) 3 (-4) 10 (+0) 3 (-4)
- Damage Vulnerabilities bludgeoning, thunder
- Damage Immunities piercing, poison, slashing
- Condition Immunities exhaustion, paralyzed, petrified, poisoned, unconscious
- Senses tremorsense 60 ft. (blind beyond this radius), passive Perception 19
- Languages –
- Challenge 1 (200 XP) Proficiency Bonus +2
False Appearance. While the pebblit remains motionless, it is indistinguishable from a normal rock.
Actions
Slam. Melee Weapon Attack: +4 to hit, reach 5 ft., one target. Hit: 11 (2d8 + 2) bludgeoning damage.
Frost Pebblit
A pebblit whose rocky body is coated in an eternal rime of frost. The frost pebblit has the same statistics as a stone pebblit, except it is vulnerable to fire damage, immune to cold damage, and its slam attack deals an additional 1d6 cold damage.
Igneo Pebblit
The rocky body of this pebblit has become super-heated, and nearly molten. The igneo pebblit has the same statistics as a stone pebblit, except it is vulnerable to cold damage, immune to fire damage, and its slam attack deals an additional 1d8 fire damage.
Wizzrobe
Undead masters of strange magic, wizzrobes are strange creatures with long and gangly limbs, and a small face characterised by large, glowing orange eyes. The magic wielded by these creatures is unlike anything else found in Hyrule, and is based entirely on the power to control the elements. Each wizzrobe wears a distinctive outfit consisting of a long gown, whose color and pattern indicate not only the wizzrobe's elemental skill, but their rank amongst other wizzrobes as well.
The first wizzrobes appeared shortly before the prophecy regarding the Second Calamity was rediscovered, leading many Hyrulians to associate them with Calamity Ganon's power. How strong this connection is, and why the wizzrobes would follow Ganon's lead, is unknown. Wizzrobes tend to treat even the most difficult battles like a game, using their magic to vanish and reappear at different spots on the battlefield, giggling and laughing to themselves as they rain down fire, ice, and lightning on their foes.
Younger, less talented wizzrobes use weaker magic to mimic the battle skills of their elders, turning themselves invisible and teleporting short distances to maintain an area of safety from enemies. Older wizzrobes, those wearing outfits that indicate their status, seem to have access to an entirely different form of magic; one that isn't limited to teleportation, but seems to let them blink out of existence entirely, though only for a brief time. No matter their ranking however, wizzrobes are dangerous enemies, and the utmost care should be taken when confronting them in battle.

Wizzrobe Adept
Medium Undead, usually chaotic evil
- Armor Class 15 (spell shield)
- Hit Points 79 (1d4 + 5)
- Speed 30 ft., fly 30 ft. (hover)
STR DEX CON INT WIS CHA 10 (+0) 15 (+2) 13 (+1) 17 (+3) 15 (+2) 14 (+2)
- Saving Throws Int +6, Wis +5
- Skills Arcana +6, Deception +5, Perception +5
- Damage Resistances cold/fire/lightning
- Senses passive Perception 15
- Languages Abyssal
- Challenge 8 (3,900 XP) Proficiency Bonus +3
Elemental Alignment. Each wizzrobe is aligned with one damage type chosen from cold, fire, or lightning. The wizzrobe is resistant to damage of the chosen type, and its wizzrobe wand attack deals damage of the chosen type.
Magic Resistance. The wizzrobe has advantage on saving throws against spells and other magical abilities.
Spell Shield. The wizzrobe is surrounded by a shield of elemental energy, which provides it protection from attacks and makes it resistant to damage of the type associated with its Eelemental Alignment.
Actions
Multiattack. The wizzrobe makes two attacks with its wizzrobe wand.
Wizzrobe Wand. Ranged Spell Attack: +6 to hit, range 120 ft., one target. Hit: 19 (3d10 + 3) cold, fire, or lighting damage (determined by the wizzrobe's Elemental Alignment).
Spellcasting. The wizzrobe casts one of the following spells using Intelligence as the spellcasting ability:
At will: invisibility (self only), mage hand
3/day each: misty stepSummon Keese (1/day). The wizzrobe attempts to summon a number of keese aligned with its chosen element to its side. The wizzrobe can summon 1d8 keese, or attempt to summon 1d4 keese swarms with a 50 percent chance of success.
The summoned creatures appear in unoccupied spaces within 60 feet of the wizzrobe, act as the wizzrobe's allies, and remain for 1 minute or until the wizzrobe dies.
Wizzrobe Master
Medium Undead, usually chaotic evil
- Armor Class 17 (spell shield)
- Hit Points 146 (1d4 + 5)
- Speed 30 ft., fly 30 ft. (hover)
STR DEX CON INT WIS CHA 10 (+0) 17 (+3) 15 (+2) 21 (+5) 18 (+4) 17 (+3)
- Saving Throws Con +6, Int +11, Wis +8
- Skills Arcana +9, Deception +7, Perception +8
- Damage Immunities cold/fire/lightning
- Senses passive Perception 18
- Languages Abyssal
- Challenge 11 (7,200 XP) Proficiency Bonus +4
Elemental Alignment. Each wizzrobe is aligned with one damage type chosen from cold, fire, or lightning. The wizzrobe is immune to damage of the chosen type, and its wizzrobe wand attack deals damage of the chosen type.
Magic Resistance. The wizzrobe has advantage on saving throws against spells and other magical abilities.
Piercing Magic. The wizzrobe's spells and spell attacks ignore damage resistances (but not damage immunities).
Spell Shield. The wizzrobe is surrounded by a shield of elemental energy, which provides it protection from attacks and makes it resistant to damage of the type associated with its Eelemental Alignment.
Actions
Multiattack. The wizzrobe makes two attacks with its wizzrobe wand.
Wizzrobe Wand. Ranged Spell Attack: +9 to hit, range 120 ft., one target. Hit: 21 (3d10 + 5) cold, fire, or lightning damage (determined by the wizzrobe's Elemental Alignment).
Etherealness. The wizzrobe magically enters the Ethereal Plane from the Material Plane, or vice versa. To do so, the wizzrobe must have a wizzrobe wand in its possession.
Spellcasting. The wizzrobe casts one of the following spells using Intelligence as the spellcasting ability:
At will: mage hand, misty step
Summon Allies (1/day). The wizzrobe attempts to summon a number of elementally aligned allies to its side. The wizzrobe can summon 1d8 keese, 1d6 keese swarms, or attempt to summon 1d4 chuchus with a 50 percent chance of success.
The summoned creatures appear in unoccupied spaces within 60 feet of the wizzrobe, act as the wizzrobe's allies, and remain for 1 minute or until the wizzrobe dies.
Legendary Actions
The wizzrobe can take 3 legendary actions, choosing from the options below. Only one legendary action option can be used at a time and only at the end of another creature’s turn. The wizzrobe regains spent legendary actions at the start of its turn.
Vanishing Movement. The wizzrobe moves up to its speed, or enters or exits the Ethereal Plane.
Wand (Costs 2 Actions). The wizzrobe makes one attack with its wizzrobe wand.
Spell Bomb (Costs 3 Actions). The wizzrobe casts one of the following spells, depending on its elemental alignment. The wizzrobe's spellcasting ability for this spell is Intelligence: cone of cold (cold), fireball (fire), or lightning bolt (lightning).
Guardians
Created ages ago by the ancient sheikah to combat the menace of Calamity Ganon, the guardians successfully served as Hyrule's defenders in the first Calamity. Alongside the hero of legend and the goddess-blessed princess, the guardian army overtook Ganon, allowing the evil to be sealed away. Afterwards, the guardian army, like the Divine Beasts, were buried beneath the ground– both to protect them from the ravages of time, and to allow the Hylian king to hide their fearsome power.
When the guardians were recovered prior to the onset of the Second Calamity, the people of Hyrule believed them to be their saving grace. Though no legendary hero had yet stepped forth, and the princess Zelda had not yet shown sign of her blessings, Hyrule hoped that the guardian army would contain Ganon's destructive impulses. While the Divine Beasts and their champions confronted Calamity Ganon directly, the guardian army would work with Hyrule's army to overrun the monstrous forces Ganon had gathered.
In the end, this did not happen. When Calamity ganon broke free from his bonds, his first step was to corrupt the guardian army, filling them with his Malice. In doing so, Ganon turned the guardian army against the people of Hyrule. This unexpected betrayal led to hundreds of casualties, and under the onslaught of such unstoppable power, the army broke ranks everywhere they had prepared to confront Ganon's own army. In Central Hyrule, where the largest cluster of guardians waited Ganon's own appearance, almost nothing survived. Every building but Hyrule Castle itself was razed to the ground, and the people of Hyrule were pushed back to the edges of the continent.
Almost a century later, the remaining guardians have almost all fallen into disrepair. Dozens of broken constructs lie scattered across Hyrule, some barely functioning, with missing legs and broken shells. Others, mostly those closest to Hyrule Castle and Calamity Ganon's power, have managed to maintain themselves– these guardians still patrol the area, and together with the hordes of bokoblins and other monsters that dwell in Hyrule Field, have essentially rendered it a no-man's-land for those few people brave enough to still travel the roads.
Guardian Scout
The smallest form of guardian, guardian scouts are barely the size of a Hylian, and far less intimidating than most of the other guardian types. But in spite of their size, guardian scouts still pose a surprising threat– their tripod construction gives them a great deal of speed, as well as versatility in a variety of terrains. This, combined with their thick armor and dangerous laser blasts, make them difficult to overcome for anyone without combat experience.
Guardian Scout
Small Construct, unaligned
- Armor Class 14 (natural armor)
- Hit Points 32 (5d6 + 15)
- Speed 30 ft.
STR DEX CON INT WIS CHA 14 (+2) 15 (+2) 16 (+3) 1 (-5) 12 (+1) 1 (-5)
- Skills Perception +3
- Damage Vulnerabilities lightning
- Damage Resistances bludgeoning, piercing, and slashing from nonmagical attacks
- Damage Immunities poison, psychic
- Condition Immunities charmed, exhaustion, frightened, paralyzed, petrified, poisoned, unconscious
- Senses darkvision 60 ft., passive Perception 13
- Languages –
- Challenge 1 (200 XP) Proficiency Bonus +2
Lightning Susceptibility. If the guardian scout takes lightning damage, it must make a Constitution saving throw with a DC of 10 or half the damage dealt, whichever is higher. On a failed save the guardian scout becomes stunned until the end of its next turn.
Actions
Guardian Laser. Ranged Weapon Attack: +4 to hit, range 45 ft., one target. Hit: 13 (2d10 + 2) radiant damage.
Laser Flurry (Recharge 5-6). The guardian scout spins while erratically firing laser blasts. Each creature within 15 feet of the guardian scout must make a DC 12 Dexterity saving throw, taking 11 (2d10) radiant damage on a failed save or half as much on a successful one.
Guardian Skywatcher
Small Construct, unaligned
- Armor Class 14 (natural armor)
- Hit Points 44 (8d6 + 16)
- Speed 0 ft., fly 40 ft. (hover)
STR DEX CON INT WIS CHA 14 (+2) 17 (+3) 14 (+2) 1 (-5) 16 (+3) 1 (-5)
- Skills Perception +7
- Damage Vulnerabilities lightning
- Damage Resistances bludgeoning, piercing, and slashing from nonmagical attacks
- Damage Immunities poison, psychic
- Condition Immunities charmed, exhaustion, frightened, paralyzed, petrified, poisoned, unconscious
- Senses darkvision 120 ft., passive Perception 17
- Languages –
- Challenge 2 (450 XP) Proficiency Bonus +2
Lightning Susceptibility. If the guardian skywatcher takes lightning damage, it must make a Constitution saving throw with a DC of 10 or half the damage dealt, whichever is higher. On a failed save the guardian skywatcher becomes stunned until the start of its next turn.
Weak Point. The guardian skywatcher moves with the use of three spinning propellers, which can be targeted separately from the guardian skywatcher. These propellers have AC 16, 15 hit points, and all of the resistances and immunities of the guardain skywatcher. Whenever a propeller takes damage, the guardian skywatcher takes damage of the same type equal to half that amount. If two propellers are destroyed, the guardian skywatcher's flying speed is reduced by half; if all three are destroyed, its flying speed is reduced to 0 until at least propeller is repaired.
Actions
Multiattack. if the guardian skywatcher has less than half its hit points remaining, it makes two attacks with its guardian laser.
Guardian Laser. Ranged Weapon Attack: +5 to hit, range 90 ft., one target. Hit: 14 (2d10 + 3) radiant damage.
Bonus Actions
Siren Alert. The guardian skywatcher produces a loud noise, audible up to 300 feet away, alerting creatures within that range.
Decayed Guardian
Large Construct, unaligned
- Armor Class 13 (natural armor)
- Hit Points 60 (8d10 + 16)
- Speed 0 ft.
STR DEX CON INT WIS CHA 1 (-5) 14 (+2) 14 (+2) 1 (-5) 12 (+1) 1 (-5)
- Skills Stealth +6
- Damage Resistances bludgeoning, piercing, and slashing from nonmagical attacks
- Damage Immunities poison, psychic
- Condition Immunities charmed, exhaustion, frightened, grappled, paralyzed, petrified, poisoned, prone, restrained, unconscious
- Senses truesight 60 ft., passive Perception 11
- Languages –
- Challenge 4 (1,100 XP) Proficiency Bonus +2
Deactivated. Unless the decayed guardian has taken damage or been alerted to the presence of another creature, it is deactivated and can be treated as unconscious.
Weak Point. The decayed guardian's eye acts as a weak point, and can be targeted separately from the decayed guardian. The eye has AC 17, and all of the resistance and immunities of the decayed guardian. Whenever the eye takes damage, the decayed guardian takes twice that amount of damage, and must make a Constitution saving throw with a DC of 10 or half the damage dealt, whichever is higher. On a failed save, the decayed guardian is stunned until the end of its next turn.
Actions
Guardian Laser. Ranged Weapon Attack: +4 to hit, range 90 ft., one target. Hit: 24 (4d10 + 2) radiant damage, and the target must succeed on a DC 12 Strength saving throw or be pushed 10 feet away from the guardian and knocked prone.
Charged Shot (Recharge 5-6). The guardian charges up and fires three lasers at once, making an attack with its guardian laser against up to three different targets. Each of these targets must be within 15 feet of each other.
Guardian Turret
Large Construct, unaligned
- Armor Class 16 (natural armor)
- Hit Points 95 (10d10 + 40)
- Speed 0 ft.
STR DEX CON INT WIS CHA 1 (-5) 16 (+3) 18 (+4) 1 (-5) 15 (+2) 1 (-5)
- Damage Immunities poison, psychic; bludgeoning, piercing, and slashing from nonmagical attacks
- Condition Immunities charmed, exhaustion, frightened, grappled, paralyzed, prone, petrified, poisoned, restrained, unconscious
- Senses truesight 60 ft., passive Perception 12
- Languages –
- Challenge 5 (1,800 XP) Proficiency Bonus +3
Anchored. The guardian turret can't be forcibly moved.
Weak Point. The guardian turret's eye acts as a weak point, and can be targeted separately from the guardian turret. The eye has AC 18, and all of the immunities of the guardian turret. Whenever the eye takes damage, the guardian turret takes twice that amount of damage, and until the end of its next turn the guardian turret's attacks deal half as much damage.
Actions
Multiattack. The guardian turret makes three attacks with its guardian laser.
Guardian Laser. Ranged Weapon Attack: +6 to hit, range 45 ft., one target. Hit: 14 (2d10 + 3) radiant damage.
Guardian Skywatcher
Even smaller than a guardian scout, skywatchers were never intended to engage in direct combat. Instead, they act as the eyes in the sky for other guardian forces, keeping watch for intruders. Once a guardian skywatcher has spotted a threat, it immediately alerts other guardians and allies in the vicinity by activating an attacher siren, which produces a loud and piercing noise. Afterwards, most skywatchers will move to attack, keeping their distance while raining attacks from their laser from the sky. Destroying a guardian skywatcher's attached propellers totally disables its ability to move, making them much less effective threats.
Decayed Guardian
All that remains of most guardian stalkers one hundred years after the Calamity, decayed guardians are stalkers whose rusted gears and broken limbs have rendered them unable to move. Some decayed guardians have spent decades in the same location, deactivating to conserve energy, and letting the natural world build up around them– covered in moss and grass, surrounded by boulders and mounds of dirt, these guardians are sometimes almost invisible from a distance. This can often work to their advantage, as they slowly power up after being alerted to a threat, then attacking at a long range from their hiding place.
Guardian Turret
Like the decayed remains of guardian stalkers, these turrets are totally incapable of movement, though in this case by design. Created by sheikah scientists before the onset of the Second Calamity, guardian turrets were the first tenative steps toward recreating the ancient technology that ran the more powerful and dependable guardian stalkers. To make up for their lack of movement, the guardian turrets were given extra layers of ancient armor, though at the tradeoff of some firepower.
Before the Calamity, the guardian turrets were installed at key defensive points, to stave off attacks by wandering monsters. From here, they were also intended to provide ranged support for Hyrule's armies as they did battle with Ganon's forces. Instead, when Calamity Ganon took control of the guardian army, the guardian turrets were turned to the purpose of preventing Hyrule's people from sheltering in the keeps and forts where they had been placed.
Guardian Skirmisher
An upgraded version of the guardian scout, guardian skirmishers have a similar body shape, but with a few significant changes. The central column of their body rises above their tripod-legs, giving them a larger size and greater reach– perfect for utilizing the variety of guardian weapons that have been attached to them. The shape and size of these weapons vary, with swords, spears, axes, and even shields being utilized by skirmishers. While a skirmisher can still fire lasers from its central eye, they're more likely to rely on their speed and the danger of their weapons to take down foes.
Guardian skirmishers were designed to fight on the front lines of battle, alongside normal soldiers. Their skill in direct combat is comparable to that of a highly experienced knight, and before the calamity many of Hyrule's soldiers had begun to spar with the skirmishers to hone their own skills. Once the Calamity struck, and Ganon took control of the guardian army, most of the guardian skirmishers were destroyed by soldiers who'd already practiced overcoming the guardian skirmishers' dangers. Finding a skirmisher wandering Hyrule in the century since is a rarity that only grows as time passes.
Guardian Stalker
The pinnacle of ancient sheikah technology, guardian stalkers are what made up the bulk of the guardian army prior to the Calamity. Each guardian stalkers has six powerful legs that can carry it up and over nearly any terrain, all supporting a heavily-armored central body with fierce combat capabilities. Like most guardians, the guardian stalker has a central eye connected directly to its ancient power core, letting it channel energy from the core to create a powerful laser blast. In the guardian stalker, this laser is its major method of attack, and for good reason– the core required to power a guardian stalker is enormous, and the energy it produces can shred most defenses.
Prior to Calamity Ganon's corruption of the guardian army, taking on a guardian stalker alone was considered an impossible feat. Up to that point, even teams of soldiers working together regularly failed to bring down guardian stalkers in mock combat. Because of this, most were unprepared to handle the danger the stalkers posed once influenced by Calamity Ganon, and most of Hyrule's major losses– both in terms of property and life– were the result of guardian stalkers.
The century between the Second Calamity and the modern day has not been kind to most guardian stalkers, which were abandoned by Ganon's power as the beast fought to escape the trap laid by Zelda. Without the influence of Malice driving them onward, and no remaining commanders to order them, most guardian stalkers came to rest where they stood. Time and weather have since ravaged them, decaying them to a state of weakness. A few guardian stalkers still remain active, working on old patrol orders or still directly controlled by Calamity Ganon. These are mostly found in Central Hyrule, clustered around Hyrule Castle, or at the edges of Hyrule's border and in ancient ruins, patrolling for trespassers.
Guardian Skirmisher
Medium Construct, unaligned
- Armor Class 16 (natural armor, shield)
- Hit Points 120 (16d8 + 48)
- Speed 40 ft.
STR DEX CON INT WIS CHA 17 (+3) 15 (+2) 16 (+3) 1 (-5) 14 (+2) 1 (-5)
- Damage Vulnerabilities lightning
- Damage Resistances bludgeoning, piercing, and slashing from nonmagical attacks
- Damage Immunities poison, psychic
- Condition Immunities charmed, exhaustion, frightened, paralyzed, petrified, poisoned, unconscious
- Senses darkvision 120 ft., passive Perception 12
- Languages –
- Challenge 7 (2,900 XP) Proficiency Bonus +3
Lightning Susceptibility. If the guardian skirmisher takes lightning damage, it must make a Constitution saving throw with a DC of 10 or half the damage dealt, whichever is higher. On a failed save the guardian skirmisher becomes stunned until the end of its next turn.
Combat Capability. If the guardian skirmisher hits a creature with a melee attack, it can use a bonus action to Shield Bash that same target.
Actions
Multiattack. The guardian skirmisher makes three attacks with its guardian weapons, or two attacks with its guardian laser.
Guardian Weapons. Melee Weapon Attack: +6 to hit, reach 10 ft., one target. Hit: 12 (2d8 + 3) slashing damage.
Guardian Laser. Ranged Weapon Attack: +5 to hit, range 45 ft., one target. Hit: 13 (2d10 + 2) radiant damage.
Shield Bash. Melee Weapon Attack: +6 to hit, reach 5 ft., one target. Hit: 7 (1d8 + 3) bludgeoning damage and the target must succeed on a DC 14 Strength saving throw or be knocked prone.
Spinning Top (Recharge 4-6). The guardian skirmisher spins in place while waving its weapons, allowing it to make a single attack with its guardian weapons against each creature within reach.
Guardian Stalker
Large Construct, unaligned
- Armor Class 17 (natural armor)
- Hit Points 180 (18d10 + 90)
- Speed 60 ft.
STR DEX CON INT WIS CHA 20 (+5) 12 (+1) 21 (+5) 1 (-5) 17 (+3) 1 (-5)
- Saving Throws Str +9, Wis +7
- Damage Resistances bludgeoning, piercing, and slashing from attacks not made with ancient weapons
- Damage Immunities poison, psychic
- Condition Immunities charmed, exhaustion, frightened, paralyzed, petrifieid, poisoned, unconscious
- Senses truesight 120 ft., passive Perception 13
- Languages –
- Challenge 10 (5,900 XP) Proficiency Bonus +4
Sure-Footed. The guardian stalker is not slowed by nonmagical difficult terrain.
Weak Point. The guardian stalker's eye and legs both act as a weak points, and can be targeted separately from the guardian stalker.
The guardian stalker's eye has AC 20, and all of the resistances and immunities of the guardian stalker. Whenever the eye takes damage, the guardian stalker takes that same amount of damage, and must make a Constitution saving throw with a DC of 10 or half the damage dealt, whichever is higher. On a failed save, the guardian stalker is stunned until the end of its next turn.
The guardian stalker has six legs, each of which have AC 17, 30 hit points, and all of the resistances and immunities of the guardian stalker. Whenever a leg takes damage, the guardian stalkers takes takes damage of the same type equal to half that amount. If a leg is reduced to 0 hit points it is destroyed, and the guardian stalker's speed is permanently reduced by 10 feet.
Actions
Guardian Laser. Ranged Weapon Attack: +5 to hit, range 90 ft., one target. Hit: 17 (3d10 + 1) radiant damage.
Laser Flurry (Recharge 5-6). The guardian stalker bombards a point it can see within 90 feet with a flurry of low-powered laser blasts, forcing each creature within 20 feet of the chosen point to make a DC 15 Dexterity saving throw. A creature caught in the laser flurry takes 33 (6d10) radiant damage on a failed save, or half as much damage on a successful one.
Reactions
Recharge (1/day). When the guardian stalker is reduced to 90 hit points or fewer, it can use its reaction to automatically recharge and use its Laser Flurry action.
Legendary Actions
The guardian stalker can take 3 legendary actions, choosing from the options below. Only one legendary action option can be used at a time and only at the end of another creature’s turn. The guardian stalker regains spent legendary actions at the start of its turn.
Move. The guardian stalker moves up to half its speed.
Guardian Laser. The guardian stalker makes one attack with its guardian laser.
Recharge (Costs 2 Actions). The guardian stalkers automatically recharges its laser flurry.
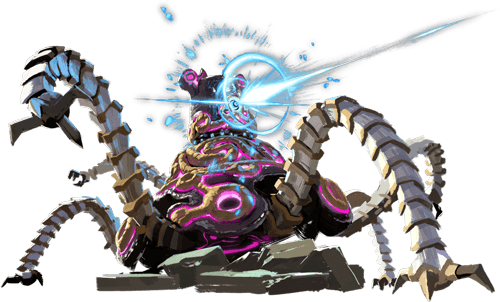
Leaders of the Yiga Clan
Founded just over a century ago, shortly prior to the events of the Second Calamity, the Yiga Clan are a group of sheikah firmly dedicated to a hatred of hylians, and a desire to wipe Hyrule Kingdom off the map. To this end, they are willing to lie, cheat, steal, and even ally with Calamity Ganon himself to achieve their goals.
Troubled History
While the Yiga Clan's formal founding only occurred just before the start of the Second Calamity, its roots go back much farther, to the original exile of the sheikah people from Hyrule. This event 10,000 years ago was triggered by a fear of sheikah technology in the wake of Calamity Ganon's first defeat, and the worry that sheikah dominance through technology would lead to their takeover of Hyrule Kingdom. The hylian king of the era demanded that the sheikah be forced from Hyrule, and while some left, others simply went into hiding.
Of this latter group, some chose to forego the technological skills they had built up, discarding invention in favor of living simple, secret lives among the other groups of Hyrule. Some, however, took umbrage with the king of Hyrule and his people– they sought vengeance for the wrongs done to them, and chose to work from the shadows to bring about the downfall of Hyrule Kingdom.
Starting small, with only a few dozen members, these hateful splinter groups would continually grow and ebb in power and influence throughout the years. Some would die off, their legacies forgotten; others would grow large enough to create infighting, and eventually splinter further into additional families. Finally, after thousands of years, the power of these families would be united under the influence of the "first" Master Kohga.
Onset of the Calamity
Once united, the Yiga quickly became a force to be reckoned with. Working from their hidden hideout in the Gerudo Desert– a rock-solid fortress built in ages past by progenitors of Kohga's clan– the Yiga presented a large threat to the stability of the gerudo. The Yiga Clan's initial hope was to steal the Thunder Helm, an ancient gerudo artifact that would give them mastery over lightning, and make them immune to the thunderous blasts of the gerudo leader, Urbosa. While initially unsuccessful, the Yiga got closer to achieving this goal than Urbosa preferred, and the gerudo leader began to focus more heavily on working to stop the rising Yiga influence.
With the increased protections on the Thunder Helm and Gerudo Town, the Yiga made the decision to focus their power elsewhere, only to rediscover fragments of the ancient sheikah prophecy predicting Calamity Ganon's return. Recognizing the opportunity to end their ages-long grudge one and for all, Master Kohga chose to work towards ensuring Calamity Ganon's successful return.To this end, Kohga dispatched assassins to deal with the hylian princess Zelda, and spies to seek out and end the life of the legendary hero reborn. Though their efforts did not bear the fruit that Kohga had hoped for, the nuisance of the Yiga Clan still proved effective in diverting important resources.
Yiga of the Wilds
Though Calamity Ganon returned, and Hyrule was thrown into disarray, it became clear to the Yiga that the prophecy had not gone as they had hoped. Over time, through information gathered by their spies, the Yiga leadership were able to piece together what had happened– the Link, the legendary warrior, had been severely injured but successfully transported to somewhere hidden to recover; and that the princess Zelda, her goddess-blessed power manifesting at the last moment, had trapped Calamity Ganon inside of Hyrule Castle to keep the beast from rampaging through Hyrule.
The Yiga, unlike Hyrule's other groups, had suffered only minor losses as a result of the Calamity. Though weakened by years of fighting the gerudo, after the Calamity there was little that stood in their way. But knowing that somewhere in Hyrule, the legendary warrior rested, and that Zelda still fought Ganon beneath Hyrule Castle, the Yiga made the decision to hide themselves away once more. Rather than push to overthrow what remain of Hyrule's forces, the Yiga would muster their strength in secret, and use their spies to ready themselves for the day the legendary warrior appeared once more.
Yiga Leadership
Even a century after the Calamity, the Yiga Clan remains firmly under the leadership of Master Kohga. Questiions abound even among the Yiga as to how Kohga has survived almost 100 years, and whether he is actually the same Master Kohga who led the Yiga before the Calamity. But these questions are asked only in secret, and most Yiga couldn't care less if the Kohga they follow now is the same one their forefathers also followed– to them, he is their beloved Master Kohga, and they will follow his commands to the end of their lives.
The general of the Yiga Clan, second-in-command and right-hand to Master Kohga, is the unparalleled warrior Sooga. Once a starving traveler, exiled to the Gerudo Desert and destined for death, Sooga was saved by the grace of Master Kohga. Taken in by the Yiga, trained in their ways, Sooga chose to dedicate every ounce of his existence to repaying his life debt. There is nowhere that Master Kohga could go, no action that he could take, that would prevent Sooga from following him and his every order.
Both Sooga and Master Kohga are skilled warriors, their exceptional combat skills said to be the envy of everyone. Master Kohga is sometimes held back by his age and hatred of hard work, and Sooga by his unflagging dedication to following Kohga's every command– even is Kohga chooses to prioritize his own comfort over the success of a particular mission.
In combat, Sooga fights with twin blades, each so fast and finely-edged that they can cut through the air itself and their blows might not be felt until seconds after they land. Kohga, on the other hand, fights with no weapons but wields a mastery of ancient sheikah skills that allow him to levitate and move heavy objects with nothing but the power of his mind. Both warriors are well-versed in sheikah stealth techniques and are masters of disguise.
Sooga
Medium Humanoid (sheikah), lawful neutral
- Armor Class 15 (studded leather)
- Hit Points 190 (20d8 + 100)
- Speed 40 ft.
STR DEX CON INT WIS CHA 19 (+4) 17 (+3) 20 (+5) 12 (+1) 17 (+3) 16 (+3)
- Saving Throws Dex +8, Wis +8
- Skills Athletics +9, Deception +8, Perception +8, Stealth +8
- Senses passive Perception 18
- Languages Hylian, Sheikah
- Challenge 13 (10,000 XP) Proficiency Bonus +5
Evasion. If Sooga is subjected to an effect that allows him to make a Dexterity saving throw to take only half damage, Sooga instead takes no damage if he succeeds on the saving throw, and only half damage if he fails.
Reactive. Sooga can take one reaction on every turn in a combat.
Sneak Attack. Once per turn, Sooga deals an extra 24 (7d6) damage when he hits a target with a weapon attack and has advantage on the attack roll, or when the target is within 5 feet of an ally of Sooga that isn't incapacitated and Sooga doesn't have disadvantage on the attack roll.
Actions
Multiattack. Sooga makes three attacks with his windcleavers.
Windcleaver. Melee Weapon Attack: +9 to hit, reach 5 ft., one target. Hit: 13 (2d8 + 4) slashing damage.
Blade Gust. Each creature in a 10-foot cone in front of Sooga must make a DC 17 Dexterity saving throw. A creature that fails this saving throw takes 16 (3d10) slashing damage and is pushed 10 feet away from Sooga; a creature that succeeds on the saving throw takes half as much damage and is not pushed away.
Bonus Actions
Nimble Escape. Sooga can take the Disengage or Hide action as a bonus action on each of his turns.
Reactions
Counter Strike. If a creature makes a melee attack against Sooga and misses, Sooga can use his reaction to make a single melee weapon attack against that creature. If this attack hits, Sooga has advantage on attack rolls made against that target until the start of his next turn.
Legendary Actions
Sooga can take 3 legendary actions, choosing from the options below. Only one legendary action option can be used at a time and only at the end of another creature's turn. Sooga regains spent legendary actions at the start of his turn.
Windcleaver. Sooga makes an attack with his Windcleaver.
Sheikah Step (Costs 2 Actions). Sooga vanishes in a puff of smoke, teleporting and reappearing in an unoccupied space of his choice that he can see within 30 feet.
Call the Clan (Costs 3 Actions). Sooga calls for aid from the Yiga Clan, summoning 1d4 yiga footsoldiers, which appear in unoccupied spaces of Sooga's choice within 30 feet. These yiga footsoldiers act at the start of Sooga's next turn, and disappear in a puff of smoke after Sooga's next turn or if reduced to 0 hit points.
Master Kohga
Medium Humanoid (sheikah), lawful neutral
- Armor Class 12 (17 with Mystic Shield)
- Hit Points 135 (18d8 + 54)
- Speed 30 ft., fly 40 ft. (with Mystic Shield)
STR DEX CON INT WIS CHA 15 (+2) 15 (+2) 16 (+3) 10 (+0) 20 (+5) 21 (+5)
- Saving Throws Int +5, Wis +10, Cha +10
- Skills Arcana +5, Deception +10, Perception +10, Stealth +8
- Condition Immunities grappled, restrained
- Senses passive Perception 20
- Languages Hylian, Sheikah
- Challenge 14 (11,500 XP) Proficiency Bonus +5
Evasion. If Kohga is subjected to an effect that allows him to make a Dexterity saving throw to take only half damage, Kohga instead takes no damage if he succeeds on the saving throw, and only half damage if he fails.
Fleet-Footed. Kohga is immune to being grappled or restrained, as well as any spell or magical effect that would reduce his speed.
Mystic Shield. Kohga begins each combat surrounded by a magical shield. While protected by this shield, Kohga's AC is 17, he has 40 temporary hit points, and he gains a flying speed of 40 feet. If Kohga's temporary hit points are depleted, the shield disappears, and Kohga loses its associated benefits. Once depleted, the Mystic Shield reappears at the end of Kohga's next turn, and he regains all of its associated benefits.
If Kohga is flying when the Mystic Shield is depleted, he immediately falls, taking falling damage as normal.
Actions
Multiattack. Kohga uses his Boulder Toss or Telekinetic Grip twice, against two different targets if possible.
Boulder Toss. Ranged Spell Attack: +10 to hit, range 60/120 ft., one target. Hit: 27 (4d10 + 5) bludgeoning damage.
Telekinetic Grip. Kohga attempts to move a Huge or smaller creature he can see within 120 feet, forcing the target to succeed on a DC 18 Strength check or be pushed up to 30 feet in any direction of Kohga's choice, including upwards. The target can not be pushed more than 120 feet from Kohga in this way.
Reactions
Reinforced Shield. When Koha becomes the target of an attack while under the effects of his Mystic Shield, he can use his reaction to reinforce the shield, increasing his AC to 21 until the end of the turn.
Legendary Actions
Move. Kohga moves up to his speed.
Boulder Toss (Costs 2 Actions). Kohga uses his Boulder Toss.
Telekinetic Grip (Costs 2 Actions). Kohga uses his Telekinetic Grip.
Shield Blast (Cists 3 Actions). Kohga pushes his shield out from him at a great speed, forcing each creature in a 20-foot radius around Kohga to make a DC 18 Strength saving throw. A creature that fails this saving throw takes 27 (6d8) force damage, is pushed 15 feet away from Kohga, and is knocked prone. A creature that succeeds on the saving throw takes half as much damage and suffers no additional effects.
Calamity Ganon and the Ganon Blights
In the far past, the land of Hyrule was a technologically advanced civilization, with little to fear from the monsters of the wilds. Through the power of its technology, Hyrule was even able to repel the dark beast known as Calamity Ganon, along with the assistance of a prophecied hero-warrior, and a goddess-blessed princess.
Together, the princess and the warrior were able to fell Ganon, sealing away the monster and its power. Over 10,000 years would pass before Calamity Ganon rose again to threaten Hyrule, and in that time, the secrets of both technology and magic were lost. Caught unprepared, the people of Hyrule scrambled to recover the secrets of their ancestors, unearthing the army of autonomous Guardians which had defended them, as well as the massive weapons known as the Divine Beasts.
Expected to be its saving grace, these technologies instead proved to be Hyrule's undoing. Splitting its power into fragments, Calamity Ganon took control of the Guardian army, turning them against the people of Hyrule. Four fragments, more powerful than the others, infiltrated the Divine Beasts themselves, and slew the champions in charge of operating them, casting Hyrule into darkness.
Rise of Calamity
To combat the Divine Beasts that proved to be Ganon's undoing millennia ago, the monster crafted four blights, each designed to take advantage of the Divine Beasts' own strengths, and the weaknesses of their champions. Now, 100 years later, the blights run rampant with the power of the Divine Beasts, terrifying Hyrule's people. Each of the blights is armed with a powerful combination of Calamity Ganon's magical power and the advanced technology of ancient Hyrule.
Fireblight Ganon
Tasked with ending the goron champion Daruk, and overtaking the Divine Beast Vah Rudania, the creature known as Fireblight Ganon is a hulking beast with a massive greataxe attached to one arm. In addition to the devastating power of this weapon, Fireblight Ganon is also capable of summoning blazing orbs of fire. When all else fails, Fireblight Ganon is also equipped with a powerful laser beam, similar to those found in the Guardians once relied upon to defend Hyrule.
In combat, Fireblight Ganon prefers to maintain its distance, using numerous fireballs to torch clusters of foes. Failing this, Fireblight Ganon seeks to get up close and personal, relying on its great physical strength to overpower it enemies. When pressed, Fireblight Ganon is capable of shielding itself with magical flames, helping to defend it from damage while also lashing out against creatures that venture too close. However, if subjected to freezing cold temperatures, this magical shield and Fireblight Ganon itself will quickly crumble.
Thunderblight Ganon
The most fearsome of the blights created from Calamity Ganon's essence, only Thunderblight Ganon's awesome speed and devastating lightning blasts could have possibly beaten the gerduo champion urbosa, pilot of the Divine Beast Vah Naboris. Thunderblight Ganon's righ hand is a quick and lethal blade, while its left hand contains a sturdy shield. With the ability to summon and control electricity, Thunderblight Ganon is particularly devastating for those who fight while clade in metal armor or wielding metal weapons.
Thunderblight Ganon makes great use of its lightning to strike foes from afar, usually following up such attacks by teleporting to be near lightly armored combatants and swinging at them with its sword. If cornered, Thunderblight Ganon can defend itself with its shield, and in a pinch, electrify its whole body to help ward off melee attackers.
Waterblight Ganon
This blight found its way onto the Divine Beast Vah Ruta, and there it fought Mipha, the champion and beloved princess of the zora. Waterblight Ganon relies more heavily on magic than technology, but the enormous pike attached to its left arm ensures that it can also dish out punishment in a physical contest.
When in a fight, Waterblight Ganon tries to take control of the battlefield itself, slowing its enemies with wind that chills and bites, creating deep water that hampers movement, and teleporting around the arena to keep its distance from more physically-adept attackers. However, the cache of water in its body and its magical circuitry means that Waterblight Ganon is particularly vulnerable to the shock of electricity, which can render its erratic movements inert for a time.
Windblight Ganon
Though physically weaker than the other blights, Windblight Ganon remains a difficult challenge for those unprepared to handle its fluidity of movement and powerful ranged attacks. Windblight Ganon was the source of corruption for the Divine Beast Vah Medoh, and the final end of the rito people's champion, Revali. Its right hand has been replaced with a small laser cannon that can fire in quick sequential bursts, while its left hand remains free to harness magic that controls the winds around it.
In battle, Windblight Ganon rarely ventures close to the ground, keeping far above in the air to fire at foes with its lasers, only coming down to throw powerful gusts of wind. The miniature tornadoes that it crafts with magic remain for some time, and Windblight Ganon can then move these around the battlefield with its supernatural powers. The hidden drones that it carries with it help enhance the powers of its laser attacks, but blasts of fire and bolts of lightning are both equally capable of brining Windblight Ganon down to earth.
Fireblight Ganon
Large aberration, chaotic evil
- Armor Class 15 (natural armor)
- Hit Points 199 (21d10 + 84)
- Speed 0 ft., fly 40 ft. (hover)
STR DEX CON INT WIS CHA 21 (+5) 17 (+3) 19 (+4) 10 (+0) 15 (+2) 18 (+4)
- Saving Throws Dex +7, Cha +8
- Damage Vulnerabilities cold
- Damage Resistances bludgeoning, piercing, and slashing from nonmagical attacks
- Damage Immunities fire, necrotic, poison
- Condition Immunities poisoned, unconscious
- Senses passive Perception 12
- Languages–
- Challenge 10 (5,900 XP)
Cold Weakness. Whenever Fireblight Ganon takes cold damage, it must succeed on a Constitution saving throw with a DC of 5 + the damage dealt or be stunned until the end of its next turn. If the damage is from a critical hit, Fireblight Ganon automatically fails this saving throw.
Magic Resistance. Fireblight Ganon has advantage on saving throws against spells and other magical effects.
Magical Weapons. Fireblight Ganon's weapon attacks are magical.
Actions
Multiattack. Fireblight Ganon makes three attacks with its greataxe, or one attack with its greataxe and one fireball attack.
Greataxe. Melee Weapon Attack: +9 to hit, reach 5 ft., one target. Hit: 18 (2d12 + 5) slashing damage.
Fireball. Fireblight Ganon casts the fireball spell (spell save DC 16) without requiring spell components.
Flamestorm (Recharges 4-6). Ranged Spell Attack: +8 to hit, range 120 ft., up to three different targets. Hit: 11 (2d10) fire damage.
Reactions
Flame Shield (1/day). When Fireblight Ganon is reduced to 100 hit points or fewer, it can use its reaction to summon a shield of magical fire around itself, causing Fireblight Ganon to gain 50 temporary hit points. While Fireblight Ganon has these temporary hit points, any creature that hits it with a melee attack automatically takes 3 (1d6) fire damage.
Legendary Actions
Fireblight Ganon can take 3 legendary actions, choosing from the options below. Only one legendary action option can be used at a time and only at the end of another creature's turn. Fireblight Ganon regains spent legendary actions at the start of its turn.
Greataxe. Fireblight Ganon makes a single attack with its greataxe.
Fireball (Costs 2 Actions). Fireblight Ganon uses its Fireball action.
Laser Beam (Costs 2 Actions). Fireblight Ganon fires a beam of energy from its single eye in a 60-foot long, 5-foot wide line. Each creature in the line must succeed on a DC 16 Dexterity saving throw or take 18 (4d8) radiant damage.
Thunderblight Ganon
Large aberration, chaotic evil
- Armor Class 18 (natural armor, shield)
- Hit Points 252 (24d10 + 120)
- Speed 0 ft., fly 40 ft. (hover)
STR DEX CON INT WIS CHA 20 (+5) 18 (+4) 21 (+5) 10 (+0) 20 (+5) 16 (+3)
- Saving Throws Dex +9, Wis +10, Cha +8
- Damage Immunities lightning, necrotic, poison; bludgeoning, piercing, and slashing damage from nonmagical weapons
- Condition Immunities posioned, unconscious
- Senses passive Perception 15
- Languages –
- Challenge 14 (11,500 XP)
Lightning Absorption. Whenever Thunderblight Ganon is subjected to lightning damage, it takes no damage and instead regains a number of hit points equal to the lightning damage dealt.
Magic Resistance. Thunderblight Ganon has advantage on saving throws against spells and other magical effects.
Magical Weapons. Thunderblight Ganon's weapon attacks are magical.
Actions
Multiattack. Thunderblight Ganon makes three attacks with its longsword.
Longsword. Melee Weapon Attack: +10 to hit, reach 5 ft., one target. Hit: 14 (2d8 + 5) slashing damage, plus 11 (2d10) lightning damage if Thunderblight Ganon is electrified.
Lightning Strike. Ranged Spell Attack: +10 to hit, range 60 ft., one target. Hit: (2d10 + 5) lightning damage, and lightning leaps from the target to another creature within 10 feet of the target, forcing that creature to succeed on a DC 18 Dexterity saving throw or take 11 (2d10) lightning damage.
If a creature damaged by this attack is wearing metal armor or wielding a metal shield, it must succeed on a DC 16 Constitution saving throw or be stunned until the end of its next turn.
Reactions
Lightning Stakes (1/day). When Thunderblight Ganon is reduced to 120 hit points or fewer, it can use its reaction to produce five metal stakes, which it launches at four different points it can see within 90 feet. Thunderblight Ganon then channels lightning through these stakes, forcing any creature within 10 feet of a stake to make a DC 18 Dexterity saving throw, taking 14 (4d6) lightning damage on a failed save or half as much on a success.
Each stake summoned by Thunderblight Ganon has AC 14, 30 hit points, and immunity to all damage except acid, bludgeoning, piercing, and slashing. A stake reduced to 0 hit points is destroyed.
Electrified Shell (1/day). When Thunderblight Ganon is reduced to 60 hit points or fewer, its body immediately becomes electrified. While it is electrified, Thunderblight Ganon's attacks deal an additional 2d10 lightning damage (included in the attack), and any creature that hits Thunderblight Ganon with a melee attack using a metal weapon automatically takes 11 (2d10) lightning damage.
Legendary Actions
Thunderblight Ganon can take 3 legendary actions, choosing from the options below. Only one legendary action option can be used at a time and only at the end of another creature’s turn. Thunderblight Ganon regains spent legendary actions at the start of its turn.
Longsword. Thunderblight Ganon makes a single attack with its longsword.
Lightning Strike (Costs 2 Actions). Thunderblight Ganon uses its Lightning Strike attack.
Telport Strike (Costs 2 Actions). Thunderblight Ganon magically teleports, along with any equipment it is wearing or carrying, up to 120 feet to an unoccupied space it can see. Thunderblight Ganon can then use its reaction to make a single melee weapon attack against a creature within range.
Channel Lightning (Costs 3 Actions; only after Lightning Stakes). Thunderblight Ganon magically teleports one of its lightning stakes that it can see to a point it can see within 30 feet of the stake's previous location. Thunderblight Ganon then channels lightning through all of its remaining stakes, forcing any creature within 10 feet of a stake to make a DC 18 Dexterity saving throw, taking 14 (4d6) lightning damage on a failed save or half as much on a success.
Waterblight Ganon
Large aberration, chaotic evil
- Armor Class 17 (natural armor)
- Hit Points 189 (18d10 + 90)
- Speed 0 ft., fly 40 ft. (hover)
STR DEX CON INT WIS CHA 19 (+4) 17 (+3) 20 (+5) 10 (+0) 18 (+4) 15 (+2)
- Saving Throws Dex +7, Wis +8
- Damage Vulnerabilities lightning
- Damage Resistances bludgeoning, piercing, and slashing from nonmagical attacks
- Damage Immunities cold, necrotic, poison
- Condition Immunities poisoned, unconscious
- Senses passive Perception 14
- Languages –
- Challenge 10 (5,900 XP)
Lightning Weakness. Whenever Waterblight Ganon takes lightning damage, it must succeed on a Constitution saving throw with a DC of 5 + the damage taken, or be stunned until the end of its next turn. If the damage is from a critical hit, Waterblight Ganon automatically fails this saving throw.
Magic Resistance. Waterblight Ganon has advantage on saving throws against spells and other magical effects.
Magical Weapons. Waterblight Ganon's weapon attacks are magical.
Actions
Multiattack. Waterblight Ganon makes two attacks with its pike.
Pike. Melee Weapon Attack: +8 to hit, reach 15 ft., one target. Hit: 15 (2d10 + 4) piercing damage.
Chilling Wind (Recharge 4-6). Waterblight Ganon slams its pike into the ground, creating a burst of ice and forcing each creature within 25 feet of Waterblight Ganon to make a DC 16 Constitution saving throw. On a failed save, an affected creature takes 18 (4d8) cold damage and its speed is reduced by half until the end of its next turn; on a success, an affected creature takes half as much damage and suffers no additional effect.
Reactions
Flood the Arena (1/day). When Waterblight Ganon is reduced to 95 hit points or fewer, it can use its reaction to magically flood an area no larger than 150 square feet in size and 20 feet deep. The water appears from thin air, and is magically kept within the chosen area– any water removed from the area automatically disippates. The water disappears after 1 hour, or if Waterblight Ganon is killed.
Legendary Actions
Waterblight Ganon can take 3 legendary actions, choosing from the options below. Only one legendary action option can be used at a time and only at the end of another creature’s turn. Waterblight Ganon regains spent legendary actions at the start of its turn.
Pike. Waterblight Ganon makes a single attack with its pike.
Teleport (Costs 2 Actions). Waterblight Ganon magically teleports, along with any equipment it is wearing or carrying, up to 120 feet to an unoccupied space it can see.
Ice Block (Costs 2 Actions). Waterblight Ganon creates a magical block of ice, which it then throws at a creature it can see within 60 feet. The target and each creature within 5 feet of it must make a DC 16 Dexterity saving throw, taking 13 (3d8) cold damage on a failed save, or half as much on a success.
Windblight Ganon
Large aberration, chaotic evil
- Armor Class 16 (natural armor)
- Hit Points 133 (14d10 + 56)
- Speed 0 ft., fly 60 ft. (hover)
STR DEX CON INT WIS CHA 15 (+2) 20 (+5) 18 (+4) 10 (+0) 18 (+4) 14 (+2)
- Saving Throws Dex +8
- Damage Vulnerabilities fire
- Damage Resistances bludgeoning, piercing, and slashing from nonmagical attacks
- Damage Immunities necrotic, poison
- Condition Immunities poisoned, unconscious
- Senses passive Perception 14
- Languages –
- Challenge 6 (2,300 XP)
Storm Weakness. Whenever Windblight Ganon takes fire or lightning damage, it must succeed on a Constitution saving throw with a DC of 5 + the damage taken, or be stunned until the end of its next turn. If the damage is from a critical hit, Windblight Ganon automatically fails this saving throw.
Magic Resistance. Waterblight Ganon has advantage on saving throws against spells and other magical effects.
Magical Weapons. Waterblight Ganon's weapon attacks are magical.
Actions
Multiattack. Windblight Ganon makes four laser blaster attacks.
Laser Blaster. Ranged Weapon Attack: +9 to hit, range 60/120 ft., one target. Hit: 7 (1d4 + 5) radiant damage.
Tornado Sweep (Recharge 4-6). Windblight Ganon summons a small, 5-foot diameter tornado in an unoccupied space within 5 feet. The tornado lasts for 3 rounds and then disappears at the end of Windblight Ganon's turn, or if Windblight Ganon uses this action again.
Windblight Ganon can use a bonus action on each of its turns to move the tornado up to 30 feet, including through creature's spaces. The first time the tornado moves through a creature's space on a turn, it must succeed on a DC 16 Strength saving throw or take 13 (3d8) bludgeoning damage and be knocked prone.
Reactions
Drone Web. When Windblight Ganon is reduced to 70 hit points or fewer, it can use its reaction to summon four flying drones that hover around it in formation. Each of these drones has AC 16, 25 hit points, and immunity to all damage except acid, bludgeoning, piercing, and slashing. Each remaining drone increases the damage dealt by Windblight Ganon's laser blaster attack by 1d4.
In addition, as long as it has at least one drone remaining, Windblight Ganon summons two tornadoes whenever it uses its Tornado Sweep action. Windblight Ganon can control both tornadoes with the same bonus action.
Legendary Actions
Windblight Ganon can take 3 legendary actions, choosing from the options below. Only one legendary action option can be used at a time and only at the end of another creature’s turn. Windblight Ganon regains spent legendary actions at the start of its turn.
Laser Blaster. Windblight Ganon makes a single attack with its laser blaster.
Tornado Sweep (Costs 2 Actions). If Windblight Ganon has a tornado summoned with its Tornado Sweep action, it can move that tornado up to 30 feet. Otherwise its Tornado Sweep action automatically recharges.
Laser Beam (Costs 3 Actions). Windblight Ganon fires a beam of energy from its single eye in a 60-foot long, 5-foot wide line. Each creature in the line must succeed on a DC 16 Dexterity saving throw or take 18 (4d8) radiant damage.
Patron Credits
The creation of this compendium would not have been possible without the support of many people, chief among them the patrons who choose to support my content every month, and the friends and family who helped guide this book to its eventual conclusion.
Lifetime Patrons
Danielle Cardamone
Matthew McKinnon
Full-Time Heroes ($20)
Castreek
Darion Nutter
City Saviors ($10)
Aden Wolf
Filippo
Joshua Russel
Sam
Shotguns & Socialites Gaming
Dungeon Delvers ($5)
Justin Landers
Rookie Adventurers ($1)
Asgardian1
Ashely Karczag
Boom Kat
Elijah64
Eric Cire
Joshua Andrews
Micah Mackintosh
Simon Traynor
Steve Ashabraner
TolarianAcademyDropout
Towel
Tool Credits
A special thanks as well to the creators of the various tools used to design this document. Chief among them is the Homebrewery, found at hombrewery.naturalcrit.com. If you'd like to support them and help keep the Homebrewery running, you can do so at patreon.com/NaturalCrit
A big thanks as well to u/AeronDrake, creator of the Hombrewery Formatting Guide, which is an excellent resource for learning how to use the Homebrewery's formatting tools, especially the inclusion of images. AeronDrake is also responsible for the creation of the "watercolor stains" used in some of the images in this document.
Finally a thank you to the Zelda Dungeon Website, and in particular the Zelda Dungeon Wiki, for being my go-to source on filling in the gaps on my own knowledge about The Legend of Zelda: Breath of the Wild and for being so comprehensive, well-designed, and easily navigable.
Special Credits
A thank you to the friends and family who have looked over this document, providing proof-reading and playtesting, and ensuring the highest quality possible for the final release.
Lastly and above all, thank you to The Nintendo Company for allowing us to live our dreams for 36 years in one of the best fantasy-adventure worlds of all time, and thank you for 5 years in one of the best open-world games ever release.