Travertine Island
Introduction
Welcome to Travertine Island! This fan-made adventure is based off of 93 Realms and uses dnd 5e, delving into the untold backstory of Travertine Island, The Temple, Jorda, and the Natives of Travertine.
The Homebrew Content
This Adventure contains some Homebrew Content to better resemble the 93 Realms universe, this includes new creatures and weapons. These can be found in Appendix A and C.
Inserting Travertine Island into your D&D World
Travertine Island is relatively easy to fit into the worl od D&D. Simply view it as an Island on the Material Plane. It reqiures nothing fancy.
The Creatures
Despite being easy to fit into the world of D&D, there are some new creatures that are not found at other places, for example, the Nurikabe. Act like these are normal monsters and not anything special, don't treat them differently. However, these new creatures do have differing stats, which I will include in Appendix A.
The Islands Nearby
Travertine is not a lonely island, it is part of a cluster of islands known as the Dortswath Cluster. The islands that are included in this group are Travertine Island, Broadway Island The Royal Island, and the largest, and therefore main island, Dortswath Island.
Some Information on the Adventure
The Natives
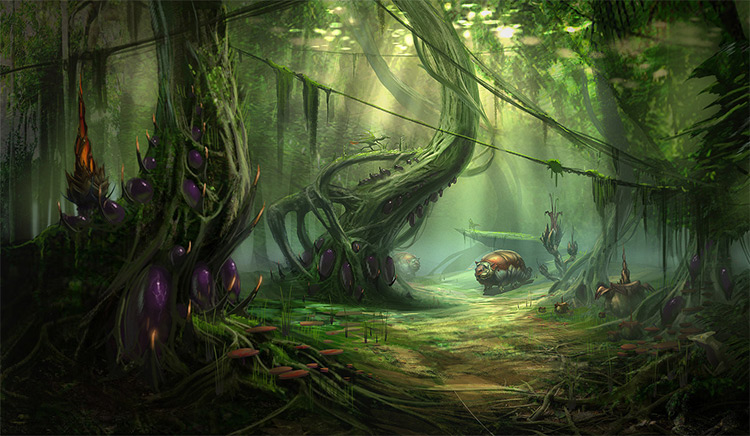
Travertine Island is a dense jungle with many strange creatures. The weather and constant threat from animals makes it an almost uninhabitable place. Howerver, a race of humans has learned to cope with these curcumstances.
The Enviorment
The enviorment at Travertine is a crude mix of storms and sunshine, resulting in a damp yet pretty place. This weather can be dangerous as well, with it making it easier to get lost in the jungle.
How This Adventure is Made
This adventure is split into segments, or parts, with each segment representing a major part in the story.
Characters
This adventure is designed for any character level, to accomodate for higher levels simply shift the story around slightly or start at a later part. Part 1 is meant for characters of lvl 1-5.
@
WQoOW Its a pYraMid
Part 1: Sailsmouth
The adventure begins with the party on their way to the town of Sailsmouth from the City of Ravenshire. During the time they are traveling, it is a good idea to let them explain their character's backstories and why they have decided to head to Travertine. Read the following to them to give them a good sense of what is going on:
You are heading for the town of Sailsmouth, and are about 4 days into the travel. So far it has been an uneventful travel, with not so much as a thief attempting to rob you.
After this tell them to explain why their PCs decided to head to Travertine, or roll a d4 and use one of the lead-ins:
1.) You are heading to Travertine in search of fame and riches.
2.)You are traveling to Travertine to learn more about the native folk and their culture.
3.) You are traveling to Travertine because everyone else is doing it and you don't want to be left out.
4.) Adventure has a natural appeal to you, and Travertine just happens to be full of it.
Road Encounters
Along the way, the characters will partake in four of the following events below. These events serve as an introduction into the lands, setting the tone of the world, feeding little bits of lore to the players, and establishing the dangers of the world. Choose one of the events, marking when they occur (day/night). Alternatively, roll a d4 and consult the Road Encounters table to determine what the party meets, rerolling any duplicate results or a 4. The difficulty of combat encounters and their subsequent XP awards assume a party of four level 1’s. If this is not the case in your game, or if you wish to make the combat easier or harder, you may tweak the combat encounters to your desired difficulty with D&D Beyond or similar builders.
Road Encounters
| d4 | Event |
|---|---|
| 1 | Rabid Monkeys |
| 2 | Theives Ambush |
| 3 | Graveyard Ambush |
| 4 | Reroll |
Rabid Monkeys
While traveling through a small road the party is ambushed by 2 Rabid Monkeys (see D&D Beyond). These monkeys will not go out of their way to kill the players, instead, their primary goal is to steal as much as they can. They have advantage on rolls against a surprised character as they pop out without warning.
Awarding EXP
Divide 150 EXP and the exp gained form each Rabid Monkey evenly among the party if they succesfully defeat both monkeys.

Theives Ambush
Two Thieves ambush the party and attempt to kill at least 1 member and steal the loot.
Treasure
If the party searches the dead theives they find 24 GP and 7 CP. One of the Theives carried a dagger. Etched on the dagger's side is a symbol that the characters can identify with a succesful Intelligence (Religion) check DC 15 -- The Symbol of the Direfang, a theive's gang. The dagger acts as a normal dagger and can be sold for 12 GP.
Awarding EXP
Divide 200 EXP and the EXP drom each Theif evenly among the party if they succesfully defeat the Theives.
Developments
If one of the thieves are captured and intimidated enough (your DC choice) they reveal that they were sent to stop you from going to Travertine Island, they will not reveal who sent them, however.
Graveyard Ambush
While passing by a deserted graveyard the party notices something amiss in the air. A detect evil and good spell or similar spell will inform the party of the lurking threat of two Skeletons and a Zombie.
Treasure
If the party loots the Skeletons, they find 6 GP, 2 SP, and 28 CP. The Zombie yields a small stone with a symbol carved on it (see developments).
Awarding EXP
Divide 200 EXP and the EXP from each enemy evenly among the party if they succesfuly defeat the Skeletons and Zombie.
Developments
Examining the Zombie's stone with a Perception check (DC 8) reveals that the symbol is one of the ship's that carry passengers to and from Travertine Island.
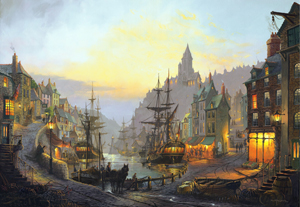
The Town of Sailsmouth
After the encounters specified above, the party reaches Sailsmouth after another 1d4 - 1 days. Award 150 EXP among the party for arriving at Sailsmouth.
Read the following to the party:
Having finally arrived at Sailsmouth, you are eager for some proper relaxation and fun. Looking around, you notice bustlinf townsfolk, merchants, a tavern called the Leaky Ship, the port, and more.
After this, let the party decide where to go and what to do.
Shops
There are various weapon and armour shops in Sailsmouth, the main of which are Dob's Weapon Shop, and Manuel's Armoursmith. There are also a variety of other shops, for example, a potion shop. You can find a list of what each shop sells below.
Roleplaying Dob
Dob is a cheery, happy guy who loves customers and is overall happy to help you figure out what to buy. When playing Dob be sure to add lots of bubblyness to your voice and be cheery and helpful.
Dob's Weapon Shop
| Weapon | Cost |
|---|---|
| Club | 1 SP |
| Dagger | 2 GP |
| Mace | 5 GP |
| Greatsword | 50 GP |
| Longsword | 15 GP |
| Rapier | 25 GP |
| Scimitar | 25 GP |
| Shortsword | 10 GP |
| Whip | 2 GP |
Manuel's Armoursmith
| Armour | Cost |
|---|---|
| Leather | 10 GP |
| Studded Leather | 45 GP |
| Scailmail | 50 GP |
| Half Plate | 750 GP |
| Chainmail | 75 GP |
| Plate | 1,500 GP |
| Platemail armour of Power | 3,000 GP |
| Full Platemail armour of Power | 4,500 GP |
Roleplaying Manuel
Manuel is the opposite of Dob, he is a grumpy, ill-mannered dwarf with a scar running down his left cheek. Manuel cares nothing about conversaition and only about making the purchase so he can once again be left alone. Be sure to add lots of sarcasm, rude comments, and more while playing as Manuel.
There are more shops besides these, so if your party wants to go searching for other items, check out the following shops:
Xather's Shop of Everything
| Item | Price |
|---|---|
| Acid (Vial) | 25 GP |
| Alchemist's Fire (Flask) | 50 GP |
| Staff | 5 GP |
| Backpack | 2 GP |
| Bedroll | 1 GP |
| Blanket | 5 SP |
| Book | 25 GP |
| Caltrops (Bag of 20) | 1 GP |
| Candle | 1 CP |
| Clothes, common | 5 SP |
| Crowbar | 2 GP |
| Hourglass | 25 GP |
| Lamp | 5 SP |
Bellwrath's Adventuring Shop
| Item | Price |
|---|---|
| Arrows (20) | 1 GP |
| Crossbow Bolts (20) | 1 GP |
| Climber's Kit | 25 GP |
| Grappeling Hook | 2 GP |
| Oil (Flask) | 1 SP |
| Poison, basic (Vial) | 100 GP |
| Spellbook | 50 GP |
| Torch | 1 CP |
Pick's War Pick Shop
| Item | Cost |
|---|---|
| War Pick | 5 GP |
Assuming you're using a Player's Handbook, you shouldn't need a list of everything places like the Leaky Ship have to offer.
Noteworthy NPCs
Amist the bustling chaos of Sailsmouth, there are some more important NPCs. Note: These are not necesarily essential to the story, so don't force the characters to talk to them. Tell the characters the following when, or if, they walk into the tavern.
As you walk through the creaky doorway of the Leaky Ship, you are instantly overwhelmed by various sights, smells, and sounds, some of witch are conversations about Travertine Island. Finding yourselves a table, you sit down and begin to order. While waiting, you notice two odd people in a heated argument. The strange thing, however, is that they both seem to be following a religion of some sort. One of them is dressed like a monk, the other is wearing some strange armour, apparently made out of wood.
A succesful Intelligence (Religion) DC 15 check reveals that the monk is a member of the Cult of Perception, while wood man is a follower of Esus.
The Cult of Perception
The Cult of Perception is one of the many cults in the Dortswath Cluster, however it is one of the most developed. They span across all of the islands, yet mostly stay at their private settlements. Being a member of the Cult of Perception yields multiple benefits, for example, special access to certain areas.
After reading the specified to the party, let the party decide whether the want to investigate the figures more or ignore them and continue to purchase drinks and food. If the party decides to walk up to the arguing figures and investegate more, read or paraphrase the following:
As you approach the figures, they end their argument and disperse, however, this does not seem to be because you were approaching them. They evidently hate each, and seemed to be arguing about some religion relating to wood and trees.
After reading this, a character can make an Intelligence (Religion) DC 10 check to determine what religion the wood man follows. On a successful check, the character can determine that the wood man is a follower of Esus, the lumberjack god.
Esus and the Lumberjacks
Esus is the god of lumberjacks, or the wood god. His followers are extremely devoted and believe that he is the best god their is. They show their devotion by chopping wood, making a=everything they own and wear out of wood.
If the players continue to pursue one of the figures, initiate a conversation, using the corresponding notes as a guide.
The Perception Cultist
If the players pursue the perception cultist, he is open to conversation. If the players ask his name, he openly states that it is Escry. He doesn't press for the characters to become cultists, however, if a character asks about the Cult, he asks if they want to join. If they say yes, read word for word the following:
Escry leads you along the road, while following him, you pass 99 flowers, smell 7 different types of beer, notice a the number 1984 painted on a royal ship, hear 2 dogs barking at each other, see 69 townsfolk talking, feel 25 gusts of wind, see 5 coins littered on the ground, and finally, as Escry leads you up a tall tower, step on 1000 steps.
Escry then asks the party how many flowers they passed, how many beers they smelled, what number was on the royal ship, how many dogs were barking, how many townsfolk were talking, how many gusts of wind blew by, how many coins were on the ground, and finally how many steps the passed while ascending the tower.
Developments
If the party or a character successfully remembers the correct numbers (99, 7, 1984, 2, 69, 25, 5, and 1000) then Escry welcomes them into the Cult of Perception and gives them a metal coin with an eye carved into it, the symbol of the Cult of Perception.
The Esus Follower
If the party instead chooses to pursue the lumberjack, he is, like the cultist, open to conversation. However, he will try to lead the conversation to Esus and attempt to convert the party. Unlike the cultist, there is no test to be approved as a follower, instead, he instantly accepts them as a follower. However, if the party wants to access an Esus follower only place, they must prove their faith by chopping down a tree and dropping the wood in a Sacred Urn (See the Developments category for further information. Upon further conversation you learn that his name is Lumberjack Jack.
Developmnts
The character is accepted as an lower less-devoted follower of Esus, to be seen as a more devoted follower and gain access to Esus-follower only areas the character has to chop wood, and put the wood into a Sacred Urn. (This only needs to be done once.) There are various Esus settlments located
throughout the adventure, all of which have a small forest of trees, and a Sacred Urn.

The Port
After the players have left town the most obvious landmark for them should be the port. If not, try to guide them to it, as it is essential to continue the story. Read or paraphrase the following:
You walk forth to the port, the vast sea streches out before you menacingly. There are many boats of various sizes docked or sailing. There is a store to purchase tickets for some boats that allow civilians as passengers. Upon walking closer the air seems to become dryer, and somehow more dense.
Let the players decide where to go, if they head to the ticket store read the following:
A young female elf sits behind a wooden counter, a timetable above her head shows the departure times of ships. She sees you walking closer and trys her best to look cheerful. There seems to be something on her eyelashes.
A succesful Perception DC 17 check reveals that her eyelashes are encrusted with salt.
Roll a d4 to determine the time of the next ship departure, in the event that the players miss their ship, or decide not to take it, roll again on the table, rerolling any repeats.
Next Ship Departure
| Time | Ticket Cost | Destanation |
|---|---|---|
| 2 hours from now | 15 GP | Travertine Island |
| 6 hours from now | 20 GP | Broadway Island |
| half an hour from now | 30 GP | Travertine Island |
| 1 hour from now | 20 GP | Travertine Island |
The players should want to go to travertine, if they have paid attention to the seeds that something is happening there, and if they are using the Travertine lead-in. If they need more directing, you could try to deter them from leaving by saying that the Travertine ships are in need of passengers, or if they try to take the Broadway ship, delay it by 5 hours as a deterent. If they persis
Read the following if they decide to board one of the Travertine ships:
You head towards the ships, however, you can't help but notice the increasing amount of salt in ther air and water. In fact, the amount of salt you can sense is in the water and air seems to be seeping onto your soul, your skin and eyes burn as you walk closer towards the docks and you have a very strong feeling that the salt might overpower you if you stay too long.
Boarding the Ship
When the players board the ship, have the captain or other higher rank worker greet them. Then read or paraphrase the following:
The planks of the ship creak beneath you as you explore the vessel. The salt that hangs in the air is still quite overpowering, so it would be a good idea to get below decks and try to get comfortable for the journey.
Let the players do what they want and improvise from there for now, as there is nothing of intrest aboard the ship currently. You can come up with some NPCs of your own to entertain the party, or leave them to their own devices, until the ship sets off.
End of Part 1
Part 2: Travertine
After the ship has set off, more people have boarded. Including some NPCs of importance and merchants. If the players want to check out some of the merchants, use the table below.
Singun's Merchant Shop
| Item | Price |
|---|---|
| Paper | 10,000 GP |
| Glass Bottle | 2 CP |
| Glass Shard | 1 SP |
| Rotting Flesh | 5 GP |
Aboard The Ship
Jorda (Important NPC)
Jorda is an NPC traveling to Travertine island in hopes of fame and loot. He is willing to cooperate with the party if they show him respect, but charges them a daily fee of 2 GP, claiming that his 'expertise' comes with a cost. If the players accept, print out or copy his character (Appendix B), if the players choose to ignore him, consider setting up a later encounter with him.
Travel Time (Fuck Naming!)
The travel between Dortswarth and TBD will take about 8 hours, considering the large ship size, this time can be spent resting or preforming an activity of choice.
TBD
The characters will