
Dragons of Stormwreck Isle PDF
But why?
Once again, WotC decided to abuse their position as market leaders to get away with terrible practices:
- If you want to run this module before Oct 4th 2022, your only option is to live in the US.
- Even if you do, you're still forced to support the dead tree and petroleum wrapping industry.
- And even then, with the Essentials Kit, you'd get the digital version for free, which, at the very least, provides useful Ctrl+C and Ctrl+F (not to mention a ton of DLC to expand the adventure).
- And even past that, if you buy the digital version, you don't even get to own your product since they don't give you a PDF. At best, you can access it offline if you download the dndbeyond app.
Now I don't know about you, but I don't want to support these anticonsumer practices, so here's the PDF they should be selling, yet refuse to.
Where did you get the text?
It was extracted from videos showing the book using image-to-text. Mistakes and formatting were done by hand, which means there might be typos!
If you see one, even one as small as a dot instead of a comma, contact me on discord so I can fix it.
What about the artwork /maps?
As of v2.1,
- Most of it was extracted from 5e.tools or my own copy from Dndbeyond.
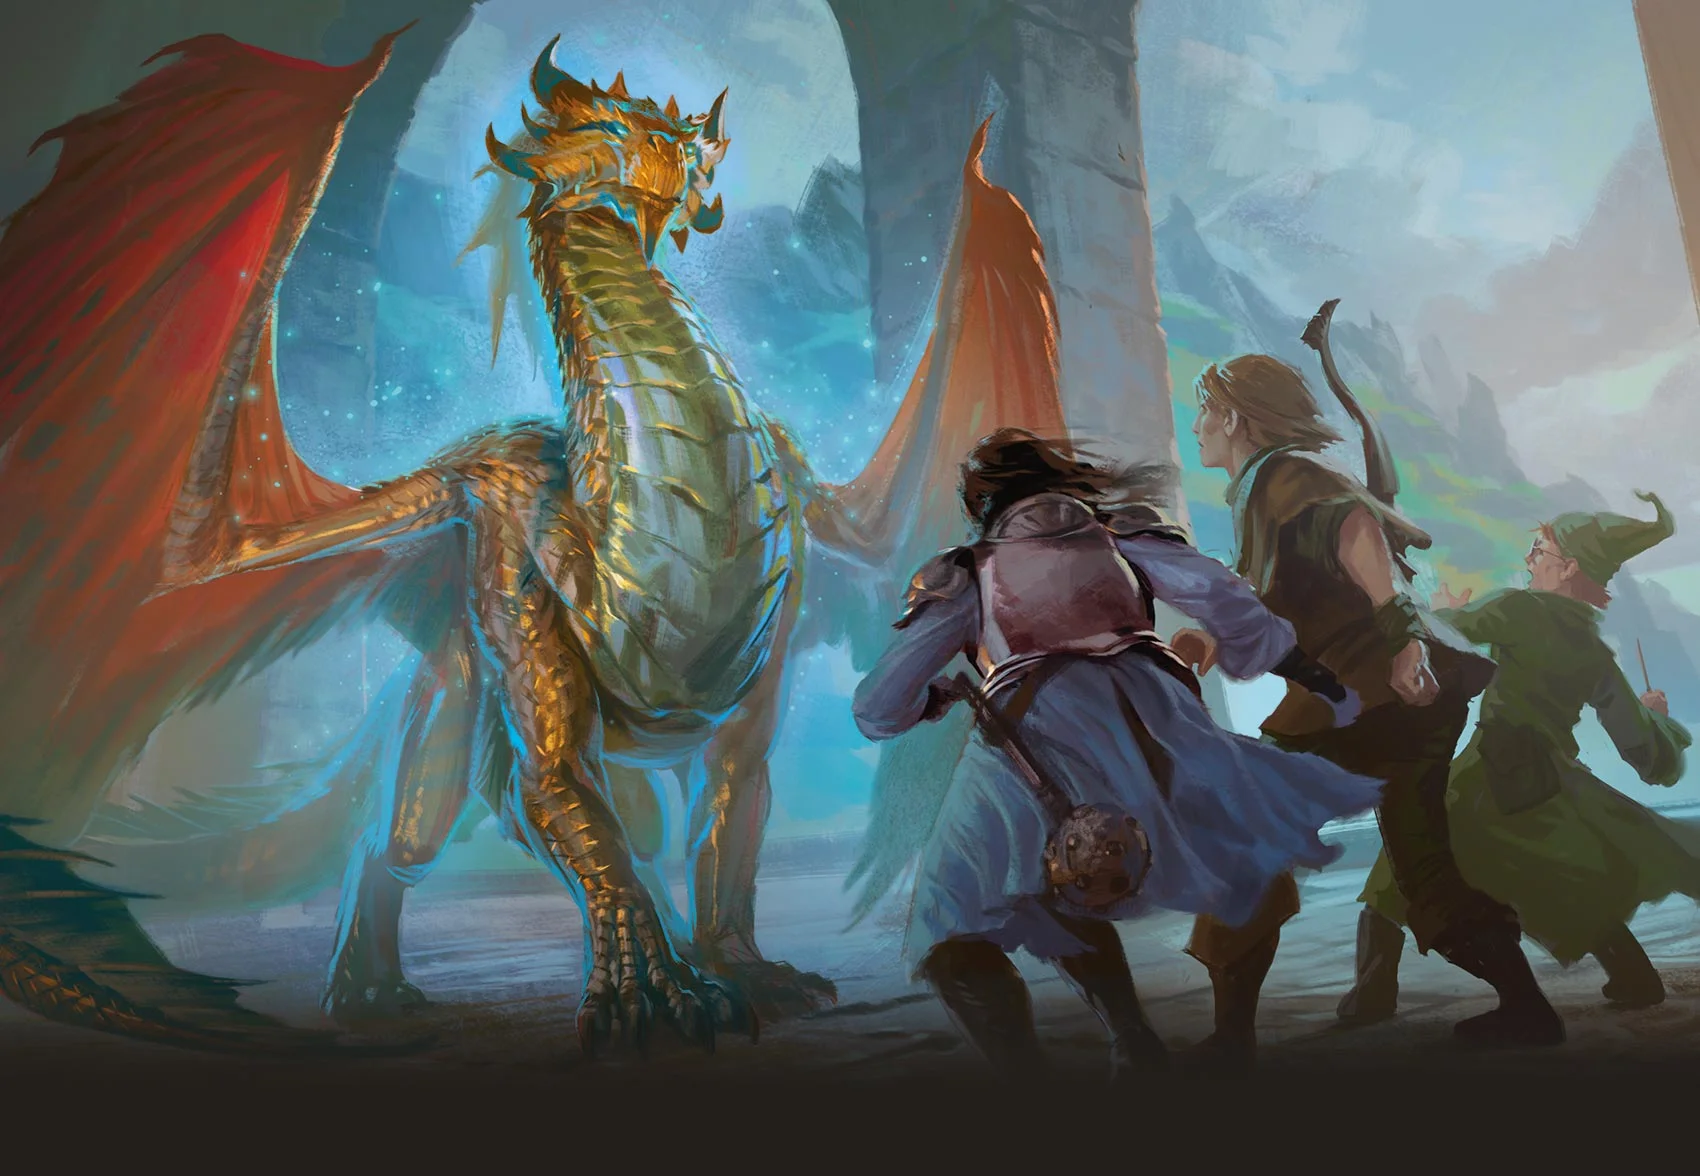
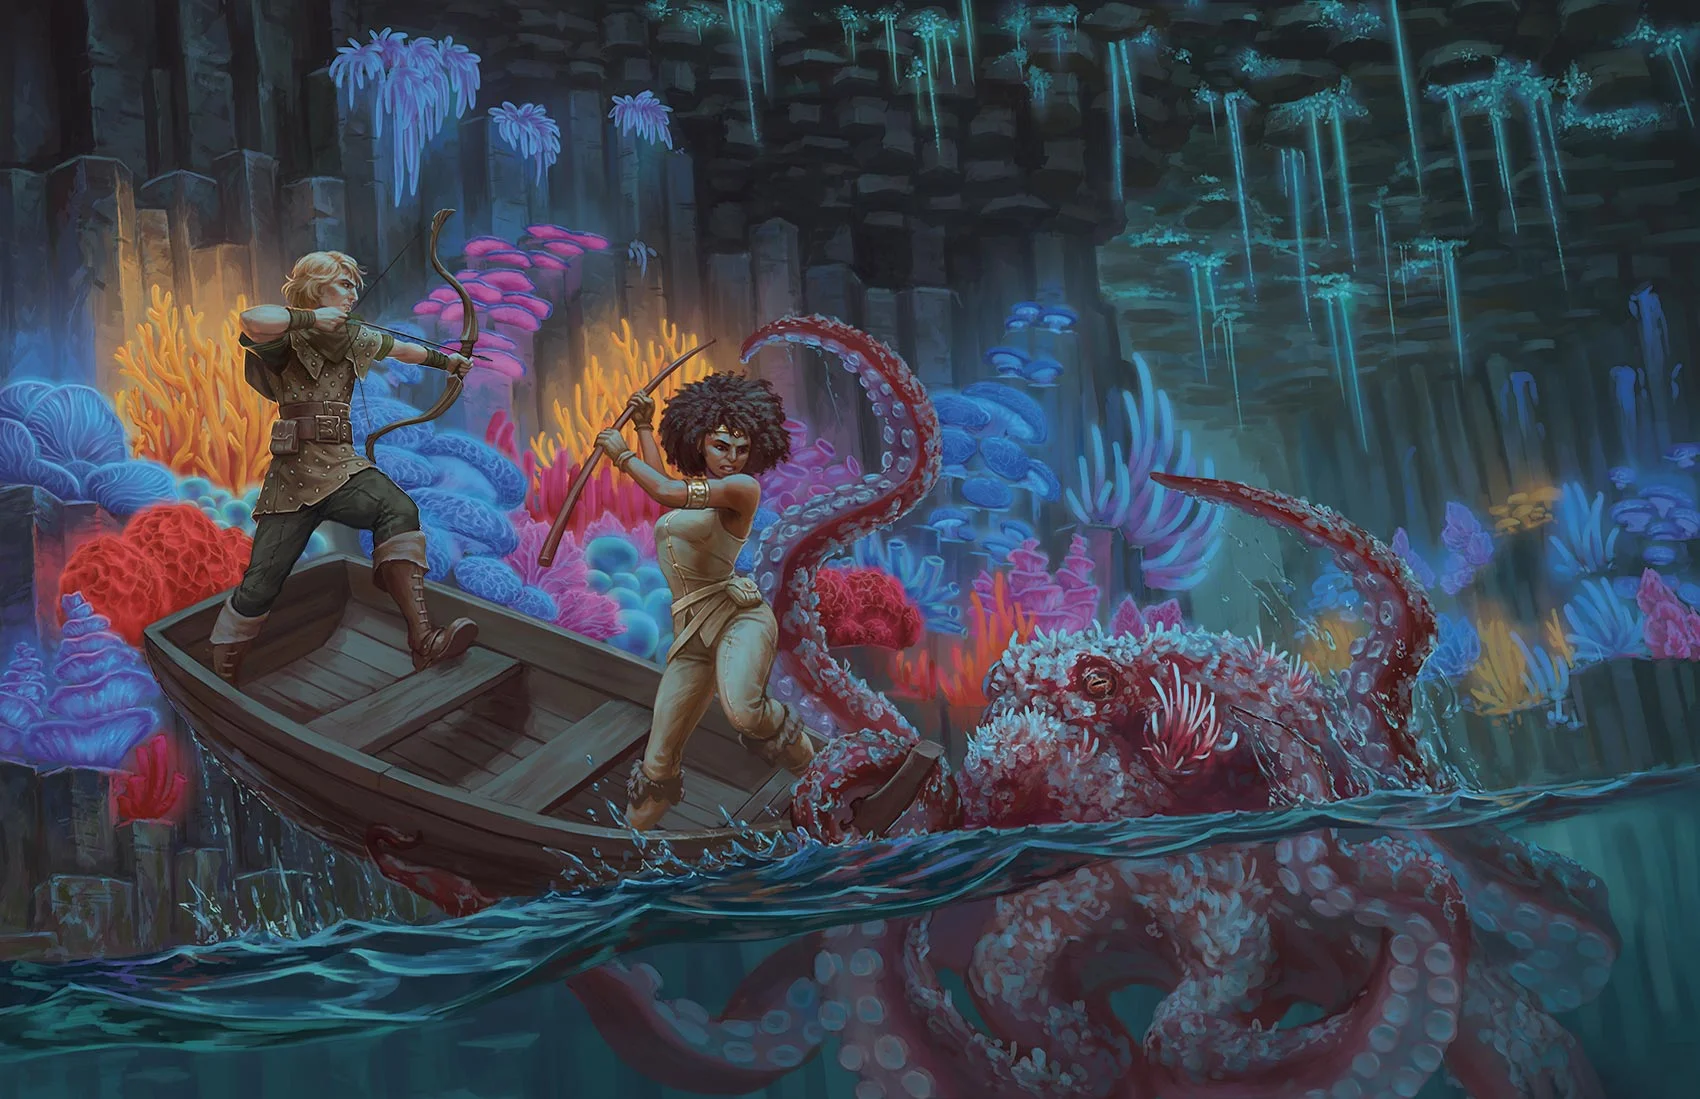
- Runara VS the Blue Dragon (above) came from one of the various videos on WotC's "how to play" page (which are actually quite good, I recommend taking a look).
Where's the table of contents?
In the original, the first page was a table of contents, which I decided to swap for all this blurb instead of putting it at the end so that people would see it.
Any other changes?
Besides the ToC and small formatting diferences,
- Some links (player maps, bigger images, etc.) where added. The joys of digital!
- Erratas were added. Additional text will be marked in [[ brackets ]] whereas removed text will be
striked through.
Everything else is just like the original
Current version: 2.1 (Jan 2023)
A detailed changelog is available at the very end.
Running the Adventure
This booklet is for the Dungeon Master. It contains a complete Dungeons and Dragons adventure, as well as descriptions for the magic items and creatures in the adventure. It also teaches you how to run a D&D game.
The rulebook that accompanies this booklet contains the rules for handling the situations that arise during the adventure
Overview
A D&D adventure is a collection of locations, quests, and challenges that inspire you to tell a story. The outcome of that story is determined by the actions and decisions of the adventurers – and by the luck of the dice.
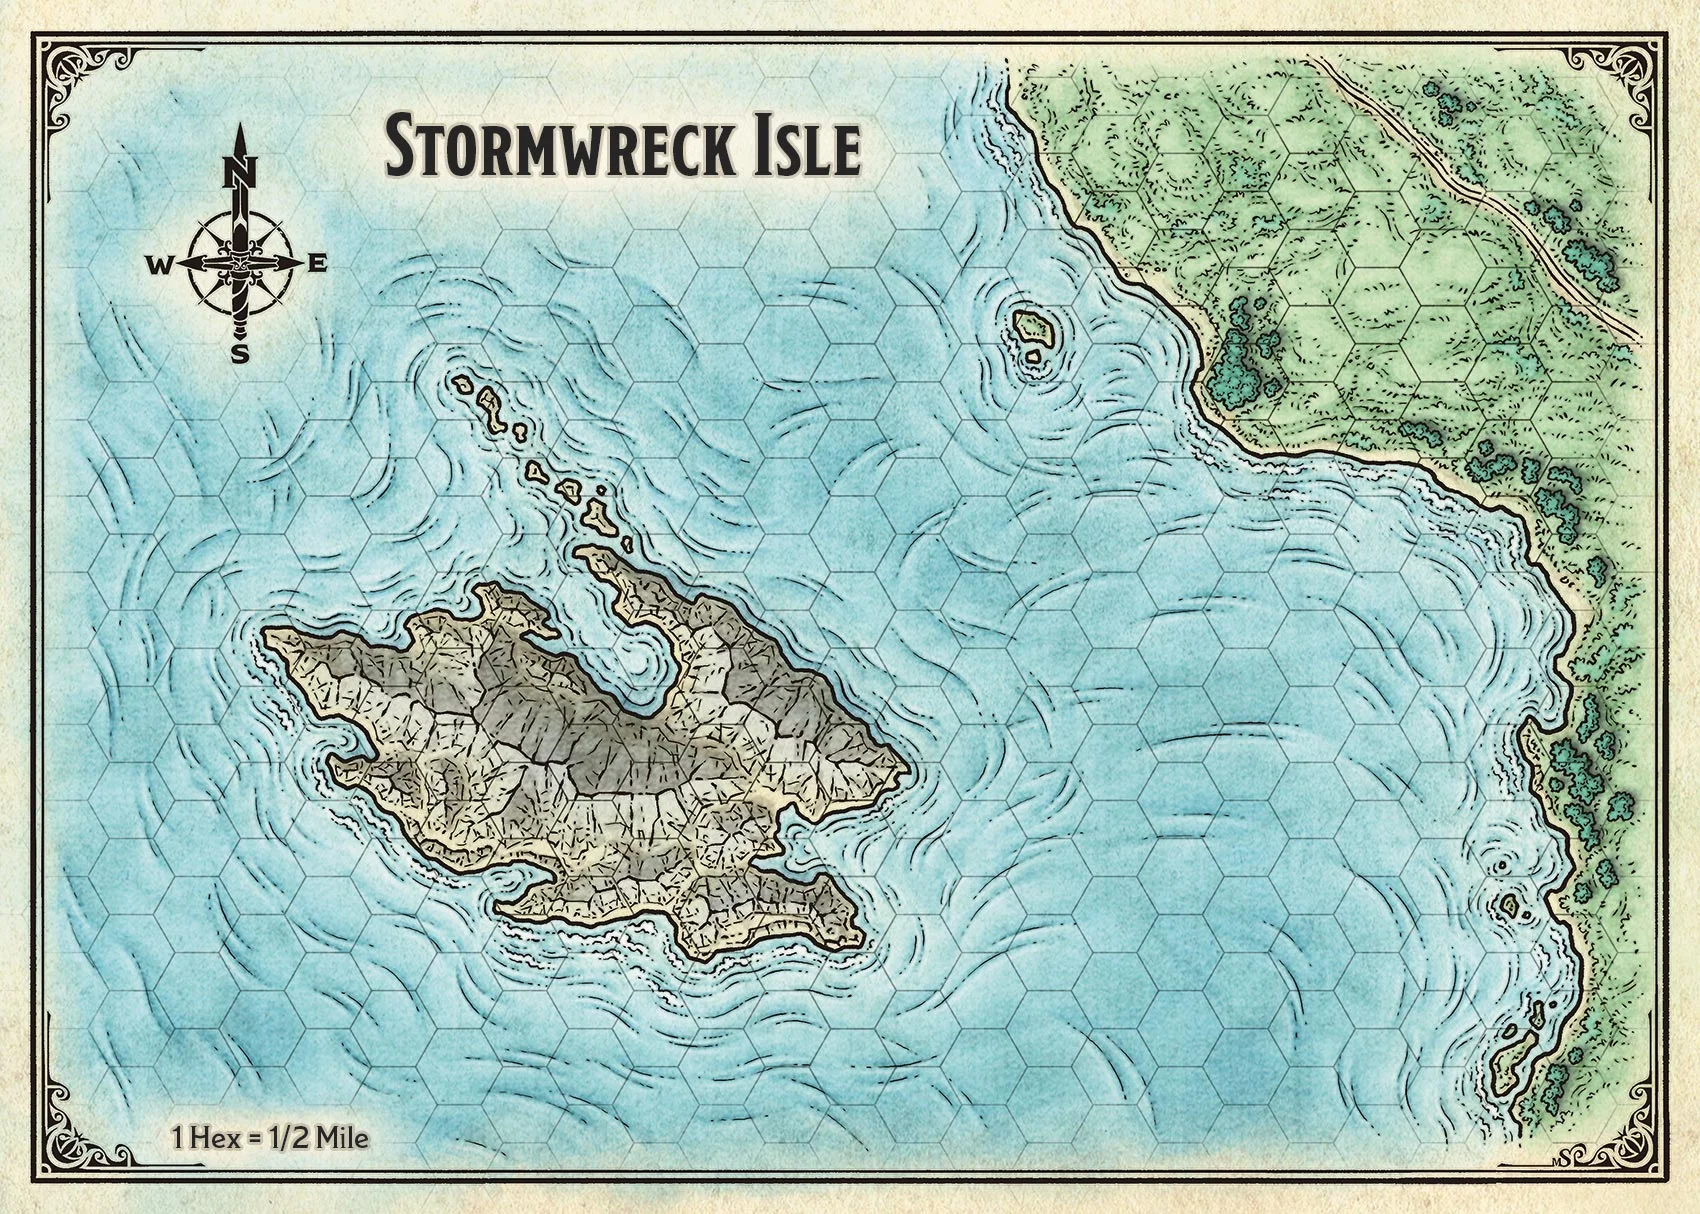
Dragons of Stormwreck Isle draws the characters into the midst of an ancient war among dragons as they explore an island that has long been a battlefield in that conflict. Here’s an overview of what you’ll find in this booklet:
- Running the Adventure. The booklet starts with an overview of the adventure. Then it takes a look at the role of the Dungeon Master in a game of D&D, and some tips to help you in this role.
- Adventure Sites. The four chapters of the adventure describe locations on Stormwreck Isle where characters can explore, interact with various creatures, and pursue their goals. The first site, Dragon’s Rest, serves as the characters’ home base during the adventure, where they can rest and get supplies between their visits to the other sites.
- Magic Items and Monsters. Two appendixes describe rules for magic items and monsters that characters might find in the course of the adventure.
Getting Started
[[ Before you get started, get familiar with the contents of this adventure. If you think there are elements your players might find scary or might make them uncomfortable, check in with the players before you start playing. Without giving away the story that awaits them, talk about the potentially troubling aspects and discuss how you’d like to handle them. This check-in is an important part of making sure everyone has a safe and fun time playing the game. ]]
To get started, have each player choose one character to play. Five characters printed on separate sheets are included in the box.
Tell the players to read over the character sheets; give their characters names; and invent the details of their characters’ personality and appearance. Encourage the players to write on the character sheets to make these characters their own.
The Forgotten Realms
The Forgotten Realms is a world of high fantasy, populated by elves, dwarves, halflings, humans, and other folk – one of many such worlds in the vast multiverse of the D&D game. In the Realms, fighters dare the crypts of the fallen dwarf kings of Delzoun, seeking glory and treasure. Rogues prowl the dark alleyways of teeming cities such as Neverwinter and Baldur’s Gate. Clerics in the service of gods wield mace and spell, defending against the terrifying powers that threaten the land. Wizards plunder the ruins of the fallen Netherese empire, delving into secrets too sinister for the light of day.
The roads and rivers of the Realms carry minstrels and peddlers, merchants and guards, soldiers and sailors. Bold adventurers follow tales of strange, glorious, faraway places. Good maps and clear trails can take even an inexperienced youth with dreams of glory far across the world, but these paths are never safe. Travelers in the Realms face fell magic and deadly monsters. Even farms and freeholds a day’s walk from a city can fall prey to monsters, and no place is safe from the wrath of a dragon.
This region is a place of adventure, where daring souls delve into ancient strongholds and explore the ruins of long-lost kingdoms. Amid a lawless wilderness of jagged, snow-capped peaks, alpine forests, bitter winds and roaming monsters, the coast holds renowned bastions of civilization such as the city of Neverwinter, in the shadow of the fuming volcano known as Mount Hotenow.
Number of Players
You can run Dragons of Stormwreck Isle for one to five players. If you have four or five friends ready to play with you, each person can take one of the characters provided in the box. Five players will find the encounters a little easier than four players will, but the adventure works fine as written for groups of four or five players.
If you have fewer than four players, you can have some players take on the role of two characters so the group has at least four characters. A player with two characters should treat one of them as their main character and the other as a sidekick, there to help out but probably not engaging in a lot of dialogue.
RUNNING THE ADVENTURE
Adventure Background
According to legend, two families of dragons came into being in the very first days of the world's creation. Bahamut, the noble Platinum Dragon, made the metallic dragons — gold, silver, bronze, brass. and copper. Cruel, five-headed Tiamat made the chromatic dragons — red, blue, green, black and white. The metallic and chromatic dragons share a mutual animosity that originates in the enmity between Bahamut and Tiamat.
[[ (Bahamut is often called the King of Metallic Dragons in the world of the Forgotten Realms, and Tiamat the Queen of Chromatic Dragons. In other worlds they have different names, and like all gods, they are beyond gender.) ]]
The origin of Dragon's Rest is rooted in that animosity. Ages ago, a fire-breathing red dragon called Sharruth rampaged up and down the Sword Coast. Three metallic dragons joined forces to battle Sharruth and imprisoned her beneath the ocean floor, believing seawater would quench her fire and keep her bound forever. But Sharruth's fury, legend says, caused the undersea volcanic activity that formed Stormwreck Isle.
In all likelihood, Sharruth is long dead and entombed beneath the island, but chromatic dragons whisper that she still lives and will one day emerge from her prison. One fact is undeniable: the powerful magic embodied in such an ancient dragon has left a permanent mark on Stormwreck Isle.
That magic has drawn other dragons to the island throughout the centuries, making it a recurring battlefield in the conflict between chromatic and metallic dragons. Several of these dragons have died there, each leaving behind a spiritual scar that causes unpredictable magical effects.
A hundred years ago, a blue dragon tried to harness this destructive magic. A bronze dragon named Runara pleaded with him to abandon his schemes. When he refused, Runara killed him, adding one more dragon grave to the island. Runara has grown weary of strife, and Stormwreck Isle's wounds are a constant reminder to her of the cost of such conflict. Devoting herself to peace and reconciliation, she established the cloister of Dragon's Rest as a safe haven from violence. Living in human guise, Runara now serves as the leader of a tiny group of hermits and ascetics.
But the ageless conflict between chromatic and metallic dragons threatens to disrupt the serenity of Dragon's Rest — and this is where the adventure begins!
ADVENTURE OUTLINE
In Dragons of Stormwreck Isle. the characters experience the magical scars left behind by the death of dragons. Faced with the evil schemes of one living dragon and the righteous anger of another, they'll have the chance to explore whether peace between the feuding dragon families is possible — or if they must resort to violence to resolve the conflict on this isle.
This adventure has four chapters:
Chapter 1, "Dragon's Rest," introduces Runara's cloister and its inhabitants and provides the characters the opportunity to learn about the problems facing the island. It also describes additional encounters you can use in the course of the adventure. including a magical hot spring with mysterious guardians at the site of a brass dragon's death.
Chapter 2, "Seagrow Caves," describes how the grave of Sharruth spawns magical connections to the Elemental Plane of Fire that threaten a community of mushroom-like myconids.
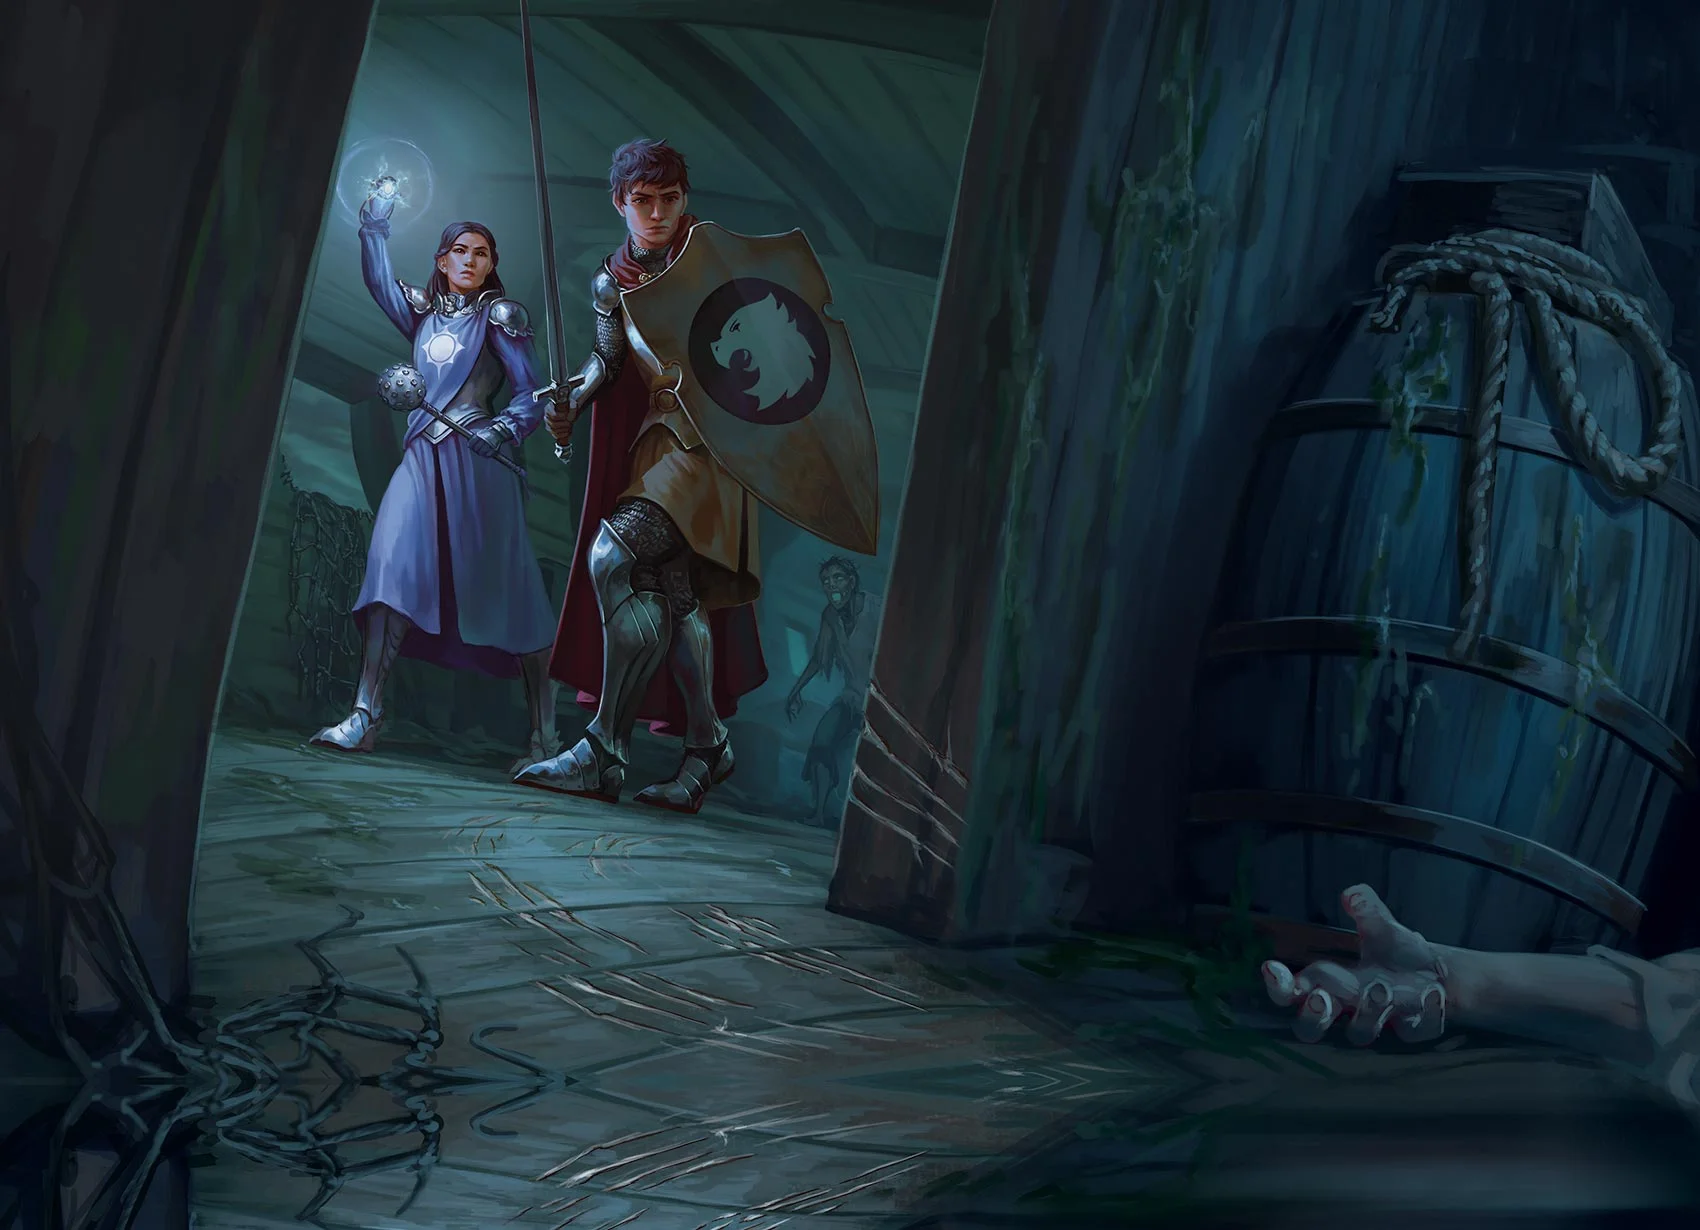
Chapter 3, "Cursed Shipwreck," details a ship that crashed alongside the bones of a gold dragon and the horrible curse within the ship's hold.
Chapter 4, "Clifftop Observatory," brings the characters to the site where Runara killed a blue dragon—and where that blue dragon's grandson has made his lair. There they'll also find a bronze wyrmling who rejected Runara's teachings of peace, now held prisoner in the blue dragon's lair.
ADVENTURE MAPS
The maps in this booklet are for the DM's eyes only. These maps show secret doors and other elements the players aren't meant to see.
When the characters arrive at a location marked on a map, describe it to give them a clear mental picture of the location. You can also draw what they see on paper, copying what's on your map while omitting secret details. It's not important that your hand-drawn map perfectly match what's in the printed adventure. Try to get the basic shape and dimensions correct and leave the rest to the players' imaginations.
RUNNING THE ADVENTURE
The Dungeon Master
The Dungeon Master has a special role in D&D games.
The DM is a storyteller. The DM presents the challenges and encounters that the characters must overcome. The DM is the players’ interface to the D&D world, who reads (and sometimes also writes) the adventure and describes what happens in response to the characters’ actions.
The DM is a referee. When iit’s not clear what ought to happen next, the DM decides how to apply the rules and keep the story going.
The DM is a roleplayer. The DM plays the monsters in the adventure, choosing their actions and rolling dice for their attacks. The DM also players all the other people the characters meet, including helpful ones.
DM Tips
The most important part of being a good DM is facilitating the fun of everyone at the table. Keep these tips in mind to help things go smoothly:
Embrace the shared story. D&D is about telling a story as a group, so let the players contribute to the outcome through the words and deeds of their characters. If some players are reluctant to speak up, ask them what their characters are doing.
It’s not a competition. The DM isn’t competing against the player characters. Your job is to referee the rules, run monsters, and keep the story moving.
Be fair and flexible. Treat your players in a fair, impartial manner. The rules help you do this, but is you can make your own rulings to ensure everyone having fun.
Modify the adventure to suit your tastes. The adventure has no prescribed outcome. You can alter any encounter to make it more interesting and fun for your players.
Keep a notepad handy. Use it to track details such as the characters' and monsters' initiative order.
SHARING INFORMATION
As Dungeon Master, one of your most important tasks is figuring out how much to tell the players and when. All the information the players need to make choices comes from you. Within the rules of the game and the limits of the characters' knowledge and senses, tell players everything they need to know.
Text that appears in a box like this is meant to be read aloud or paraphrased to the players when their characters first arrive at a location or under a specific circumstance, as described in the text. It usually describes locations or presents scripted dialogue, so players know what’s up and have a sense of what their characters' options are.
You don't have to reveal every aspect of a situation or hazard in one go. Boxed text typically describes everything the characters see, hear, or smell at first glance. As characters search rooms, make Wisdom (Perception) or Intelligence (Investigation) checks, open drawers and chests, and generally examine things more closely, give players more details about what their characters find
Creature Stat Blocks. Whenever the adventure text presents a creature’s name in bold type, that’s a visual cue directing you to the creature's stat block in appendix B. Those stat blocks are intended for your eyes only. However, as the characters fight monsters, you can reveal certain information to help them make smart choices in combat:
Hit Points. You can give players a sense of how well they're doing against a creature by describing, in narrative terms, how hurt the creature is. For example, if the creature has fewer than half its hit points remaining, you can describe it as being badly wounded. Such information gives the players a sense of progress and might spur them to press the attack. On the other hand, if the characters aren't damaging the creature much, let the players know that the creature looks like it can take a lot more punishment. That might encourage the players to change their plan.
Abilities, Strengths, and Weaknesses. As they fight a creature, characters should learn more information about the creature's abilities. Share information with the players as it become becomes apparent. For example, if the wizard casts flaming sphere (a spell that deals fire damage) against a fire snake (a creature that’s immune to fire damage), let the wizard’s player know the spell doesn’t seem to bother the creature at all. Players might correctly guess that a fire snake probably isn’t harmed by fire; feel free to subtly confirm their guesses (perhaps smiling and saying, “That sounds reasonable”).
Story Information. A location description might include important information not in boxed text. Often you’re meant to reveal such information when the characters examinee particular areas or interact with creatures.
RUNNING THE ADVENTURE

Link to player version of Map 1
As the DM, you roleplay the creatures that the characters encounter. The adventure offers guidance to help you decide what these creatures know and how willing they are to share information with the characters. Beyond that, improvise and bring these creatures to life as best you can. For example, the adventure describes Runara (the disguised bronze dragon who leads the cloister of Dragon's Rest) as wise and peace-loving, but you get to decide what her voice sounds like and how she reacts to a given situation. You can also ignore what the text says and roleplay Runara or any other creature as you see fit.
Treasure. When characters find treasure, tell them how many coins they find and how much any gems and art objects are worth. Sometimes treasure includes magic items, whose names are presented in italic type. Appendix A describes these items and their properties, as well as the rules for how characters figure out what a magic item does.
MAKING MISTAKES
Dungeon Masters are fallible, just like everyone else, and even experienced DMs make mistakes. If you overlook, forget, or misrepresent something, correct yourself and move on. No one expects you to memorize every part of this adventure and all the rules in the rulebook. As long as your players are having fun, everything will be just fine.
IMPROVISING ABILITY CHECKS
The adventure often tells you what ability checks characters might try in certain situations and the Difficulty Class (DC) of those checks. But sometimes characters try things that the adventure can't anticipate. In that case. you decide how to handle it.
Ability checks are for situations where a character’s success or failure isn't guaranteed. If anyone can easily accomplish a task, don't ask for an ability check. Just tell the player what happens. And if there's no way anyone could accomplish the task, just tell the player it doesn't work.
When you decide an ability check is required, consult the "Ability Checks" section of the rulebook and the table of Typical Difficulty Classes. Most of the time, choose a DC that is easy (DC 10), moderate (DC 15), or hard (DC 20).
RUNNING THE ADVENTURE
Chapter 1 - Dragon's Rest
The adventure begins at a tiny cloister called Dragon's Rest, a haven where world-weary people come to seek peace, reconciliation, and enlightenment. There, the characters learn about the dangers facing Stormy neck Isle.
Each character has a specific reason for coming to the cloister, as shown on the character sheets. You can also let players invent their own reasons for their characters to seek out Runara's wisdom and assistance.
Welcome to Dragons Rest
Read the following text when you're ready to start:
Your journey was uneventful, but the island now visible off the bow promises rare wonders. Seaweed shimmers in countless brilliant colors below you, and rays of sunlight defy the overcast sky to illuminate the lush grass and dark basalt rock of the island. Avoiding the rocks jutting up from the ocean, your ship makes its way toward a calm harbor on the island's north side.
A large, open air temple comes into view, perched on the edge of a cliff high above you. The ship drops anchor at the mouth of the harbor, and two sailors row you ashore. You have plenty of time to admire the towering statue at the center of the temple, depicting a wizened man sorrounded by seven songbirds. A long path winds up the side of the cliff to the temple, dotted along the way with doorways cut into the rock.
The sailors set you ashore on a rickety dock, where a large rowboat is neatly tied. They point to the base of the path and wish you good luck before they row back to the ship. Your visit to Dragon's Rest begins!
Before continuing with the adventure, encourage the players to introduce their characters to each other if they haven't done so already. They might want to discuess their reasons for visiting Dragon's Rest, or they might prefer to keep their reasons secret for now. If they have any questions about what they can see of the cloister from the boat, use map 2 and the information in "Dragon's Rest Locations" to answer them.
CHAPTER 1 | DRAGON'S REST
Ask the players to give you the party's marching order as they start toward the cloister. Who's in front, and who's bringing up the rear? Make a note of this marching order.
When you're ready, continue with the "Drowned Sailors" section.
DROWNED SAILORS
Read the following text to start the encounter:
As you're about to leave the beach and start your climb, you hear a ruckus of splashing and a wet, gurgling moan behind you. Three figures are shambling up from the water's edge, about thirty feet away. They're dressed as sailors, but their skin is gray and they look drowned. Sea water drools from their slack mouths as they lurch toward you.
The three shambling sailors are zombies, the animated corpses of sailors who died in a recent shipwreck. The characters face a choice: they can turn and fight the zombies, or they can continue up the path and leave the slow, shambling zombies behind. If the characters turn and fight, this is the first combat encounter in the adventure. Here are the steps you should follow to run it:
- Review the zombie stat block in appendix B.
- Use the initiative rules in the rulebook to determine who acts first, second, third, and so on. Keep track of everyone's initiative count on your notepad.
- On the zombies' initiative count, they move to-ward the characters. if they get close enough, they make melee attacks. The zombies stat block contains the information you need to resolve these attacks. If all the characters are more than 20 feet away, the zombies use the Dash action so they can move farther. For more information on what the zombies can do on their turn, see "Combat" in the rulebook.
- The zombies fight until they're all defeated.
Tip: Undead Fortitude. The zombies Undead Fortitude trait reflects how hard it is to kill these walking corpses. When this trait prevents a zombie from dying, give the players a hint about what happened. You might say, "That should have finished the creature off, but it refuses to stop moving!" On the flip side, any time a zombie takes radiant damage (such as from the cleric's sacred flame cantrip), you might describe the creature howling in agony.
This can help the players realize that radiant damage is a way to get around Undead Fortitude. If the players ask whether their characters know anything about fighting zombies. have them make DC 10 Intelligence checks. Those who succeed might recall that a particularly powerful blow (a critical hit) or radiant damage can help finish off a zombie.
Runara's Aid. In the unlikely event that the zombies defeat the adventurers, Runara comes to their rescue. The characters wake up in the temple (area AS in Dragon's Rest). Runara explains that she heard the sounds of combat and arrived just in time to prevent the zombies from dragging the characters into the sea.
Avoiding the Zombies. If the characters decide not to fight the zombies, they easily escape from the slow, shambling monsters. The zombies don't follow them up the path toward Dragon's Rest. The characters will have another opportunity to deal with the zombies later (see "Cloister Quests" later in this chapter).
MEETING THE INHABITANTS
Read this text when the characters first climb the path to Dragon's Rest:
Your arrival quickly draws the attention of the entire population of the place – which consists mostly of kobolds. These small, reptilian folk eye you curiously while a couple of humans watch from a distance. All the cloister's residents are dressed in simple clothes. and no one carries a visible weapon. One of the Ko-bolds pipes up with, "What's your name?"
At that, all the kobolds begin barraging you with questions – "Where are you from?" "What's that?" "Why are you here?" and more that are lost in the din.
Visitors to the cloister are rare, and the kobolds curiosity is insatiable; they keep asking questions until the characters insist they stop.
When the characters quiet the kobolds (or if the players start showing signs of exasperation), the leader of the cloister approaches to welcome the characters. Read the following text:
CHAPTER 1 | DRAGON'S REST
The chattering kobolds fall silent as a new figure comes into view, descending gracefully from the upper part of the cloister. She's an elderly human woman with weathered brown skin, white hair in tight braids, and kindly hazel eyes, dressed in a simple white robe. She smiles as she draws near and extends her arms in greeting.
'Welcome to Dragon's Rest,” she says. "May Bahamut’s guidance lead you to whatever you seek."
This is Elder Runara. the leader of Dragon's Rest. If the characters defeated the zombies at the beach, she thanks them for their service to the cloister. Even if they did not fight the zombies, she tells them they're welcome to stay at Dragon's Rest as long as they wish, sleeping either in one of the monastic cells (area A1) or in the temple (area A2) and eating with the rest of the community in the dining room (area 43). Runara says nothing about payment of any kind. If the characters offer to give money or perform services around the cloister in exchange for her hospitality, she accepts these gifts.
Throughout this adventure. Dragon's Rest serves as a home base for the characters. All the places they'll explore on the island are within a few miles of the cloister, and they can return here whenever they wish to rest, heal, and get information they need for the next part of their adventures. In addition, they can buy any of the equipment described in the rulebook from Myla (sec “Kobolds”).
During their time at Dragon's Rest, the characters can interact with any of its residents. All the residents but Runara live in the small monastic cells cut into the cliff face (area A1 on the cloister map).
Elder Runara
Elder Runara is the leader of Dragon's Rest. She appears as a human woman, but she is actually an adult bronze dragon disguised in human form. She guides the residents of the cloister in their contemplation and study. The cloister's inhabitants know Runara's true identity, but they do not speak of it to visitors.
Runara's initial attitude toward the characters is indifferent (see "Social Interaction" in the rulebook). She becomes friendly as soon as the characters demonstrate that they care about the cloister's safety, such as by fighting the zombies at the beach or undertaking any of the quests she offers them (see "Cloister Quests" later in this chapter). If the characters harm any of the residents of Dragon's Rest. she becomes hostile and insists the characters make amends for the harm they did before she is willing to deal with them in any way.
Runara’s mission is to help those whose lives have been shaped by violence find new paths forward in pace. Ultimately, she would like to see chromatic and metallic dragons find a peaceful way to coexist in the world. In the meantime, she finds comfort in helping humans and other people escape from cycles of violence.
Runara maintains a secret lair in a cave accessed by an undersea tunnel, a short distance from the cloister and not shown on the map of Dragon's Rest. She is careful not to enter or leave the cave when anyone might spot her, and she enters and emerges from the water in the open ocean, out of sight of the cloister. The other residents of the cloister think she lives in the temple at the top of the island (area A5), or they simply laugh away queries about her accommodations. explaining that she's always in the temple, or in the library, or checking on the rest of the residents – she never seems to sleep!
Kobols
Kobolds are small reptilian Humanoids who believe they are descended from dragons and gravitate to the service of dragons [[ often live near them ]]. Over the centuries, many bands of kobolds have been drawn to Stormwreck Isle by the lingering draconic magic that suffuses the island. Nine kobolds utterly devoted to Runara now live at Dragon's Rest.
The kobolds of Dragon's Rest are lawful good, sharing Runara's ideals of justice and compassion. Since they are sensitive to sunlight, they work at night and avoid moving about during the day. Unless otherwise noted, the kobolds are initially friendly toward the adventurers.
The kobolds are summarized below. They can provide comic relief, offer a down-to-earth perspective [[ offer a local perspective ]], or be a way for you to pass hints to the players if they're having trouble putting things together. But don't feel like you need to bring all nine of these kobolds to life! Pick one or two of these kobolds that you and the characters like the most and let them be the focus of the characters interactions with the kobolds:
Agga speaks little and has no patience for non-sense. She keeps the rest of the kobolds organized and in line. She is indifferent toward visitors, but if the characters show respect for the cloister and help keep the more rambunctious kobolds in line, her attitude improves to friendly.
Blepp has a sharp danger sense and is convinced he's supernaturally lucky. His prized possession is an ordinary dagger he claims is magical.
Frub has limitless energy and desperately needs help finding productive directions to channel it. He loves to ask questions about everything other people are doing.
CHAPTER 1 | DRAGON'S REST
Ever since an unfortunate accident in the
kitchen, Laylee is no longer allowed to
handle Myla's alchemical fire.
Kilnip has terrible insomnia and sleeps only a few hours each day. She is always tired but an eager conversationalist.
Laylee has a curious mind and a talent for tools and building. She serves as Myla's helper.
Mumpo is so audaciously courageous that he stole a copper piece from Runara's hoard. He's convinced she has no idea. (He is wrong, but Runara finds the situation amusing and lets Mumpo continue to believe in her ignorance.)
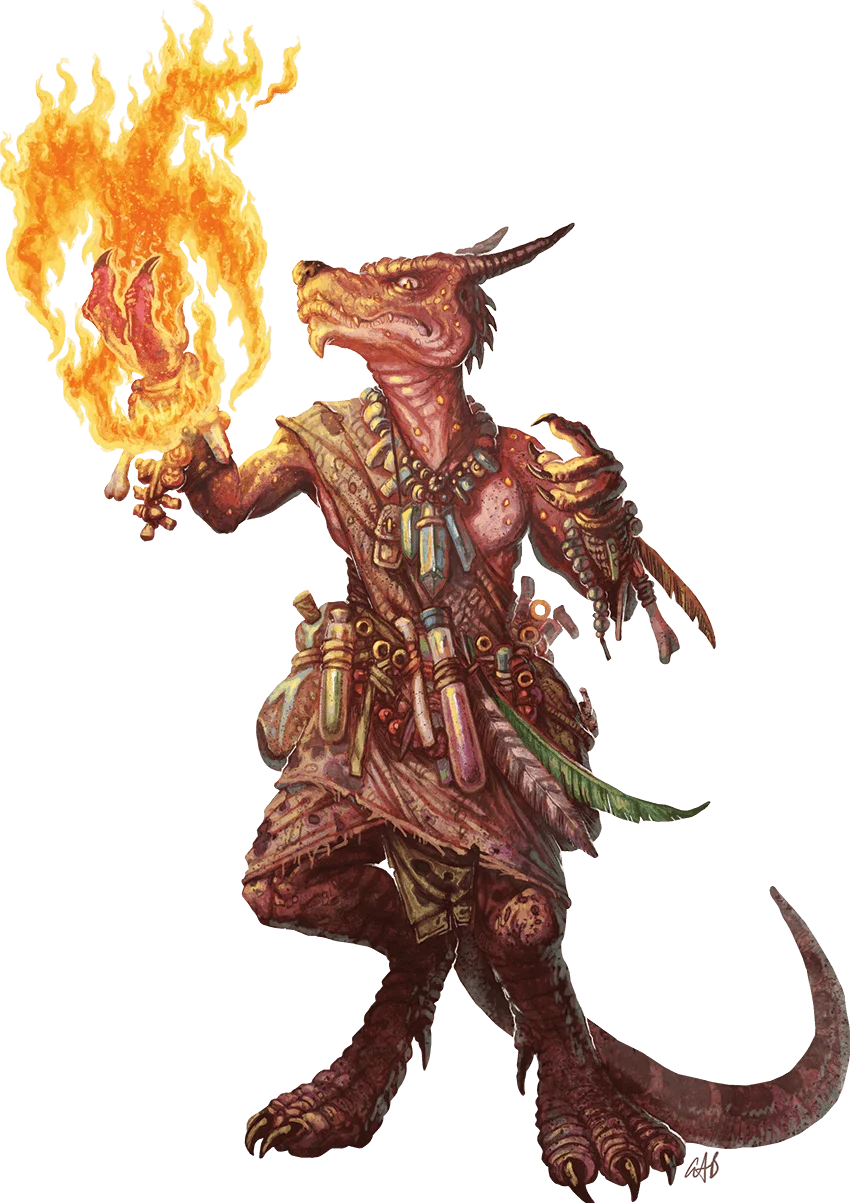
Myla (lawful good kobold tinkerer) is a winged kobold whose brothers, Mek and Minn, now follow Sparkrender, the blue wyrmling in Clifftop Observatory (see chapter 4). When Myla's wings were badly injured in an attack by stirges (which she describes as "hungry, icky, blood-sucking, bat-things"), Runara helped in her recovery. Now Myla spends her time experimenting with alchemy, engineering, and magic.
Rix is pious and tends to the temple, acting as Runara's assistant. She adores puns. Rix recently witnessed a ship crashing on the rocks to the north (see "Cloister Quests" later in this chapter).
Zark is rude and fond of colorful insults. His favorites are "Eat my sword, bugbear breath!" and "Your father was a gas spore!" He is indifferent toward visitors.
Tarak
Tarak is a human man in late middle age. He has pale skin tanned darker with many freckles, auburn hair and a beard that is mostly gray, and gray-blue eyes. Faded tattoos in an abstract design peck up the side of his neck from beneath his dirt-stained robes.
An avid botanist, Tarak tends the cloister's garden plots, growing flowers, herbs, and vegetables. He is soft spoken and helpful, eager to share his knowledge of herbalism. But his kindly demeanor belies his past as a ruthless poisoner for a thieves’ guild. After his work led to the death of his lover, he fled the guild and plans to spend the rest of his life atoning for his past evils.
Tarak is initially friendly toward visitors, but if a character pries into his past, his attitude shifts – first to indifferent, then to hostile if the character continues to push. When he's hostile, his demeanor becomes cold and clipped, and he avoids the characters if he can.
A gold hangman's noose is worked into the design of Tarak's visible tattoos. A character who studies the tattoos and succeeds on a DC 15 Intelligence (History) check recognizes the mark as a symbol associated with the Gilded Gallows, a thieves’ guild that operates in a country far to the southeast called Elturgard. A character with the criminal background automatically succeeds on this check. Tarak does not willingly discuss the details of his past with anyone but trusted friends.
Tarak frequently visits the sea caves on the south side of the island to acquire heart cap mushrooms from the myconids that live there. He uses the mushrooms to make potions of healing. But the myconids have installed a fearsome guardian at their caves – a fungus-covered octopus monster – that has turned him away on his latest visits, and he is worried (see "Cloister Quests").
Varnoth
Varnoth is a human woman whose frame, once tightly muscled, has thinned with age. Her [[ muscular human whose ]] black hair is cropped close to her scalp, and her light brown skin bears many scars – one of which runs across her left eye, which is milky and blind. An elegant prosthetic made from wood and metal replaces her right leg below the knee.
Varnoth was a feared general at the head of a mercenary company called the Azure Wolves. Age and battle have taken a toll on her, and she is spending her twilight years in reflective contemplation at Dragon's Rest. Her demeanor is gruff, but she is observant and empathetic. Above all, Varnoth believes in second chances and redemption.
Varnoth has a set of mason's tools that she uses to maintain the temple and other areas of the cloister.
CHAPTER 1 | DRAGON'S REST
While working in the temple recently, she witnessed a ship chaotic course and crash into the rocks to the north (see "Cloister Quests").
Varnoth is indifferent to visitors, but n character can shift her attitude to friendly by engaging her in conversation on her favorite topics: history, ethics, and the impact of individual actions on the world.
A character who learns Varnoth's name and succeeds on a DC 15 Intelligence (History) check recalls hearing of General Varnoth Wender and the Azure Wolves, which was a mighty force in the east about a decade ago. A character with the soldier background succeeds on this check automatically.
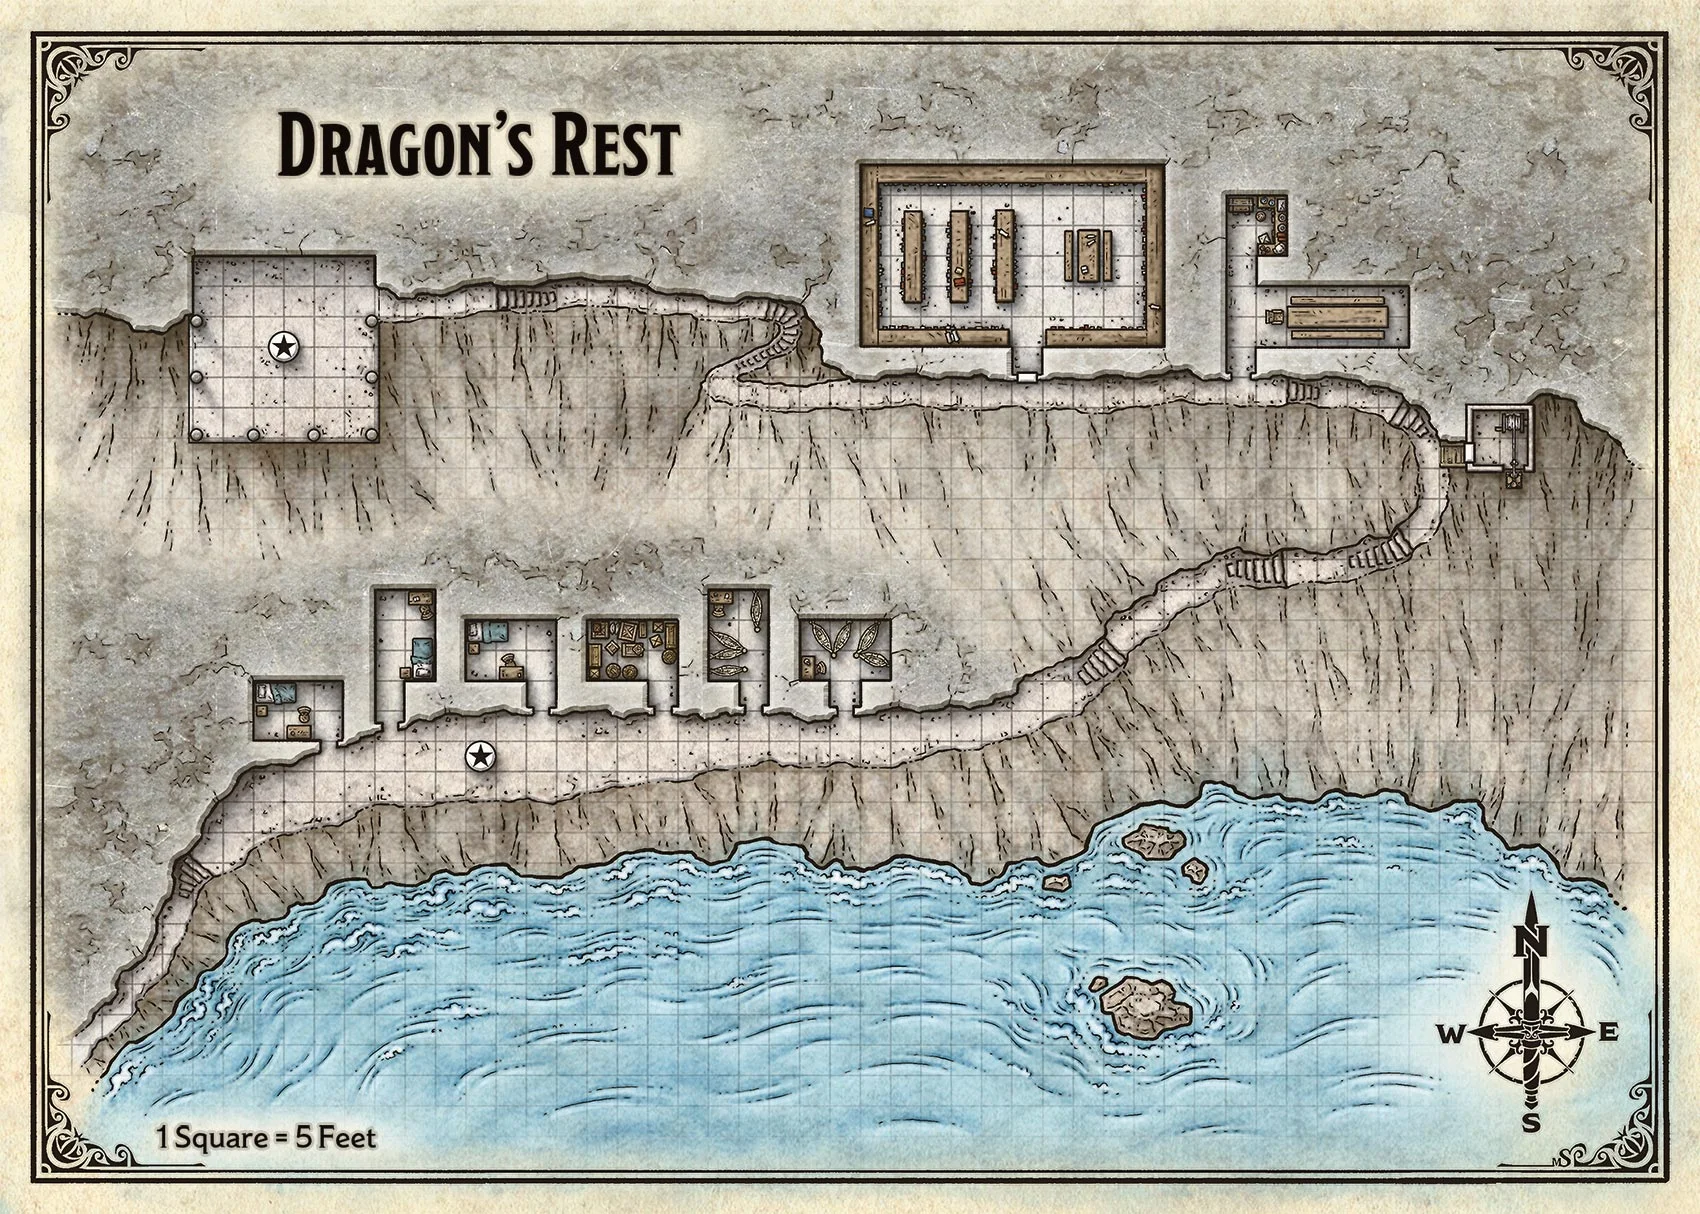
Dragon's Rest Locations
The following locations are keyed to map 2, which shows the layout of Dragon's Rest.
A1: Path and Monastic Cells
A long path leads from the rocky shore up the side of the cliff, with occasional stairs to ease the ascent. Here and there along the lower part of the path, well-tended garden plots hold flowers, herbs, and vegetables.
About thirty feet above the bay, the path widens into a long plaza. Halfway along the plaza, a stone statue of a dragon gazes serenely down the path. Six open doorways are cut into the cliff side.
Statue. The star-in-a-circle symbol on the map represents the dragon statue. A character who examines the statue and succeeds on a DC 10 Intelligence (Arcana) check recognizes that it depicts a bronze dragon – a member of the metallic family. If characters ask Runara about the statue, she tells them it depicts Astalagan, who died on these cliffs centuries ago. She doesn't tell them that Astalagan was her father.
Cells. The doorways lead into simple monastic cells occupied by the cloister residents. Each cell is furnished with a bed, a nightstand, a small desk, and a chair.
The westernmost cell is vacant, and it is available to the characters if they don't mind sharing the space. Next to it is Tarak's cell, then Varnoth's. The fourth cell is Myla's, cluttered with junk and tools. The fifth and sixth cells are strung with hammocks, offering space for the other eight kobolds lo sleep.
A2: Winch House
A small, free-standing building halfway up the path has a peaked roof and a weathered wooden door. A sturdy wooden pallet wrapped with rope hangs beneath the building on an iron chain, lying flat against the cliff face.
Inside the building is to winch that allows the pallet to be lowered down to the water, 50 feet below. When boats deliver supplies to the cloister, the residents use this pallet to haul goods both up and down.
A lever locks the winch In plane. If a character pulls the lever, the pallet falls down to the water and floats there. As an Action, a character can operate the which to pull the pallet back up 10 feet.
A3: Kitchen
A doorway in the rock opens into a dining room with a long table. Two benches run the length of the table, and a single chair sits at the table's head. A short hallway connects to a small, tidy kitchen.
The cloister residents share three daily meals here. They take turns cooking and cleaning up after meals. Nobody says it out loud, but the days when Tarak cooks are everyone's favorite.
A4: Library
Of all the doorways cut into the cliff face, only one has an actual door. This entry's door is made of sturdy oak with iron bands, and it swings open easily to reveal a spacious library. Bookshelves line every wall, with three free-standing shelves in the west half the room. In the east half is a table with two benches, writing implements, book stands, and glass-shielded lamps.
The cloister library holds books and scrolls covering a variety of topics, but focused on theology and history. Runara spends nearly half her time in here, studying, copying, and annotating the library's collection. Tarak and Varnoth also come here to read and discuss various works. Many of the kobolds visit as well, but mostly for the quiet; only Myla could be described as studious.
CHAPTER 1 | DRAGON'S REST

Link to Player Version of Map 2
A5: Temple of Bahamut
The highest point of the cloister is crowned by an open-air temple that overhangs the cliff, supported by arched stone struts anchored to the cliff face. The north wall of the temple is carved directly into the rock, while the rest is open to the sea air. Heavy pillars mark the three open sides, supporting the wooden roof. In the center of the temple stands a stone statue of a kind-looking old man with canaries perched on his hands, shoulders, and head. A feeling of serenity suffuses the place.
The temple is very simple. with the statue (represented by the star-in-a-circle symbol on the map) as its only furnishing. The statue depicts Bahamut, the Platinum Dragon, in mortal disguise, surrounded by seven canaries that represent gold dragons who accompany him on his travels. A character who examines the statue and succeeds on a DC 10 Intelligence (Religion) check recognizes Bahamut, and any resident of Dragon's Rest identifies the god if asked.
Depressions in the statue's pedestal at the four cardinal directions hold offerings of incense made to Bahamut. Runara spends about half her time here, tending and maintaining the temple, offering prayers and incense, or in quiet contemplation. Other residents of the cloister help her, most often Varnoth and the kobold Rix.
The feeling of serenity that pervades the temple is the result of protective magic. A non-evil creature who makes a saving throw within the temple can roll a d4 and add the number rolled to the saving throw. If a character casts detect magic in the temple, the spell reveals a faint aura around the statue. Runara is the only inhabitant of Dragon's Rest who knows that this is a lingering effect of the death of a dragon on this site – her father, Astalagan.
About Bahamut. Known as the Platinum Dragon, Bahamut is the patron and progenitor of metallic dragons. Adventurers and dragons alike pray to Bahamut to uphold honor and justice, or when they need courage to face a great threat. He seldom interferes in the affairs of mortal creatures, though he makes exceptions to help thwart the machinations of Tiamat the Dragon Queen and the evil dragons that serve her.
CHAPTER 1 | DRAGON'S REST
Cloister Quests
As the characters explore Dragon's Rest, the residents talk with them about the problems the cloister is facing. These conversations are opportunities for you to introduce the players to the adventures that await them in the sea caves, the shipwreck, and the ancient observatory.
This adventure is designed to be flexible and give the players the sense that they're in charge of their destiny on Stormwreck Isle. Ideally, the characters will spend time at Dragon's Rest and then explore both Seagrow Caves (described in chapter 2) and the wreck of Compass Rose (chapter 3). They can choose where to go first. After they've explored both of those sites, they should be ready to face Sparkrender in the Clifftop Observatory (chapter 4).
Each character sheet includes a personal goal for that character. Some of those goals are concrete – the wizard, for example, is eager to learn the secrets of Clifftop Observatory. Others are more general and might be fulfilled gradually over the course of the adventure – both the paladin and the fighter gaining a better understanding of their role in the world, for example. Use those goals (described under Individual Quests" below) to help the players bring their characters to life as they interact with Runara and the other residents of Dragon's Rest.
Zombie Resurgence
If the adventurers did not fight the zombies when they first arrived on the island, the zombies cause trouble later. After the characters have spent some time at the cloister, they hear cries for help. Read the following text:
Two residents of Dragon’s Rest are running for their lives up the lower path, their fishing equipment discarded behind them. Blood and dirt stain their robes. Three figures shamble after them – bloated corpses dressed as sailors, moaning and gurgling.
The characters have another opportunity to fight the three zombies, this time with the lives of two new acquaintances – Blepp the kobold and Tarak the human gardener – hanging in the the balance. See “Drowned Sailors” for help getting the encounter started.
Blepp has 2 hit points left after a zombie hit him, and he is convinced that his good luck and his “magical” dagger saved him from certain death. Tarak is unarmed, and the zombies overpower both him and Blepp if the characters don’t help.
If the characters talk to Runara about the zombies. she tells them she suspects a wrecked ship off the rocks to the north is the source of these monsters, and she asks the characters to investigate the site (see "Shipwreck" below).
More Zombies
if the characters defeated the zombies when they first arrived on the island, you can use this encounter at any point during the adventure to add a little extra combat spice to the characters' lives. If the characters have already reached 2nd level, you can use from four to six zombies to give them a good challenge.
Sea Caves
Tarak is eager to reestablish contact with the myconids of the sea caves. He asks the characters to visit the caves, find out what's wrong with the myconids, and bring him back sonic heart cap mushrooms. He warns them about the fungal octopus the myconids have created as a guardian and tells them they'll probably have to fight the creature to gain access to the caves. He also gives them a foul-smelling sack of food scraps they can give the myconids as a gesture of friendship. Finally, he gives them two potions of healing (described in appendix A).
Shipwrek
Several ships have recently crashed on the rocks north of Dragon's Rest and sunk with no survivors. and a few days ago both Varnoth and the kobold Rix witnessed the most recent wreck. They saw the ship abruptly veer off course and crash into the rocks, and they suggest the characters might help the island by discovering what caused the crash. If the characters ask Runara about it, she suggests that the answer is likely to be found on an older wreck – the wreck of Compass Rose.
Individual Quests
As described on the character sheets, the characters have their own reasons for visiting Dragon’s Rest.
The Cleric
The cleric was led here by a recurring dream involving the shadow of death. If the character talks to Runara about the dream or their quest, Runara listens closely, then pauses to think. “Well,” she says, “I am no expert on interpreting dreams, but perhaps the zombies you fought are the ‘hunger of death’ you spoke of.” She points the character toward the wreck of Compass Rose (see “shipwreck” above) to investigate further.
CHAPTER 1 | DRAGON'S REST
The Fighter
The fighter has come to Dragon's Rent in the hope that Runara can help the distracter understand the sense of destiny that weighs on their shoulders. If the character talks to Runara about this on first arriving at the cloister, Runara invites the character to consider how their reaction to the zombies on the beach might reflect their destiny – or not. If the character talks to Runara after having completed one or more of the adventure's quests, she encourages the character to consider whether their heroic actions might be the first manifestations of that destiny taking shape. At the end of the adventure. Runara encourages the character to continue on their path: "If your destiny is not clear to you yet, I'm confident it soon will be."
The Paladin
Disillusioned with the corruption of NeverwInter, the paladin comes to Dragon's Rest seeking rest and new resolve. Runara welcomes the character and encourages them to talk to Tarak and Varnoth, who both know about escaping lives of corruption and violence. She also encourages the paladin to spend time in the temple of Bahamut. At the end of the adventure, she asks the paladin if they have learned anything about how to live in a world plagued with such corruption. If the character has no answer, she suggests, "Perhaps your adventures here have shown you a way to combat evil on your own terms. Perhaps other such adventures await you."
The Rogue
The rogue comes to Dragon's Rest in search of a lost fortune supposedly secreted away on the island by a member of the Gilded Gallows. The thieves' guild member in question is Tarak, who did in fact betray the guild, though the story has been twisted in the retelling. Tarak's last assignment for the guild was to assassinate a traitor, who was his lover.
Runara Saves the Day!
Runara is a powerful dragon, but she is dedicated to the cause of peace. She's not interested in fighting the battles that the characters might get themselves into, but she keeps an eye on them, and she can rescue them if things go badly for them on the island.
If any encounter on the island ends with all the characters unconscious, you can have the characters awaken in the temple (area A5), with some of the kobolds tending to their wounds. Runara prefers not to explain how she rescued the characters.
If this happens more than once, the characters might need extra assistance. If you haven't already, consider asking one or more players to play an additional character as a sidekick. You can explain that these additional characters have just arrived at Dragon's Rest and are eager to help.
The two tried to flee Elturgard together, but his lover was killed by another assassin. Tarak escaped, but no treasure was involved. If the rogue asks him about it, he explains he has left the life of crime and suggests perhaps it's time for the rogue to do the same.
The Wizard
The wizard carries a letter from a colleague about lost knowledge held in the Clifftop Observatory (see chapter 4). If asked about the observatory, Runara says, "Many have sought the knowledge contained In that place. I can direct you there, but first you need to show me you are worthy." She promises to direct the wizard to the observatory after the characters help deal with the other problems on the island.
Lost Wyrmling
When the characters have proven themselves trustworthy and competent by dealing with the zombies. the myconids. and the shipwreck, Runara decides It's time to confide in them. She summons them to the temple (area AS). Read the following text when the characters arrive:
Elder Runara smiles as you approach. "I have something to show you," she says. There's a flash like a silent stroke of lightning, and the human woman is gone. In her place is an enormous dragon with bronze-colored scales. "Now you see me as I truly am," she says, tilting her head with an expression that might be a smile on her scaled face.
"As you have discovered, this island has many old wounds. And I'm afraid the cycle of violence is starting again. I have one more favor to ask you."
Runara outlines the history summarized in the "Adventure Background" section and explains that each site the characters visited is linked to the death of a dragon. Then she tells them that a bronze wyrmling named Aidron came to the island a few months ago and studied with her at Dragon's Rest. Five days before the characters arrival, he argued with her, angrily rejected her teaching of peace, and stormed away from the cloister. She fears he went to the ancient observatory on the southeast side of the island, which is another dragon's final resting place. She suspects some evil has arisen there, but says she dares not go there herself, lest her presence reopen old wounds. She gives them a moonstone key – a 3-inch-long, 1-inch-wide hexagonal prism made from moonstone, with a dragon's head engraved on one end – and explains that they'll need it to access the observatory.
CHAPTER 1 | DRAGON'S REST
Exploring the Island
This adventure presents Dragon's Rest and three adventure locations in detail, but Stormwreck Isle holds the possibility of excitement nod danger beyond those sites. While the characters travel between locations on the island, or if they set out to explore the island, they might stumble across fantastical creatures and locations that provide an extra challenge on their journey.
Additional Encounters
Place these encounters wherever you want to on the island, or use them as inspiration as you begin to craft your own adventures.
Hot Springs Havoc
This encounter poses a simple challenge for characters of 2nd level or higher, or a harder challenge for 1st-level characters. It's particularly appropriate if the characters are rowing around the island or making their way along the coast at sea level.
Billowing clouds of steam emerge from the rocks ahead, and the air grows thicker with moisture. As you round a bend, you see a cove where a hot spring burbles up from the rocks and spills into a pool before draining Into the ocean. The turquoise water is luminescent, and the gray basalt edges of the spring are lined with vibrantly colored mushrooms, which occasionally burst in a shower of rainbow spores.
Not immediately visible to the characters are the guardians of the spring: three fume drakes. These mischievous creatures are initially indifferent to the characters and ignore their arrival, but if anyone attempts to gather mushrooms or enter the water of the hot spring, the fume drakes become hostile, emerging from the water to attack the group. A character who examines the water and succeeds on a DC 10 Wisdom (Perception) check spots the shimmering outlines of the fume drakes in the water.
Spring Waters. The spring is the site of a brass dragon's death. and life-giving magic persists at the site. A character who spends 10 minutes bathing in the waters of the spring can roll one of their Hit Dice (noted on each character sheet) and regain hit points equal to the roll plus their Constitution modifier. A character can benefit from bathing in the hot spring at most once per day.
Treasure. A character who examines the mushrooms lining the spring and succeeds on a DC 15 Intelligence (Nature) check identifies these mushrooms as wind spores – a rare fungus with a unique magical property.
When a creature squeezes a wind spore mushroom’s cap, it releases a small cloud of spores. For 1 hour, the creature doesn't need to breathe. as the spores provide it with oxygen. A wind spore is worth 30 gp, and at any given time 2d4 wind spores are ready to be harvested.
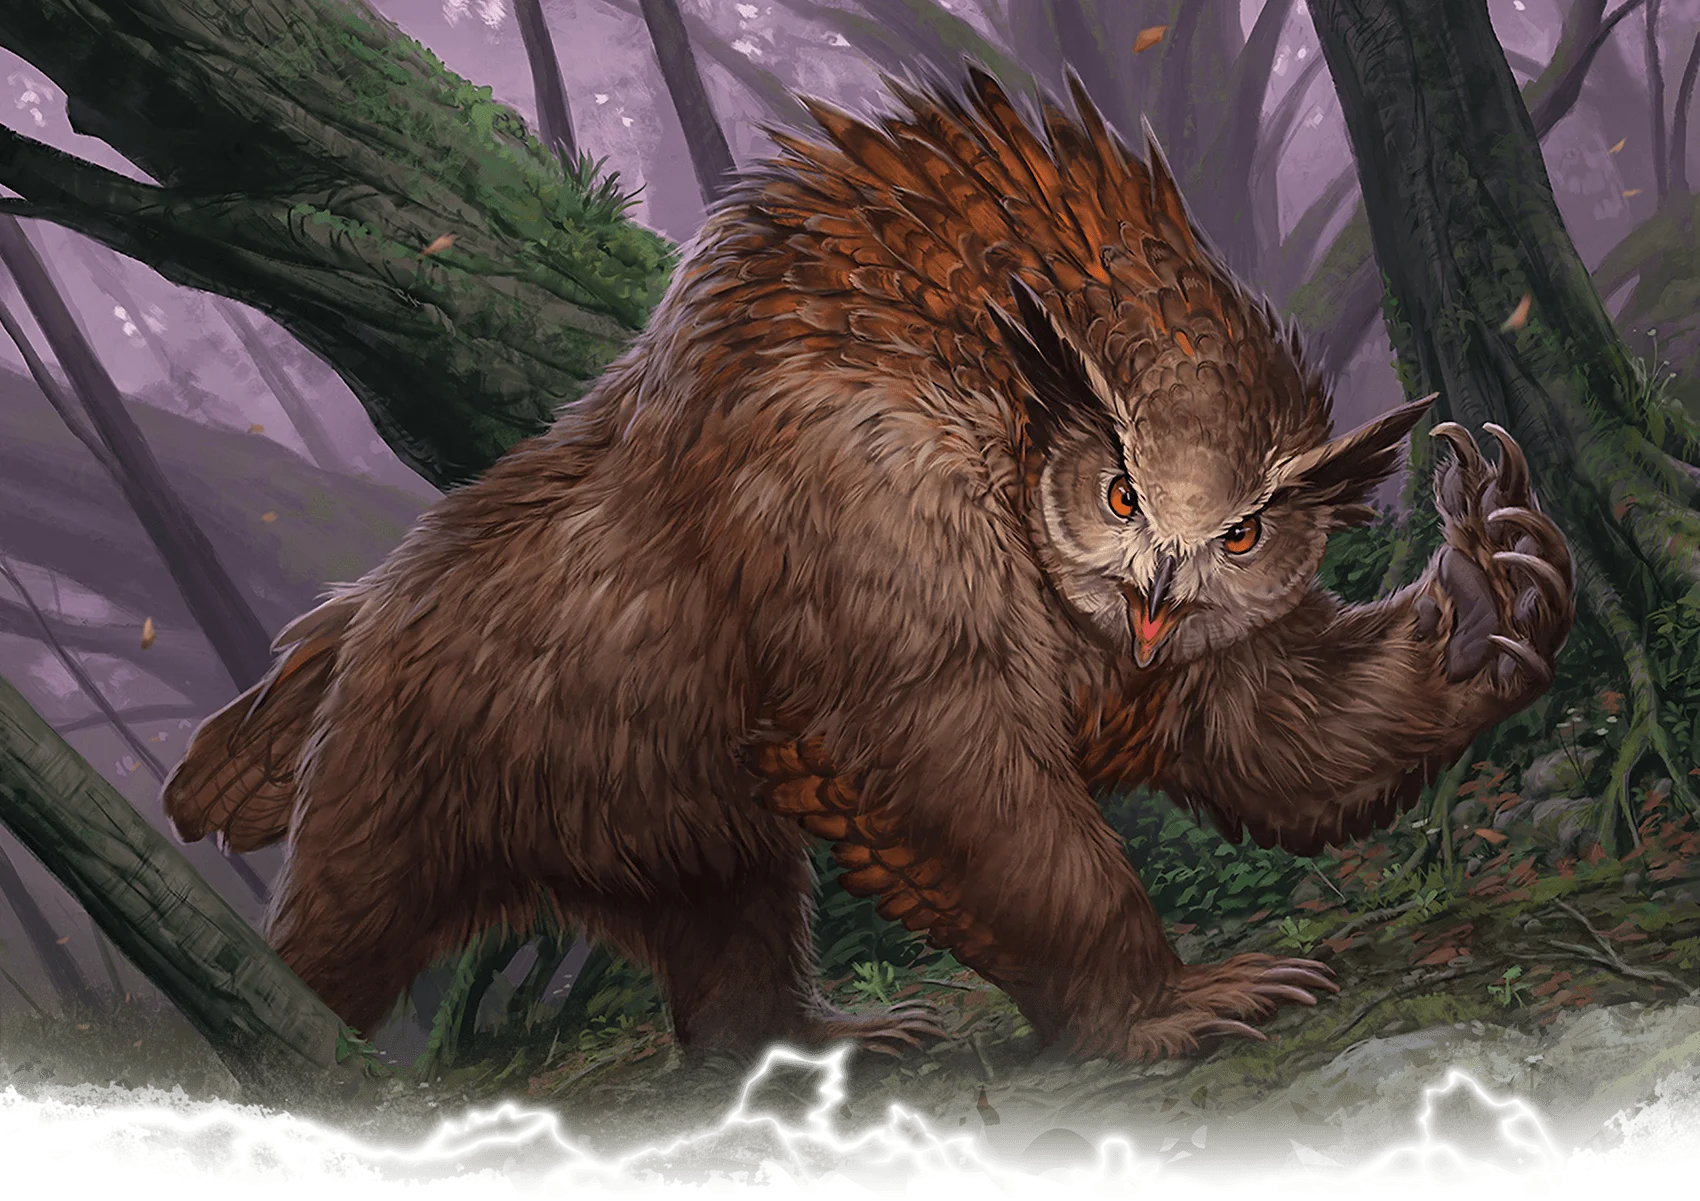
There, There, Owlbear
This encounter poses a medium challenge for 3rd. level characters and a difficult challenge for 2nd-level characters. Use it if your group enjoys combat or the players need a chance to practice using their characters' new Abilities after gaining a level. It's particularly appropriate if the characters are traveling across the island rather than following the coast.
A discordant sound – half a low growl, hairs piercing screech – rips through the air. Abruptly. a hulking creature comes into view. A mix of purple feathers and deep brown fur covers its bearlike body, and its large eyes stare hungrily at you from its owlish head.
This owlbcar is hostile toward the characters. It views them as intruders in its territory, though its goal is to drive them away rather than kill them. Originally a part of a performing troupe, the owlbear was stranded here after the ship carrying the troupe crashed on the northern rocks.
Any character within 5 feet of the owlbear notices a small wooden whistle hanging around its neck. This whistle was (and still can be) used to train and command the owlbear. A character within 5 feet of the owlbear can use their action to attempt to grab the whistle. If the character succeeds on a DC 12 Strength check, the whistle comes free. With the whistle in hand, a character can take an action to blow into it and make a DC 10 Wisdom (Animal Handling) check. On a success, the owlbear calms and immediately becomes friendly toward the whistle holder and indifferent toward the other characters. However, it won't leave the area it now considers its territory, and any attempt to force it to leave makes it hostile again.
Kobold Renegades
This encounter is a difficult challenge for 1st-level characters and can be scaled up for 2nd- or 3rd-level characters as noted below. It's appropriate whenever characters are traveling around the island by land.
A group of kobolds tries to ambush the characters. They're hiding in the rocks and light foliage, hoping to get the jump on the adventurers. Make a Dexterity (Stealth) check for the kobolds, rolling once for all of them and using the Dexterity modifier (+2) of the wingless kobolds.
CHAPTER 1 | DRAGON'S REST
Compare the result to the characters' passive Wisdom (Perception) scores. Any character whose score is lower than the kobolds' check result is surprised and loses their turn during the first round of combat (see "Surprise" in the rulebook). Read this text when the kobolds attack:
A yipping sound erupts around you as angry kobolds emerge from their hiding places and attack!
Four kobolds and one winged kobold (all lawful evil) participate in this ambush. These cruel, vicious kobolds reject both the peaceful teaching of Runara and the tyrannical rule of Sparkrender, and they prey on travelers who stray away from Dragon's Rest. They haven't had much success and are desperate, so they're hostile and fight to the death.
Their desperation means that they can easily be persuaded to stop fighting with an offer of money or food. Otherwise, they're not interested in conversation or negotiation.
2nd-Level Characters. If the characters are 2nd level, use six kobolds and two winged kobolds.
3rd-Level Characters. If the characters are 3rd level, use eight kobolds and three winged kobolds.
What Lies Beneath
As described in the "Adventure Background" section in the introduction, Stormwreck Isle was formed from magic-fueled volcanic activity in the tomb of a monstrous red dragon named Sharruth. Some legends and rumors suggest Sharruth is not actually dead, merely imprisoned beneath the island, and the activity in Seagrow Caves suggests that all is not well beneath Stormwreck Isle.
You can devise your own adventures around characters investigating Sharruth's tomb. Characters might scour the island until they find hidden vents they can use to access winding tunnels leading deep into the earth. More fume drakes and fire snakes might lurk below. Perhaps there's even a group of kobolds who serve mighty Sharruth.
Such an adventure is yours to devise, and youcan put your unique spin on what the characters do and discover there. Of course, if you're not ready to craft an expedition into the caverns beneath the island, then the characters simply don't discover those subterranean passages no matter how much they search.
CHAPTER 1 | DRAGON'S REST
Chapter 2 - Seagrow Caves
This chapter assumes the characteers come here before going to the wreck of Compass Rose, and they are still 1st level. It also includes simple instructions to scale up the danger in combat encounters if the characters complete chapter 3. "Cursed Shipwreck," before coming here, and are now 2nd level.
Caves Overview
The sea caves on the southwest side of Stormwreck Isle are inhabited by an unusual colony of myconids – fungus people who normally live deep underground. Though they can't abide sunlight, these myconids used to welcome visitors now and then. In particular, they traded with Tarak from Dragon's Rest, giving him rare fungi that grow in their caves in exchange for food scraps and other waste from the cloister, which nourished the fungi in the caves. Recently, though, the myconids have rejected Tarak's visits and placed a monstrous guardian at the entrance to their caves that keeps all visitors away.
The reason for this sudden shift in the myconids' behavior is that a blight has spread through the caves and is poisoning the myconids, twisting their
gardens, and even laying low their leader, Sinensa. The source of the blight is the tomb of the red dragon Sharruth deep beneath the island. Noxious fumes from the dragon's tomb normally filter up through the rock and vent to the surface through a cavern at the back of Seagrow Caves that the myconids avoid, but the vent has become blocked, and the fumes have spilled into the myconids' caves.
Besides this insidious poison, visitors to Seagrow Caves must face one additional threat: the stirges that nest in the caves. These blood-sucking monsters aren't much of a threat individually and don't bother the bloodless myconids, but they can be deadly in large numbers.
Seagrow Caves Features
The caves have the following features:
Ceilings. Unless noted otherwise, the ceilings in the caverns are 20 feet high, and the tunnels connect-ing the caverns are 15 feet high.
Light. The interior caves are illuminated by bioluminescent fungi, which provide dim light throughout the area. See "Vision" in the rulebook.
CHAPTER 2 | SEAGROW CAVES
Walls. The cave walls are formed from hexagonal columns of dark gray basalt-volcanic rock originating from Sharruth's undersea tomb. The walls provide hand- and footholds, so climbing the walls doesn't require an ability check.
Fumes. Toxic volcanic fumes from deep below the island are slowly poisoning the fungi in the caves. A faint smell of sulfur pervades the place, growing stronger the closer one gets to area B6. If the characters take a long rest inside the caves before opening the vent in B6, each character must succeed on a DC 13 Constitution saving throw or become poisoned (see "Conditions" in the rulebook). The lesser restoration spell ends this effect, as does finishing a long rest in fresh air.
Running this chapter
Once the characters decide to visit Seagrow Caves. they have two options for reaching the site:
By Boat. Dragon's Rest has a rowboat the characters can take around the western end of the island. (This is Tarak's preferred method.) The trip to Seagrow Caves is 5 miles, which takes about 3 hours and 20 minutes to row.
Along the Coast. Walking around the coast of the island is a little easier than rowing, even though it's farther because the characters have to walk around the bays instead of rowing across them. The 7-mile trip takes only 2 hours and 20 minutes at a normal walking pace. The characters can choose whether they want to walk on the cliffs high above the sea or pick their way among the tide pools at the base of the cliffs. The lower route is available only at low tide (see the Tides table).
APPROACHING AT SEA LEVEL
If the characters arrive at Seagrow Caves at sea level, read the following text:
A cliff of dark gray stone towers two hundred feet above the crashing waves, which rush in and out of a yawning cave mouth. A swirling slick of colors dances in the water's surface, emanating from the cave.
Approaching from above
If the party approaches from above, read this text:
An opening gapes in the cliff face two hundred feet below you, like a mouth drinking in the crashing waves. Two natural stairways formed of stone columns offer ways down the cliffs.
Entering the Caves
At high tide, the 40-foot-high tunnel (area B1) is flooded all the way to area B2. The natural stairways, which are not shown on the map of Seagrow Caves, descend the cliffs into the sea. The characters can either wait for low tide or row or swim into the tunnel. At low tide, a 5-foot-wide pathway is exposed along the base of the cliffs and the edge of the tunnel.
The tides shift every 6 hours, as summarized on the Tides table.
Tides
| Time | Tide |
|---|---|
| Midnight to sunrise | Low |
| Sunrise to noon | High |
| Noon to Sunset | Low |
| Sunset to Midnight | High |
Interacting with the Myconids
The myconids' initial attitude toward outsiders is hostile (see "Social Interaction" in the rulebook). They aren't malicious, though, and they don't resort to violence immediately. Adults use their Rapport Spores to telepathically warn visitors to leave. (See "Rapport Spores" below for details about this form of communication.) Sprouts flee toward the nearest adults to warn them of intruders. If the characters attack, the myconids defend themselves.
To convince a hostile myconid to converse or to allow the characters to do anything other than leave the caves, a character must succeed on a DC 20 Charisma check. Depending on the character's approach, the Deception, Intimidation, or Persuasion skill can apply to the check. Mentioning Tarak's name or presenting the offering he sent the myconids grants advantage on this check.
An indifferent myconid is willing to explain what is going on in Seagrow Caves. The sprouts know only that their leader, Sinensa, has fallen ill – and that a nasty smell pervades their caves. Adult myconids know that the "crystal cave" (area B6) is the source of the foul odor and that Sinensa fell ill after going into that cave to investigate the issue. The myconids normally avoid that cave because sunlight filters into it by way of the vent at the western end of the cave, and even diffuse sunlight is unpleasant to these cave-dwelling creatures.
Rapport Spores
A myconid’s Rapport Spores ability allows all intelligent creatures in the area to communicate telepathically with each other. The characters and the myconids are effectively speaking thoughts at each other. This effect doesn’t allow any creature to probe invasively into another creature's mind.
CHAPTER 2 | SEAGROW CAVES
Link to Player Version of Map 3
But it transcends language barriers, and you can play around with the kind of communication that the spores allow. Myconids' facial expressions might be difficult to read, but their telepathic communication might carry a direct expression of the myconids' emotional state. For example, when the myconids talk about their ailing leader, the characters might feel a deep sadness and a sense of anxiety much more clearly and powerfully than mere words and facial expressions can communicate.
The effect of Rapport Spores lasts for 1 hour, so characters might be telepathically linked to each other whenever they're within 30 feet of each other even after they leave the cave. Encourage the players to think about how this might affect their characters. Does it make them feel closer to their friends? Does it ease any suspicions they might have had about each other?
Distress Spores
When myconids take damage, they release spores that alert all other myconids within 240 feet of them. All myconids in the cave are in range of each other's Distress Spores. Myconids in areas B2 and B3 move to area B4 if they detect Distress Spores.
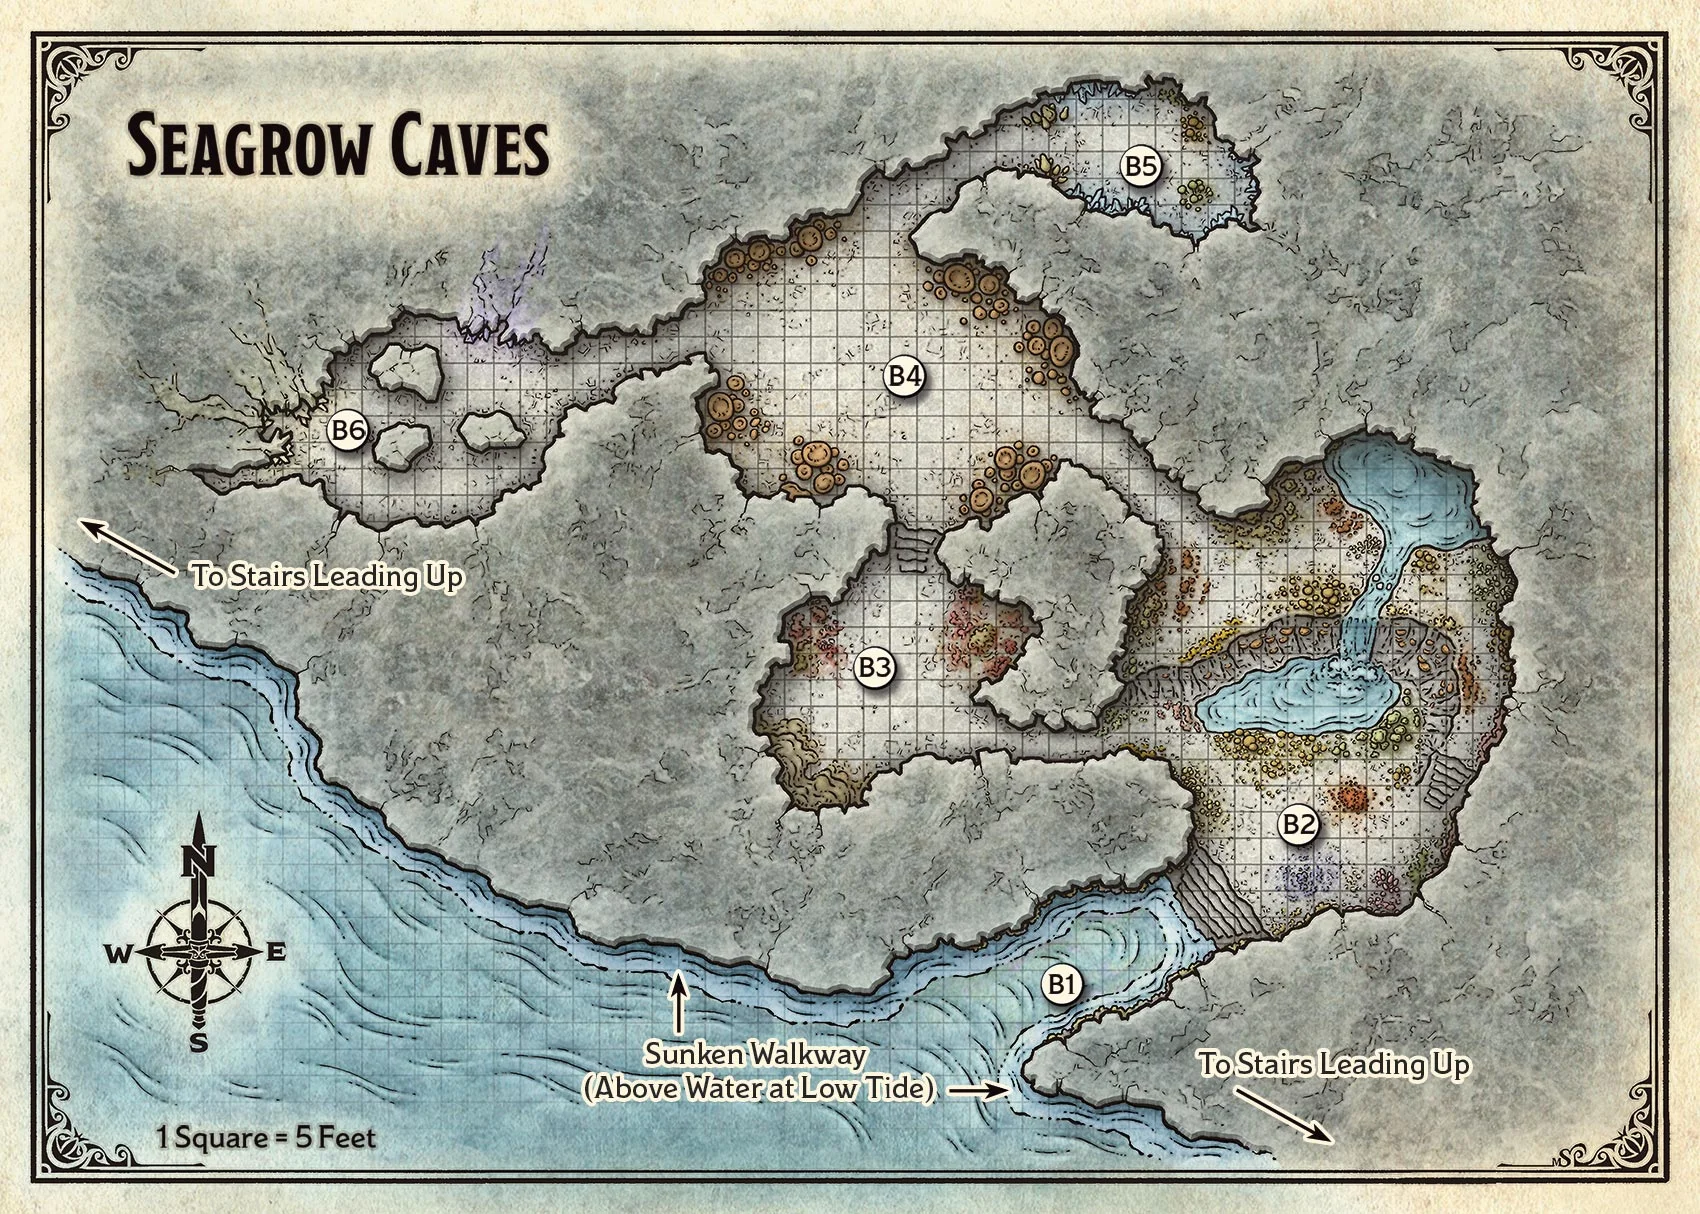
Seagrow Caves Locations
The following locations are keyed to map 3, which shows the layout of the Seagrow Caves.
B1: Entrance Tunnel
Multicolored fungus covers the walls of this tunnel, its bioluminescent glow filling the cavern with dim light. The surface of the water swirls with colorful, faintly glowing spores – perhaps reacting to the movement of something under the surface.
At high tide, the tunnel is flooded, so visitors must approach by boat or swim. At low tide, walkways formed by the tops of stone columns line the sides of the tunnel, leading to a flight of natural steps up to area B2. A spore servant octopus lurks in the water and attacks any creatures (other than myconids) who enter the tunnel, regardless of the state of the tides. Before the myconid leader lapsed into unconsciousness, it created this guardian to keep outsiders away.
As described on the previous page, the water level here varies by up to 10 feet with the tides. At high tide, the water is about 8 feet deep along the edges of the tunnel and 25 feet deep in the middle. At low
CHAPTER 2 | SEAGROW CAVES
tide, the walkways along the edges are exposed, and the water is 15 feet deep in the middle.
2nd-Level Characters. If the characters are 2nd level, two striges clinging to the tunnel ceiling are disturbed if fighting breaks out in this area and join the battle. The stirges ignore the spore servant.
B2: Fungus Farm
This filty-foot-high cavern is a forest of multicolored fungi, ranging from tiny filaments to tree-sized mushrooms. A natural staircase of stone columns along the cast wall leads up ten feet to a higher cave area in the north. Water burbles down from that upper cave and collects in a large pool. Two small mushroom-like people are working amid the mushrooms near the pond. A sickening smell, like sulfur, hangs in the air.
The waterfall is fed from a pool in the upper cave, which in turn is supplied by runoff trickling clown from the surface. Both pools are 5 feet deep at most.
The two mushroom people are myconid sprouts named Molen and Kraz. They are spreading fertilizer from area B3, while two myconid adults named Hipsiz and Rugoso tend the mushrooms near the upper pool, out of sight from below. All four myconids are oblivious to the true threat in the cave – three violet fungi that grow among the harmless mushrooms here.
If the characters move into the cave toward the myconids, one violet fungus attacks them, extending long tendrils that cause immediate rot when they touch living flesh. Read this text:
As you advance into the cave, a sickly looking mushroom suddenly stirs to life. It extends long purple tendrils toward you and moves slowly across the cave floor on root-like tendrils.
Running the Combat. Because the violet fungi move so slowly, it's easy for the characters to stay out of their reach and kill the fungus monsters with ranged attacks. The interesting part of this en counter is identifying the danger. One violet fungus moves and attacks to start the encounter, but the other two remain motionless until characters move close to them.
You don't need to keep track of exactly where everyone is standing in the room. Instead, rely on your sense of what's fun and exciting.
When a character moves away from an active violet fungus, have another fungus stir and attack that character on the fungus’s next turn. If a character scans the fungus farm looking for more violet fungi, cast as much doubt as you can: many of the fungi look sickly and purple, but pose no danger.
Myconids. The myconid sprouts avoid the characters and the violet fungi. If the adults become aware of danger through the noise of combat (or the sprouts' Distress Spores), they move as quickly as they can to protect the sprouts.
If the characters defeat the violet fungi, the myconids’ attitude improves to indifferent, and they are willing to speak to the characters (using Rapport Spores). The adults agree to accompany the characters and vouch for them with the rest of the myconid colony, improving the other myconids attitude to indifferent as well.
Blighted Fungi. A character who examines any of the fungi notices that many of the mushrooms are sickly, shriveled, and blotched with black patches of decay. The blight has no obvious source.
Treasure. The fungus farm contains heart cap mushrooms ready for harvest. A character who spends 15 minutes searching this chamber for useful fungi and succeeds on a DC 12 Intelligence (Nature) or Wisdom (Survival) check finds 1d6 of these reddish mushrooms, which bear an unsettling resemblance to human hearts. Tarak can make each heart cap mushroom into a potion of healing.
2nd-Level Characters. If the characters are 2nd level, add two violet fungi to this encounter.
B3: Larder
This cave reeks of rot, and the floor is covered with decaying vegetation. Three small mushroom-folk are working amid the filth. In the southwest corner of the cave, a bulbous object the size of a cart clings to the wall and ceiling, glistening like a glob of jelly.
Three myconid sprouts named Bispo, Valup, and Popple work here gathering fertilizer for use in area B2. The bulbous object is a stirge nest, which characters can identify with a successful DC 15 Intelligence (Nature) check. If a character moves more than 5 feet into the chamber, six stirges emerge from the nest and attack. Meanwhile, the sprout flee toward area B4 at the first sign of intruders, relying on the distraction of the stirges to escape.
2nd-Level Characters. If the characters are 2nd-level, add two stirges to this encounter.
CHAPTER 2 | SEAGROW CAVES
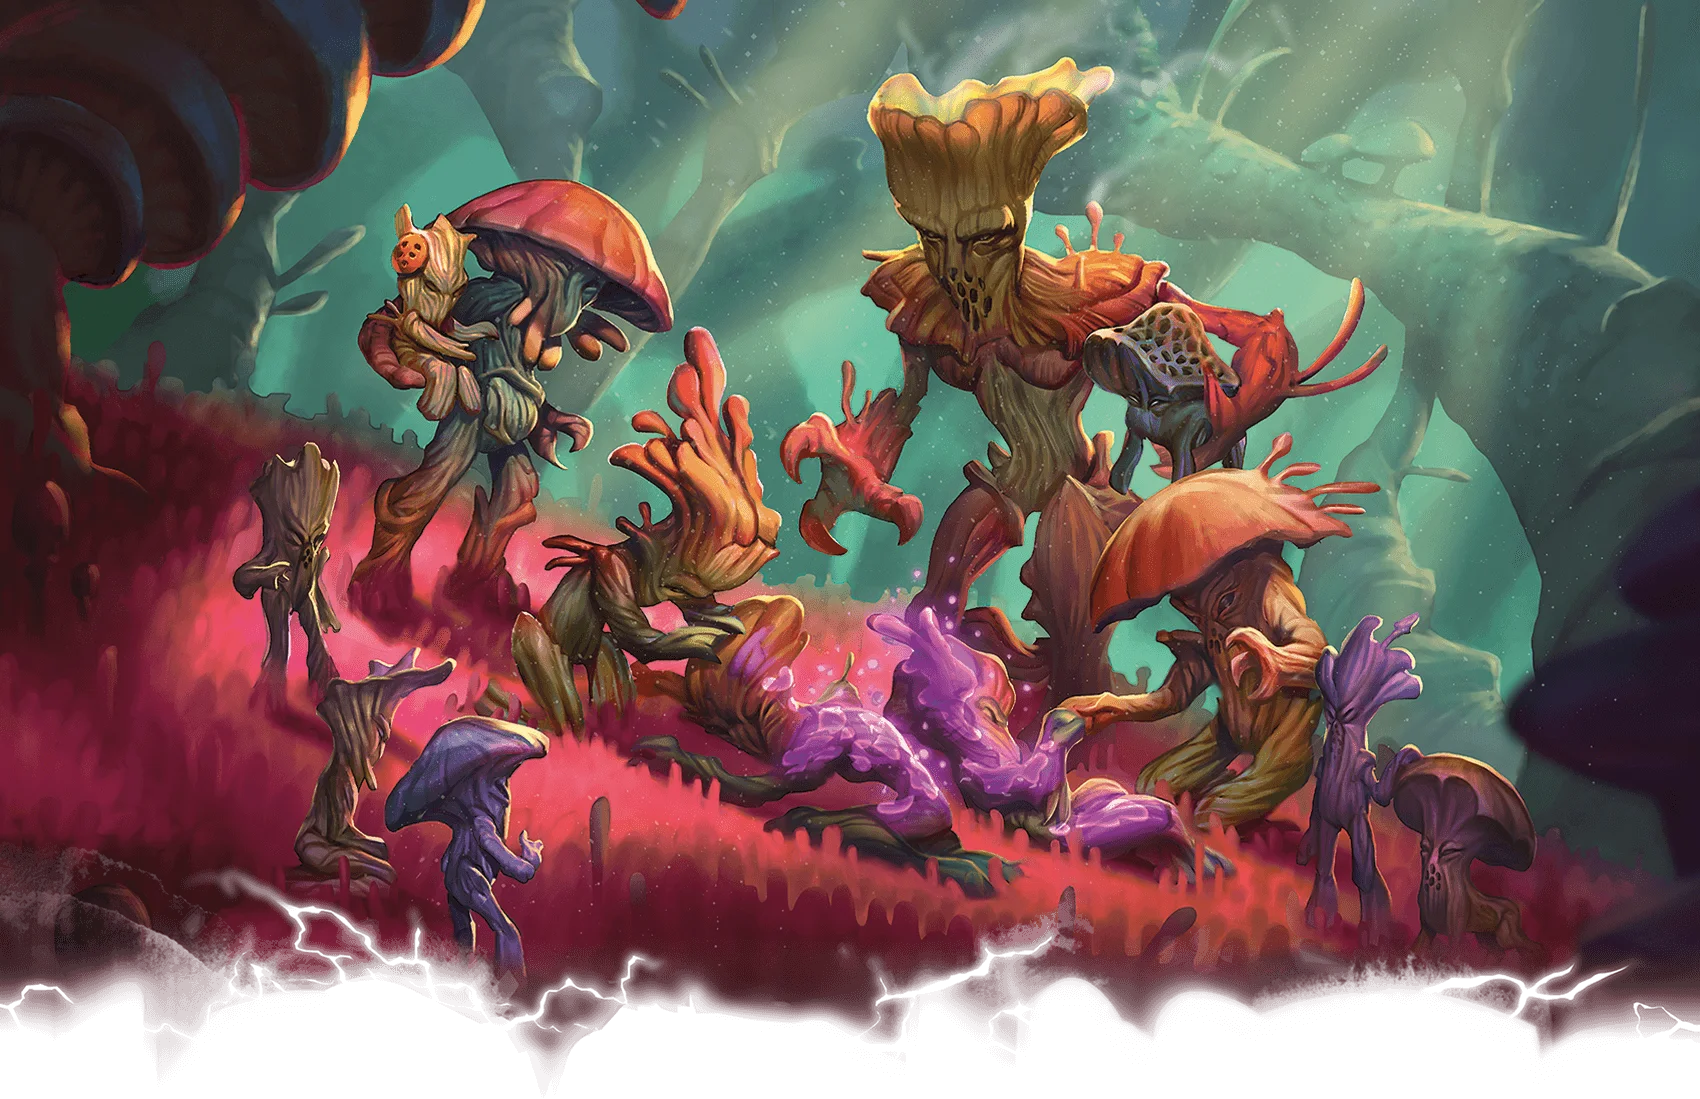
B4: Circle Chamber
Six clusters of giant mushrooms are arranged in a rough circle around this cavern. Several human-sized mushroom folk stand in a circle in the center of the cave. The smell of sulfur is stronger here.
Six myconid adults are here. Two of them (named Agric and Omphalo) are tending to the other four (Craterel, Pleuro, Subrufus, and Virosa), who are standing stock-still in a dream-like trance called a meld, experiencing a shared transcendent state. The two conscious myconids move quickly to confront any intruders who aren't escorted by other myconids, and they respond with violence to any threat.
All six myconids are ill and fatigued from the blight that is spreading through the caves, so they take turns resting here.
B5: Sinensa’s Sanctum
Glowing fungus and colorful crystals grow from the walls and ceilings of this smaller cave. In the middle of the cave, two human-sized mushroom folk tend to a larger specimen of their kind. The large one is shriveled and covered with unhealthy purple blotches, and it does not move.
Two myconid adults named Auranta and Enok are tending the unconscious myconid who leads this colony, Sinensa. The adults collect spores from a barrel-sized, glowing red fungus that vaguely resembles a human brain and puff the spores around the leader's head. The treatment is keeping the leader alive for now, but it is a losing battle. Sinensa's only hope is for the blight to end. The adults zealously defend their leader, immediately attacking intruders who aren't accompanied by other myconids.
Treasure. If the characters bring the glowing red fungus, called a ruby morel, back to the cloister, Tarak uses it to make them an elixir of health (described in appendix A).
B6: Crystal Cave
The air in this cave is choked with thick smoke that assaults your nostrils with a pungent odor of brimstone. Strange, flickering orange light illuminates the smoke. This area is free of fungal growth; instead, crystals grow from the rock. To your right, a large cluster of purple crystals juts from the stone. On the far wall, a glowing orange crystal wedged into a fissure in the cave wall seems to be the source of the light. Streaks of soot trace a path along the cave walls between the purple crystals and the fissure.
Two fume drakes lurk amid the sulfurous fumes. These elemental creatures look like little dragons formed entirely of greenish smoke. They don't leave this cave, but they rush to attack any creature that enters it.
This cave is the source of the blight spreading through the myconid colony. As the characters explore the cave, they can easily determine that noxious fumes from deep beneath the island seep up around the vein of purple crystals. Ordinarily, the fumes vent to the surface through a fissure in the west wall, but the fissure is now blocked by the enormous orange crystal, which is also the source of the light here.
The heart of the problem is the tomb of the red dragon Sharruth, deep beneath the island. The presence of such a powerful dragon far underground causes the volcanic activity that produces the noxious fumes. What's more, the dragon's energy occasionally tears open small rifts in the fabric of reality that lead to the Elemental Plane of Fire – another dimension of reality that is the cosmic source of fiery energy. The Plane of Fire is the origin of both the orange crystal blocking the vent (which is actually an egg case) and the creatures currently in the cave.
Fire Crystal. Destroying the orange crystal blocking the western fissure allows the noxious fumes to escape the cave and stops the blight that is harming the myconids. Single strong whack with a weapon, a crowbar, or another too is sufficient to shatter it. When the crystal breaks, a two-foot-diameter sphere of smoldering obsidian falls to the floor amid the other pieces and breaks open, releasing a fire snake from this stony egg. Seeing the characters only as fuel, it attacks them at once.
Breaking the fire crystal also reveals the reason the myconids avoid this cave: the cave is immediately filled with shimmering sunlight refracted through the crystals that line the vend. Bright light fills the entire area.
CHAPTER 2 | SEAGROW CAVES
Treasure. The fire snake's egg breaks into 25 tiny chunks of obsidian worth 10 gp each.
2nd-Level Characters. If the characters are 2nd level, add a third fume drake to the room when the characters first arrive. Then, at the same time the fire snake hatches from its egg, two more fume drakes emerge from the cluster of purple crystals.
Ending This Chapter
If the characters destroy the orange crystal so the toxic fumes can escape the caves, the myconids' attitude improves to friendly. Sinensa, the myconid leader, regains consciousness the following morning. If the characters are present when Sinensa awakens, Sinensa gives them the ruby morel from area B5 and permission to keep any other treasure or mushrooms they collected in the caves.
Once the characters return to Dragon's Rest, Tarak can use the ruby morel to make an elixir of health (described in appendix A), which he gives to the characters in gratitude for their efforts.
Gain a Level
After they complete this chapter of the adventure, the characters gain a level. If they visited Seagrow Caves before the wreck of Compass Rose, they advance from 1st level to 2nd level. The residents of Dragon's Rest urge them to visit the wreck of Compass Rose next (see "Shipwreck" on page 12).
If they've already explored the wreck of Compass Rose in chapter 3, they advance from 2nd level to 3rd level and are ready to visit Clifftop Observatory in chapter 4. See "Lost Wyrmling" on page 13.
The character sheets explain what happens when characters gain a level.
CHAPTER 2 | SEAGROW CAVES
Chapter 3 - Cursed Shipwreck
This chapter assumes the characters come here before Seagrow Caves and are still 1st level. It also includes instructions to scale up the danger in combat encounters it the characters complete chapter 2, "Seagrow Caves," before coming here and are now 2nd level.
Shipwreck Overview
Ever since the violent death of a gold dragon on the rocky shoal on the north side of Stormwreck Isle. the bone-strewn rocks have been the site of many shipwrecks through the centuries. One such shipwreck left a lasting mark on the island.
About forty years ago, a ship named Compass Rose carrying passengers bound for the cloister wrecked on the shoal, killing all aboard. To the horror of the cloister's residents, those who drowned found their way ashore as shambling zombies. Since the loss of that ship, each new shipwreck has brought a fresh wave of zombie sailors to the island's shore. Fortunately, wrecks are rare – or they were, until recently.
Not long ago, a harpy settled into the wreck of Compass Rose. With its magically entrancing voice,
the harpy has been luring ships to crash on the shoal and feasting on the unlucky sailors. The sailors who escape the harpy's talons end up as zombies menacing the people of Dragon's Rest.
The harpy is only the most immediate problem lurking in the wrecked hull of Compass Rose. The greater threat is a cursed talisman held in the ship's
Other Shipwrecks
This chapter assumes the characters heed Runara's advice and search Compass Rose for clues to the recent shipwrecks. If the characters decide to explore other recent wrecks, you can use the map of Compass Rose to represent any other sunken ship's deck plan, though most of the wrecks are entirely underwater. Characters exploring other wrecks might find more zombies – sailors killed in the wrecks who were animated by the talisman in Compass Rose's hold but couldn't get off their ships for some reason. They might also find giant octopuses (you can use the spore servant octopus slat block from appendix B), ghouls, or other dangers aboard. These adventures are yours to create, but only the wreck of Compass Rose holds the secret to freeing Dragon's Rest from the zombie attacks.
CHAPTER 3 | CURSED SHIPWRECK
hold, imbued with magic by a long-dend sailor's desperate prayers to a demon lord. This curse is responsible for the drowned sailors animating as zombies. Most of the sailors who were aboard the ship when it wrecked are long gone, but some zombies have been trapped in the wreck for years.
Shipwreck Features
The wreck of Compass Rose is located at the northern end of a long spur of sharp rocks and dragon bones Jutting from the ocean waves, about 2½ miles from the cloister. It remains mostly above the water, held up by the ancient bones that tore its hull. The wreck has the following features:
Walls. The soggy wooden walls are aged to a sickly black and green. Algae and barnacles grow on walls throughout the wreck.
Ceilings. The ceilings in the ship are 8 feet high.
Doors. The doorways are 6 feet high, and the doors are in the same waterlogged condition as the walls.
Light. During the day, the sun fills the upper deck and main deck with bright light and the lower deck with dim light. Sunlight doesn't reach into the hold, and the whole wreck is dark at night. See "Vision" in the rulebook.
Running This Chapter
Dragon's Rest has a rowboat the characters can take to visit the wreck of Compass Rose. The trip of 2½ miles takes about 1 hour and 40 minutes to row. When the characters arrive, read this text:
Waves lap against a derelict ship lodged against a ridge of rocks and enormous dragon bones. A faint odor of rot wafts on the sea air, along with the sound of screeching seagulls and the roar of the surf. A tangled mess of tattered sails and rigging hangs off the starboard side of the main deck, offering one possible way to climb aboard. At the stern, you can make out a gaping hole in the hull beneath the water line.
If the characters pull the rowboat up to the south (starboard) side of the ship, they can easily tie up the little boat to the derelict's rigging and climb onto the main deck (area C1). However, they're free to explore other possibilities for getting aboard, such as swimming through the hole in the hold (area C9).
Shipwreck Locations
The following locations are keyed to map 4, which shows the layout of the shipwreck.
C1. Main Deck
The moldering wood of the deck is slick with algae and seawater. Amid the tangle of rigging, splintered railings, and stray seaweed, you spot boots, bones, and bits of gore that seem considerably more recent than the wreck of this ship
Stairs lead to upper decks at fore and aft, and doors lead into cabins under those decks. The mainmast remains intact and mostly upright, topped with a crow's nest overflowing with debris. A staircase near the mast and a large hatch on the port side both lead down Into the hold.
Crow's Nest. A rope ladder runs up the mast to the crow's nest, secure despite the condition of the wreck. The mast sways alarmingly as characters climb, and at the top of the 50 foot climb the characters find that they are leaning out over the water on the port (north) side of the ship.
The crow's nest now serves as a nest for the harpy that has made Compass Rose its lair. The basket-shaped area is stuffed with wood shavings, dry grass, and shredded canvas from ships sails. Bits of bones, tufts of hair, and shiny baubles are also visible in the harpy's nest.
Harpy's Return. When the characters arrive at the shipwreck, the harpy is out looking for another ship to lure onto the rocks. It returns after the characters have spent some time aboard, as described in "Harpy's Return" later in this chapter.
Treasure. Characters who search through the crow's nest find a small gold bracelet worth 25 gp, a single gold hoop earring worth 25 gp, two small tiger eye gems worth 10 gp each, and one bloodstone gem worth 50 gp.
C2: Forecastle
The broken foremast leans out across a broken railing, with a tangle of rigging and tattered canvas trailing down to the rocks and dragon bones below. A rusted and rotting ballista stands near the broken mast.
The ballista no longer works. There's nothing of interest to find here.
CHAPTER 3 | CURSED SHIPWRECK
C3: Quarterdeck
The splintered remains of a mast jut up from this rear deck like a broken spear. The ship's wheel is askew, dislodged from its mechanism.
The wheel bears the name of the ship—Compass Rose—engraved and inlaid with mother-of-pearl, though in the wheel's current position the name is upside down. If the character turns the wheel, it snaps free of its axle and falls. If the character tries to catch the wheel before it hits the deck, ask the player to make a DC 10 Dexterity saving throw. On a successful save, the character catches the wheel. On a failed save, the wheel hits the deck with a loud thud that catches the attention of the zombies in area C4. A moment later, the thud is answered with a loud crash against the door to C4, which repeats every 10 to 15 seconds.
C4: Captain’s Quarters
The door to the captain's quarters is barricaded from the inside, though the heavy wooden bar blocking the door is half rotten. A character who tries to force the door open can break it down with a successful DC 10 Strength check.
The door crashes open to reveal two drowned sailors in a cabin that must once have been luxurious. A bookcase, half collapsed. holds waterlogged and disintegrating books and scrolls. The polished wood desk leans awkwardly on three legs; it has art ornate compass set in its center. The bed is covered in rotting bedding and sags in the middle. A jagged hole gapes on the floor beside the bed.
If the characters dropped the wheel in area C3 or needed more than one Strength check to open the door into this room, the two zombies are beside the door when it opens. Otherwise. they're aimlessly shuffling around the cabin. In either case. they move to attack the characters right away.
Hole to the Hold. The hole beside the captain's bed formed when the rotting floorboards collapsed under the weight of the captain's sea chest. It broke through the floor of the lower deck (area C8) as well, coming to rest in the hold (area C9).
Treasure. Two small drawers in the desk hold a pouch containing 50 gp, a set of cartographer's tools, and a dagger. The compass set in the desktop can easily be pried free; it is worth 25 gp.
2nd-Level Characters. If the characters are 2nd level, add a third zombie to this encounter.
C5: Gallery
A long-dead, headless skeleton sits propped up against a counter to the right, but the galley is otherwise empty. Unless... did the skeleton just move?
C6: Crew Quarters
The portrait shows a young couple smiling and embracing. Written across the bottom of the portrait are the words “Aleitha and Brastos – together forever”. The black-haired woman wears a sailor's uniform similar to the tatters worn by the zombies aboard this ship. The blond-haired man wears a merchant’s fine clothes.
Floorboard Stash. character who searches the cabin and succeeds on a DC 10 Wisdom (Perception) check notices a floorboard in the middle of the room that is raised slightly above its neighbors. A character who lifts the floorboard triggers a trap: a tiny dart shoots up. making an attack against the character. Its attack bonus is +5. If it hits, it deals 2 (1d4) piercing damage, and the character must succeed on a DC 11 Constitution saving throw or take 3 (1d6) poison damage. Once the trap is triggered. it does not trigger again unless a character resets it. (If the characters figure out a way to lift the floorboard from a safe distance, the dart misses.)
Treasure. A sack full of 200 gp rests in a small compartment beneath the raised floorboard.
C7: Mess Hall
A long table takes up most of this cabin, which must have served as a mess hall. Decaying chairs are scattered about, and broken gloss and crockery litter the floor.
There's nothing of interest to find here.
CHAPTER 3 | CURSED SHIPWRECK
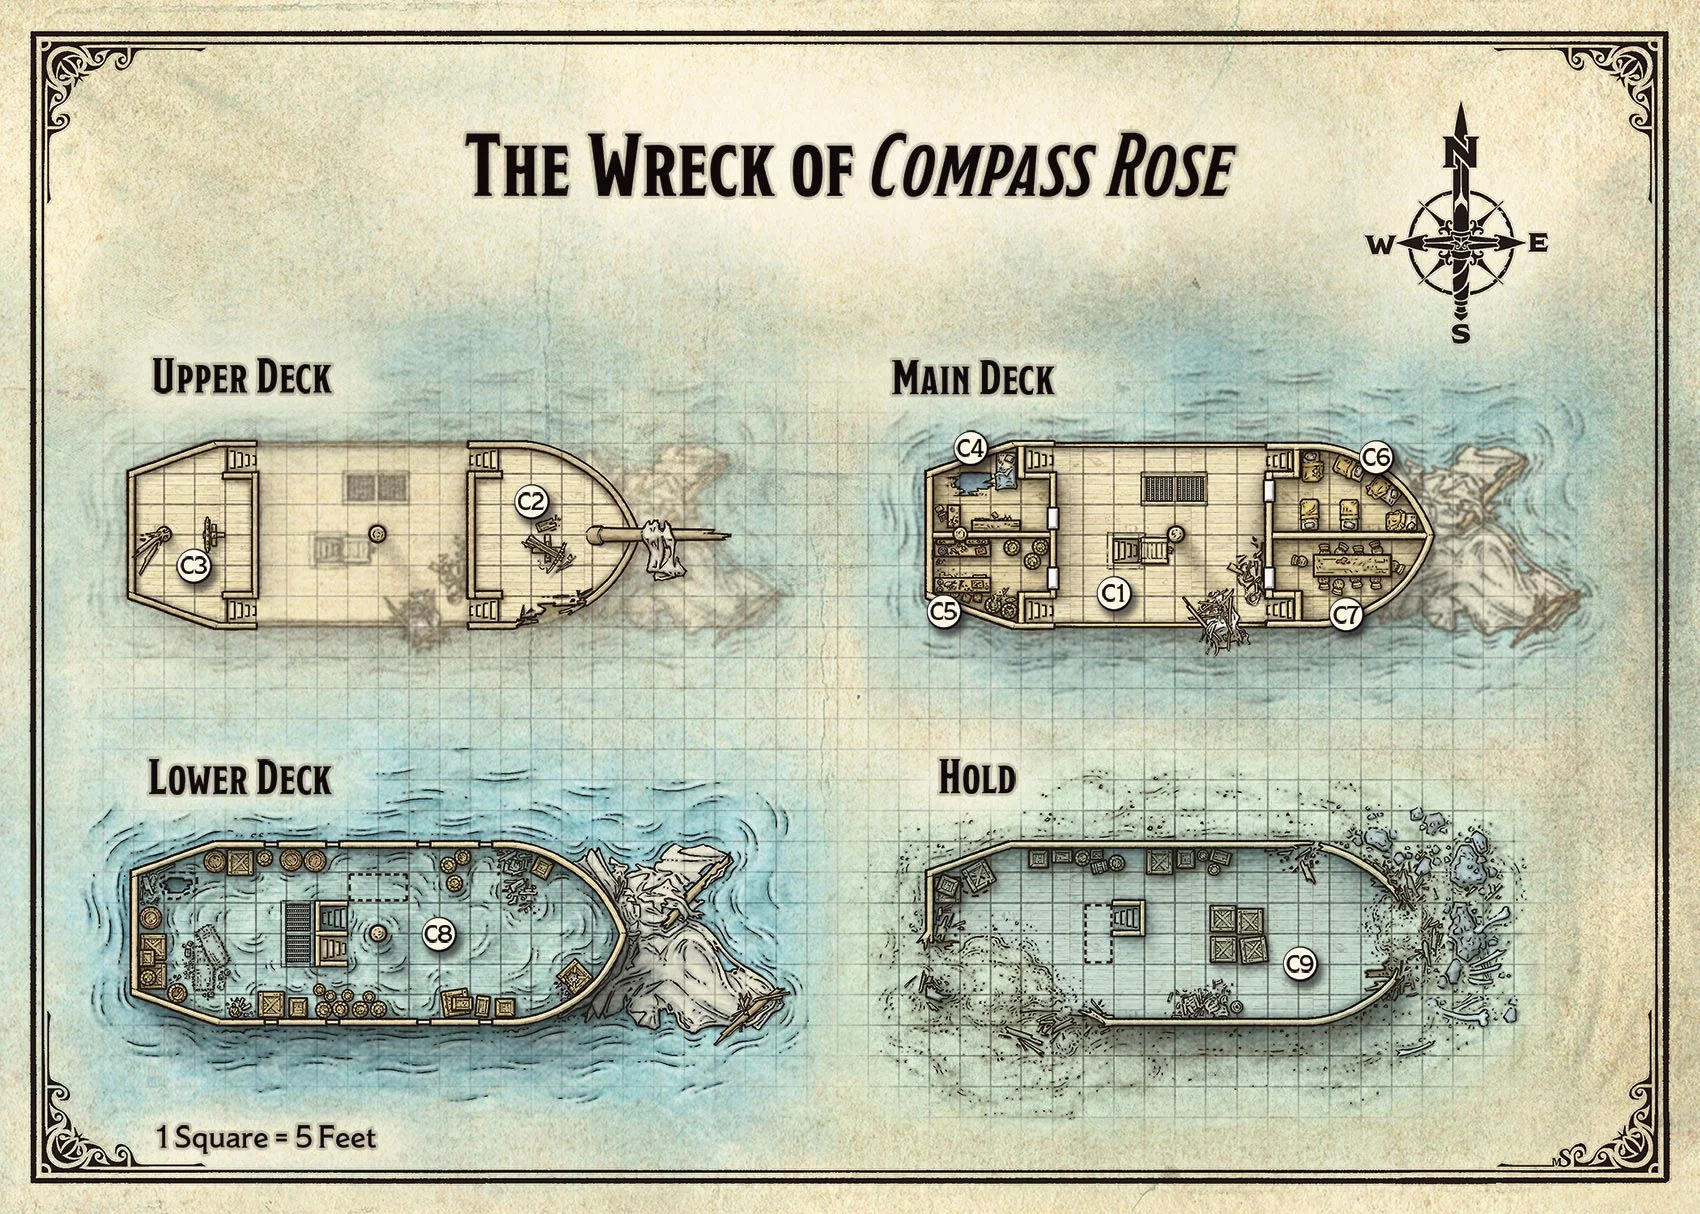
Link to player version of Map 3
C8: Lower Deck
The descent to the lower deck is chilly, wet. and unsettling. Seawater obscures the floor and sloshes against the hull. Decaying crates and barrels are scattered around, some floating freely and others stacked into corners. You hear splashing as a walking corpse lumbers toward you, wading in water that doesn't quite reach its knees.
The zombie is an obvious threat, but another Undead monster — a ghoul — lurks in the aft part of the hold. Much more cunning than the zombies, the ghoul waits to attack until the characters are busy with the zombie. It hopes to paralyze a character with its Claw attack, then drag the paralyzed character away to feast on while the other characters contend with the zombie. Unlike the zombies, the ghoul is not a former member of the ship's crew, but a vile scavenger drawn by the presence of decaying flesh.
The water on the floor ranges from about 6 inches deep on the starboard (south) side of the ship to 18 inches deep on the port (north) side. The water makes the entire lower deck difficult terrain (see "Difficult Terrain" in the rulebook).
Hole to the Hold. A hole in the ceiling in the northwest part of the area leads up to the captain's quarters (area C4). It's matched by a similar hole directly below it. The holes were caused by the captain’s chest falling through the floorboards all the way to the hold, where it came to rest (sec area C9).
2nd-Level Characters. If the characters are 2nd level, add two zombies to this encounter.
Treasure. Some of the goods in the crates here remain valuable. Using a crowbar, a character can pry open a crate in 1 minute; without a crowbar, it takes 10 minutes. When a character opens a crate. roll a d6 and consult the Crate Contents table to determine what's inside. The characters can find each item on the table once.
CRATE CONTENTS
| d6 | Contents |
|---|---|
| 1 | Five bottles of fine wine (worth 10 gp each) packed in straw, plus one broken bottle |
| 2 | A 20-pound sack of whole cloves, worth 60 gp |
| 3 | Ten small, 1-pound bars of silver (worth 5 gp each) |
| 4 | A pair of candlestick holders carved from bone to resemble dragons, worth 25 gp each |
| 5 | A fine lute with mother-of-pearl inlay, worth 50 gp |
| 6 | A spell scroll of command (see appendix A), sealed in a leather case |
CHAPTER 3 | CURSED SHIPWRECK
C9: Hold
As the cold water engulfs you, a strange undersea world is revealed. Colorful seaweed grows over the shattered hull, especially around the gaping hole in the stern of the ship. Tiny fish dart among hunks of debris and cargo.
See “Climbing, Swimming, and Crawling" and “Suffocating” in the "The Environment" section of the rulebook as the characters venture into the submerged hold. Fortunately for them. unless something goes wrong, there's no significant time pressure on the characters as they swim around here. They can surface (at the hole in area C8's floor, or at the top of the stairs up to C8) to breathe as often as they need to.
Captain’s Chest. A heavy iron chest lies on the floor of the hold, directly beneath the hole it fell through. If a character opens the chest here, a large air bubble rushes out, and a packet, wrapped and sealed in waxed fabric, rises up after it. Though the chest is heavy (about 125 pounds), the characters can also carry it to the surface before opening it.
The chest contains a pouch holding 55 gp and three turquoise stones (worth 10 gp each), as well as a pair of boots of elvenkind The floating packet contains the captain's journal, which has been keep safe from the water bay its wrapping. A braid of hair is stuck in the pages like a bookmark. indicating the log's last entry. The last entry reads as follow:

19 Tarsakh
Our journey is ended, though fear my own is to continue in the most horrible way imaginable. Compass Rose wrecked on a shoal south of Neverwinter. Many sailors perished with the initial impact, and Aleitha was gravely injured. As I tended her wounds, she clutched her talisman and breathed soft prayers. I asked her what the talisman signified. She told me love. Her husband waits for her at Dragon's Rest, having pledged his service to the dragon there. The talisman is made from locks of their hair, woven together as a promise to be reunited no matter what fate might befall them. It might have been a beautiful story, had it not been for Aleitha's gruesome end--and the words of the prayer I heard as she breathed her last. For she was begging Orcus, the Prince of Undeath, to reunite her with her husband.
I held her hands as the breath left her, and I felt a horrible chill pass through her. Next I knew, she was sinking her teeth into my neck. At the same moment I heard moans begin to rise from the dead sailors all around us. What curse has she brought on us all?
Already I feel a creeping chill overtaking my body. I am securing her talisman with this book in my chest, in the hope that someone who comes after us may end this nightmare by bringing Altheia's talisman to her husband.
The talisman is formed from long locks of hair – some blonde, some black—braided together and knotted around two small finger bones. If a character casts detect magic, the talisman is revealed to carry magic of the school of necromancy. See “Ending This Chapter" for more about the talisman.
Tarsakh is a month in the calendar of the Forgotten Realms, roughly corresponding to April. No year is specified in the log.
About Orcus. Known as the Demon Prince of Undeath and the Blood Lord, the demon lord Orcus is a fiend whose power rivals that of the gods. Ruling over hordes of demons in the nightmarish plane of existence called the Abyss, Orcus yearns to transform the multiverse into a ghastly place of death. Many Undead creatures (like ghouls) worship him or seek to bargain with him in exchange for some fragment of his power over undeath.
A New Threat. After the characters find the captain's chest, when they come up from the hold to the lower deck, they hear a heavy thump on the deck above them as the harpy lands on the main deck. See "Harpy's Return" below.
CHAPTER 3 | CURSED SHIPWRECK
Harpy’s Return
The harpy that makes its lair in the crow's nest (area C1) returns to the ship when one of these conditions is met:
- The characters find the captain's chest in the hold (area C9) and return to the lower deck (area C8).
- The characters finish a short or long rest on the ship.
The next time the characters show themselves on the main deck, the harpy confronts them:
A terrifying monster perches on the top of the crow's nest, spreading its scraggly wings and screeching harshly. Its wings and legs resemble those of a mangy vulture, while its head, torso, and arms look almost human. It clutches a large bone like a club and flexes its talons.
On its first turn, the harpy uses its Luring Song in an attempt to charm the characters and draw them up to the crow’s nest. A character charmed by the harpy’s Luring Song thinks it’s the most beautiful sound they have ever heard. It’s easy to imagine how a ship might be lured off course to get closer to the source of this music.
Talking to the Harpy
The harpy is cruel and hungry for flesh, but it speaks Common and can be reasoned with. It's not easy to convince the bloodthirsty monster to change its ways and leave the wreck of Compass Rose, but if the players come up with a strong argument (possibly supported with high rolls on Charisma checks), the harpy cooperates. These tactics are the most likely to convince the harpy to leave:
If the characters have already reduced the harpy to fewer than half its hit points, it might flee.
If the characters claimed the treasure from the crow's nest while the harpy was absent, it might agree to leave in exchange for the return of its treasure.
lf the characters are 2nd level and two harpies are present (see below), characters can play on the distrust between the two harpies and might convince them to part ways and leave the area.
2nd-Level Characters
If the characters are 2nd level, add a second harpy to the encounter. This harpy initially perches on the ballista in area C2 and uses its own Luring Song. Although they're allies, the harpies don't trust each other.
Ending This Chapter
If the characters defeat the harpy, one problem is solved: no more ships will be lured to the rocks, and shipwrecks will once again be a rarity.
If the characters find Aleitha’s talisman in the hold, they can solve the zombie problem entirely. If they bring the talisman to Runara and explain what they found in the captain’s log, Runara nods sadly. She remembers Aleitha’s husband, Brastos's, but he died many years ago. He was laid to rest in the graveyard atop the cliffs at the northern point of the island, northwest of Dragon’s Rest.
The graves in the little clifftop cemetery are covered in white wildflowers and marked with simple wooden slabs. If the characters lay the talisman on Brastos’s grave, bury it in the soil over the grave. or burn it atop the grave, the wind seems to sigh in relief. Thick fog forms around the rocks north of the island. The fog lingers overnight, and when it disperses, no trace of Compass Rose remains.
The characters might also disregard the words of the captain's journal and destroy the talisman while aboard the ship. This also breaks the curse - the characters still feel something likc a sigh in the air, fog rises up to engulf the wreck while the characters are rowing away, and the ship is gone when the fog lifts the next day.
If the characters undo the talisman’s curse, the next time they sleep, the cleric character has another dream. Read this text to the cleric’s player.
In your dream, you are once again on the deck of the ship that brought you here, and you see Stormwreck Isle shrouded in darkness, just as it was in your earlier dreams. As you sail closer, the darkness breaks, and a dazzling ray of sunlight shines down over the island. A gentle plume of white smoke rises up from the island as the darkness is driven away. Then the darkness and he smoke are gone, the light swells to enfold you as well, and you feel the love and approval of your god.
Gain a Level
After they complete this chapter of the adventure, the characters gain a level. If they visited Compass Rose before Seagrow Caves, they advance to 2nd level. The residents of Dragon's Rest urge them to visit Seagrow Caves next (see "Sea Caves" on page 12). If the characters have already explored the caves, they advance to 3rd level and are ready to visit Clifftop Observatory in chapter 4. See "Lost Wyrmling" on page 13.
The character sheets explain what happens when characters gain a level.
CHAPTER 3 | CURSED SHIPWRECK
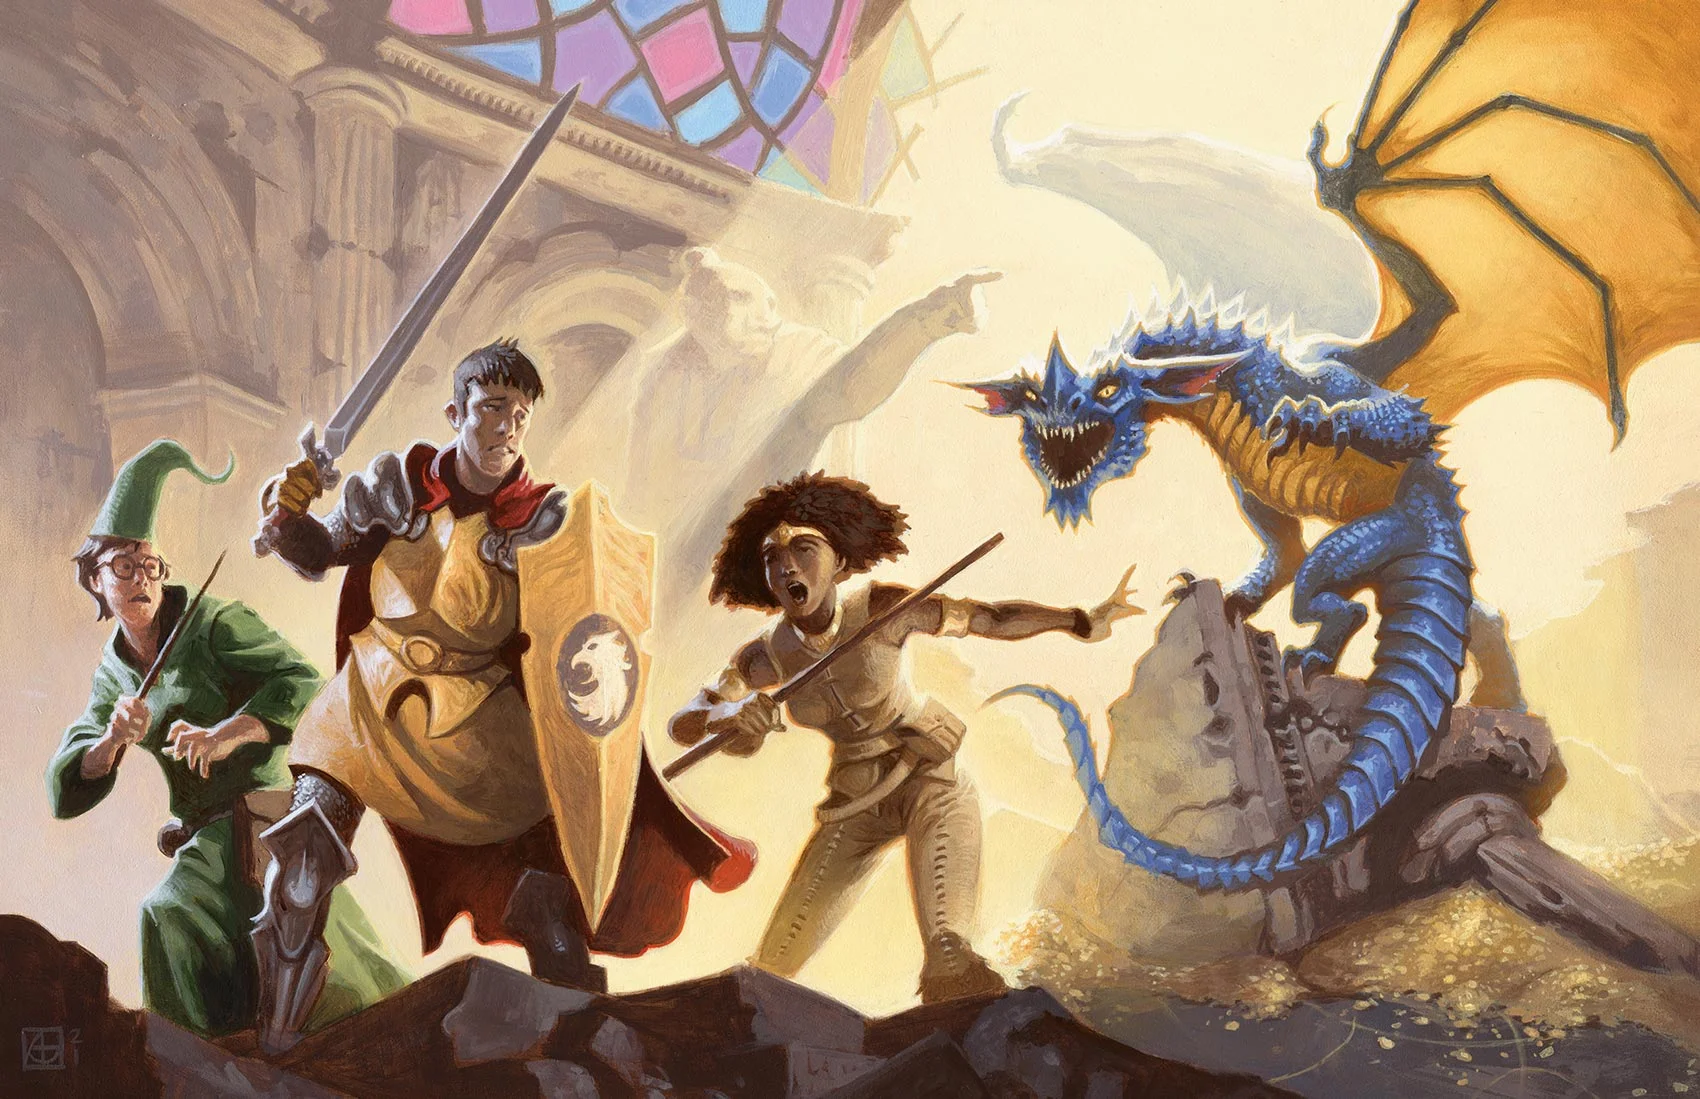
Chapter 4 - Clifftop Observatory
This chapter assumes the characters visit the observatory after exploring Seagrow Caves and the wreck of Compass Rose, and thus have reached 3rd level. If they come here before visiting the other adventure sites, the combat encounters are probably too difficult for them. That's the reason Runara won't give the characters the moonstone key or information about the observatory until after they've dealt with the island's other problems. If necessary, you can have Runara warn the characters that they're not ready to face this part of the adventure yet.
Observatory Overview
During its heyday. the Clifftop Observatory was a marvel of magical innovation. Adorned with gorgeous stained glass windows and marble spires, the observatory's towers stood high above the churning sea on separate islets, linked by shimmering bridges of magical energy. But the observatory was wrecked when Runara battled her blue dragon rival centuries ago, and now it lies in ruin, a crumbled memory overtaken by nature.
In recent months, the observatory ruins have become the home of an arrogant blue dragon wyrmling called Sparkrender, a descendant of Runara's ancient rival. Like his ancestor, Sparkrender seeks to claim the destructive magic that lingers at the site. Like Runara. Sparkrender has recruited kobolds to join his cause.
About five days before the characters arrived on the island, a bronze dragon wyrmling named Aidron left the safety of Dragon's Rest and Runara's tutelage and came to the ancient observatory. The two wyrmlings met and immediately clashed. Sparkrender attempted to turn the bronze wyrmling against Runara, but Aidron's hatred of chromatic dragons was stronger than his disagreement with Runara. Ultimately, Sparkrender overpowered Aidron and imprisoned him in the observatory ruins.
Sparkrender believes Aidron is the key to unlocking the observatory's magic and claiming his ancestor's power. With the bronze wyrmling imprisoned, Sparkrender began planning a ritual that will awaken the spirits of all the island's dead dragons and bind them to his will—at the cost of Aidron's life.
CHAPTER 4 | CLIFFTOP OBSERVATORY
Observatory Features
The observatory is built on a series of basalt spires jutting up from the ocean at the southeastern tip of Stormwreck Isle. Almost all the structure’s former ceilings and walls have crumbled away, exposing the ruins to the open air.
Unless otherwise noted, the ruins stand 30 feet above the ocean’s surface. The rugged cliffs offer abundant hand- and footholds, so a character who jumps or falls into the water and survives (see “Falling” in the rulebook) can climb back up without needing to make an ability check.
Running This Chapter
Once the characters decide to visit the Clinton Observatory, they have three options for reaching the site:
By Boat. Dragon's Rest has a rowboat the characters can take around the eastern end of the island. The trip to the observatory is 5 miles, which takes about 3 hours and 20 minutes to row.
Along the Coast. Walking around the coast of the island is a little easier than rowing, and a quicker trip despite the characters having to walk around the eastern bay instead of rowing across it. The 6-mile trip takes only 2 hours at a normal walking pace.
Overland. The characters can walk southeast from Dragon's Rest to the head of the bay, where a rough path cuts across the island to the eastern bay. The rocky ground of the island is difficult terrain, but this is still the fastest and most direct route. Characters can make the 3½-mile trip in about 1 hour and 15 minutes.
Approaching by Land
If the characters approach the observatory by land. read the following text:
Clambering over the rocky ground of Stormwreck Isle, you spot strange, twisted protrusions of glassy crystal jutting from the earth. The vegetation in this area bears reddish branching scars that form similar shapes. Suddenly, you hear a screeching roar and notice a winged, glittering blue shape swooping overhead.
The blue shape is Sparkrender flying by. This glimpse of the dragon is an opportunity to make your players nervous about the foe they're about to face. Feel free to elaborate on the description of Sparkrender and play on the characters' worry that he might spot them, but ultimately he passes by
without noticing them. The characters see him come to rest on a rocky spire off the coast as he turns to his hoard among the ruins (area D5).
A character who examines the crystalline protrusion or the scarred vegetation can make a DC 10 Intelligence (Nature) check. On a success, the character recognizes the phenomenon as a sign of lightning strikes – or the lightning breath of a blue or bronze dragon.
Assuming characters continue toward the observatory, they soon arrive at area D1, described below.
Approaching by Water
If the characters row to the observatory, read this. text instead:
As you round the southeastern top of the island, you can see crumbling ruins atop basalt columns just off the main island body. If you pull the boat ashore on the island, it would be an easy walk up to the top of the cliffs, though there is no obvious bridge from the cliffs to the ruins. Alternatively, you could tie the boat up at the bottom of the columns and try to climb directly up to the ruins.
As you consider these options, you hear a screeching roar and notice a winged, glittering blue shape swooping through the air ahead of you. The figure comes to rest atop the column farthest from Stormwreck Isle and vanishes from sight.
Again, Sparkrender does not notice the characters as he returns to his lair, but feel free to tease the players with the idea that he might notice them.
If the characters beach the boat on the shore, they can easily climb the bluffs to area D1, described below. If they tie up the boat at the base of one of the pillars, they can instead climb to the area atop it (area D2, D3, D4, or D5).
Sparkrender’s Kobold Allies
The kobolds who joined forces with Sparkrender are lawful evil and cruel. Their initial reaction toward outsiders is hostile (see "Social Interaction" in the rulebook), but they're more likely to warn intruders to leave the ruins than to immediately attack. They readily threaten violence and back up their threats with combat if necessary.
As an action, a character can try to convince a hostile kobold to have a conversation or to allow the characters to explore the area, doing so on a successful DC 15 Charisma check. Depending on the character's approach, the Deception, Intimidation, or Persuasion skill can apply to the check.
CHAPTER 4 | CLIFFTOP OBSERVATORY
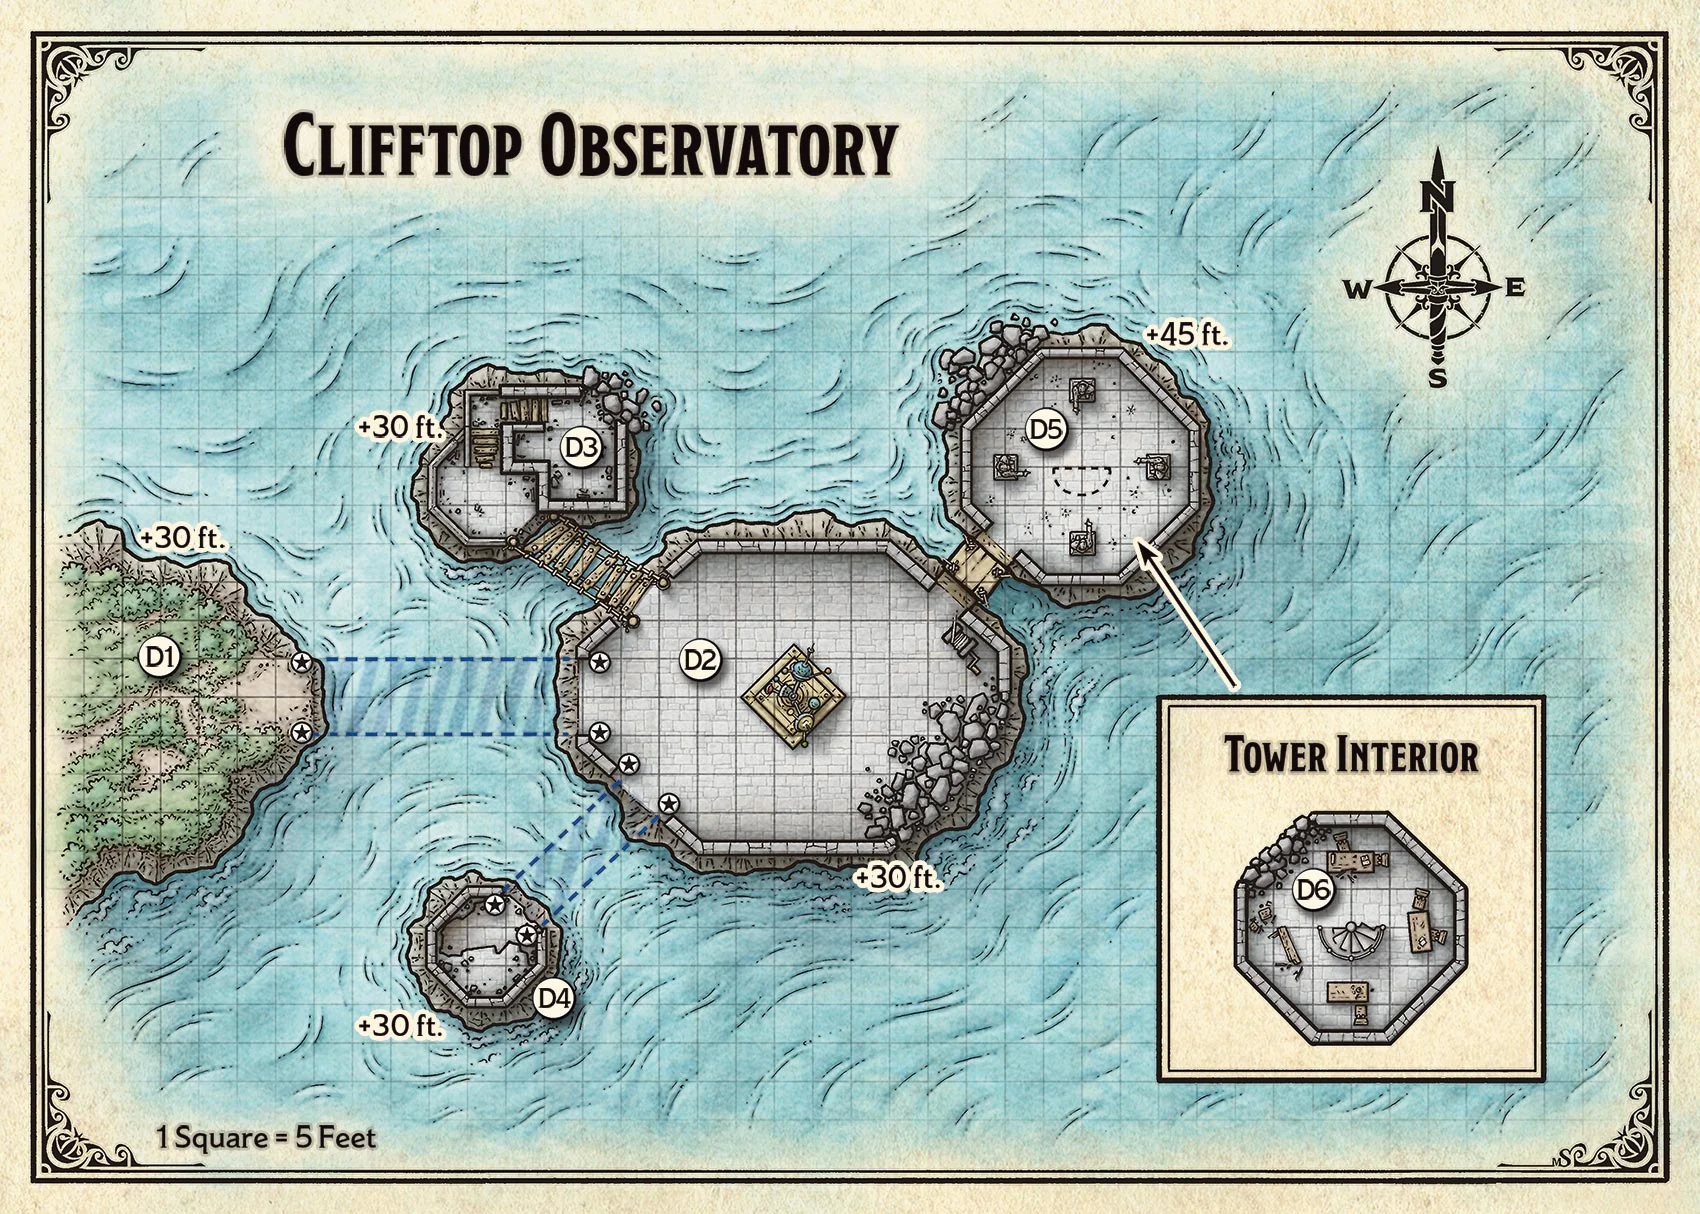
Link to Player Version of Map 4
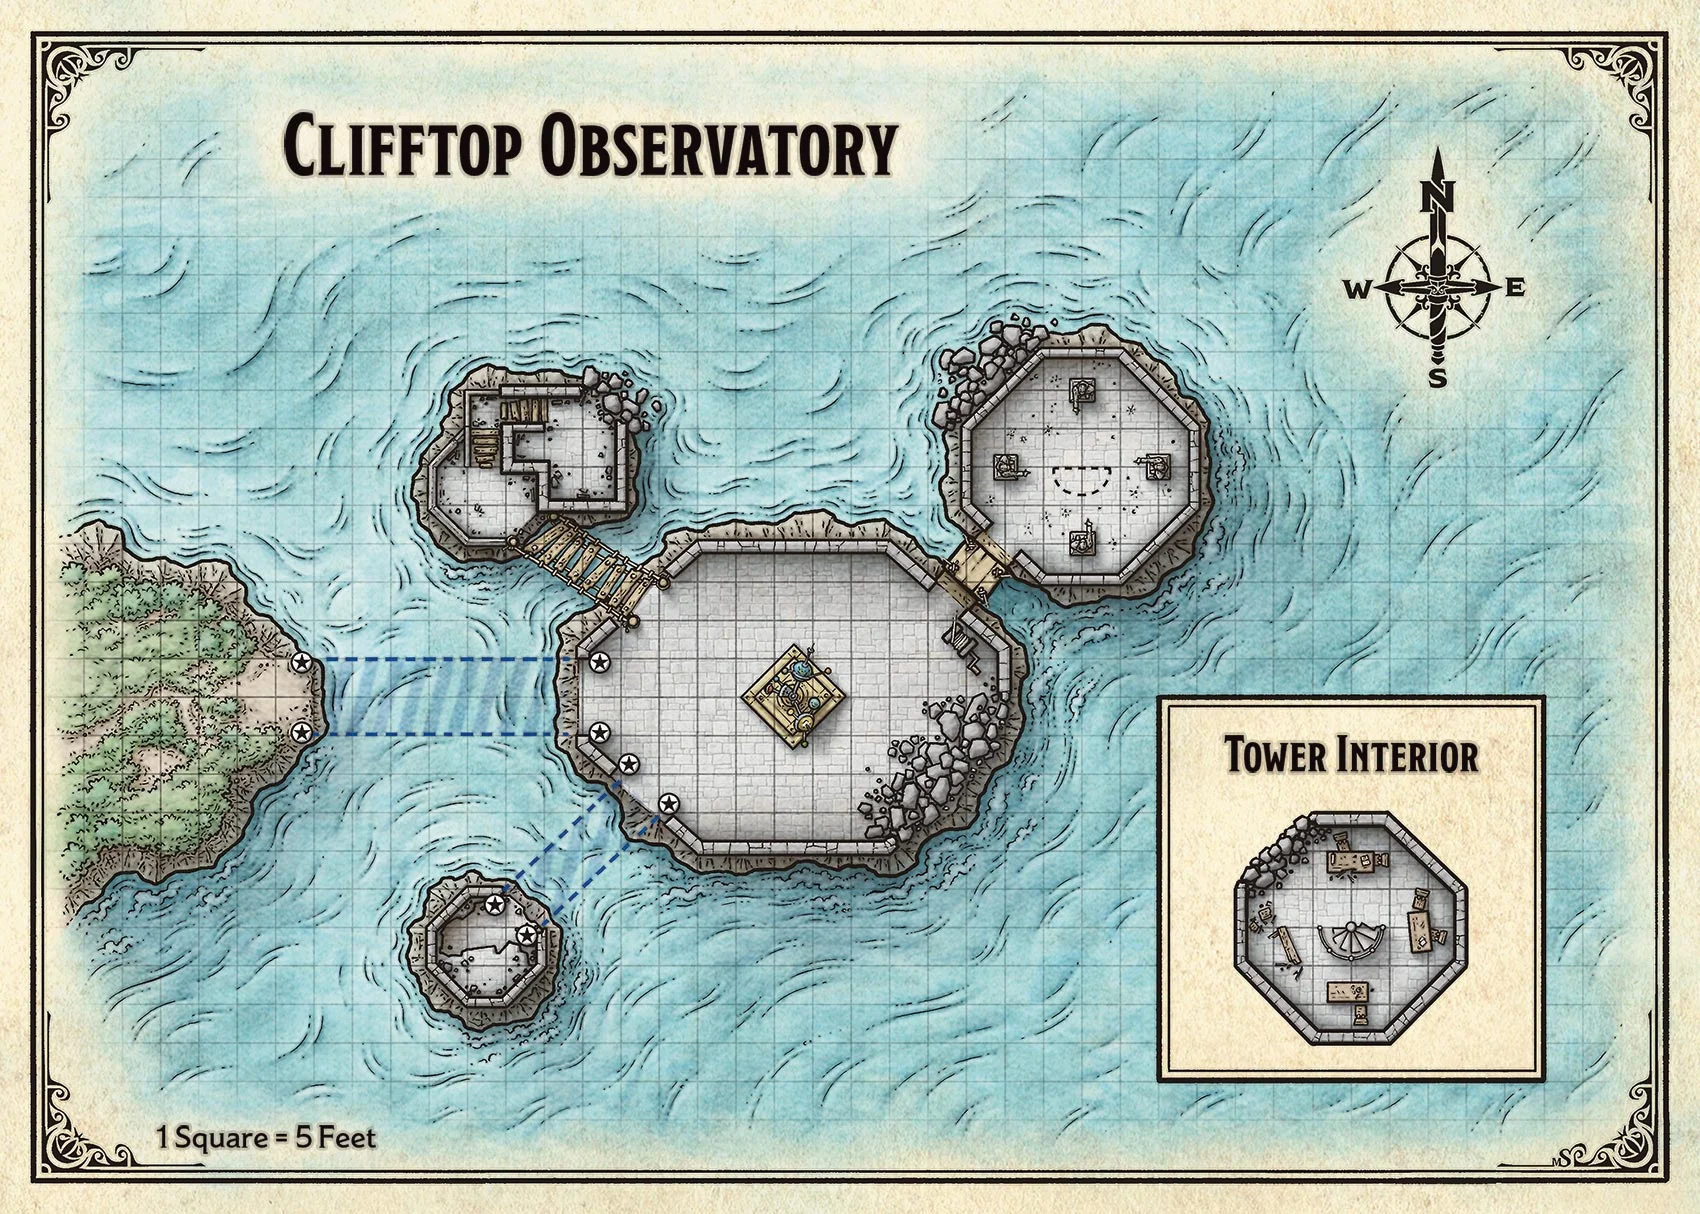
This list summarizes what the kobolds know:
Kobold History. The kobolds here have served Sparkrender for about a year. They revere the blue dragon as a semidivine figure and trust him to provide for their every need.
Big Plans. Sparkrender has big plans that will allow him to manifest his full power. The wyrmling is waiting for the sculpture in the rotunda ruins (area D2) to tell him it's time to act. The kobolds think it must be soon – possibly even today.
Dragon Visitor. Not long ago, another dragon arrived. This other dragon was about Sparkrender's size but looked like greenish yellow metal. They remember hearing the two arguing at the observatory tower (area D5), and they have heard the other dragon roaring and crashing around inside the tower (area D6) since then.
Caved-In Wall. Though the kobolds have been trying to tidy the ruins, Sparkrender specifically told them not to clean up the newly caved-in wall at the base of the observatory tower (area D6). The caved-in wall is visible from area D3.
Observatory Locations
The following locations are keyed to map 5, which shows the layout of the Clifftop Observatory.
D1: Overlook
A broken and overgrown path winds to the edge of the cliff. The overlook is marked by two marble statues veined with gold, each carved in the shape of a dragon with its mouth open in a silent roar.
At the base of each statue is a small hexagonal indentation, about 1 inch wide and 2 inches deep—perfectly sized to accommodate the moonstone key Runara gave them.
When the key is inserted into the base of either statue, magical light sparks to life in both statues’ open mouths, and a shimmering bridge made of iridescent magical energy extends from the overlook to the observatory ruins (area D2). The bridge is sturdy and lasts until the key is removed from the statue.
CHAPTER 4 | CLIFFTOP OBSERVATORY
D2. Rotunda Ruins
Broken stone lines this plaza – fragments of elegant statues, once-magnificent pillars, and shining marble walls. At the center, a tall sculpture of rusted planets and gilded stars spins idly in a jerky mimicry of celestial motion.
A gargled screech suddenly rises from across the plaza. A half-dozen batlike creatures are swarming around two winged kobolds with blue paint smeared across their long snouts. The kobolds are fighting fiercely, but they seem close to being overwhelmed.
The two winged kobolds are locked in battle with eight stirges. When the characters enter the area, six of the stirges turn their attention to this new, juicier prey. The kobolds try to deal with the remaining two stirges. and then decide what to do based on what the characters are doing. If the characters actively help the kobolds during the battle, then the kobolds return the favor. If the characters attack the kobolds instead of (or as well as) the stirges, the kobolds fight back. Otherwise. the kobolds hang back, trying to stay out of the way until the fight is over.
Once the stirges have been defeated, if the kobolds survive, they approach the characters. Their names are Mek and Minn, and they're the brothers of Myla. the kobold tinkerer at Dragon's Rest. They left their sister for dead after the stirge attack that maimed her wings. They have sworn loyalty to Sparkrender. and they share the dragon's cruel, haughty demeanor.
lf the characters actively helped the kobolds or mention that Myla is alive, the kobolds' attitude becomes friendly. They offer to introduce the characters to their leader and help the characters in any way they can (such as retrieving the moonstone key from area D1 so the characters can activate the bridge to D4). They won't help the characters fight Sparkrender, though: they are loyal to the dragon.
Golden Sculpture. The sculpture in the center of the rotunda is an astronomical model used for research in centuries past. The sculpture depicts the planet of Toril (the world of the Forgotten Realms), its moon (called Selûne), the sun, and seven other planets, as well as one comet with a very eccentric orbit. A character who studies the sculpture can puzzle out its importance with a successful DC 15 Intelligence (Arcana) check: its current position suggests the comet will soon pass very close to Toril.
Sparkrender plans to hold his ritual when the comet is at its closest point. He believes the comet, called the King-Killer Star, controls the destiny of dragons and will allow him to claim power of the dragons who fell on Stormwreck Isle.
Dragon Effigies. The stirge attack interrupted the kobolds from their assigned task of preparing this site for Sparkrender’s ritual. With the wyrmling’s help, they have crudely sculpted five chunks of rubble into vaguely draconic shapes and splashed each one with paint, and the kobolds were In the process of arranging them around the metal sculpture. Each effigy has the name of the dragon it represents etched into it. These are the names and colors of the five dragons:
| Name | Color |
|---|---|
| Astalagan | Bronze |
| Clyssavar | Gold |
| Eldenemir | Blue |
| Sharruth | Red |
| Turadaer | Brass |
If the characters ask the kobolds about these dragon effigies, Mek and Minn swell with pride and explain that they crafted them according to Sparkrender's instructions. The kobolds know the effigies have some part to play in Sparkrender's plans.
Energy Bridge Anchors. A pair of dragon statues like the ones in area D1 stands on the west side of the rotunda, and another pair stands on the south-west side. If the moonstone key is inserted in one of these statues. the western pair creates a bridge back to the overlook (area D1), and the southwestern pair creates a bridge to a crumbled and isolated tower (area D4).
D3: Kobold Camp
A rickety bridge made of driftwood and rope spans the 15-foot gap between the rotunda (area D2) and this structure.
Skittering sounds and whispers come from inside this ruined tower. Gaps in the stone are patched over with wooden planks and threadbare cloth.
Three kobolds (Ekrash, Erp, and Hev) and two winged kobolds (Nuhro and Snirke) currently inhabit this camp, polishing sling bullets and keeping busy until it's time for Sparkrender's ritual. Initially, the kobolds are hostile toward the characters, determined to scare off the intruders. They are susceptible to intimidation, though; as an action, a character can make a DC 13 Charisma (intimidation) check, convincing them to back down on a success.
CHAPTER 4 | CLIFFTOP OBSERVATORY
D4. Isolated Study
No bridge spans the 22-foot gap between the rotunda and the spire, unless the characters use the moonstone key to activate the energy bridge in area D2. Characters might come up with any number of ingenious ways to cross the gap. See the sidebar called “Clever Solutions” for advice to help you determine whether these solutions work.
The rhythm of the waves below echoes throughout this cramped tower. Part of the floor has crumbled away, dropping off into a chamber below. Amide the rubble, collapsed bookcases jut out at odd angles, and moldering books are strewn across the floor.
Scholar’s journal. Though most of the books have fallen apart, one tome – a small black journal with an ornate lock – remains intact. A character who examines the book and succeeds on a DC 15 Wisdom (Perception) check notices a small arcane rune engraved above the keyhole on the journal's lock. A character who casts the detect magic spell also sees a faint aura around the keyhole.
This rune is a magical trap that triggers if the journal is opened without the use of its original key, which is long lost. A character who makes a successful DC 11 Intelligence (Arcana) check can determine how to disarm the trap: by carefully scratching over the rune with a dagger, a sharp piece of wire, or a similar implement. Once this is done, the journal can safely be opened either by picking the lock with thieves' tools and making a successful DC 10 Dexterity check, or by breaking the lock with a successful DC 12 Strength check. If the lock is opened without first disarming the trap, the magic trap spews out noxious green gas, and the character who opened the lock takes 3 (1d6) poison damage.
Inside, the journal contains star maps and notes on experiments with magic. One passage is underlined near the start of the journal. It reads, in an archaic dialect of Common, “To ye four scholars: point your eyes towards the Dragon’s light, for it guides your descent into knowledge.” This passage is a clue to unlocking the hidden entrance in the observatory tower (area D5).
Treasure. A character who searches the tower and succeeds on a DC 12 Intelligence (Investigation) check finds a loose brick In the northwest wall. Pulling the brick out reveals a hidden comportment containing a potion of resistance (lightning; described in appendix A) and a pouch holding 10 gp.
D5: Observatory Tower
Standing taller than the rest of the observatory, the main floor of this tower is 45 feet above the ocean's surface, which puts it 15 feet above the floor of the rotunda (area D2). The kobolds have constructed a
Clever Solutions
The challenges characters face in this adventure can have more than one solution. For example. to reach the isolated study (area D4), characters could try any of these approaches:
- Ask the winged kobolds to retrieve the moonstone key from area D1 so it can be used again in area D2.
- Dive or climb down into the water below, swim over to the other column, and climb back up to the study.
- Have a character use the misty step spell to cross the gap and explore alone.
Remember, there's more than one way to proceed through an adventure, and more than one way to play D&D! When characters come up with clever solutions to tricky problems, reward them with success – or at least a good chance of success. Use the guidelines in the "Improvising Ability Checks" section at the start of this booklet to help you. Embrace your players' creativity, and let them surprise you!
rough pulley lift so the wingless kobolds can reach this area when Sparkrender summons them.
Rays of light dance across the remains of this tower's stained glass dome, making iridescent colors shimmer across the crumbled marble walls. Gilded lines and jewelrf inlays form a detailed star map spanning the dusty floor. Four alabaster statues of scholars stand around the perimeter of the room, their expressions worn with time. Each ten-foot-tall statue is pointing or gesturing in a different direction.
Curled in the northeast corner of the tower is a lithe blue dragon. Lightning arcs around his horns and snout as he slumbers amid a scattered collection of coins and glittering jewels.
Sparkrender the blue dragon wyrmling is currently sleeping here, curled up against the northeast wall. This presents the characters with an important choice: they can waken the dragon and fight him now, or they can sneak past the dragon, find a way into the secret library below (area D6) and free Aidron, and then fight Sparkrender with Aidron's help. Either approach is fine. The fight will be easier for the characters with Aidron on their side, but they can still triumph without Aidron's help.
You don't need to encourage one course of action or the other. Make sure the players realize they have a choice, though. You can use Mek and Minn (the kobolds from D2) to remind the characters there's another dragon around. As you describe the observatory tower, you can also highlight the caved-in wall beneath it (leading to area D6) as a potential
CHAPTER 4 | CLIFFTOP OBSERVATORY
point of access to the tower. Or you can just tell the players they have these two options – plus any other they come up with on their own!
Sneaking Around. If the characters move quietly around the area, they can avoid waking Sparkrender as long as at least half of them succeed on a DC 14 Dexterity (Stealth) check.
If the characters try to turn the statues (see “hidden Entrance” below) without waking Spakrender, have the characters turning the north and east statues (nearest the sleeping dragon) each make a DC 14 Dexterity (Stealth) check. On a failed check, the noise of a turning statue wakes the dragon.
Waking the Dragon. If awakened, Sparkrender is hostile toward the characters, growling and barking threats in Draconic. Characters who Speak Draconic (the paladin and the wizard) can try to convince the dragon not to attack by making a DC 12 Charisma check and applying the Deception, Intimidation, or Persuasion skill as appropriate. A character who succeeds on the check stops Sparkrender from attacking immediately, and he instead takes the opportunity to boast about his grand ambitions. If no character successfully intervenes, or if a character mentions Aidron or Runara. Spark render snarls and attacks.
Despite his youth, Sparkrender is a fearsome foe and a loathsome villain. He uses Breath Weapon on his first turn and every round it is available thereafter. (Clever characters can try to use the statues for cover from the dragon's breath; see "Cover" in the rulebook.) Consider having the wyrmling deliver short lines of dialogue on each of his turns, inspired by the following examples:
- "You pests will not stand in my way! I will claim the might of my ancestors!"
- "Get out of here before I tire of this game and end you all!"
- "Chromatic dragons are the rightful rulers of this world. Bow down to the children of Tiamat!"
- "Enough of this! This work is too important to be hindered by the likes of you!"
The dragon fights until reduced to 10 or fewer hit points, at which point he swears vengeance against the characters and attempts to flee the island starting on his next turn. (He might say something like this as he takes the Disengage action and flies away: "I swear by Eldenemir the Raging Storm and the five heads of Tiamat, you will pay for this insult!")
It the characters flee, Sparkrender does not pursue them, but he taunts them as they run away. (He might say something like, "Yes! Flee before my might, as all will flee when I claim my inheritance!")
If the characters defeat Sparkrender, they hear growling and yelping coming from below them (area D6).
Hidden Entrance. Each of the four statues can be rotate on its base. To unlock the hidden entrance to the observatory's secret archive, each statue must be rotated so it points at the constellation called the Dragon of Dawn on the floor’s star map.
If the characters found the clue in the isolated study (area D4) exhorting 'four scholars" to "point your eyes toward the Dragon’s light, “ they might search the star map for a constellation that looks like a dragon. A character who searches the floor and succeeds on a DC 10 Intelligence (Investigation) check finds a constellation resembling a dragon in the southeast quadrant of the floor.
In lieu of that information, a character who searches the room for clues and succeeds on a DC 15 Wisdom (Perception) check notices worn grooves in the base of each statue, suggesting the statues can turn on their bases. While turning a statue, a character can make a DC 10 Wisdom (Perception) check: if the check succeeds, the character notices the statue settles slightly when it is pointing toward the southeast quadrant of the room and requires extra effort to nudge out of that position.
Once each statue in in its correct position, a semicircular section at the center of the floor begins to glow before descending into the library (area D6). It forms a spiral staircase leading down to the floor of the library. When any statue is rotated out of its position, the staircase rises back up, sealing the library shut once more. (A character on the staircase when this happens is lifted up to this area on the rising stairs.)
Treasure. With Sparkrender no longer defending his fledgling hoard, characters can gather it up. It includes large piles of coins: 4.500 cp, 2.200 sp, and 130 gp. There are also ten gems: five pale blue quartz crystals worth 10 gp each and five blue jasper stones worth 50 gp each. A waterproof leather case holds a blue silk fan painted with powdered blue gems, worth 25 gp. There are also a few ordinary items Sparkrender enjoyed, including a crude flute with a pleasing sound, an hourglass filled with sparkling sand, and a set of seven candlesticks.
D6: Secret Library
This space was formerly a hidden archive of knowledge, accessible only to those who knew the observatory’s secrets. However, the walls of the tower are crumbling—a fact that Sparkrender used to trap Aidron here. After weakening the bronze wyrmling, Sparkrender forced him into the library and then caused one of the walls to cave in, sealing the exit.
If the characters don't use the hidden entrance in area D5, they can attempt to clear away the rubble from the cave-in to access the secret library. To access the rubble, the characters must climb down from area D5 or swim to the bottom of this spire
CHAPTER 4 | CLIFFTOP OBSERVATORY
and climb up from the water. Clearing the rubble takes one character 30 minutes, or the character can work together to clear it faster (for example, it takes two characters 6 minutes). If characters are trying to clear the rubble quietly, it takes twice as long, and at least half of the characters must succeed on a DC 14 Dexteriy (Stealth) check to avoid waking Sparkrender.
Once they've cleared the rubble, the characters can access the library’s interior.
Stale air heavy with the smell of old parchment floods your nostrils. The walls are lined with shelves stuffed full of old tomes and yellowing scrolls. Glass cases, toppled over and shattered, have strewn their contents across the stone floor. The sound of splintering wood echoes through the space, and a moment later you see an agitated bronze dragon the size of a bear, picking himself up from the wreckage of the old desk he apparently crashed into.
Aidron the bronze dragon wyrmling excitedly greets the characters when they enter. He has spentdays trying to dig his way out through the caved-in wall, but his efforts from the inside only caused further collapse. He is eager to escape, but if the characters ask, he explains his conflict with Sparkrender. He expresses regret over his inability to defeat the blue wyrmling and concern for the safety of the island's other inhabitants. And he is terrified of the fate Sparkrender has in store for him – the blue dragon plans to use Aidron's death to claim the power of all the dead dragons on the island, transforming himself into a mighty draconic avatar.
If the characters have not yet defeated Sparkrender, Aidron decides to face the blue dragon himself. He flies to the top of the observatory tower (area D5) to confront Sparkrender once more. However, Aidron is too weak to defeat Sparkrender alone; he needs the characters' help.
Once Sparkrender is defeated, the bronze wyrmling is excited to return to Dragon's Rest with the characters.
Treasure. This library was once a repository of magical knowledge and items of power, though most of its contents are too weathered to read. However, a character who searches through the room and succeeds on a DC 15 Intelligence (Investigation) check finds a +1 battleaxe or a spell scroll of hold person (+1 weapons and spell scrolls are both described in appendix A). A detect magic spell reveals the location of both of these items without requiring an ability check. Aidron has also cataloged the contents of the room and can direct the characters to these valuable items.
Sparkrender’s Ritual
If the characters leave the observatory defeating Sparkrender, they might return to find the blue wyrmling’s ritual underway. This is most likely to happen if the characters leave and take a long rest before confronting Sparkrender, or if they flee from combat with Sparkrender and return after they’ve rested.
Another possibility is that the characters drive Sparkrender away from the island without killing him, but leave Aidron imprisoned in area D6. In this case, Runara urges the characters to return to the observatory to find Aidron. When they arrive. Sparkrender has also rested, heraled, and returned to finish his work.
In either case. the characters arrive just as Sparkrender’s ritual is getting underway. (If they took or destroyed the dragon effigies in area D2, they have been replaced by even cruder versions created in a hurry.) Read the following text:
Streams of colored light swirl through the air around the golden statue in the ruined rotunda. Each shimmering display seems to originate from one of the five dragon effigies you saw before, and the lights' colors match the colors of the effigies: red, gold, brass, blue. and bronze. A blue dragon is perched atop the sculpture, throwing his head back in pain or ecstasy as the lights surround him, and he unleashes a bolt of lightning up toward the sky. At the base of the statue, a bronze dragon is bound to the ground by three heavy chains. He looks like he's in agony.
To stop the ritual, the characters must face Sparkrender (blue dragon wyrmling), potentially with the help of Aidron (bronze dragon wyrmling), if they can free Aidron from his chains (see "Freeing Aidron" below). Any surviving kobolds and winged kobolds lurk here, but they stay out of combat if possible.
See "Waking the Dragon" in area D5 for ideas on how to play Sparkrender in this encounter. He uses Breath Weapon as the characters approach the scene (unleashing lightning into the sky), so he has to wait for this action to recharge before he can use it on the characters this time. He fights to the death – the has too much riding on the success of this ritual to abandon it now.
CHAPTER 4 | CLIFFTOP OBSERVATORY
Dragon Spirits. At the end of each round of combat (on initiative count 0, after everyone else has acted), a random magical effect occurs, caused by the magical lights that swirl around the rotunda. These lights are manifestations of the dragon spirits Sparkrender is trying to bind to himself, but their effects are unpredictable. Roll a d10 and consult the Dragon Spirits table to see what happens.
DRAGON SPIRITS
| d10 | Effect |
|---|---|
| 1-2 | Astalagan's Blessing. Aldron and the characters each regain 1d4 + 4 hit points as the bronze light surrounds them with warmth. |
| 3-4 | Clyssavar's Flames. Sparkrender must succeed on a DC 12 Dexterity saving throw or take 7 (2d6) fire damage as the golden light crashes into him. |
| 5-6 | Eldenemir’s Gift. Sparkrender's Breath Weapon recharges as the blue light enfolds him. |
| 7-8 | Sharruth's Fury. Each of the characters must succeed on a DC 12 Dexterity saving throw or take 3 (1d6) fire damage as the red light erupts with fire. |
| 9-10 | Turadaer's Tricks. Aidron and the characters gain advantage on attack rolls and saving throws until initiative count 0 of the next round, as the brass light shimmers and sparks around them. |
Freeing Aidron. Aidron is bound by three heavy chains that keep him restrained. He can still take actions, such as biting or clawing an enemy that comes within his reach, but he knows Sparkrender is unaffected by his lightning Breath Weapon, so he doesn't bother using it. He might use his Repulsion Breath if he can see a good use for it.
Large clasps attach the chains to iron rings embedded in the ground. A character can use an action to undo one clasp. Once all three clasps are undone. Aidron is no longer restrained, though the chains reduce his speed by 10 feet. Removing the chains from Aidron takes 10 minutes.
Disrupting the Ritual. The most straightforward way to prevent Sparkrender from completing his ritual and obtaining the power he craves is to kill him. But characters can also use their actions in combat to interfere with the process and hinder Sparkrender in magical ways. Let the players try whatever they can imagine, using these ideas as examples:
Manipulate the Effigies. A character might use an action to lift an effigy closer to the central sculpture, breathe a prayer to the dragon it represents, or otherwise coax magic from it. Doing so immediately triggers the corresponding effect from the Dragon Spirits Table.
Destroy the Effigies. A character might break an effigy or throw it over the crumbling wall and into the ocean below. This ensures the corresponding effect does not occur again. (Reroll If you get than result on the Dragon Spirits table.)
Manipulate the Sculpture. Characters might try to manipulate the golden sculpture as a way of disrupting the ritual. The sculpture is large and sturdy, though, so a single action has no noticeable effect on the sculpture or the magic. (The sculpture has AC 20, 27 hit points, and immunity to poison and psychic damage.) However, disturbing the sculpture does distract Sparkrender. The first time a character uses an action to attack or otherwise try to disturb the sculpture, the distracted blue dragon has disadvantage on attack rolls and saving throws until the end of his next turn. Once he sees the character's meddling isn't very effective, he can't be distracted in this way again.
Ending the Adventure
With Aidron in tow, the characters can return victorious to Dragon's Rest. Runara is pleased by the bronze wyrmling's safe return. As a reward, she gives each of the characters a potion of healing and an exquisite pearl worth 100 gp. She welcomes them to stay at Dragon's Rest as long as they wish and furnishes them with whatever supplies they need for their travels when they're ready to leave the island. If Sparkrender is dead, she grieves the death of yet another dragon on Stormwreck isle, but she doesn't condemn the characters for killing him.
If your players wish to continue playing their characters, you can use the contents of this set to create your own adventures. The "Exploring the Island" section of chapter 1 offers additional encounters you can use if the characters haven't already faced them. Perhaps Sparkrender (or a relative of his) pursues the characters in search of revenge, or perhaps something uncovered in the secret library leads the characters to a distant locale in pursuit of more adventure.
If you want to advance these characters beyond 3rd level and create adventures for them, you'll need the basic rules online or the advanced rulebooks: the Player's Handbook, Dungeon Master's Guide, and Monster Manual.
CHAPTER 4 | CLIFFTOP OBSERVATORY
APPENDIX A - Magic Items
Every adventure holds the promise – but not a guarantee – of finding one or more magic items. Dragons of Stormwreck Isle contains and assortment of magic items that hints at the wider variety of magic items waiting to be found in the worlds of D&D.
Using a Magic Item
A magic item’s description explains how the item works. Handling a magic item is enough to give a character a sense that something is extraordinary about the item. To learn more, a character can concentrate on the item during a short rest, while being in physical contact with the item. At the end of the rest, the character learns the item's properties. Potions are an exception: a little taste is enough to tell the taster what the potion does.
Item Descriptions
These items are in alphabetical order. Under an item's name is a line that tells you the type of the item, its rarity and whether you must attune to it.
Boots of Elvenkind
Wondrous Item. Uncommon
While you wear these boots, your steps make no sound, regardless of the surface you are moving across. You also have advantage on Dexterity (Stealth) checks that rely on moving silently.
Elixir of Health
Potion. Rare
When you drink this potion, it cures any disease afflicting you, and it removes the blinded, deafened. paralyzed, and poisoned conditions. The clear red liquid has tiny bubbles of light in it.
Boots of Elvenkind
Potion of Healing
Potion, Common
You regain 2d4+2 hit points when you drink this potion. The potion’s red liquid glimmers when agitated.
Potion of Resistance
Potion, Uncommon
When you drink this potion, you gain resistance to one type of damage for 1 hour. The DM chooses the type or determines it randomly from the options below.
| d10 | Damage Type |
|---|---|
| 1 | Acid |
| 2 | Cold |
| 3 | Fire |
| 4 | Force |
| 5 | Lightning |
| d10 | Damage Type |
|---|---|
| 6 | Necrotic |
| 7 | Poison |
| 8 | Psychic |
| 9 | Radiant |
| 10 | Thunder |
SPELL SCROLL
Scroll. Varies
A spell scroll bears the words of a single spell, written in a mystical cipher. If the spell is on your class's spell list, you can read the scroll and cast its spell without providing any material components. Otherwise, the scroll is unintelligible. Casting the spell by reading the scroll requires the spell's normal casting time. Once the spell is cast, the words on the scroll fade, and it crumbles to dust. If the casting is interrupted, the scroll is not lost.
If the spell is on your class' spell list but of a higher level than you can normally cast, you must make an ability check using your spellcasting ability to determine whether you cast it successfully. The DC equals 10 + the spell's level. On a success, you cast the spell: on a failure, the spell disappears from the scroll with no other effect.
The level of the spell on the scroll determines the spell's saving throw DC and attack bonus, as well as the scroll's rarity, as shown in the Spell Scroll table.
Spell Scroll
| Spell Level | Rarity | Save DC | Attack Bonus |
|---|---|---|---|
| Cantrip | Common | 13 | +5 |
| 1st | Common | 13 | +5 |
| 2nd | Uncommon | 13 | +5 |
Weapon +1
Weapon (Any), Uncommon
You have a +1 bonus to attack and damage rolls made with this magic weapon.
APPENDIX A | MAGIC ITEMS
APPENDIX B - Creatures
This appendix contains stat blocks and short descriptions for the creatures that appear in Dragons of Stormwreck Isle
Creature Stat Blocks
A creature's stat block provides the essential information that you, as the DM, need to run it. The following sections explain the various pieces of information you'll find in s slat block.
Size
A stat block tells you a creature's size: Tiny, Small, Medium, Large, Huge, or Gargantuan. Size is explained in the rulebook.
Squeezing into a Smaller Space
A creature can squeeze through a space large enough for a creature one size smaller than itself. When a creature is squeezing through such a space, its speed is halved, it has disadvantage on attack rolls and Dexterity saving throws, and attack rolls against it have advantage.
Type
A creature's type is specified in a stat block, indicating the family of creatures that it belongs to. The types in the game are Aberration. Beast. Celestial, Construct. Dragon. Elemental. Fey. Fiend. Giant. Humanoid. Monstrosity, Ooze. Plant, and Undead.
Alignment
A creature's alignment reflects its disposition. See the rulebook for descriptions of the different alignments.
Armor Class
A creature that wears armor or carries a shield has an AC that takes its armor, shield, and Dexterity into account. Otherwise, a creature's AC is based on its Dexterity modifier and any natural armor or supernatural resilience it might possess.
If a creature wears armor or carries a shield, the kind of armor it wears or shield it carries is noted in parentheses after its AC value.
Hit Points
A stat block specifies a creature’s hit point maximum. In parentheses, the stat block also indicates the Hit Dice that were rolled to determined those hit points, plus the creature’s Constitution modifier multiplied by the number of Hit Dice.
Speed
A creature’s speed tells you how far it can move on its turn. For more information on speed, see the rulebook.
All creatures have a walking speed; those that have no form of ground based locomotion have a walking speed of 0 feet. Some of the creatures in this adventure have one or more additional movement modes:
- Burrow. A creature tha has a burrowing speed can use all or part of its movement to move through sand, earth, mud or ice. It can’t burrow through solid rock unless it has special trait allows it do do so.
- Fly. A creature that tins a flying speed can use all or part of its movement to fly. If the creature is incapacitated or knocked prone while flying, it falls unless it can hover.
- Swim. A creature that has a swimming speed doesn't need to spend extra movement to swim.
Ability Scores
Every creature has six ability scores (Strength. Dexterity. Constitution. Intelligence, Wisdom, and Charisma) and corresponding modifiers. For more information on ability scores, see the rulebook.
Saving Throws
The Saving Throws entry is reserved for creatures that are proficient in one or more saving throws.
Saving throws in a stat block are shown with the total modifier – the creatures ability modifier plus its proficiency bonus. If a creature’s stat block says “Con +4”, roll a d20 and add 4 when the creature makes a saving throw using Constitution.
Skills
The Skills entry is reserved for creatures that are proficient in one or more skills.
Skills in a stat block are shown with the total modifier – the creature's ability modifier plus its proficiency bonus. If a creature's stat block says "Stealth +4," roll a d20 and add 4 when the creature makes an ability check using Stealth.
Vulnerabilities, Resistances, and Immunities
Some creatures have vulnerability, resistance, or immunity to certain types of damage. Additionally. some creatures are immune to certain conditions. These immunities are also noted here.
APPENDIX B | CREATURES
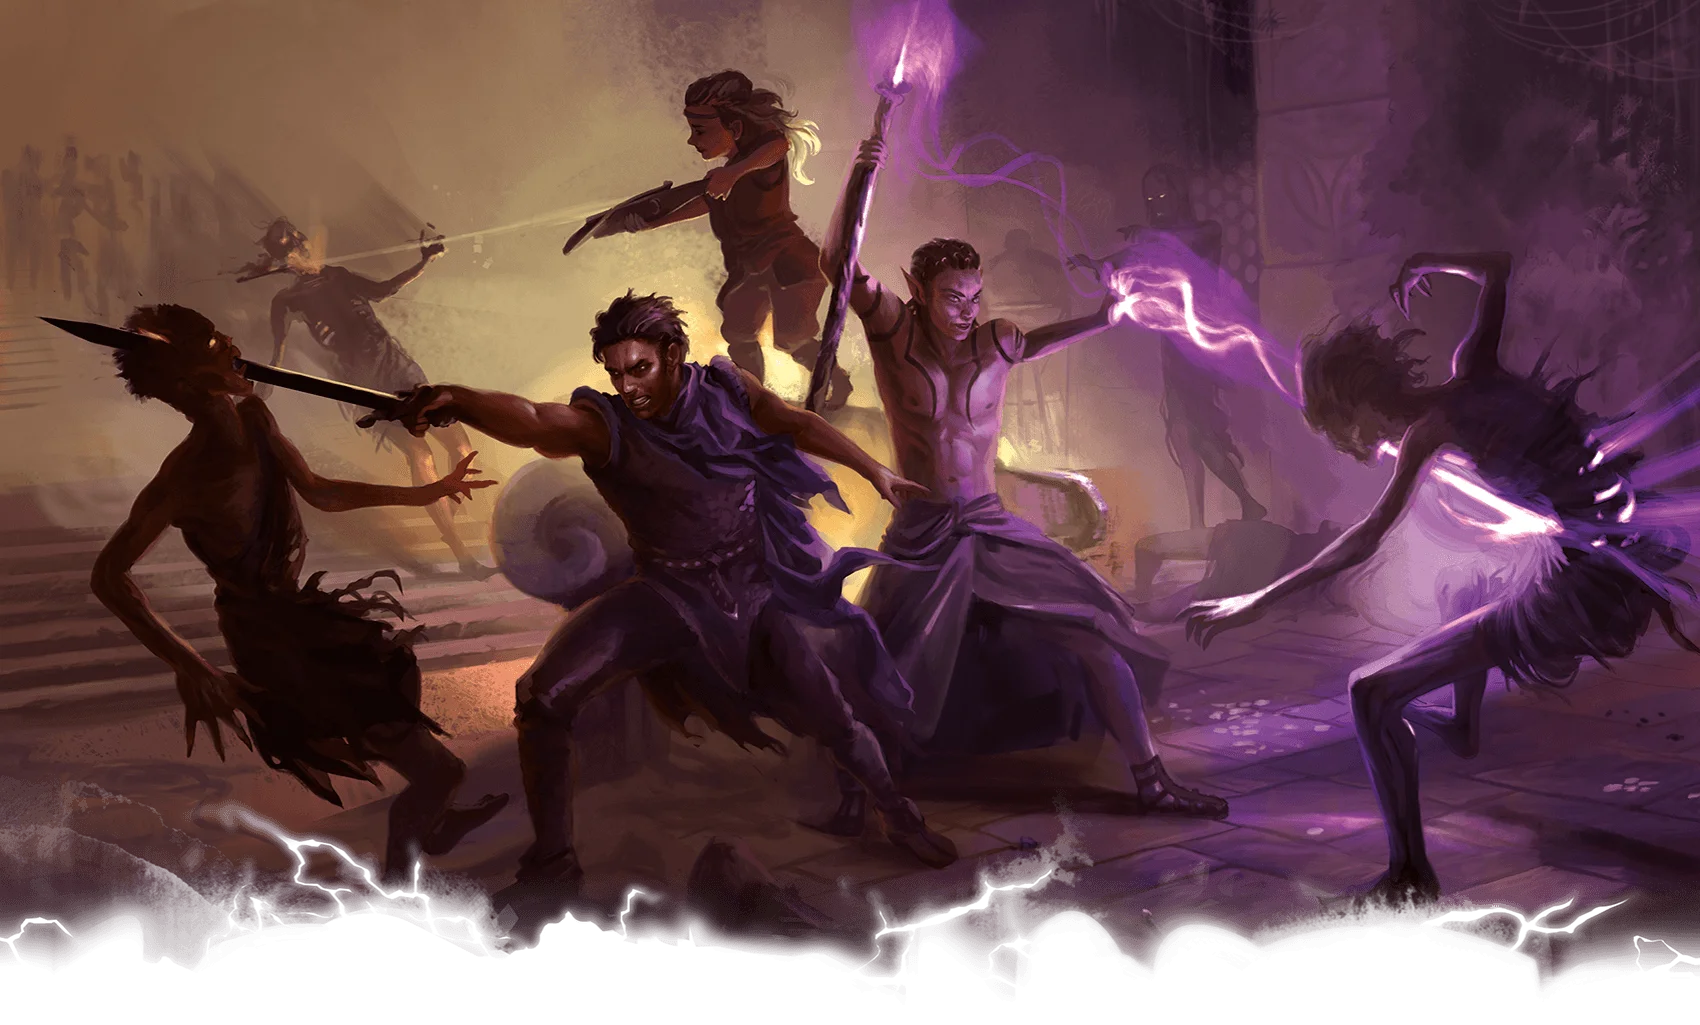
Senses
The Senses entry gives a creature's passive Wisdom (Perception) score, as well as any special senses the creature has, such as the following:
Blindsight. A creature with blindsight can perceive its surroundings without having to rely on sight, within a specific radius.
Darkvision. A creature with darkvision can see in dim light within the radius as if it were bright light and in darkness as if it were dim light. The creature discerns color in darkness as shades of gray.
Languages
The languages tha a creature can speak are listed in alphabetical order.
Challenge
A well-rested party of four adventurers should be able to defeat a creature that has a challenge rating equal to the adventurers’ level without any characters dying. Creatures weaker than 1st-level characters have challenge ratings lower than 1.
Traits
In a stat block, traits are special features that appear right under the creature’s Challenge entry.
Actions
When a creature takes its action, it can choose from the options in the “Actions” section of its stat block and the options in the rulebook.
Melee and Ranged Attacks
The most common actions that a creature takes in combat are melee and ranged attacks.
See the rulebook for how attacks work.
Any damage or other effects that occur as a result of an attack hitting a target are described here. As the DM, you can use the average damage or roll the damage; for this reason, both the average damage and the die expression are presented. For example, if a monster deals 4 (1d8) slashing damage with its longsword, that notation means you can have the monster deal 4 damage, or you can roll 1d8 to determine the damage.
Limited Usage
Some special abilities – whether they are traits, actions, or reactions – have restrictions on the number of times they can be used:
X/Day. The notation “X/Day” means a special ability can be used a certain number of times, and then the creature must finish a long rest to regain expended uses. For example, “1/Day” means a special ability can be used once, and then the creature must finish a long rest to use it again.
Recharge X-Y. The notation “Recharge X-Y” means a creature can use a special ability once, and then the ability has a random chance of recharging during each subsequent round of combat. At the start of each of the creature’s turns, roll a d6. If the roll is one of the numbers in the recharge notation, the creature regains the use of that special ability. The ability also recharges when the creature finishes a short or long rest. For example, “Recharge 5-6” means a creature can use the special ability once. Then, at the start of the creature’s turn each round, it regains the use of the ability if it rolls a 5 or a 6 on a d6.
APPENDIX B | CREATURES

Creature Descriptions
The creatures tha appear in the adventure are presented in this section in alphabetical orcer.
Dragons
Dragons are winged reptiles of ancient lineage and fearsome power. THe oldest dragons, over a thousand years old, are some of the most powerful creatrures in the world. Dragons' innate magic fuels their dreaded breath weapons and other preternatural abilities.
The chromatic and meatllic dragon families encompass most of the dragonkind. The chromatic dragons - black, blue, green, red and white - are largely selfish, evil, and feared. The metallic dragons - brass, bronze, copper, gold, and silver - are typically noble, good, and respected by the wise.
Though their goal and ideals vary tremendously, most dragons covet wealth, boarding mounds of coins and gathering gems, jewels, and magic items.
Chromatic and metallic dragons pass through four distinct stages of life, from wyrmlings to ancient dragons. Even wyrmlings in their first five years of life are fearsome threats, and wise adventurers do not underestimate them or dismiss them as "children".
Blue Dragons
Vain and territorial, many blue dragons take pleasure in lording their power over creatures they see as lesser.
Blue Dragon Wyrmling
Medium Dragon (Chromatic), Typically Lawful Evil
- Armor Class 17 (natural armor)
- Hit Points 52 (8d8+16)
- Speed 30ft., burrow 15ft., fly 60ft.
STR DEX CON INT WIS CHA 17 (+3) 10 (+0) 15 (+2) 12 (+1) 11 (+0) 15 (+2)
- Saving Throws Dex +2, Con +4, Wis +2, Cha +4
- Skills Perception +4, Stealth +2
- Damage Immunities lightning
- Senses blindsight 10 ft., darkvision 60 ft, passive Perception 14
- Languages Draconic
- Challenge 3 Proficiency Bonus +2
Actions
Bite. Melee Weapon Attack: +5 to hit, reach 5ft., one target. Hit: 8 (1d10 + 3) piercing damage plus 3 (1d6) lightning damage.
Lightning Breath (Recharge 5-6) The dragon exhales lightning in a 30-foot line that is 5 feet wide. Each creature in that line must make a DC 12 Dexterity saving throw, taking 22 (4d10) lightning damage on a failed save, or half as much damage on a successful one.
APPENDIX B | CREATURES
Bronze Dragons
Many bronze dragons are friendly coastal dwellers who enjoy watching ships and sailors.
Runara. Despite her innocuous disguise and her commitment to peace, the leader of Dragon's Rest is an adult bronze dragon - a fearsome opponent or a powerful ally. Her capabilities go beyond what is presented here.
Runara (Adult Bronze Dragon)
Huge Dragon (Metallic), Lawful Good
- Armor Class 19 (natural armor)
- Hit Points 21 (17d12+102)
- Speed 40ft., fly 80ft., swim 40ft.
STR DEX CON INT WIS CHA 25 (+7) 10 (+0) 23 (+6) 16 (+3) 15 (+2) 19 (+4)
- Saving Throws Dex +5, Con +11, Wis +7, Cha +9
- Skills Insight +7, Perception +12, Stealth +5
- Damage Immunities lightning
- Senses blindsight 60 ft., darkvision 120 ft, passive Perception 22
- Languages Common, Draconic
- Challenge 13 Proficiency Bonus +5
Amphibious. Runara can breathe air and water.
Legendary Resistance (3/Day). If Runara fails a saving throw, she can choose to suceed instead.
Actions
Multiattack. Runara makes one Bite attack and two Claw attacks.
Bite. Melee Weapon Attack: +12 to hit, reach 10ft., one target. Hit: 18 (2d10 + 7) piercing damage.
Claw. Melee Weapon Attack: +12 to hit, reach 5ft., one target. Hit: 18 (2d6 + 7) slashing damage.
Breath Weapon (Recharge 5-6) Runara uses one of the gollowing breath weapons:
Lightning Breath. Runara exhales lightning in a 90-foot line that is 5 feet wide. Each creature in that line must make a DC 19 Dexterity saving throw, taking 66 (12d10) lightning damage on a failed save, or half as much damage on a successful one.
Repulsion Breath. Runara exhales repulsion energy in a 30-foot cone. Each creature in the area must make a DC 19 Strength saving throw or be pushed up to 60 feet away from Runara.
Change Shape. Runara magically transforms into a Humanoid or Beast that is Medium or Small, while retaining her game statistics (other than her size). This transformation ends if Runara is reduced to 0 hit points or uses a bonus action to end it.

Bronze Dragon Wyrmling
Medium Dragon (Metallic), Lawful Good
- Armor Class 17 (natural armor)
- Hit Points 32 (5d8+10)
- Speed 30ft., fly 60ft., swim 30ft.
STR DEX CON INT WIS CHA 17 (+3) 10 (+0) 15 (+0) 10 (+0) 11 (+0) 15 (+2)
- Saving Throws Dex +2, Con +4, Wis +2, Cha +4
- Skills Perception +4, Stealth +2
- Damage Immunities lightning
- Senses blindsight 10ft., darkvision 60ft, passive Perception 14
- Languages Draconic
- Challenge 2 Proficiency Bonus +2
Amphibious. Runara can breathe air and water.
Actions
Bite. Melee Weapon Attack: +5 to hit, reach 5ft., one target. Hit: 8 (1d10 + 3) piercing damage.
Claw. Melee Weapon Attack: +12 to hit, reach 5ft., one target. Hit: 18 (2d6 + 7) slashing damage.
Breath Weapon (Recharge 5-6) The dragon uses one of the gollowing breath weapons:
Lightning Breath. Runara exhales lightning in a 40-foot line that is 5 feet wide. Each creature in that line must make a DC 12 Dexterity saving throw, taking 16 (3d10) lightning damage on a failed save, or half as much damage on a successful one.
Repulsion Breath. The dragon exhales repulsion energy in a 30-foot cone. Each creature in the area must make a DC 12 Strength saving throw or be pushed up to 30 feet away from Runara.
APPENDIX B | CREATURES
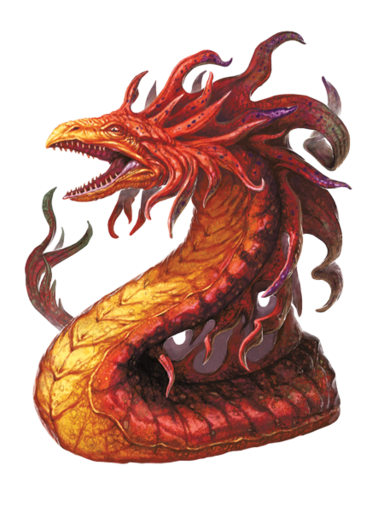
Fire Snake
Fire snakes are the larval form of salamanders - powerful creatures from the Elemental Plane of Fire. Intense heat washes off their bodies, and their yellow eyes glow like candles.
Fire Snake
Medium Elemental, Typically Neutral Evil
- Armor Class 14 (Natural Armor)
- Hit Points 22 (5d8)
- Speed 30 ft.
STR DEX CON INT WIS CHA 12 (+1) 14 (+2) 11 (+0) 7 (-2) 10 (+0) 8 (-1)
- Damage Vulnerabilities cold
- Damage Resistances bludgeoning, piercing, and slashing from nonmagical attacks
- Damage Immunities fire
- Senses darkvision 60ft., passive Perception 10
- Languages understands Ignan but can't speak
- Challenge 1 Proficiency Bonus +2
Heated Body A cerature that touches the snake or hits it with a melee attack while within 5 feet of it takes 3 (1d6) fire damage.
Actions
Multiattack. The snake makes one Bite attack and one Tail attack.
Bite. Melee Weapon Attack: +3 to hit, reach 5ft., one target. Hit: 3 (1d4 + 1) piercing damage plus 3 (1d6) fire damage.
Tail. Melee Weapon Attack: +3 to hit, reach 5ft., one target. Hit: 3 (1d4 + 1) bludgeoning damage plus 3 (1d6) fire damage.
Fume Drake
Fume drakes are mischievous creatures that arise from the lingering magical energy of a dead dragon. They resemble small, legless dragons formed from clouds of greenish smoke. They delight in causing pain and confusion in other creatures.
Fume Drake
Small Elemental, Typically Neutral
- Armor Class 12
- Hit Points 22 (5d6 + 5)
- Speed 30ft., fly 30ft.
STR DEX CON INT WIS CHA 6 (-2) 14 (+2) 12 (+1) 6 (-2) 10 (+0) 11 (+0)
- Damage Vulnerabilities fire, poison
- Condition Immunities poisoned
- Senses darkvision 60ft., passive Perception 10
- Languages Draconic, Ignan
- Challenge 1/4 Proficiency Bonus +2
Death Burst When the gume drake dies, it explodes in a cloud of noxious fumes. Each creature within 5 feet of the fume drake must succeed on a DC 11 Constitution saving throw or take 4 (1d8) poison damage.
Unusual Nature. The drake doesn't require food, drink or sleep.
Actions
Bite. Melee Weapon Attack: +4 to hit, reach 5ft., one target. Hit: 4 (1d4 + 2) fire damage.
Scalding Breath (Recharge 6). The fume drake exhales a 15-foot cone of scalidng steam. Each reacture in that area must make a DC 11 Dexterity saving throw, taking 4 (1d8) fire damage on a failed save, or half as much damage on a successful one.
APPENDIX B | CREATURES

Ghoul
Ghouls are Undead that roam the night in packs, driven by insatiable hunger for flesh. Like maggots, they thrive in places rank with decay and death.
Ghoul
Medium Undead, Typically Chaotic Evil
- Armor Class 12
- Hit Points 22 (5d8)
- Speed 30 ft.
STR DEX CON INT WIS CHA 13 (+1) 15 (+2) 10 (+0) 7 (-2) 10 (+0) 6 (-2)
- Damage Immunities cold
- Condition Immunities charmed, exhaustion, poisoned
- Senses darkvision 60ft., passive Perception 10
- Languages common
- Challenge 1 Proficiency Bonus +2
Actions
Bite. Melee Weapon Attack: +2 to hit, reach 5ft., one target. Hit: 9 (2d6 + 2) piercing damage.
Claw. Melee Weapon Attack: +4 to hit, reach 5ft., one target. Hit: 7 (2d4 + 2) slashing damage. If the target is a creture other than an elf orr Undead, it must succeed on a DC 10 Constitution saving throw or be paralyzed for 1 minute. The target can repeat the saving throw at the end of each of its turns, ending the effect on itself on a success.
Harpy
The cruel harpy uses its sweet song to lure adventures and sailors to their deaths. A harpy has the body, legs, and wings of a vulture but the torso, arms and head of a human.
Harpy
Medium Monstrosity, Typically Chaotic Evil
- Armor Class 11
- Hit Points 38 (7d8+7)
- Speed 20 ft., fly 40ft.
STR DEX CON INT WIS CHA 12 (+1) 13 (+1) 12 (+1) 7 (-2) 10 (+0) 13 (+1)
- Senses passive Perception 10
- Languages Common
- Challenge 1 Proficiency Bonus +2
Actions
Multiattack. The harpy makes one Claw attack and one Club attack.
Claw. Melee Weapon Attack: +3 to hit, reach 5ft., one target. Hit: 6 (2d4 + 1) slashing damage.
Club. Melee Weapon Attack: +3 to hit, reach 5ft., one target. Hit: 3 (1d4 + 1) bludgeoning damage.
Luring Song. he harpy sings a magical melody. Every humanoid and giant within 300 feet of the harpy that can hear the song must succeed on a DC 11 Wisdom saving throw or be charmed until the song ends. The harpy must take a bonus action on its subsequent turns to continue singing. It can stop singing at any time. The song ends if the harpy is incapacitated.
While charmed by the harpy, a target is incapacitated and ignores the songs of other harpies. If the charmed target is more than 5 feet away from the harpy, the target must move on its turn toward the harpy by the most direct route. It doesn't avoid opportunity attacks, but before moving into damaging terrain, such as lava or a pit, and whenever it takes damage from a source other than the harpy, a target can repeat the saving throw. A creature can also repeat the saving throw at the end of each of its turns. If a creature's saving throw is successful, the effect ends on it.
A target that successfully saves is immune to this harpy's song for the next 24 hours.
APPENDIX B | CREATURES
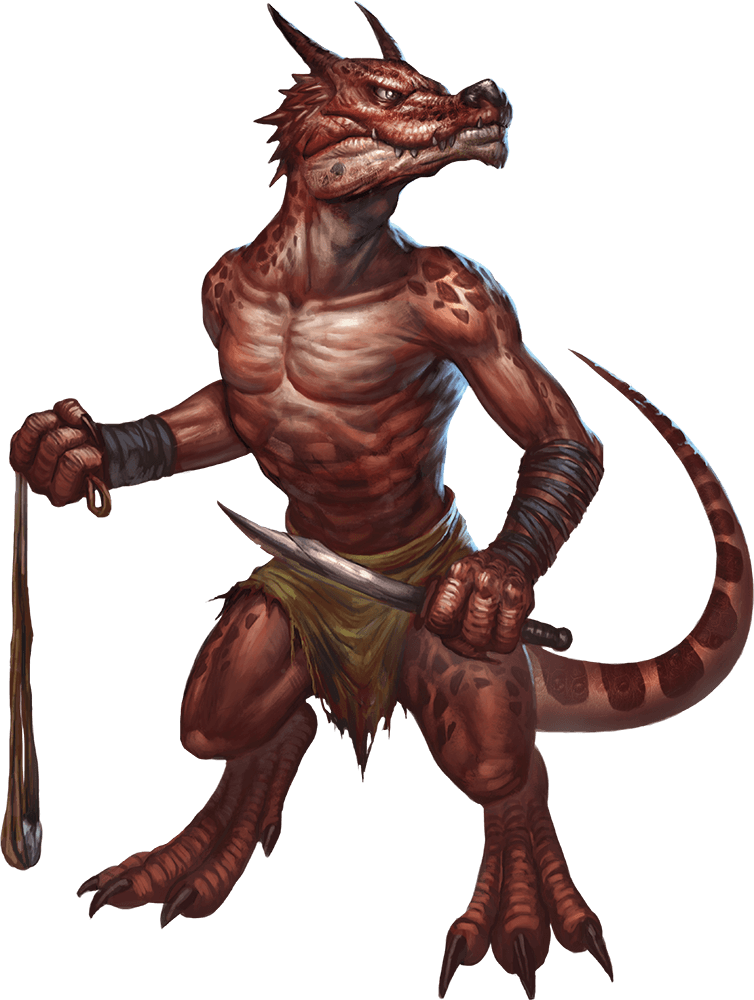
Kobolds
Kobolds are reptilian Humanoids that often revere dragons. Physically weak, they find strength in numbers.
A few kobolds are born with leathery wings and can fly, which is often seen as a gift from dragon gods.
Kobold Tinkerer
Small Humanoid, Any Alignment
- Armor Class 12
- Hit Points 10 (3d6)
- Speed 30 ft., fly 10 ft.
STR DEX CON INT WIS CHA 7 (-2) 14 (+2) 10 (+0) 15 (+2) 7 (-2) 9 (-1)
- Skills Arcana +4, Perception +0
- Senses darkvision 60ft., passive Perception 10
- Languages Common, Draconic
- Challenge 1/4 Proficiency Bonus +2
- Inquiring Mind (1/Day). The kobold can cast detect magic, requiring no spell components and using Intelligence as the spellcasting ability
- Pact Tactics. The kobold has advantage on an attack roll against a creature if at least one of the kobold's allies is within 5 feet of the creature and the ally isn't incapacitated.
- Sunlight Sensitivity. While in sunlight, the kobold has disadvantage on attack rolls, as well as on Wisdom (Perception) checks that rely on sight.
Actions
Dagger. Melee or Ranged Weapon Attack: +4 to hit, reach 5ft. or range 20/60 ft., one target. Hit: 4 (1d4 + 2) piercing damage.
Alchemical Flame (Recharge 6) The kobold unleashes fire in a 15-foot cone. Each creature in that area must make a DC 12 Dexterity saving throw, taking 10 (3d6) fire damage on a failed saving throw, or half as much damage on a sucessful one.
Kobold
Small Humanoid, Any Alignment
- Armor Class 12
- Hit Points 5 (2d6 - 2)
- Speed 30 ft.
STR DEX CON INT WIS CHA 7 (-2) 15 (+2) 9 (-1) 8 (-1) 7 (-2) 8 (-1)
- Senses darkvision 60ft., passive Perception 8
- Languages Common, Draconic
- Challenge 1/8 Proficiency Bonus +2
- Pact Tactics. The kobold has advantage on an attack roll against a creature if at least one of the kobold's allies is within 5 feet of the creature and the ally isn't incapacitated.
- Sunlight Sensitivity. While in sunlight, the kobold has disadvantage on attack rolls, as well as on Wisdom (Perception) checks that rely on sight.
Actions
Dagger. Melee or Ranged Weapon Attack: +4 to hit, reach 5ft. or range 20/60 ft., one target. Hit: 4 (1d4 + 2) piercing damage.Sling. Ranged Weapon Attack: +4 to hit, range 30/120 ft., one target. Hit: 4 (1d4 + 2) bludgeoning damage.
Winged Kobold
Small Humanoid, Any Alignment
- Armor Class 13
- Hit Points 7 (3d6 - 3)
- Speed 30 ft., fly 30 ft.
STR DEX CON INT WIS CHA 7 (-2) 16 (+3) 9 (-1) 8 (-1) 7 (-2) 8 (-1)
- Senses darkvision 60ft., passive Perception 8
- Languages Common, Draconic
- Challenge 1/4 Proficiency Bonus +2
- Pact Tactics. The kobold has advantage on an attack roll against a creature if at least one of the kobold's allies is within 5 feet of the creature and the ally isn't incapacitated.
- Sunlight Sensitivity. While in sunlight, the kobold has disadvantage on attack rolls, as well as on Wisdom (Perception) checks that rely on sight.
Actions
Dagger. Melee or Ranged Weapon Attack: +5 to hit, reach 5ft. or range 20/60 ft., one target. Hit: 5 (1d4 + 3) piercing damage.Dropped Rock. Ranged Weapon Attack: +5 to hit, one target directly belwo the kobold. Hit: 6 (1d6 + 3) bludgeoning damage.
APPENDIX B | CREATURES
Myconids
Myconids are intelligent, mobile fungi thast live in caves, seek enlightenment, and dislike violence.
Adult myconids live and work together in colonies and practice a form of communal meditation called the meld, in which they seek to transcend mundane reality thourgh shared hallucination. Myconid leaders like Sinensa use their Hallucination Spores to help myconids create melds.
Myconid Sprout
Small Plant, Typically Lawful Neutral
- Armor Class 10
- Hit Points 7 (2d6)
- Speed 10 ft.
STR DEX CON INT WIS CHA 8 (-1) 10 (+0) 10 (+0) 8 (-1) 11 (+0) 5 (-3)
- Senses darkvision 120ft., passive Perception 10
- Languages ---
- Challenge 0 Proficiency Bonus +2
Distress Spores. When the myconid takes damage, all other myconids within 240 feet of it can sense its pain.
Sun Sickness. While in sunlight, the myconid has disadvantage on ability checks, attack rolls, and saving throws. The myconid dies if it spends more than 1 hour in direct sunlight.
Actions
Fist. Melee Weapon Attack: +1 to hit, reach 5ft., one target. Hit: 1 (1d4 -1) bludgeoning damage plus 2 (1d4) poison damage.
Rapport Spores (3/Day) A 10-foot radius of spores extends from the myconid. These spores can go around corners and affect only creatures with an Intelligence of 2 or higher that aren't Undead, Constructs, or Elementals. Affected creatures can communicate telepathically with one another while they are within 30 feet of each other. The effect lasts for 1 hour.

Myconid Adult
Medium Plant, Typically Lawful Neutral
- Armor Class 12 (natural armor)
- Hit Points 22 (4d8 + 4)
- Speed 20 ft.
STR DEX CON INT WIS CHA 10 (+0) 10 (+0) 12 (+1) 10 (+0) 13 (+1) 7 (-2)
- Senses darkvision 120ft., passive Perception 11
- Languages ---
- Challenge 1/2 Proficiency Bonus +2
Distress Spores. When the myconid takes damage, all other myconids within 240 feet of it can sense its pain.
Sun Sickness. While in sunlight, the myconid has disadvantage on ability checks, attack rolls, and saving throws. The myconid dies if it spends more than 1 hour in direct sunlight.
Actions
Fist. Melee Weapon Attack: +2 to hit, reach 5ft., one target. Hit: 5 (2d4) bludgeoning damage plus 5 (2d4) poison damage.
Pacifying Spores (3/Day) The myconid ejects spores at one creature it can see within 5 feet of it. The target must succeed on a DC 11 Constitution saving throw or be stunned for 1 minute. The target can repeat the saving throw at the end of each of its turns, ending the effect on itself on a success.
Rapport Spores A 20-foot radius of spores extends from the myconid. These spores can go around corners and affect only creatures with an Intelligence of 2 or higher that aren't Undead, Constructs, or Elementals. Affected creatures can communicate telepathically with one another while they are within 30 feet of each other. The effect lasts for 1 hour.
APPENDIX B | CREATURES
Sinensa
Large Plant (Myconid), Lawful Neutral
- Armor Class 13 (natural armor)
- Hit Points 60 (8d10 + 16)
- Speed 20 ft.
STR DEX CON INT WIS CHA 12 (+1) 10 (+0) 14 (+2) 13 (+1) 15 (+2) 10 (+0)
- Senses darkvision 120ft., passive Perception 12
- Languages ---
- Challenge 2 Proficiency Bonus +2
Distress Spores. When the myconid takes damage, all other myconids within 240 feet of it can sense its pain.
Sun Sickness. While in sunlight, the myconid has disadvantage on ability checks, attack rolls, and saving throws. The myconid dies if it spends more than 1 hour in direct sunlight.
Actions
Multiattack. The myconid makes one Fist attack and uses its Hallucination Spores.
Fist. Melee Weapon Attack: +3 to hit, reach 5ft., one target. Hit: 8 (3d4 + 1) bludgeoning damage plus 5 (2d4) poison damage.
Hallucination Spores The myconid ejects spores at one creature it can see within 5 feet of it. The target must succeed on a DC 12 Constitution saving throw or be poisoned for 1 minute. The poisoned target is incapacitated while it hallucinates. The target can repeat the saving throw at the end of each of its turns, ending the effect on itself on a success.
Rapport Spores A 20-foot radius of spores extends from the myconid. These spores can go around corners and affect only creatures with an Intelligence of 2 or higher that aren't Undead, Constructs, or Elementals. Affected creatures can communicate telepathically with one another while they are within 30 feet of each other. The effect lasts for 1 hour.
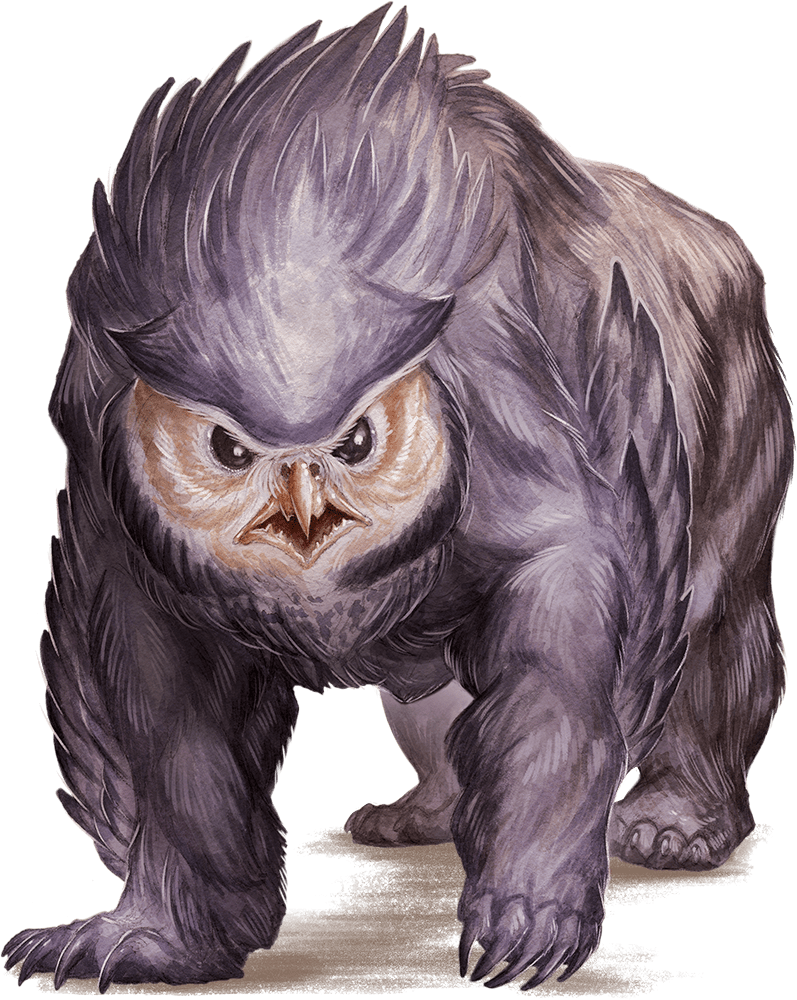
Owlbear
The owlbear's ferocity and stubbornness make it a terrifying predator. It fears few other creatures. Scholars debate whether it is a natural creation or the result of a magical experiment.
Owlbear
Large Monstruosity, Unaligned
- Armor Class 13 (natural armor)
- Hit Points 59 (7d10 + 21)
- Speed 40 ft.
STR DEX CON INT WIS CHA 20 (+5) 12 (+1) 17 (+3) 3 (-4) 12 (+1) 7 (-2)
- Skills Perception +3
- Senses darkvision 120ft., passive Perception 12
- Languages ---
- Challenge 3 Proficiency Bonus +2
Keen Sight and Smell. The owlbear has advantage on Wisdom (Perception) checks that rely on sight or smell.
Actions
Multiattack. The owlbear makes two attacks: one with its beak and one with its claws.
Beak. Melee Weapon Attack: +7 to hit, reach 5ft., one target. Hit: 10 (1d10 + 5) piercing damage.
Claws. Melee Weapon Attack: +7 to hit, reach 5ft., one target. Hit: 14 (2d8 + 5) slashing damage.
APPENDIX B | CREATURES

Spore Servant Octopus
Spore servants are dead creatures reanimated by the magical spores of a myconid leader. The final act of the myconid leader in Seagrow Caves before lapsing into its current comatose state was creating a spore servant from a dead giant octopus to protect the caves while the leader could not. Unlike a living octopus, theis guardian has only basic control over its tentacles. Rather than coiling around intruders to imobilize them, the spore servant simply bludgeons them.
Spore Servant Octopus
Large Plant, Unaligned
- Armor Class 11
- Hit Points 52 (8d10 + 8)
- Speed 5 ft., swim 50 ft.
STR DEX CON INT WIS CHA 17 (+3) 13 (+1) 13 (+1) 2 (-4) 6 (-2) 1 (-5)
- Condition Immunities blinded, charmed, frightened, paralyzed
- Senses blindsight 30ft (blind beyond this radius), passive Perception 8
- Languages ---
- Challenge 1/4 Proficiency Bonus +2
Held Breath. While out of water, the octopus can hold its breath for 1 hour.
Water Breathing. The octopus can breath only underwater.
Actions
Tentacle. Melee Weapon Attack: +5 to hit, reach 15ft., one creature. Hit: 7 (1d8 + 3 ) bludgeoning damage.
Stirge
A stirge is a winged pest that feeds on the blood of living creatures through its long proboscis. It uses its proboscis to pierce its victim's flesh while clutching its prey with hooked claws.
Stirge
Tiny Beast, Unaligned
- Armor Class 14 (natural armor)
- Hit Points 2 (1d4)
- Speed 10 ft., swim 40 ft.
STR DEX CON INT WIS CHA 4 (-3) 16 (+3) 11 (+0) 2 (-4) 8 (-1) 6 (-2)
- Senses darkvision 60 ft., passive Perception 8
- Languages ---
- Challenge 1/8 Proficiency Bonus +2
Actions
Blood Drain. Melee Weapon Attack: +5 to hit, reach 5ft., one creature. Hit: 5 (1d4 + 3 ) piercing damage, and the stirge attaches to the target. While attached, the stirge doesn't attack. Instead, at the start of each of the stirge's turns, the target loses 5 (1d4 + 3) hit points
The stirge can detach itself by spending 5 feet of its movement. It does so after it drains 10 hit poiunts from the target or the target dies. A creature, including the target, can use its action to detach the stirge.
APPENDIX B | CREATURES

Tarak
Before coming to Dragon's Rest, Tarak was a criminal, but he has since devoted himself to the study of herbs and medicine. He is usually unarmed, but he keeps several daggers hidden in his cell (in area A1 of Dragon's Rest; see page 10).
Tarak
Medium Humanoid (Human), Lawful Neutral
- Armor Class 13
- Hit Points 27 (6d8)
- Speed 30 ft.
STR DEX CON INT WIS CHA 10 (+0) 16 (+3) 10 (+0) 12 (+1) 14 (+2) 16 (+3)
- Skills Deception +5, Insight +4, Medicine +4, Nature +3
- Senses passive Perception 12
- Languages Common, Draconic, thieve's cant
- Challenge 1 Proficiency Bonus +2
Actions
Multiattack. Tarak makes three Dagger attacks.
Dagger. Melee or Ranged Weapon Attack: +5 to hit, reach 5ft. or range 20/60 ft., one target. Hit: 5 (1d4 + 3 ) piercing damage.
Bonus Actions
Cunning Action. Tarak takes the Dash, Disengage, or Hide action.
Varnoth
A hardened mercenary captain, Varnoth Wender is an experienced professional fighter. She is usually unarmed, but she keeps her old sword beneath the mattress in her cell (in area A1 in Dragon's Rest; see page 10).
Varnoth
Medium Humanoid (Human), Neutral Good
- Armor Class 11
- Hit Points 39 (6d8+12)
- Speed 30 ft.
STR DEX CON INT WIS CHA 16 (+3) 13 (+1) 14 (+2) 10 (+0) 11 (+0) 10 (+0)
- Skills Athletics +5, History +2, Perception +2, Religion +2
- Senses passive Perception 12
- Languages Common
- Challenge 2 Proficiency Bonus +2
Actions
Multiattack. Varnoth makes three Shortsword attacks.
Shortsword. Melee Weapon Attack: +5 to hit, reach 5ft., one target. Hit: 6 (1d6 + 3 ) piercing damage.
APPENDIX B | CREATURES

Violet Fungus
Violet fungi are giant purplish mushrooms that use root-like feelers to creep across cavern floors. They use the four stalks protruding from their central mass to lash out at prey, rotting flesh with the slightest touch.
Violet Fungus
Medium Plant, Unaligned
- Armor Class 5
- Hit Points 18 (4d8)
- Speed 5ft.
STR DEX CON INT WIS CHA 3 (-4) 1 (-5) 10 (+0) 1 (-5) 3 (-4) 1 (-5)
- Condition Immunities blinded, deafened, frightened
- Senses blindsight 30ft. (blind beyond this radius), passive Perception 6
- Languages ---
- Challenge 1/4 Proficiency Bonus +2
False Appearance If the violet fungus is motionless at the start of combat, it has advantage on its initiative roll. Moreover, if a creature hasn't observed the fungus move or act, that creature must succeed on a DC 18 Intelligence (Investigation) check to discern that the violet fungus isn't ordinary fungus.
Actions
Multiattack. The fungus makes 1d4 Rotting Touch attacks.
Rotting Touch. Melee Weapon Attack: +2 to hit, reach 10ft., one creature. Hit: 4 (1d8) necrotic damage.
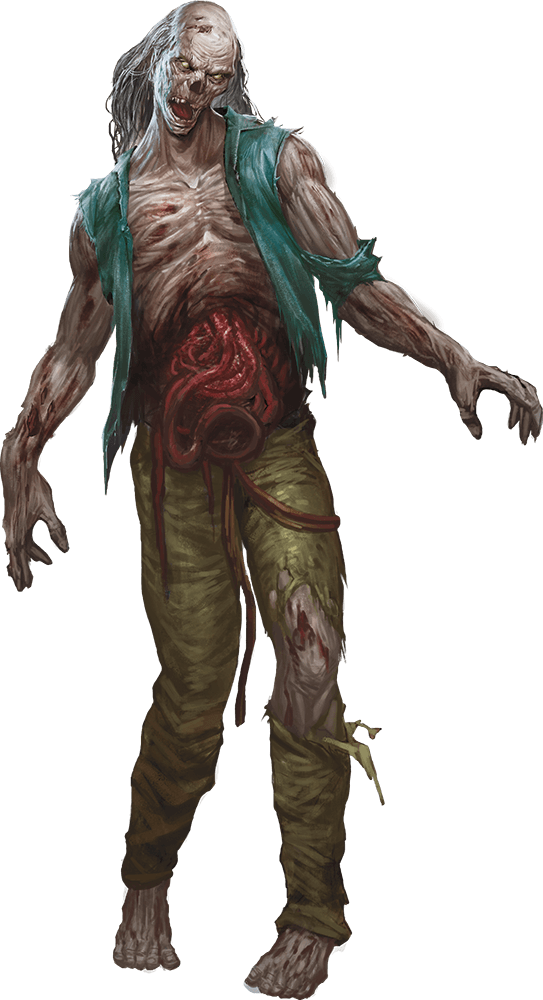
Zombie
Zombies are mindless reanimated corpses that have no memories from their past lives.
Zombie
Medium Undead, Typically Neutral Evil
- Armor Class 8
- Hit Points 22 (3d8 + 9)
- Speed 20ft.
STR DEX CON INT WIS CHA 13 (+1) 6 (-2) 16 (+3) 3 (-4) 6 (-2) 5 (-3)
- Saving Throws Wis +0
- Damage Immunities poison
- Condition Immunities poisoned
- Senses darkvision 60ft, passive Perception 8
- Languages understands the langueages it knew in life, but can't speak
- Challenge 1 Proficiency Bonus +2
Undead Fortitude. If damage reduces the zombie to 0 hit points, it must make a Constitution saving throw with a DC of 5 + the damage taken, unless the damage is radiant or from a critical hit. On a success, the zombie drops to 1 hit point instead.
Unusual Nature. A zombie doesn't require air, food, drink, or sleep.
Actions
Slam. Melee Weapon Attack: +3 to hit, reach 5ft., one target. Hit: 4 (1d6 + 1 ) bludgeoning damage.
APPENDIX B | CREATURES
Changelog and Notes
Special notes
Statblock Changes
Many creatures had their stat blocks changed. Here are the ones I've spotted:
- Runara is considerably different than a regular Adult Bronze Dragon. Legendary Actions and her Tail attack were cut, and as a result the CR was lowered to 13. Notably, her Change Shape ability is greatly simplified: she changes into any Humanoid / Beast (no CR limit), but retains all her game statistics other than size. This was probably just a space saving measure.
- Sinensa is a tweaked Myconid Sovereign. They lack the Animating Spores (3/Day) and Pacifying Spores features, the poison damage is 2d4, rather than 3d4, and the Multiattack order is Fist followed by Hallucination, rather than Animating / Pacifying followed by Fist.
- Violet Fugus had their False Appearance trait greatly altered. Rather than simply being undistinguishable from normal fungi while montionless, it now gives advantage on initiative rolls while so, and if a character hasn't seen it move yet, they can at least attempt a DC 18 Investigation check.
None of the stat blocks in the module contain XP numbers, so they were not included in here.
Intentional Typos
Some sentences are clearly typos on WotC's part. As an executive decision, I have decided to not fix these so that I could get as close of a PDF as possible to the original. Here is a list of them:
Chapter 3 (p.26) on the captain's journal, in the last paragraph, Aleitha's name is spelled wrong in the sentence "(...) end this nightmare by bringing Altheia's talisman to her husband.
Appendix B (p.39) has a sentence "the stat block also indicates the Hit Dice that were rolled to dertermined those hit points".
Changelog
V 2.2 - June 2023
- Some small typo fixes, including a phrase missed.
V 2.1 - Jan 18th, 2023
- Fixed some typos
- Updated the ToC
- Added a link to the full Diver's Grave image (p26)
- Updated many images for higher quality and/or transparent backgrounds
V 2.0 - Oct 4th, 2022
- Fixed some typos
- Added the "battle VS undead" image to p38
- All maps have player versions now
- Replaced most images with uncropped, higher quality ones
- Added official erradas
V 1.2 - August 14th, 2022
- Tweaked the Changelog and Notes section. It's cleaner and now lists Intentional Typos.
- Other small typo and formatting fixes.
V 1.1 - August 11th, 2022
Lots of typo fixes.
V 1.0 - August 9th, 2022
The initial release! Hooray!
CHANGELOG